
If you’re wondering how to start an online store in 2026, we’ve got you covered.
In this post, we’ll walk you through a comprehensive guide on how to start an online store for your online business, using the best platform out there, WordPress and WooCommerce.
Plus, we’ll show you how to maximize your sales with the help of some easy-to-use WooCommerce plugins.
Here’s what we’ll cover:
- Why start an online store with WordPress and WooCommerce?
- How to start an online store with WordPress and WooCommerce.
- Plugins and extensions to use with your WooCommerce store.
By the end of it, you’ll know how to create an efficient and user-friendly online store that connects you to your customers.
To start, let’s look at why you should use WordPress and WooCommerce to create your online store.
Why start an online store with WordPress and WooCommerce?
WordPress is the world’s most popular content management system (CMS). It provides users with a robust platform to build all types of websites, including blogs, portfolios, business websites, and online stores.
WooCommerce is the WordPress solution for ecommerce websites. It turns WordPress into a fully functional online store, allowing you to sell products and services, process payments, manage inventory, and more.
📈 Together, WordPress and WooCommerce power over 160 million websites on the internet today, that’s about 8.6% of all websites. That’s way more than any other ecommerce platform, making WooCommerce the most popular ecommerce platform.
For your online store, we highly recommend using WordPress with WooCommerce. Here’s why.
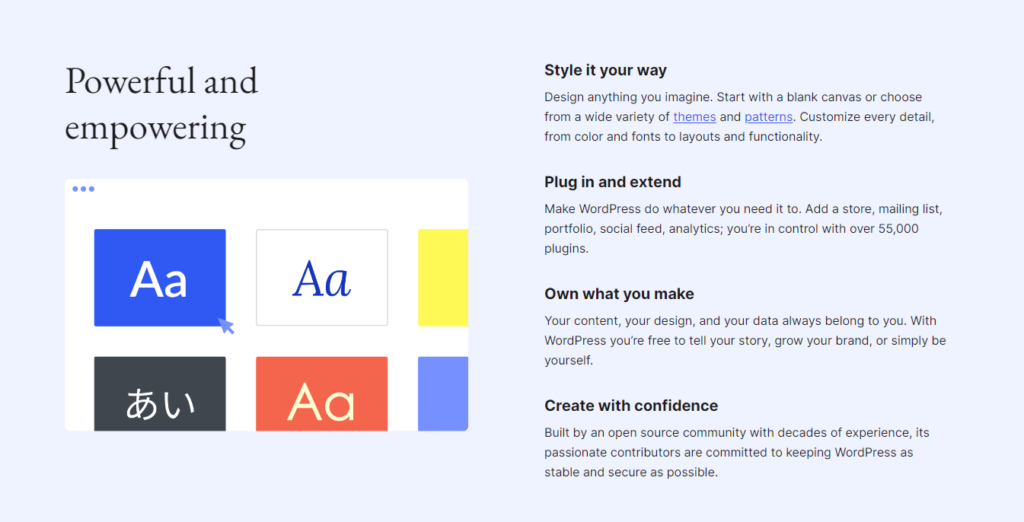
WordPress is easy to use
WordPress is user-friendly, making it easier for beginners to get started. It has a clear and organized dashboard that makes it easy for you to access and use its features.
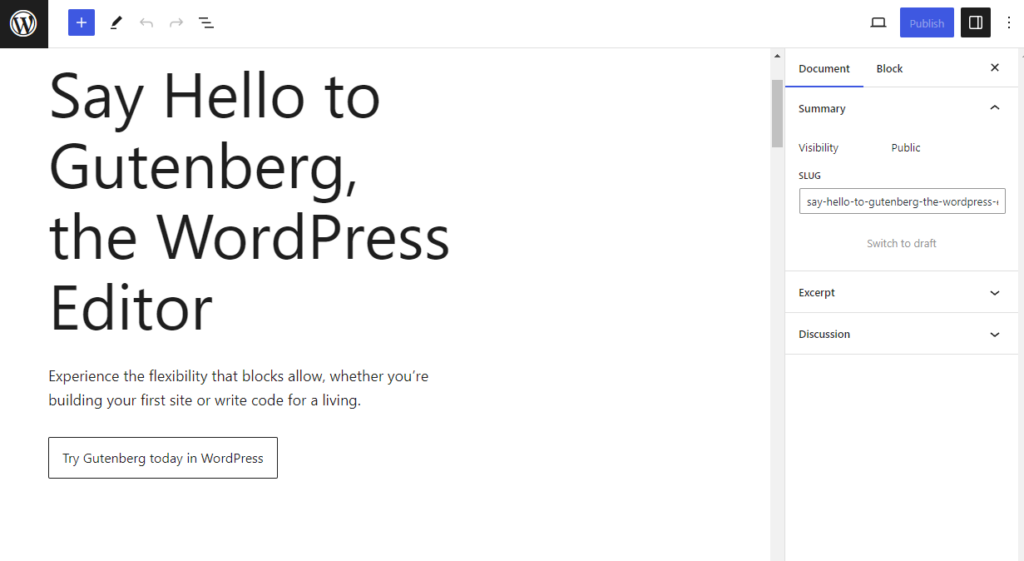
WordPress comes with a ‘What You See Is What You Get’ (WYSIWYG) editor and Gutenberg. This is a visual editor that allows you to create and edit content on your website in real-time without writing any code.
To top it off, you don’t have to start creating websites from scratch. You can leverage WordPress themes and templates to give your online store a general appearance. Then, edit it to suit your brand’s style.
WordPress is cost-effective
WordPress and WooCommerce are free to use. After paying for a domain name and hosting (more on this later), you can install and use WordPress for free. You won’t have to pay for WordPress or WooCommerce monthly as you would for other ecommerce platforms like Squarespace, Wix, and Shopify.
Also, it has tons of free and budget-friendly themes and plugins to add the features you want to your online store.
WordPress is customizable and scalable
WordPress provides several options to edit how your online store looks and works.
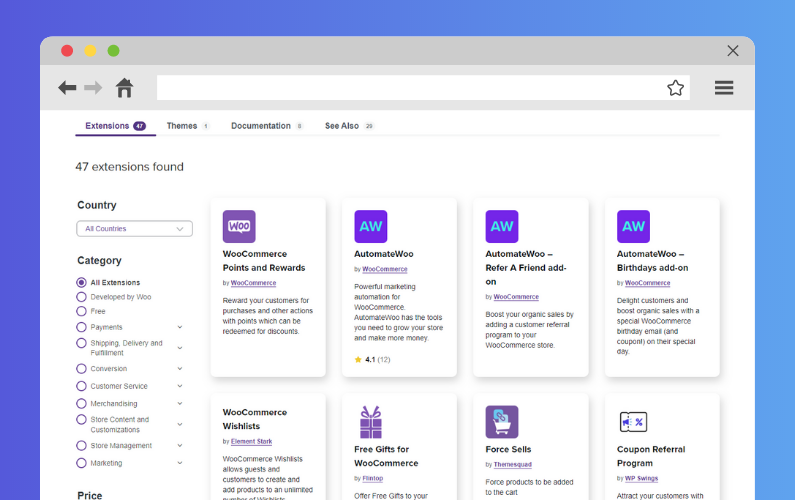
First, it has a vast library of plugins that extend its features, for instance:
- SEO plugins – to improve your site’s search engine optimization.
- Contact form plugins – to add contact forms on your website, which customers can use to reach out to you when they need to make inquiries.
- Website builders – to help you to build your web pages.
- And so much more.
WooCommerce is also a WordPress plugin. Its role is to add ecommerce features to WordPress. At the same time, WooCommerce has several plugins built to improve its default ecommerce features – as we’ll see later in this guide.
WordPress and WooCommerce are also highly scalable. In other words, they can grow with your business. As a business owner, you can add unlimited products and product variations. You can also optimize it for better performance using plugins or a better hosting service to ensure your online store handles a high volume of site visitors.
Whether you want to run a large ecommerce store like Amazon or dip your toes in a small business like dropshipping, here’s how to start an online store with WordPress and WooCommerce.
How to start an online store with WordPress and WooCommerce
📈 Online shopping is on the rise. Research shows that the number of online shoppers is currently above 2.6 billion. In other words, one out of every three people you see is an online shopper.
With such strong numbers behind it, it only makes sense that you’re considering starting your online store today. We’re here to help you do it.
In this section, we’ll walk you through a step-by-step guide on how to start an online store with WordPress and WooCommerce.
Step 1: Domain and hosting
Every website needs both a domain name and a hosting service, but what exactly are they?
- A domain name – is what customers will type on the search bar of their browsers when looking for your ecommerce site, for example, myonlinestore.com. Think of it as your website’s address, as it points site visitors to your website.
- A hosting service – this is the service that stores your website’s files and data on a server. It allows customers to access your website online from anywhere in the world.
📈 Studies show that 53% of site visitors will leave a webpage if it takes longer than 3 seconds to load. When selecting your hosting provider, you should remember this because it will directly affect your site’s speed.
There are numerous domain name registrars and hosting providers currently in the market, but we highly recommend getting both from Nexcess. This is because Nexcess offers cost-effective domain names and managed WordPress hosting.

What is managed WordPress hosting by Nexcess?
Managed WordPress hosting by Nexcess is a specialized type of hosting designed specifically for WordPress websites. It comes with features that will make managing your online store on WordPress easier and more convenient. This includes strong security measures, automatic updates, regular automated backups, and more.
Since you’ll be getting both your domain name and hosting from Nexcess, it will be easier to connect them.
Let’s first see how you can register for a domain name on Nexcess.
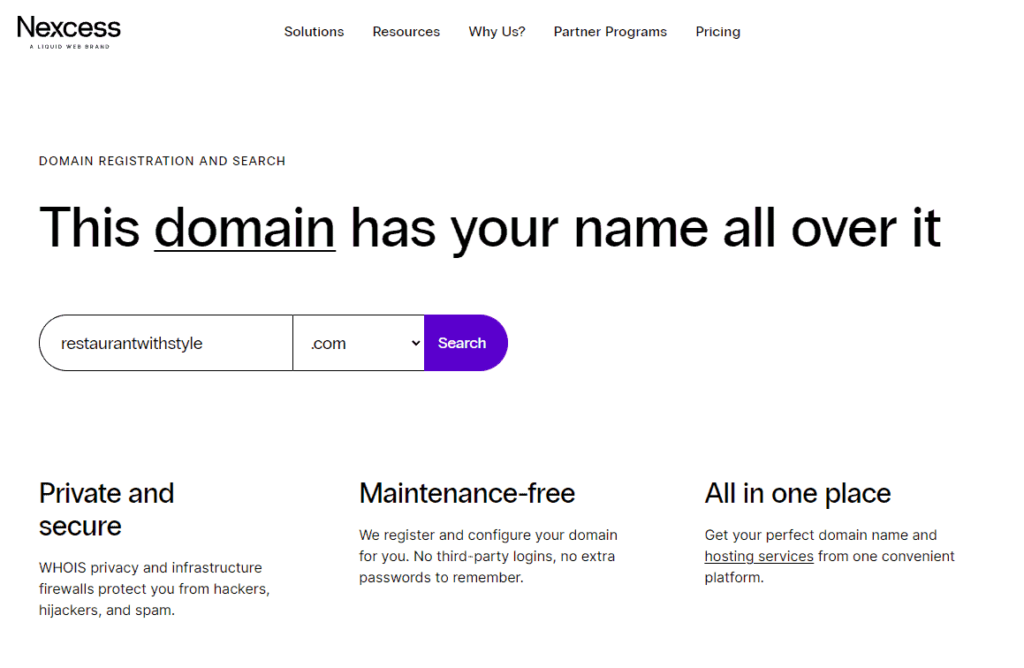
Register for a domain name
To register for your domain name, go to the Nexcess website: nexcess.net/domain-name-registration and follow these steps:
- Type your preferred domain name and select the top-level domain next to it (.net, .com, etc.).
- Click Search to see if it is available, then add it to your cart.
Scroll down and click on the Proceed to Hosting Options button.
Get web hosting
Here, we’ll go with the managed WordPress hosting to create an online store on WordPress.
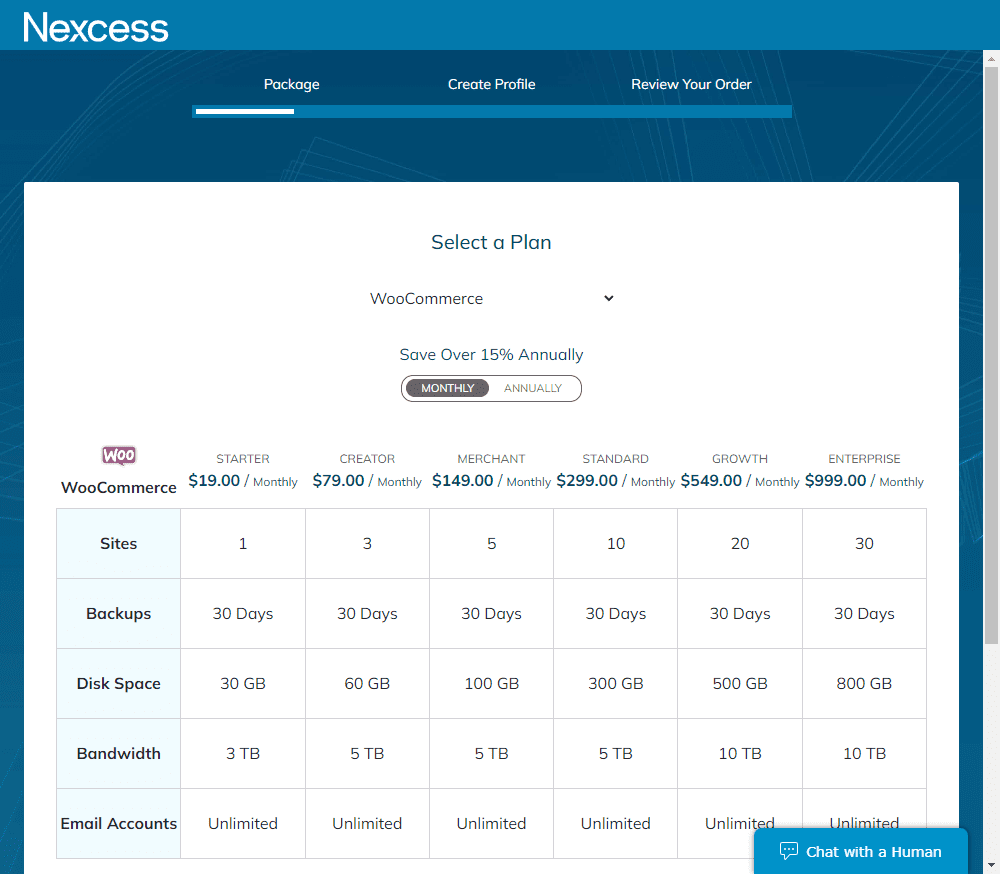
- On the next page, click on WordPress and then select the plan you want to use. If you’re just starting out, the Starter plan should work just fine.
- After selecting your preferred plan, click on Next.
- This will take you to the checkout page, where you can complete your purchase and buy both the domain name and hosting for your website.
With your domain name and hosting in place, we can now install WordPress.
Step 2: Installing WordPress
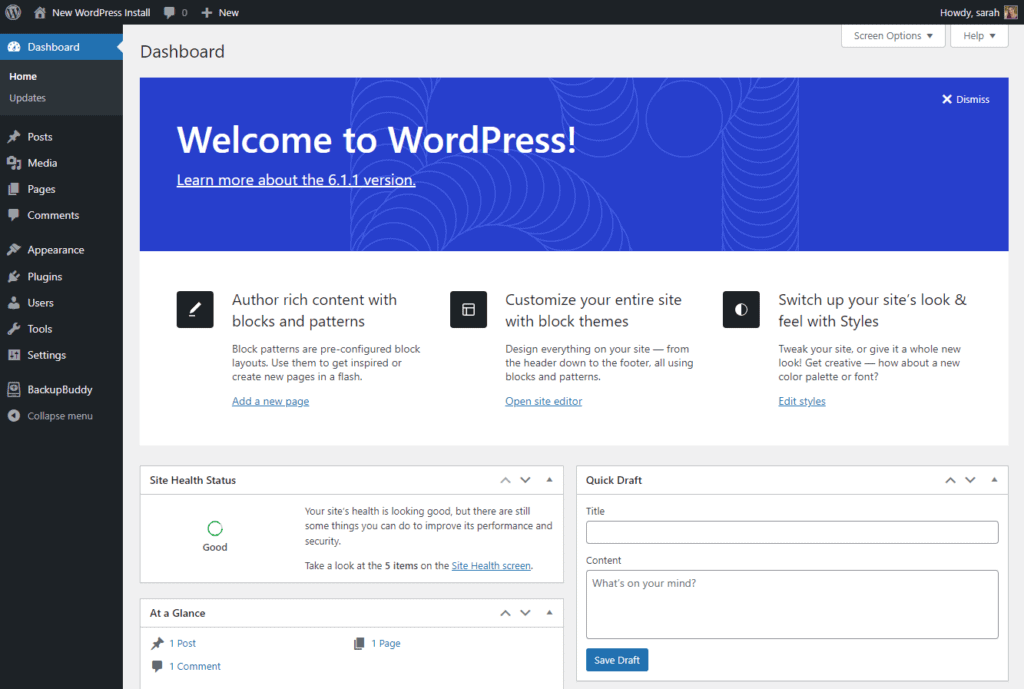
Since we selected the managed WordPress hosting plan, Nexcess will install WordPress for you. All you have to do here is retrieve your login details from your Nexcess client portal and log into your WordPress website.
To do this:
- Log into your Nexcess client portal and go to Plans > Menu > Environment.
- Under Application, you’ll see the username and password for the admin of your WordPress site.
- Access the login page by typing your domain name/wp-admin (myonlinestore.com/wp-admin) and then use the above credentials to log into your WordPress site.
You can now install WooCommerce inside your WordPress dashboard.
Step 3: Installing WooCommerce
Like any other WordPress plugin, you can install WooCommerce in just a few clicks. To install WooCommerce:
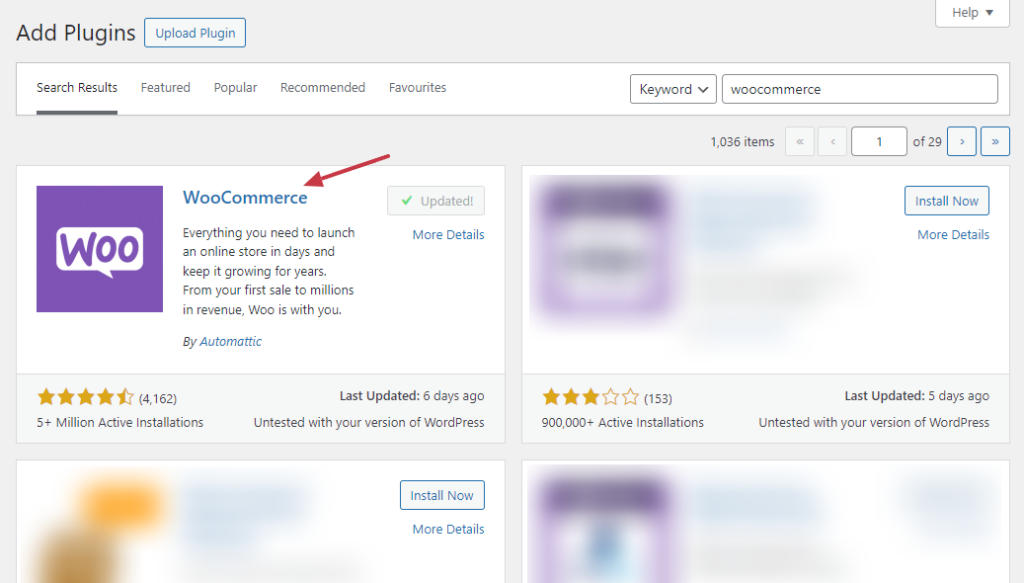
- From your WordPress dashboard, go to Plugins > Add New and then search for WooCommerce.
- Click Install Now as soon as it appears, then activate once the installation is done. This kicks off the WooCommerce quick setup wizard. Here, you’ll see a few steps that help you to set up the initial WooCommerce settings. You’ll customize the following settings here:
- Store details – You’ll add your store’s information including its address, country/region, city, and postal code.
- Industry – Select the industry most applicable to the products you’ll be selling.
- Product types – Choose the type of products, for example, physical goods like clothes or downloadable products like music.
- Business details – Add more information about your business, including the business name, business idea, and brand name.
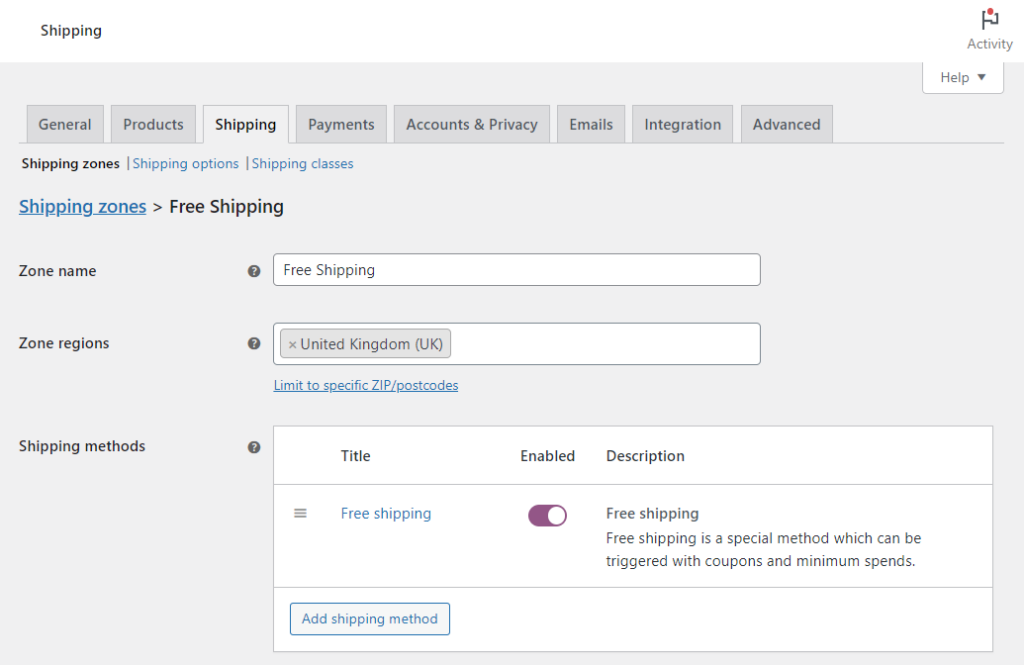
NOTE: These are only the basic settings. You’ll need to customize things like shipping, tax information, add payment options (like Stripe and mobile payment methods like PayPal), etc.
The final step is setting up your theme. You can skip it for now, as we will set it up next.
Adding a theme to your website
WordPress themes provide you with a template of your site’s general appearance. This includes the layout of elements on your web pages, the font styles, etc. This way, you won’t have to start creating your site’s pages out of nothing.
Besides making it easy for you to create your web pages, WordPress themes define the visual appearance of your website. A well-designed theme makes your online store more visually appealing to customers.
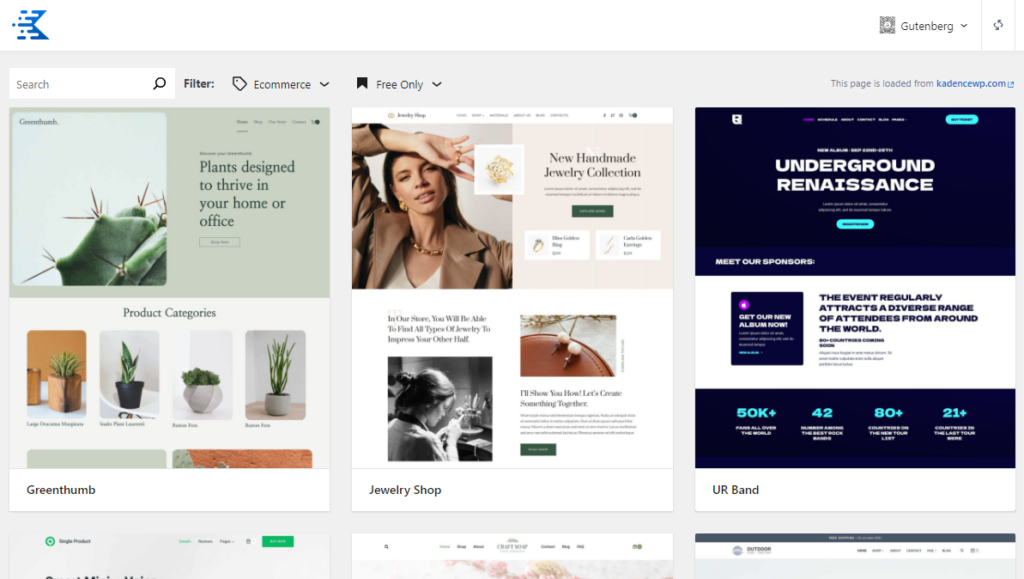
When it comes to WordPress themes, we recommend the following themes:
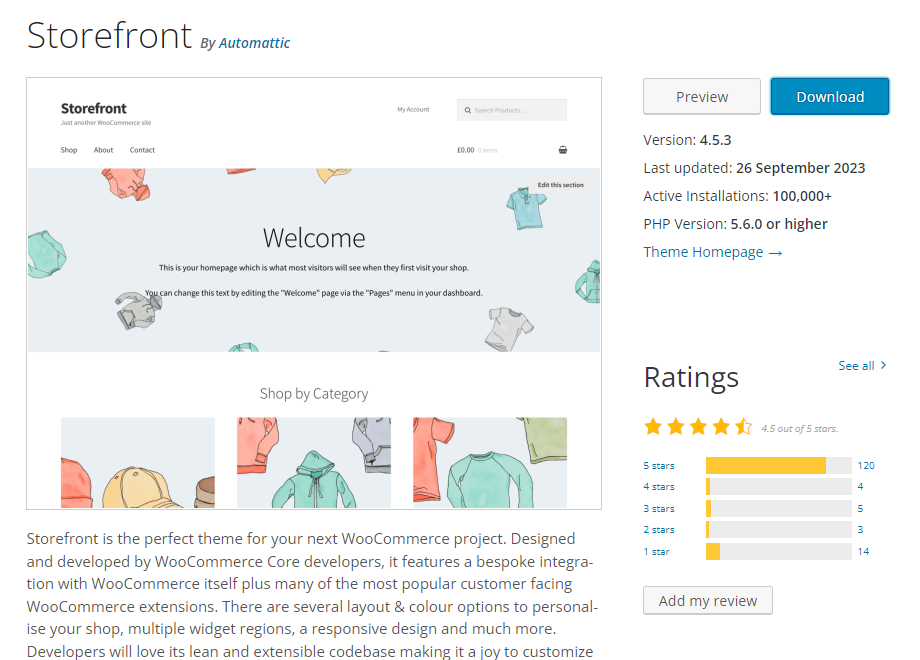
- WooCommerce Storefront – a user-friendly free theme built specifically for WooCommerce. It has a minimalistic design that makes it lightweight. As a result, it won’t slow down your website. This is great for starting out.
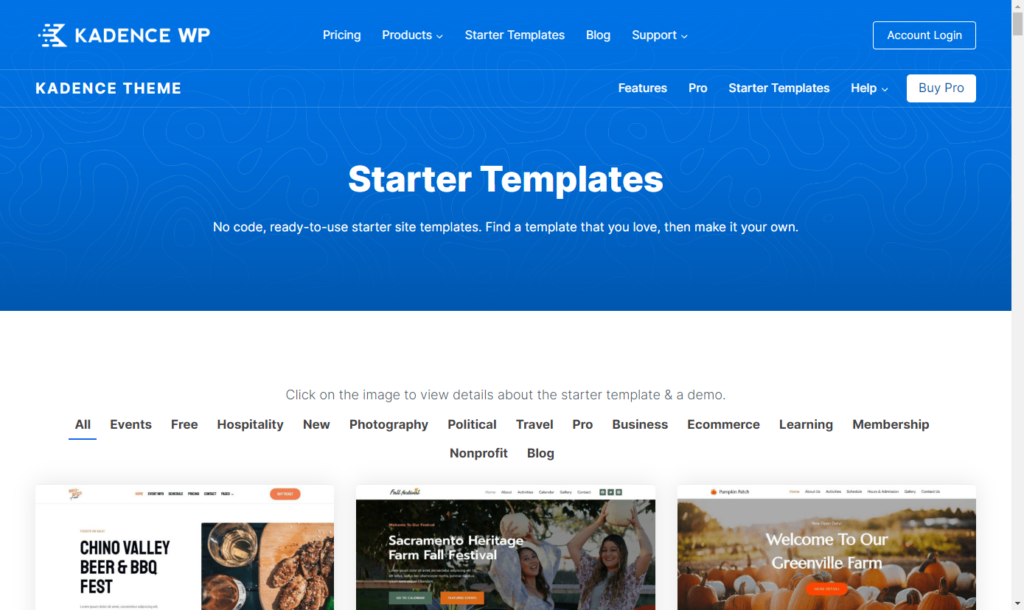
- Kadance Starter Templates – Kadence comes with several templates to choose from, for instance, ‘Gourmet Burger’ for online food ordering stores. It is free but offers additional paid upgrades and support.
How to Install Kadence Starter Templates
To see how you can add a theme to your WordPress site, let’s go through the process of installing Kadence Starter Templates.
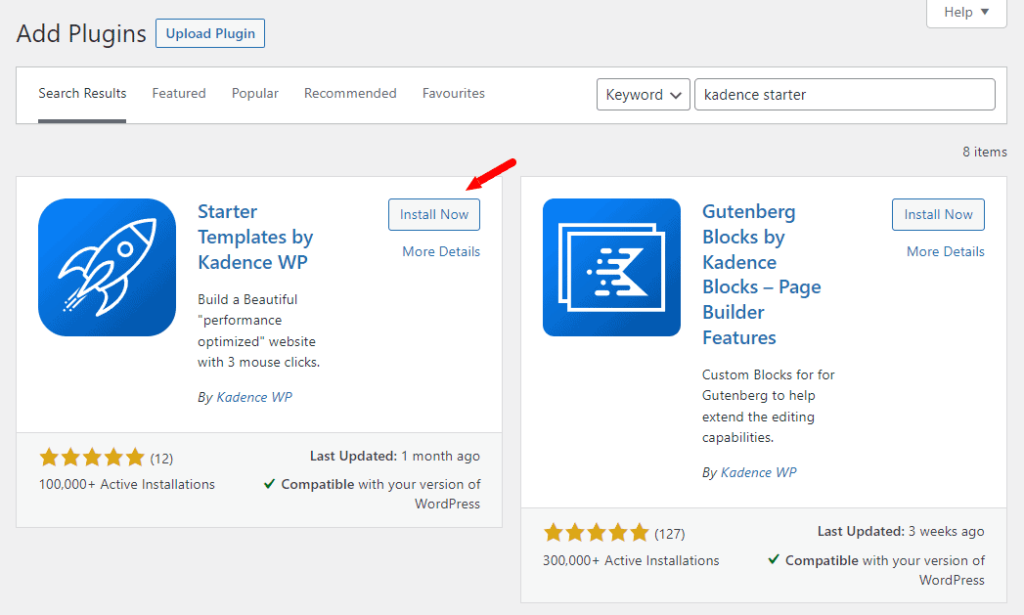
- Go to Plugins > Add New and search for Starter Templates by Kadence WP.
- Click on Install Now once it appears and then Activate once the installation is complete.
- To access these templates, go to Appearance > Starter Templates on your WordPress dashboard.
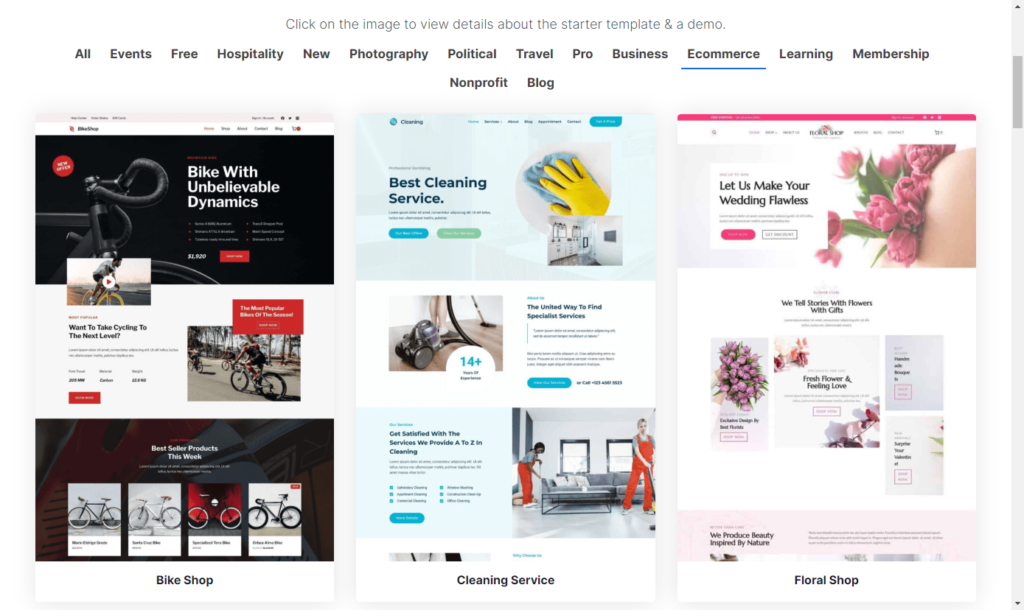
- You’ll see several themes on this page. Use the filter button to show themes specific to ecommerce only.
- Select your preferred theme. You can edit it by changing its color scheme or font, and when you’re done, import it by clicking on the button at the bottom left.
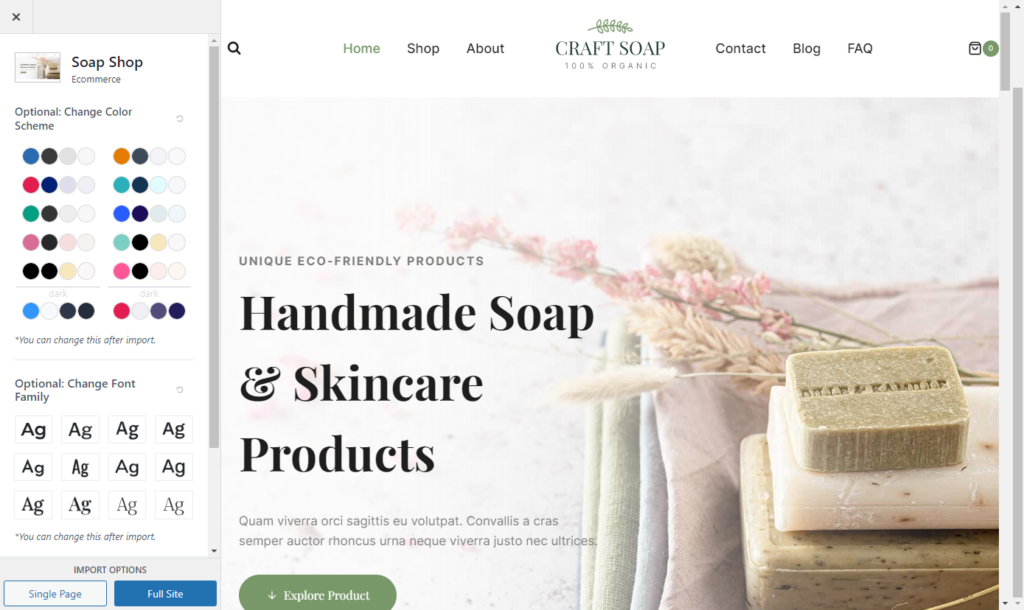
Once done, click on View Site to see your website’s new look.
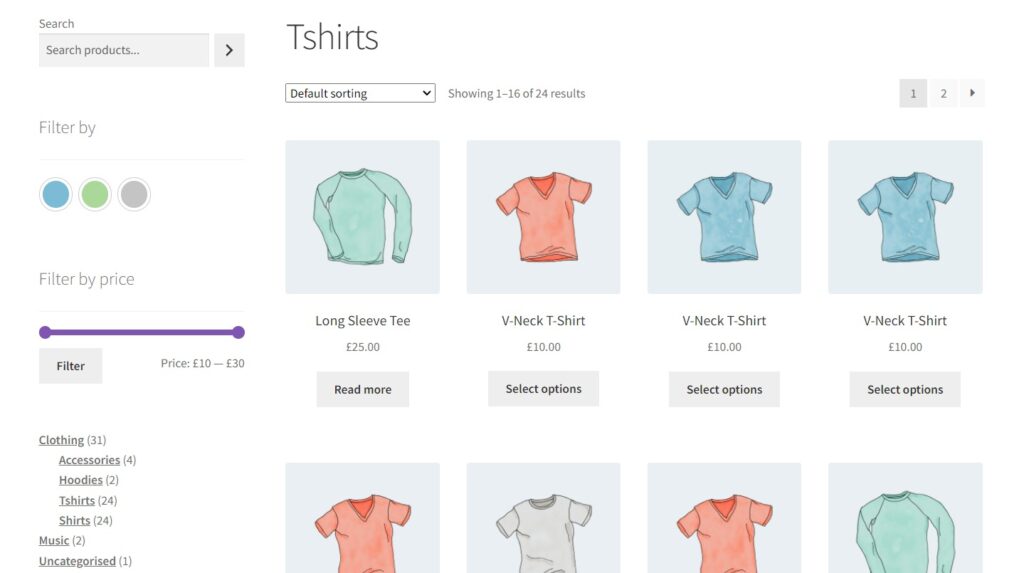
Step 4: Add your products
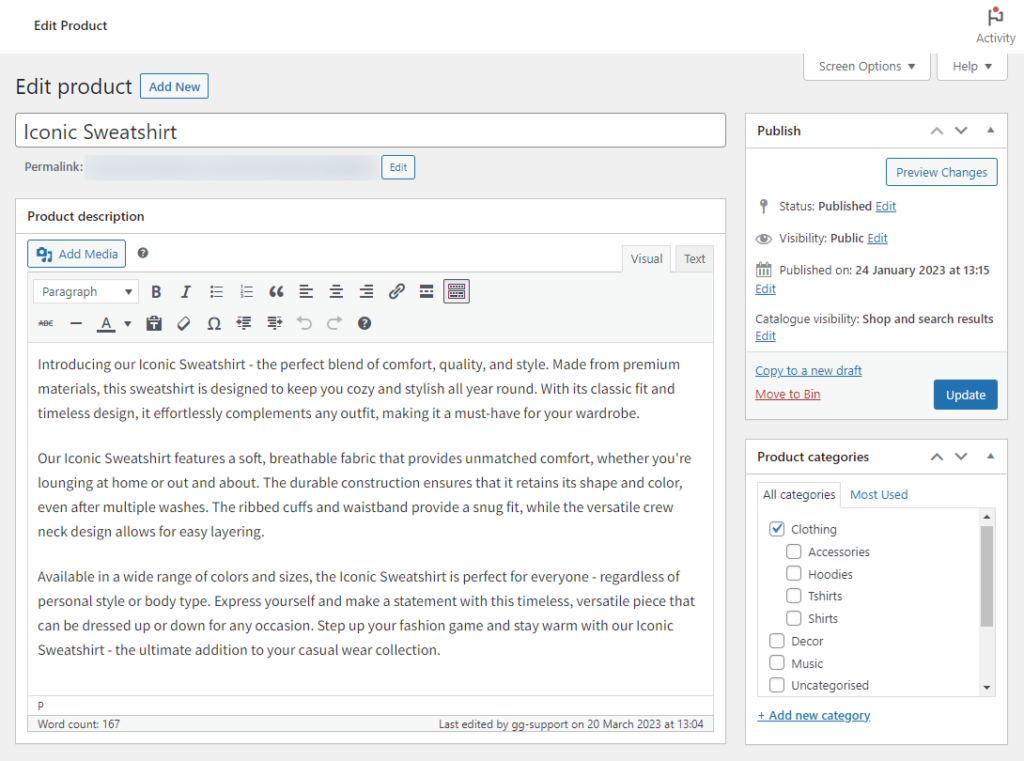
After completing your initial settings and adding your theme, you’re ready to add products to your WooCommerce shop. You can add new products easily by following these steps:
- From your WordPress dashboard, hover on Products and click Add New. Name your product and add a product description for it.
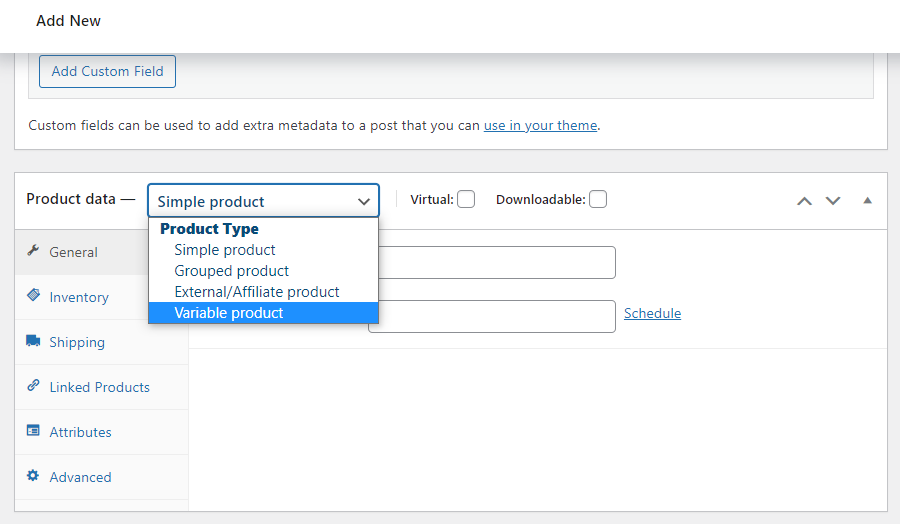
- Scroll down to the Product Data section and select the type of product you want to add. It could be physical products (simple or grouped), virtual, etc.
- The rest of what you have to do here will depend on the type of product you added.
- If you selected Simple product, all you have to do in this section is add the price.
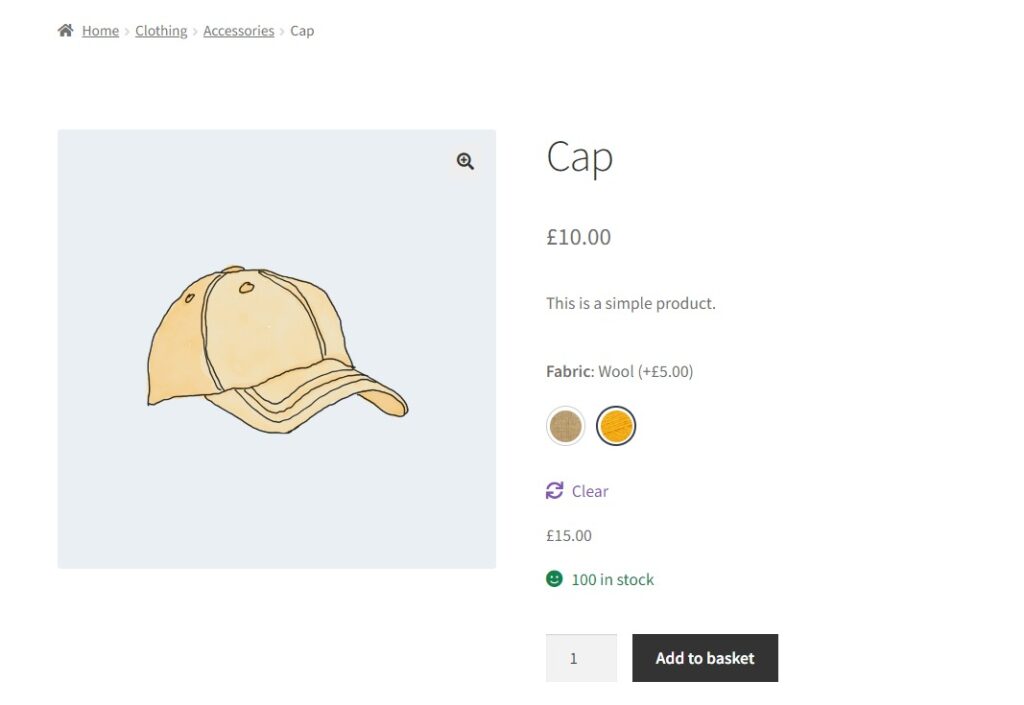
- Variable product – Click on the Attributes tab to add your product variations. If you’re selling t-shirts, you can add a color attribute and use the values box to add different variations, for example, red, blue, and purple. Click on save attributes once you’re done.
- Grouped product – Use the Linked Products tab to group different products that will be displayed together. You’ll also need to add the stock-keeping unit (SKU) to help you in inventory management.
- Next, use the right-side panel to add your product to a category and include tags that make it easy for customers to search for the product. Finish up by adding the product image.
- Once this is done, you can use the Preview button (top-right) to preview your product. If it is as you want it to be, click on Publish.
That’s it. You’ve just created your first product. You can follow the same steps to add other products to your online store.
Why might you need WooCommerce plugins?
By now, we know that WooCommerce provides a strong, practical platform for your online store on WordPress. The default WooCommerce features will meet your store’s general needs, but they’re highly unlikely to meet your store’s specific needs.
This is why you’ll find it necessary to extend your store’s capabilities using WooCommerce extensions, commonly referred to as WooCommerce plugins. WooCommerce plugins will allow you to create a more appealing and user-friendly online store to boost your conversions and help you retain more customers. We’ll look at some of these plugins in the next section.
Plugins and extensions to use with your WooCommerce store
Once your store is set up, you might need to enhance it to suit your ecommerce business’s needs with some WooCommerce plugins.
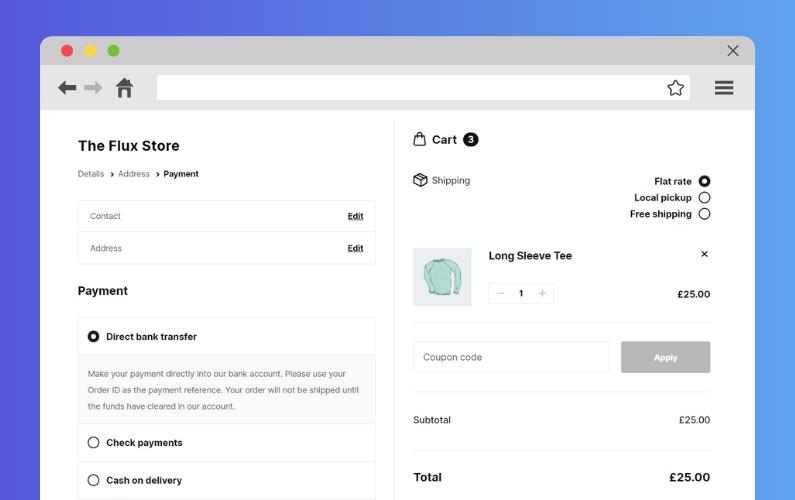
Upgrade the default WooCommerce checkout page
? Did you know that the shopping cart abandonment rate is 70%? This means that 7 out of every 10 customers leave online stores without buying products they’re interested in.
Some of this stems from customers’ indecisiveness and other issues on your WooCommerce site. However, many customers shy away from completing their purchases when they have a poor experience at checkout.
Why the default WooCommerce checkout might not work for you
There’s a lot to love about the WooCommerce checkout, but its default setup leaves room for improvement. It might not work to get you enough sales because:
- It’s not user-friendly – It lumps all the checkout steps on a single page, making it more complicated than it should be. Research shows this can cause 18% of customers to abandon their carts.
- It has too many fields – This causes customers to do too much unnecessary work to complete a purchase.
- It has too many distractions – That draw your customer’s focus away from completing the checkout.
The last thing you would want is to get customers to your checkout and lose them right before they’re about to buy.
Fortunately, you can improve your checkout, and ensure that the potential customers you’re attracting are turning into paying customers. You can do it all with the help of the Flux Checkout for WooCommerce plugin.
Flux Checkout for WooCommerce
Flux Checkout transforms the default WooCommerce checkout into one that’s lightning-fast, distraction-free, and reduces checkout abandonment.
Improve your checkout for more conversions using Flux Checkout
Flux Checkout replaces the default WooCommerce checkout with a simple, lightning-fast, and distraction-free checkout experience. This plugin is designed to get more customers over the line when they reach your checkout. This is how it does it.
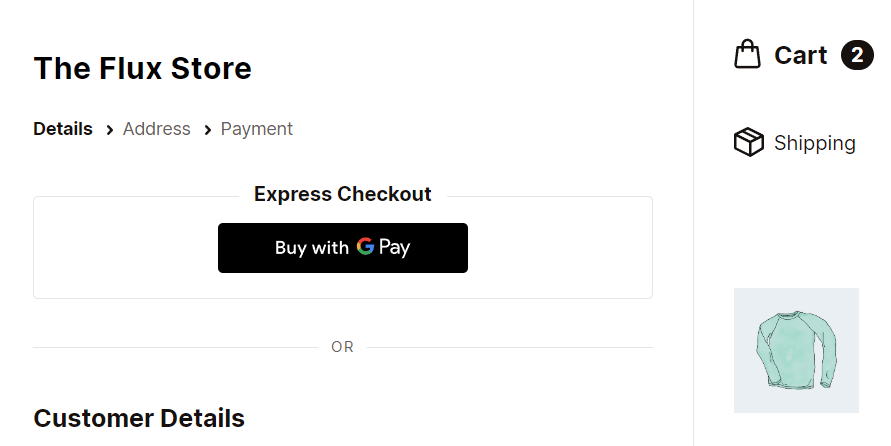
It introduces a multi-step checkout
Flux breaks down the checkout process into a few simple steps. This allows customers to complete the checkout without being overwhelmed with too much information on one page.
It minimizes distractions
With Flux, you’ll have the option to hide unnecessary fields like separate street number. It removes headers, footers, and sidebars so customers can focus on checking out.
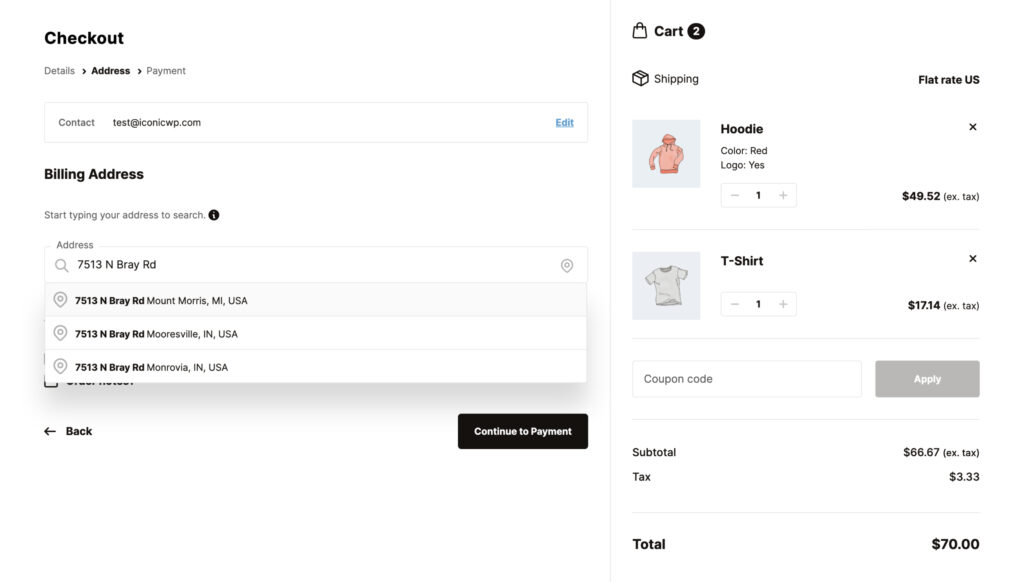
It takes the work out of filling in form fields
Flux has an address autocomplete feature that suggests customer addresses and fills the rest of the address fields once customers select their address.
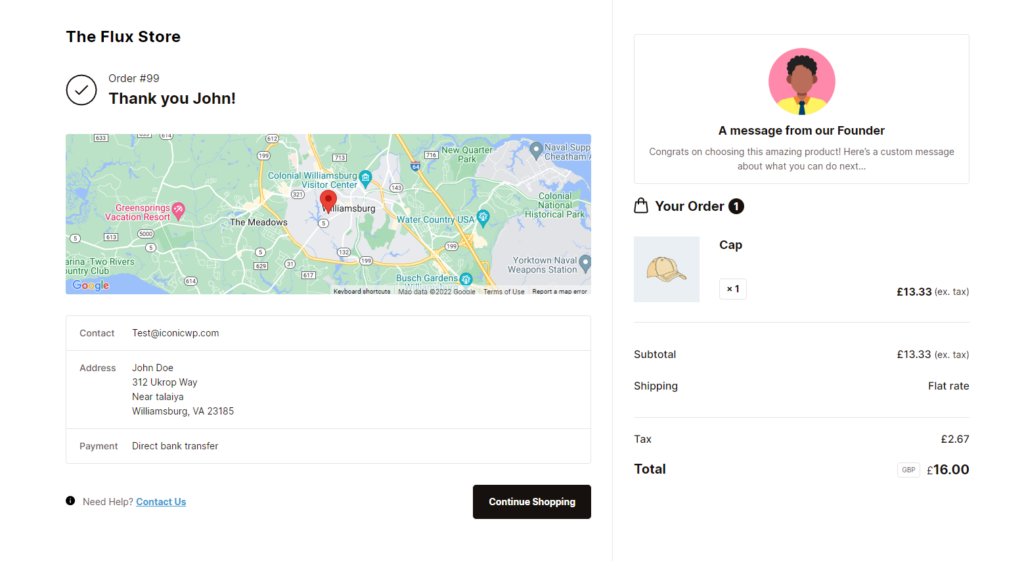
It allows you to create a useful custom order confirmation page
It allows you to replace the default lackluster order confirmation page with a customizable one. You can create a custom order confirmation page encouraging customers to continue engaging with your online store.
Flux allows you to show shipping costs upfront on the order summary to prevent checkout surprises that could cause customers to abandon their carts.
Also, it has a mobile-optimized design that gives your customers an improved checkout design whether they checkout on desktops or mobile devices. Flux upgrades your checkout and allows you to get more conversions on your online store with minimal effort.
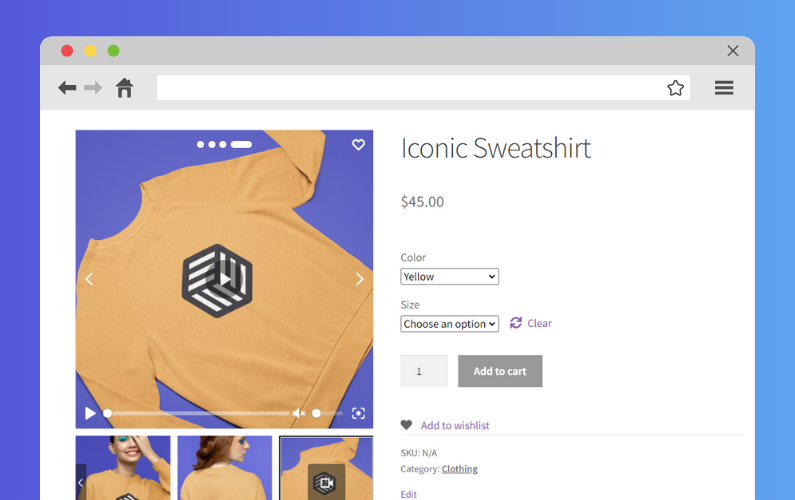
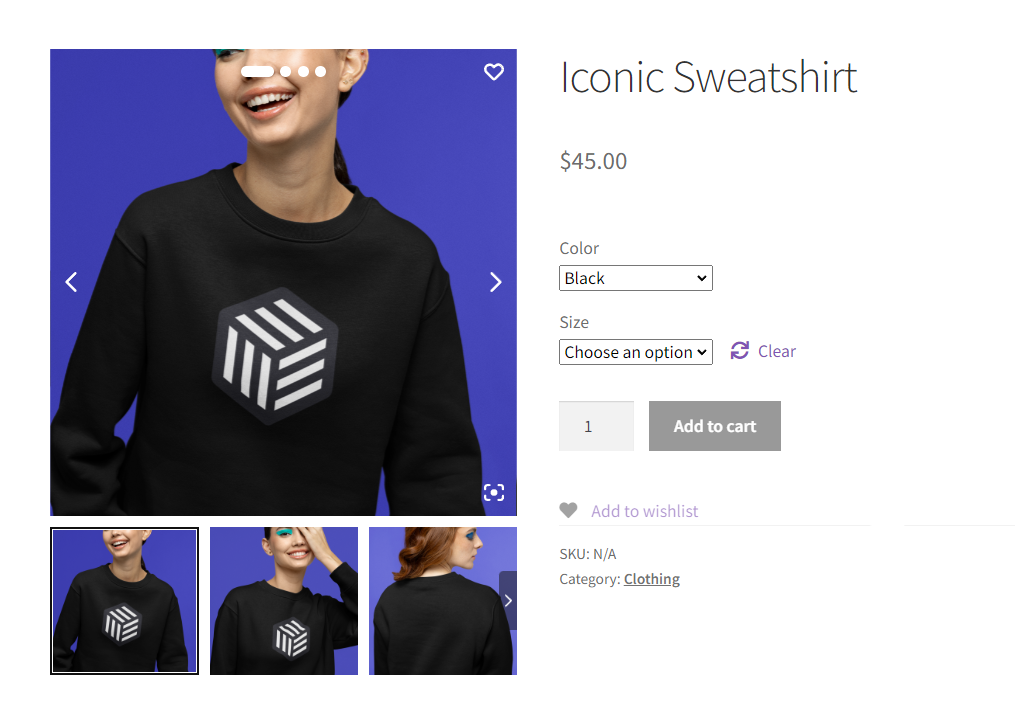
Improve the WooCommerce product gallery
Your product gallery is so important to you and your customers. As the store owner, you should go to great lengths to improve it because:
- Studies show that 75% of online shoppers rely on product photos to make purchasing decisions. In other words, a better product gallery that showcases your products well is bound to increase your conversions.
- A better product gallery can also reduce the number of products customers return to your store. According to research, 22% of returns result from the product looking different in person.
Improving your product gallery to show more of your product lets customers know exactly what they’ll get.
How is the default WooCommerce product gallery limited?
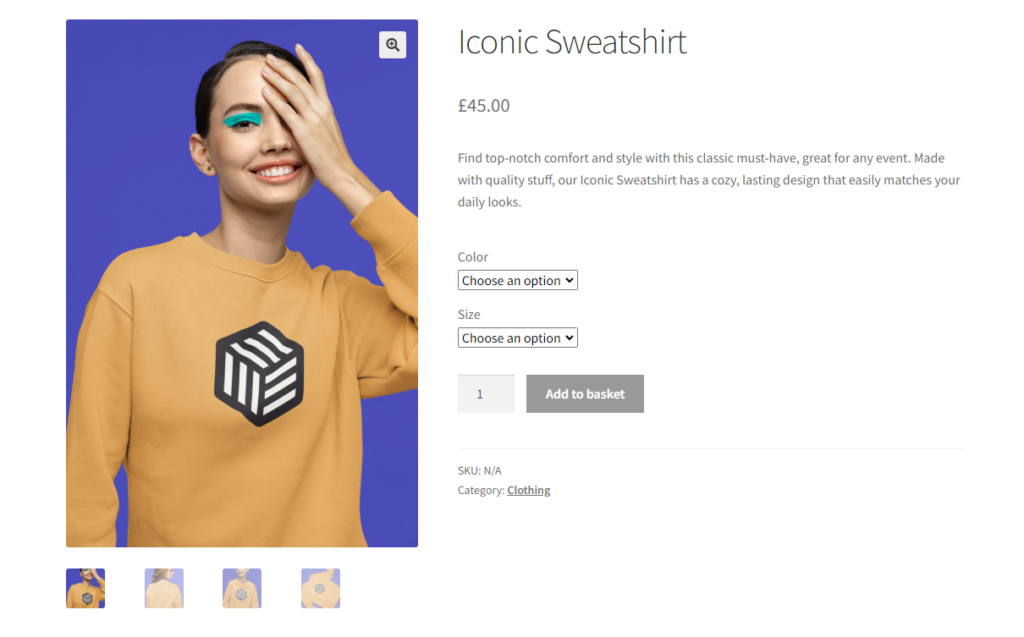
The default WooCommerce product gallery has some useful features for presenting your products, like image zoom, multiple product images, etc. However, it is inflexible in its offerings.
You can barely customize how the gallery looks, meaning you’ll be stuck with the default arrangement of elements. What’s more, it has very limited video support, and you won’t be able to easily add product videos.
Thankfully WooCommerce is extensible, and you can address these limitations using the WooThumbs for WooCommerce plugin.
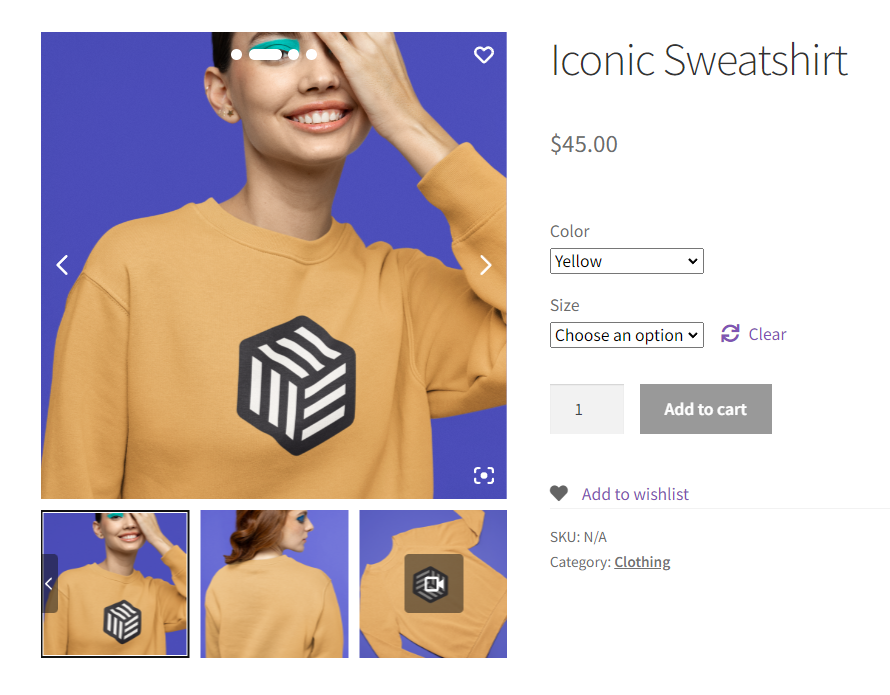
WooThumbs for WooCommerce
Customize your WooCommerce product image gallery in minutes with a new layout, embedded video, multiple images per variation, and more.
Upgrade your WooCommerce product gallery with WooThumbs
WooThumbs makes your default WooCommerce product gallery completely customizable. It allows you to customize everything on this page, including:
- Change where the image thumbnails are placed.
- Add different transitions when you move from one image to the next.
- Customize your image sizes to avoid slowing down your website.
- And more.
The best part? You can do all of this in just a few clicks. No coding experience is needed. Apart from customizing your product gallery, WooThumbs also allows you to do the following.
Add product video
It allows you to add a product that gets your customers excited about your product. It simplifies this process, allowing you to upload a video directly from your local computer.
Also, you can host product videos elsewhere, like YouTube or Vimeo, and add them to your gallery using a link. The choice is yours.
Add multiple images per product variation
Lastly, you can show more of your products by adding multiple products per product variation. This will help to reduce product returns.
With this plugin, you can create a complete product gallery that removes any doubt about buying your products from your customers.
Include cross-selling
Just like improving your product gallery, cross-selling benefits both you and your customers.
📈 It improves your average order value (AOV), and research by McKinsey shows that it can increase your revenue by 20% and your profitability by 30%. It does this by encouraging customers to spend more per order.
When done right, cross-selling can enhance customer satisfaction. Providing customers with relevant product recommendations helps them to find what they might need easily.
How to implement effective cross-selling
To be effective, cross-selling should be customer-centric. The product recommendations must be relevant and have the potential to add value to the customer’s purchase. The goal here is to help customers discover products that meet their needs better.
By default, WooCommerce only allows you to cross-sell on the product page. But you can take it further and cross-sell at different parts of your online store with the help of Iconic Sales Booster for WooCommerce.
Iconic Sales Booster for WooCommerce
Add cross-selling to your entire WooCommerce store in minutes with Iconic’s WooCommerce cross-sell plugin, Iconic Sales Booster for WooCommerce.
Boost sales by cross-selling using Iconic Sales Booster
If you’re looking to cross-sell to customers with relevant product recommendations and improve your AOV (average order value), Iconic Sales Booster is the plugin to help you do it. It allows you to leverage proven high-converting techniques to cross-sell at different parts of your ecommerce site, including:
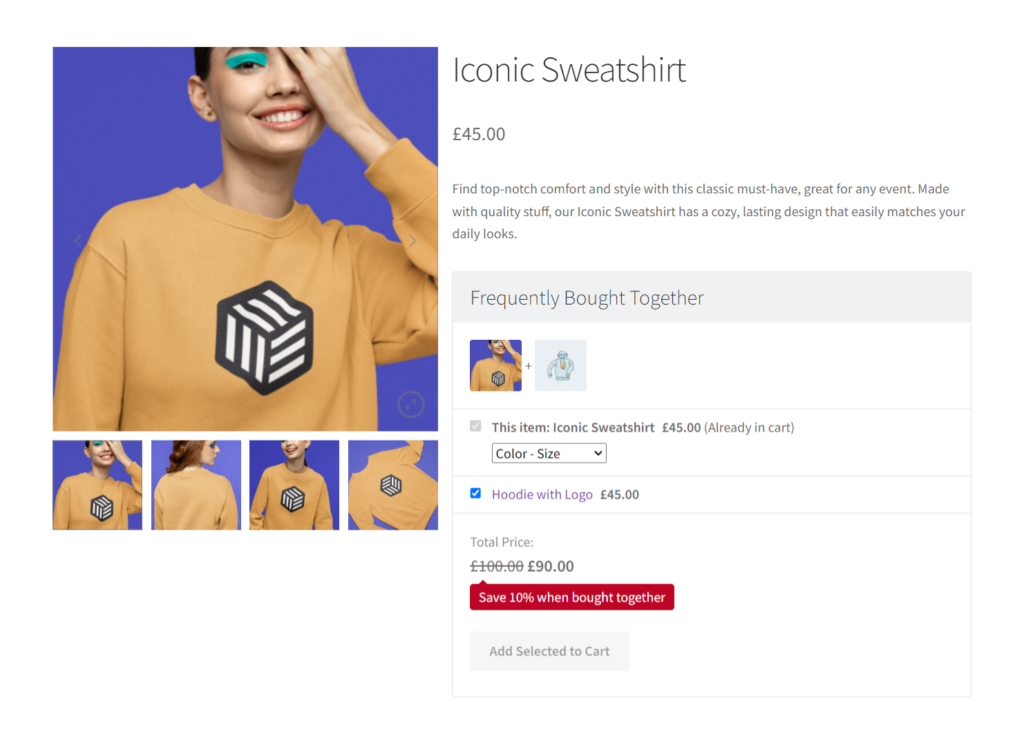
On the product page
Add a ‘Frequently Bought Together’ cross-sell just below the ‘Add to Cart’ button to show customers complementary products. You can add a discount to entice customers to add this offer to their purchase.
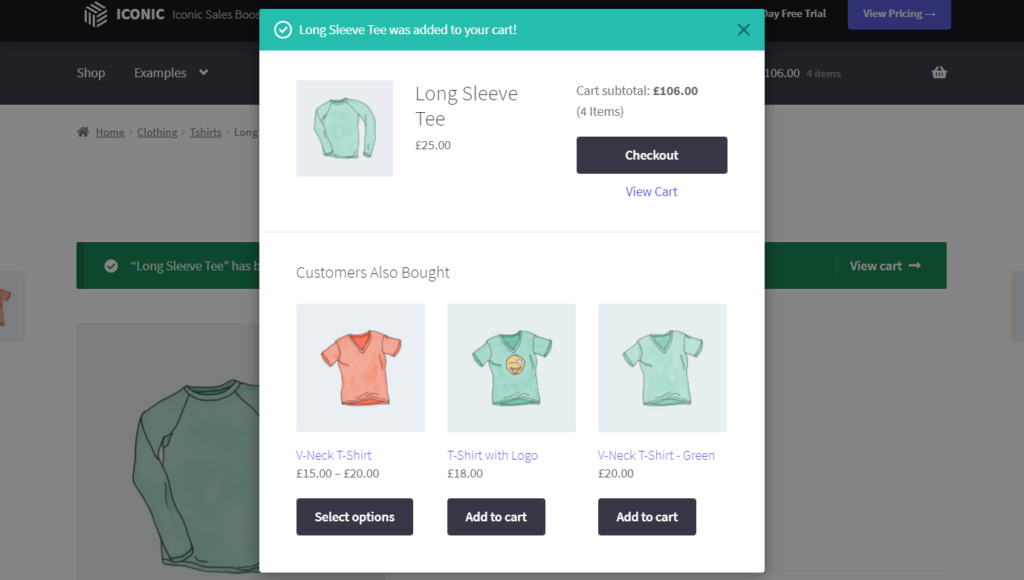
As soon as the customer clicks the ‘Add to Cart’ button, Iconic Sales Booster allows you to display a ‘Customers Also Bought’ popup. You can use this to show customers the products that they might have missed out on.
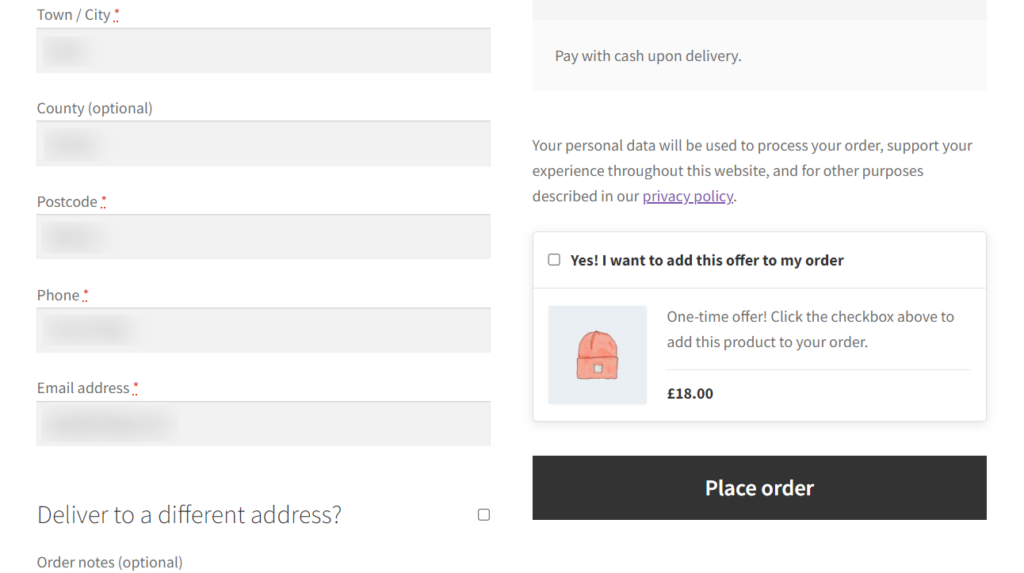
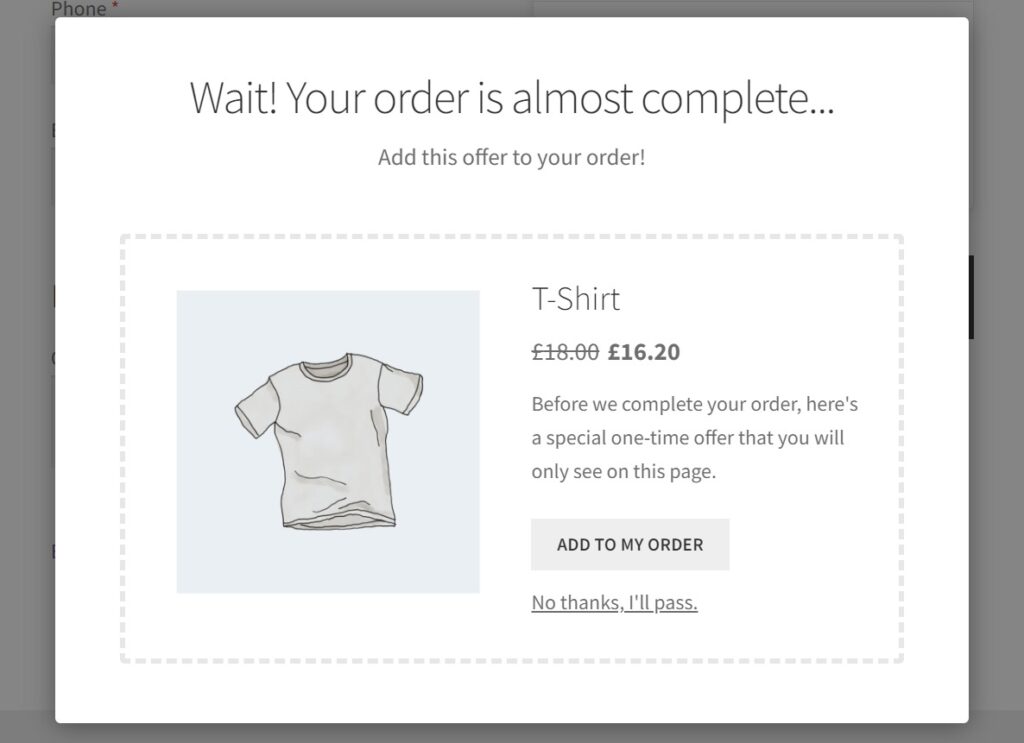
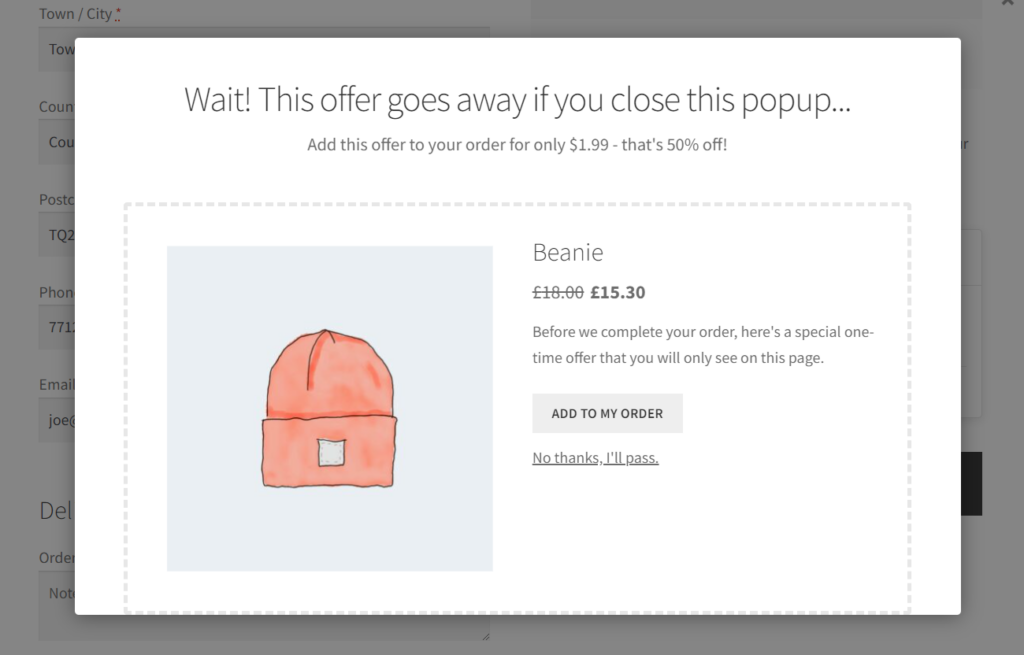
At checkout
Iconic Sales Booster allows you to use order bump popups to promote impulse purchases and increase your AOV. To increase the chances, you can make this offer heavily discounted.
Post-checkout
As a final attempt to make a sale, you can display a cross-sell immediately after a customer completes their purchase. You can make this a one-time offer that displays after checkout.
For each of the above, Iconic Sales Booster allows you to customize each popup element, including the borders and sales text, to make it more appealing to customers. It’s important to keep this text consistent with your brand’s messaging.
Also, once they click on the popup, the cross-sell will be added directly to their purchase. There’s no need to re-enter credit card details again, and this results in a smooth, frustration-free experience.
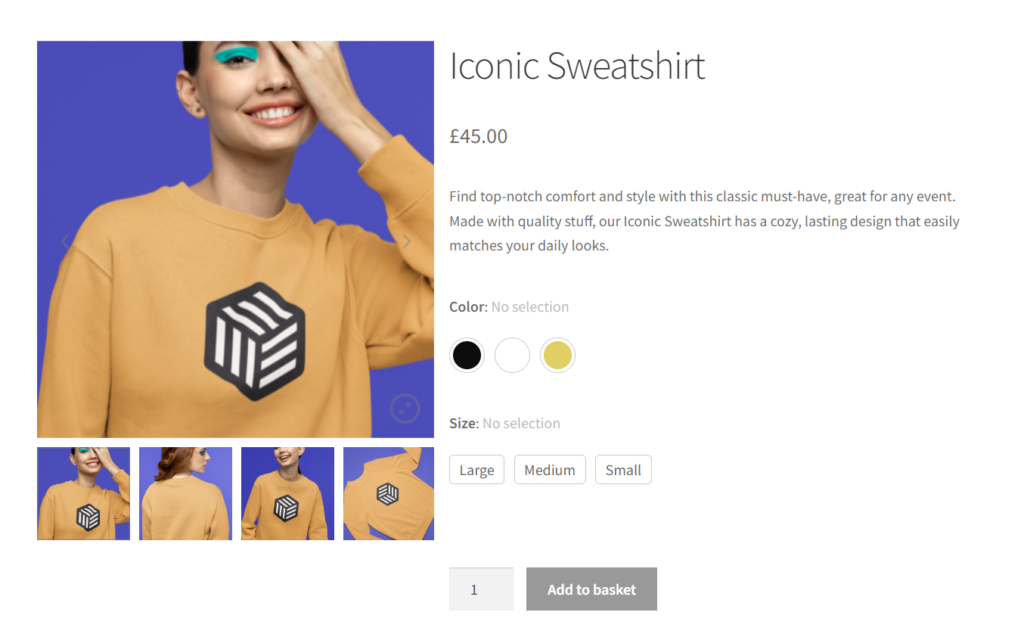
Improve product variations
Every customer wants to buy the best goods possible and those that they prefer the most. This is why, if you have product variations, they’ll want to explore each one to discover the product that suits them best.
However, if you have complex product listings or several product variations, it can be difficult for them to find what they’re looking for.
📈 We don’t want that since research shows that 61% of site visitors will abandon a website if they can’t find what they’re looking for within 5 seconds.
For variable products to work in your favor, you need to make it easy for customers to explore them and discover what best suits their needs. Improving their experience as they do this can increase your sales and conversions.
How do customers explore product variations in the default WooCommerce?
Unfortunately, the default WooCommerce product variations don’t provide customers with the best experience. If you have numerous product variations, they will be lumped together on a single product page. Also, customers can only explore product variations using dropdowns.
Overall, this doesn’t make for a pleasant experience, and it could cause your customers to leave your site without purchasing.
To give your customers the best experience possible when browsing product variations, you’ll need these plugins: WooCommerce Show Single Variations and WooCommerce Attribute Swatches.
Improve product variations with Show Single Variations and Attribute Swatches
Showing product variations as single products
WooCommerce Show Single Variations allows you to make variable product exploration user-friendly and more engaging for your customers. This plugin can display product variations as individual products on the shop page, category pages, and search results.
You can easily help customers find what they’re looking for by accurately showing individual product variations in search and filter results. Customers can add these single-product variations to their carts in just one click without visiting the parent product page. This will help you to save them time, clicks, and frustration – improving their overall browsing experience.
Suppose you have a small product catalog. You can seamlessly expand it by selecting the single variations on the product page.
WooCommerce Show Single Variations
Show WooCommerce variations as single products on the shop page, category pages, search results, and filtered results with WooCommerce Show Single Variations.
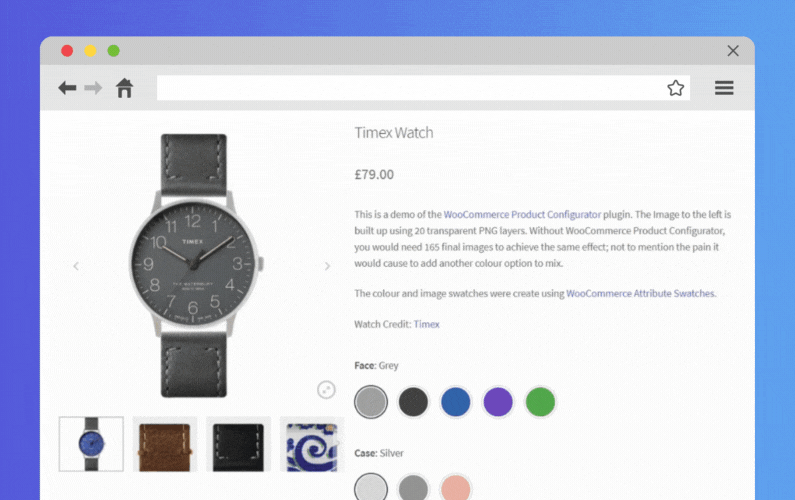
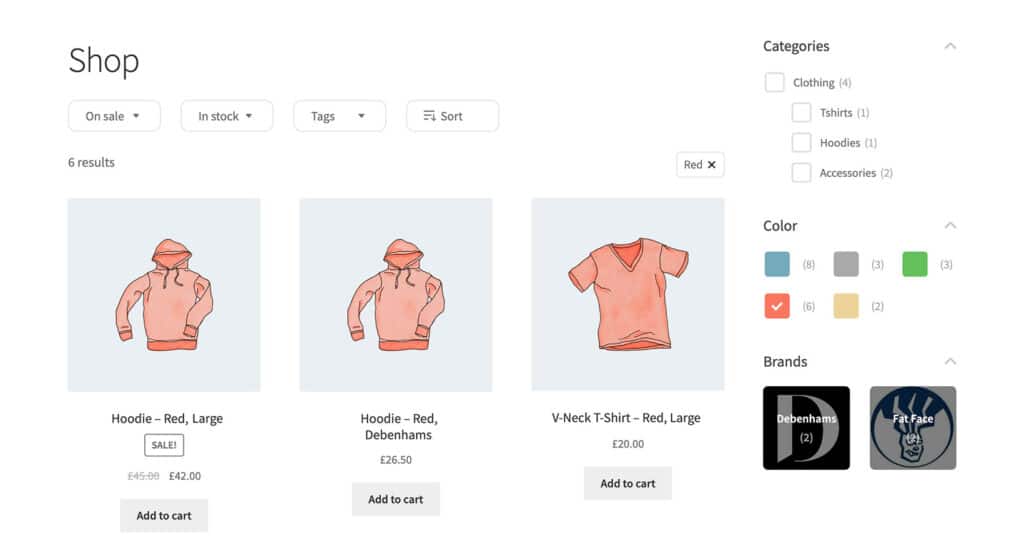
Allowing customers to explore product variations with color and image swatches
WooCommerce Attribute Swatches provides your customers with a visually appealing way to browse your product variations. It allows you to replace the default product variation dropdowns with color, image, and text swatches.
You can give your attributes a modern look using:
- A color picker – an easy-to-use color picker that allows you to select the perfect color swatches for your products.
- An image thumbnail – you can show a preview of the appearance of each attribute’s material, texture, etc.
- Radio buttons – Upgrade text-based swatches with clean text and radio buttons.
You add these swatches to your product page, shop page, and product filters, making product browsing an enjoyable experience for your customers. As a result, they can find the products they want quickly.
WooCommerce Attribute Swatches
Replace the default WooCommerce variation dropdown menu with variation swatches for WooCommerce. Add color swatches, image swatches, and modern text buttons to your variable product pages.
With all of these features, both plugins will help you to turn more curious browsers into paying customers.
Learn how to start your ecommerce website today
Starting your own online store has never been easier. With WordPress and WooCommerce you get your up and running in just a few clicks, add your own products, and sell online. However, the default WooCommerce setup is not enough to get you as many sales as you would want from your online store.
Thankfully, WooCommerce is extensible. This means that you can use the plugins mentioned in this guide to upgrade its default features to boost conversions and foster customer loyalty.
- Flux Checkout for WooCommerce – Upgrade your entire checkout flow to boost conversions.
- WooThumbs for WooCommerce – Improve your product gallery to help customers make a purchase decision.
- Iconic Sales Booster for WooCommerce – Cross-sell at different parts of your online store to boost your AOV.
- WooCommerce Show Single Variations – Show product variations as single products to improve product discoverability.
- WooCommerce Attribute Swatches – Allow customers to explore product variations with color and image swatches to improve their experience.
Join the All Access Club and get all of these plugins in one discounted purchase, or buy them one after the other above.
Join the All Access Club
Get every one of the plugins in this guide, as well as 9 others by joining the All Access Club.

Gina Lucia is our in-house Content Manager at Orderable. She writes articles, user guides, technical documentation, and creates videos on everything WooCommerce and Orderable.
Gina has been working in the WordPress/WooCommerce space since 2012 when she developed WordPress websites for clients large and small.
For the past 8 years, she’s been writing about everything WordPress and WooCommerce, becoming an expert in what makes a WooCommerce store succeed.
When not writing, Gina loves to tend to her vegetable garden, read, or travel to mainland Europe.