
In this guide, we’ll show you how to edit the WooCommerce shop page with a few different techniques.
We’ll also show you how to customize the WooCommerce shop page using shortcodes, templates, page builders, and blocks.
By editing and upgrading your shop/category page, you’ll be able to:
- Improve customer experience and make your store user-friendly.
- Increase conversions with tried and true techniques.
- Make more sales by helping customers find products quickly.
You’ll be able to do this using WooCommerce settings and some plugins to achieve all of the above and much more.
So, in this article, we’ll show you how to edit the WooCommerce shop page using WooCommerce settings and the following plugins:
- WooCommerce Attribute Swatches – Add color and image variation swatches to your WooCommerce shop pages.
- Image Swap for WooCommerce – Encourage shoppers to purchase your products in fewer clicks with shop page image swap effects.
- WooCommerce Show Single Variations – Display WooCommerce variations as individual products on the shop page, category pages, search results, and filtered results.
First, let’s look at how to edit the WooCommerce shop page using default WooCommerce settings.
Customize the WooCommerce shop page using WooCommerce settings
For your default WooCommerce shop page, WooCommerce has a built-in tool called the WooCommerce customizer that allows you to edit the display settings of the WooCommerce shop page.
The customizer allows you to:
- Choose whether to display products, product categories, or both on the shop page.
- Choose the default sorting criteria for products on the shop page. This allows you to determine the order in which products are displayed.
To choose what to display on the shop page:
- From your WordPress dashboard, go to Appearance > Customize. You can also go to the shop page and click the Customize button at the top WordPress admin bar.
- Click on WooCommerce > Product Catalog.
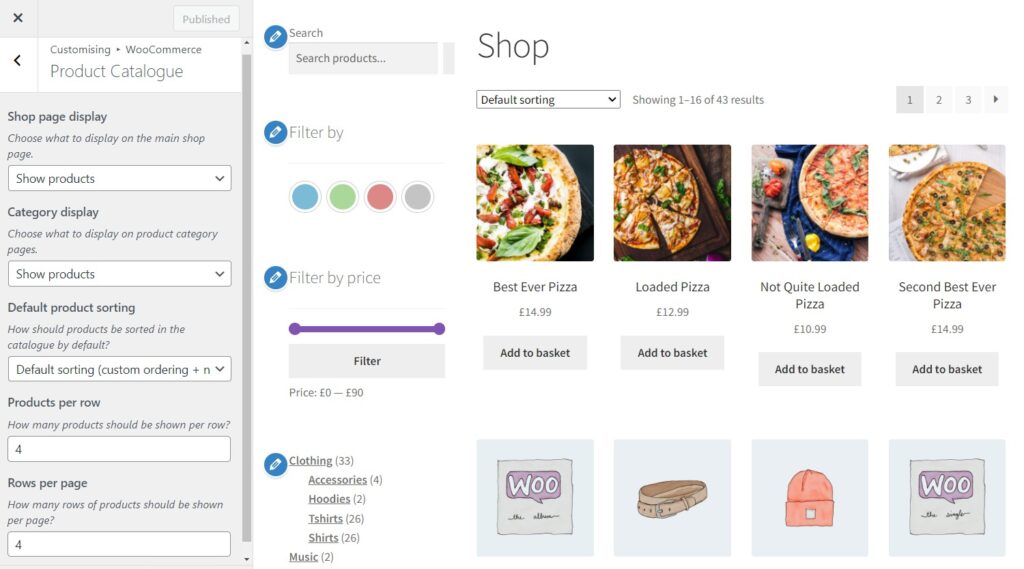
- You will see a Shop page display appear first. Click the dropdown and choose whether you want to display products or product categories or both on the shop page.
- You can preview the changes on the shop page and once you’re satisfied, click Publish.
To select default product sorting on the shop page:
- From your WordPress dashboard go to Appearance > Customize > Product Catalog.
- Click the dropdown under Default product sorting section and select the criteria to determine the order in which your products are displayed. It can be:
- Default sorting (custom ordering+name).
- Popularity.
- Average rating.
- Sort by most recent and price (either ascending or descending).
- Once you’re done with your changes click Publish.
The WooCommerce customizer also allows you to change the number of products per row and the number of rows on the shop page. To do this, follow the same procedure as the one above, except this time you will be in the Products per Row and Rows per Page sections.
These are the display settings provided by the default WooCommerce settings. If you want to give your shop page a sleek and professional look while optimizing the customer experience, WordPress plugins are the way to go.
How to edit the WooCommerce shop page using plugins
Using plugins to edit the WooCommerce shop page allows you to have a wider array of display options. These options enable you to get detailed about how your product or categories are displayed on the shop page.
If done correctly, these changes have a role to play in increasing conversions for your online store.
In this section, we’re going to walk you through, step-by-step, some powerful changes you can make to the shop page using plugins.
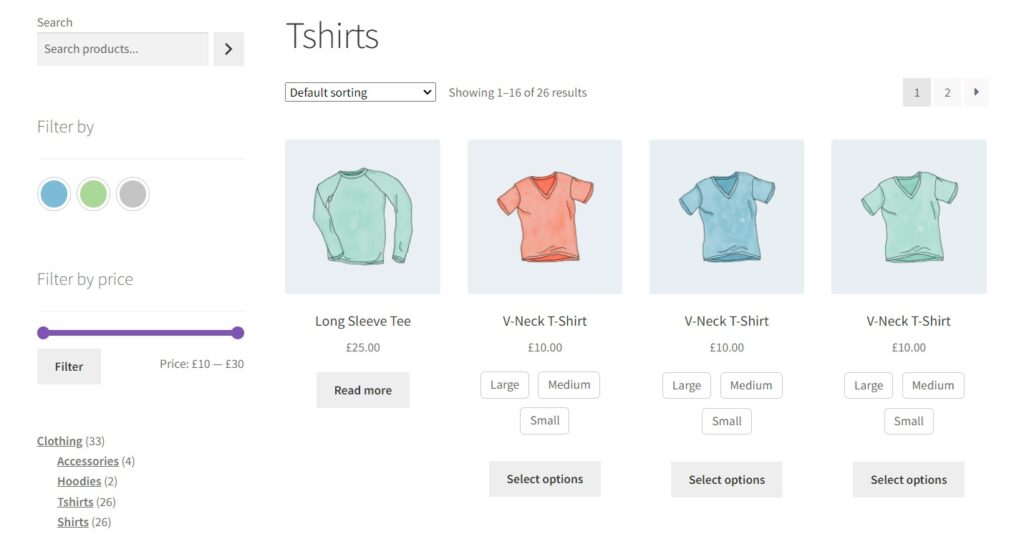
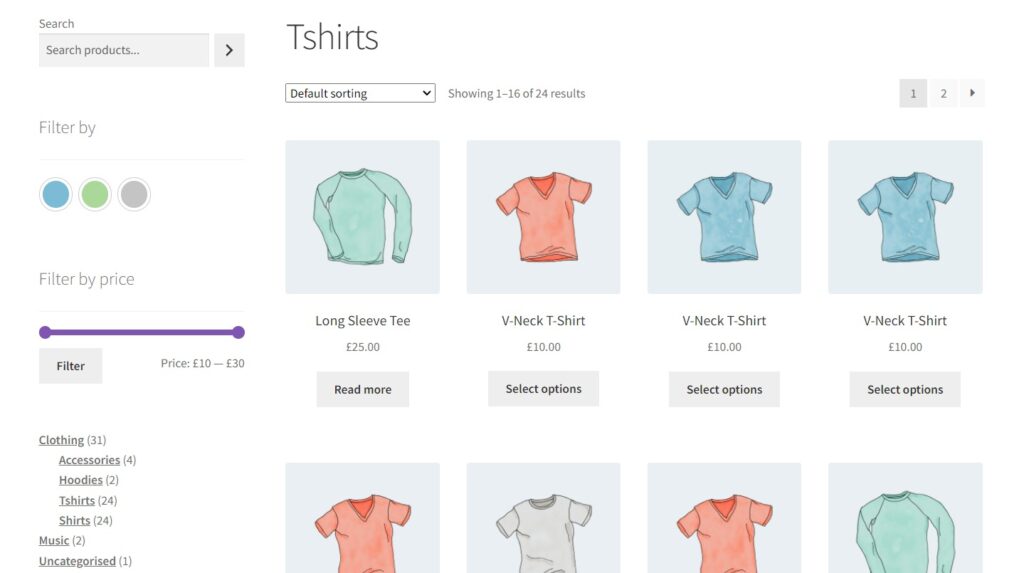
Add color and image swatches to the product filter sidebar
When you have a lot of products displayed on your shop page, it’s difficult for your customers to quickly find their preferred product.
Suppose you’ve already added the product filter sidebar to your WooCommerce shop page to help your customers quickly and easily find their preferred product. You can go a step further and add color and image swatches to this sidebar.
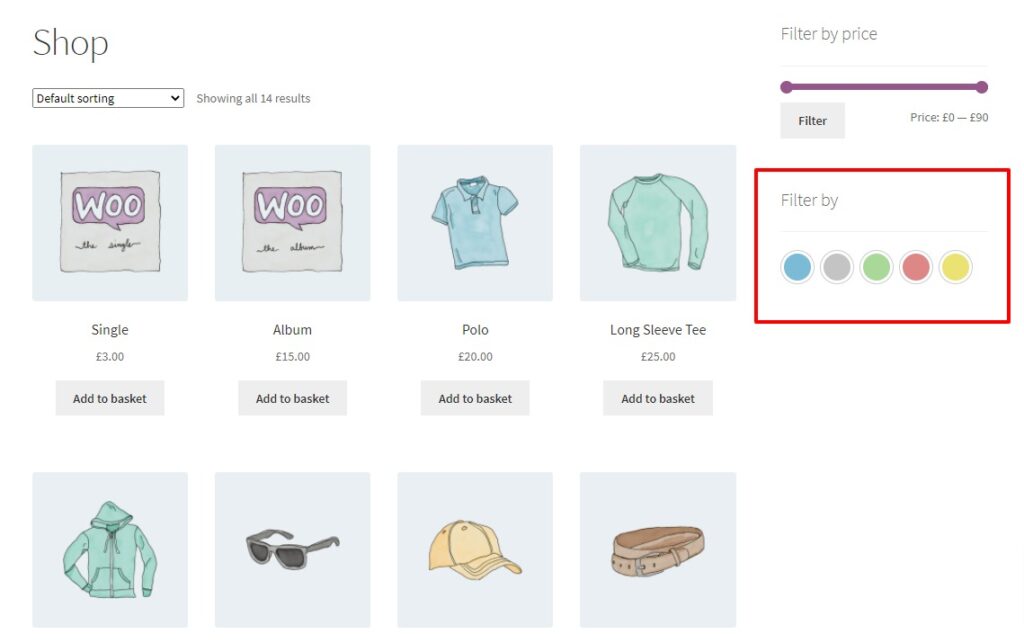
Image and color swatches enable your customers to quickly find their preferred option from product variations by allowing customers to sort through product variations visually.
WooCommerce on its own doesn’t allow you to do this, you will need the help of a plugin.
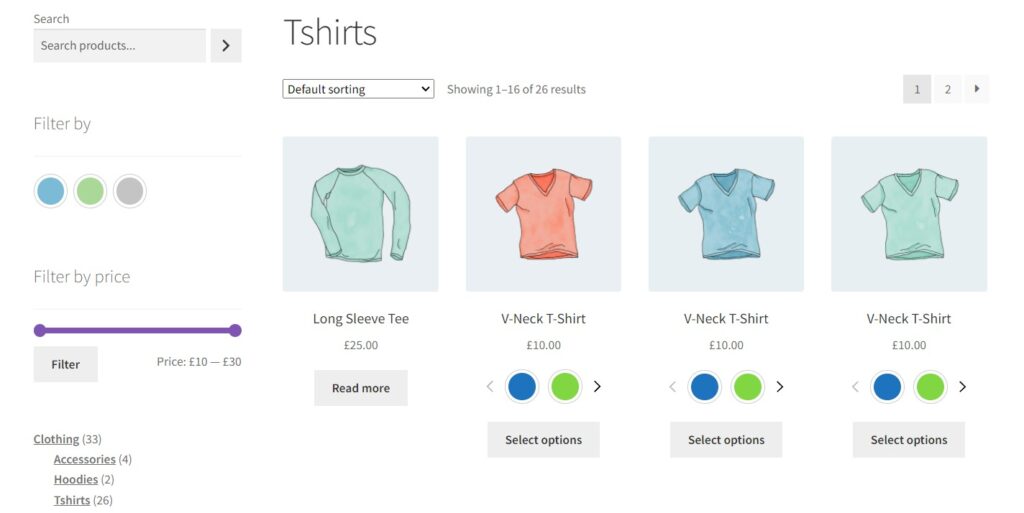
WooCommerce Attribute Swatches is a plugin that allows you to add color and image variation swatches to the product filter sidebar on the shop page.
WooCommerce Attribute Swatches
Replace the default WooCommerce variation dropdown menu with variation swatches for WooCommerce. Add color swatches, image swatches, and modern text buttons to your variable product pages.
Customers can select their preferred variation when filtering products, allowing them to find their preferred option a lot quicker. Due to this feature, customers will spend less time searching for products and more time making purchases.
WooCommerce Attribute Swatches also allows you to add color and image swatches just below the variable products displayed on the shop page.
Show extra product images on hover or click
Having extra images for your product is a great way to make more products appealing to customers. When these product images are taken from multiple angles, they help the customer to understand the product much better.
To enhance the experience of your customers on the shop page, you can show additional product images on hover or click. This way, the customer doesn’t have to go to the product page to view them. It keeps them in the shop longer which can lead to more sales.
This feature will also assist them in making purchase decisions a lot quicker as they can view multiple product images at a glance.
Image Swap for WooCommerce enables you to add image flip on hover effects to the images of your products displayed on the shop page. This works to encourage your shoppers to purchase your products by limiting the clicks they have to go through to access additional product images.
Image Swap for WooCommerce
Add gallery-like image swap effects to your product images on the shop, catalog, search, and filter results pages with Image Swap for WooCommerce.
Image Swap for WooCommerce has multiple image transition effects and customization options, including slide, fade, and more, that can be added to your WooCommerce storefront.
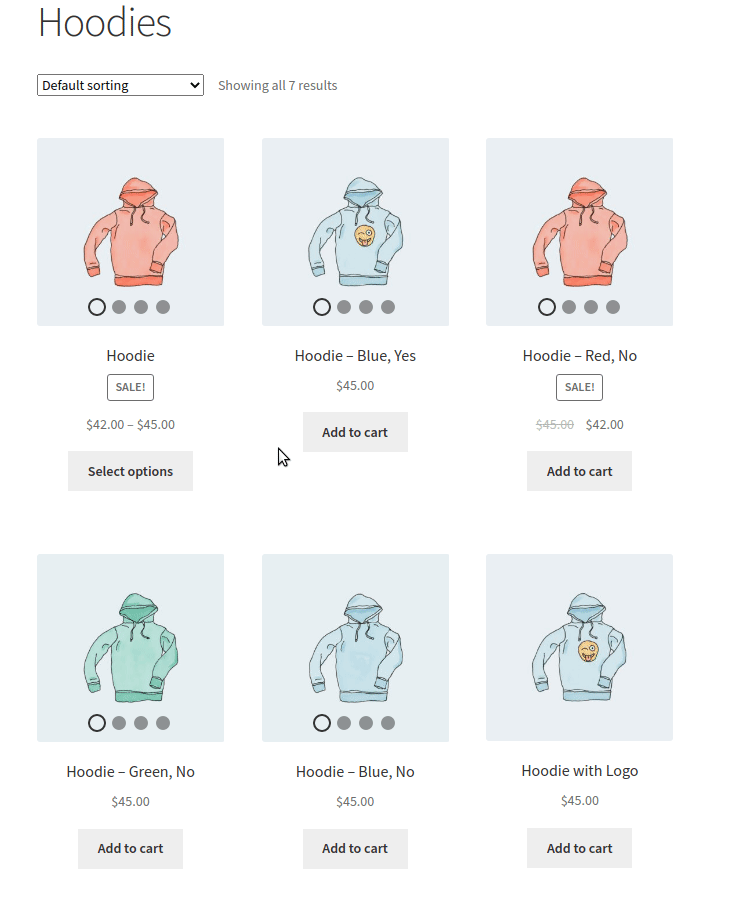
Show variations as single products to expand your catalog
Displaying variable products exclusively as options of a parent product tends to shrink your product catalog. To expand it, you can separate product variations to be displayed individually as single products on the shop page.
Showing variations as single products on the shop page presents them more appealingly compared to displaying them as variable product options. Doing this also makes it easier for customers to access variable product options to find their preferred products.
To do this you will need the WooCommerce Show Single Variations plugin. It allows you to display WooCommerce variations as individual products on the shop page, category pages, search results, and filtered results.
WooCommerce Show Single Variations
Show WooCommerce variations as single products on the shop page, category pages, search results, and filtered results with WooCommerce Show Single Variations.
Using plugins is just one way to edit your shop page. If you want to customize a few more things, you can also use shortcodes.
How to edit the WooCommerce shop page with shortcodes
You can also create an entirely custom shop page (rather than your main shop page) using small pieces of code that have a dedicated function. WooCommerce has a built-in library of shortcodes that you can use to display content on your shop page.
These include shortcodes created by WordPress and those created by WooCommerce.
Shortcodes are made up of human-friendly language, enclosed in square brackets, for example [add_to_cart]. Shortcodes condense large amounts of code in one-line statements.
On the shop page, you can use WooCommerce shortcodes to display all products, products from a specific category, products by attribute, on-sale, best selling, etc.
Let’s see how you can use shortcodes to edit the WooCommerce shop page.
Step 1: Create a custom shop page
To create a custom shop page, take the following steps:
- From your WordPress dashboard, go to Pages > Add New.
- The Gutenberg WordPress editor should pop up with a new blank page. Give the page a title, ‘Shop’ in this case.
Next, we’ll need to add our products and other shop page elements to this page.
Step 2: Add your shop page shortcodes
You can use any number of shortcodes that come with WooCommerce here to create an entirely custom WooCommerce shop page layout. Let’s see some examples.
Display products on the shop page
If you want to display all products, use the following tutorial:
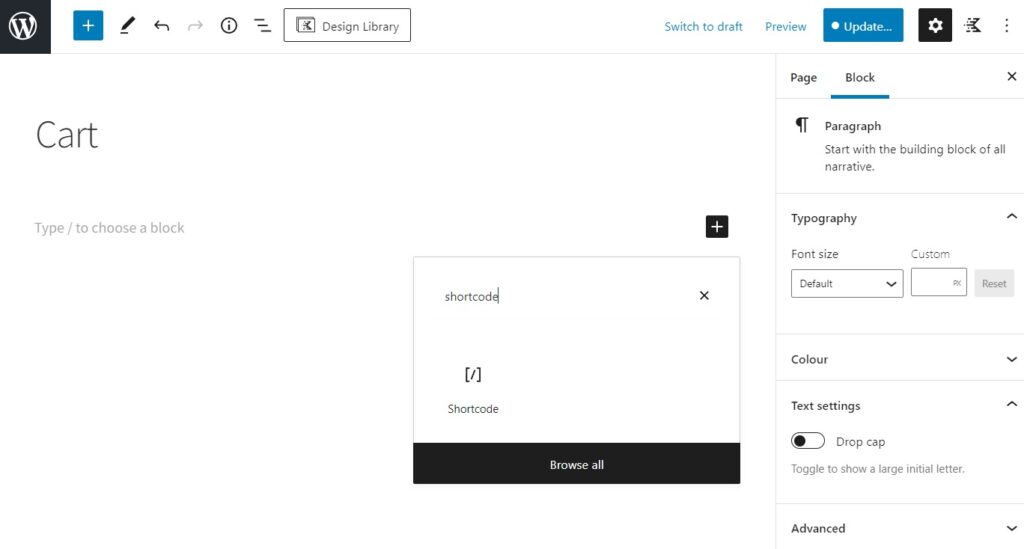
- Click on the plus (+) button to add a block.
- Search for the Shortcode block and click on it once it appears. You can also use /(forward slash) and type shortcode and click on the block once it appears.
- Next type in the shortcode [products].
- Click Publish on the top right of the page and that’s it.
This is a general example of how you use shortcodes to determine what is displayed on the shop page. You can do so much more with WooCommerce shortcodes.
Using WooCommerce shortcodes you can display:
- Sale products.
- Best-selling products.
- A single product on a page or a post.
- New/recent products.
- Related products on the single product page.
We’ve gone into all of this in much more detail in our WooCommerce shortcodes guide.
The advantage of using shortcodes is that you will be able to manage the customization of your site without having advanced coding knowledge. You can add a wide variety of content, including dynamic elements, anywhere on the shop page and determine how they are displayed.
So far we have covered two very powerful methods of editing a WooCommerce shop page. Next, let’s look at customizing the WooCommerce shop page using templates, page builders, and blocks.
How to customize the WooCommerce shop page with templates, page builders, and blocks
You can edit the WooCommerce shop page using your WordPress theme, or template if you want to. However, not all themes allow you to customize this page, so here are a few suggestions:
Elementor for WooCommerce
Elementor is a great page builder for WordPress. It enables WordPress (and WooCommerce) users to build and edit pages using simple drag-and-drop features.
Elementor has both a free and pro version. The free version doesn’t have WooCommerce widgets. The pro version on the other hand seamlessly integrates with WooCommerce and has WooCommerce widgets such as customizing the add to cart button, product reviews, product upsell, etc.
With Elementor Pro, you can custom-build your shop page (termed products archive by Elementor) from scratch while having a live preview of the changes. Alternatively, you can upload pre-built templates to save time.
You can choose where to display a specific group of products using queries. It also allows you to add WooCommerce widgets, determine the typography, color scheme, and add hover effects.
Kadence WooCommerce Elementor Pro
Another way you can edit your WooCommerce shop page is using the Kadence WooCommerce Elementor Pro add-on plugin. It allows store owners to create and assign custom templates for the shop page and individual product pages. If you want to speed up this process you can simply download pre-built Elementor templates.
Its most notable feature is that it allows WooCommerce users to customize archive pages across the whole store. This feature is not well represented in Elementor pro alone, but the combination with Kadence takes it to a whole new level.
Learn how to edit the WooCommerce shop page today
The shop page is one of the most vital parts of your WooCommerce store and you need to edit it for an optimum customer experience and high conversion rate.
You can use built-in WooCommerce settings for basic editing but if you want to take your ecommerce store to the next level, you should consider the following WooCommerce plugins:
- WooCommerce Attribute Swatches – Add color and image variation swatches to your WooCommerce shop pages.
- Image Swap for WooCommerce – Encourage shoppers to purchase your products in fewer clicks with shop page image swap effects.
- WooCommerce Show Single Variations – Display WooCommerce variations as individual products on the shop page, category pages, search results, and filtered results.

Gina Lucia is our in-house Content Manager at Orderable. She writes articles, user guides, technical documentation, and creates videos on everything WooCommerce and Orderable.
Gina has been working in the WordPress/WooCommerce space since 2012 when she developed WordPress websites for clients large and small.
For the past 8 years, she’s been writing about everything WordPress and WooCommerce, becoming an expert in what makes a WooCommerce store succeed.
When not writing, Gina loves to tend to her vegetable garden, read, or travel to mainland Europe.