
In this guide, we’ll walk you through how to add a WooCommerce multistep checkout to your WordPress website.
Plus, we’ll do it the most fuss-free way possible with the WooCommerce multistep checkout plugin, Flux Checkout for WooCommerce.
Flux Checkout for WooCommerce
Flux Checkout transforms the default WooCommerce checkout into one that’s lightning-fast, distraction-free, and reduces checkout abandonment.
But first, let’s outline why a multistep checkout is better for user experience over a one-page checkout.
Why use a multistep checkout instead of a one-page checkout?
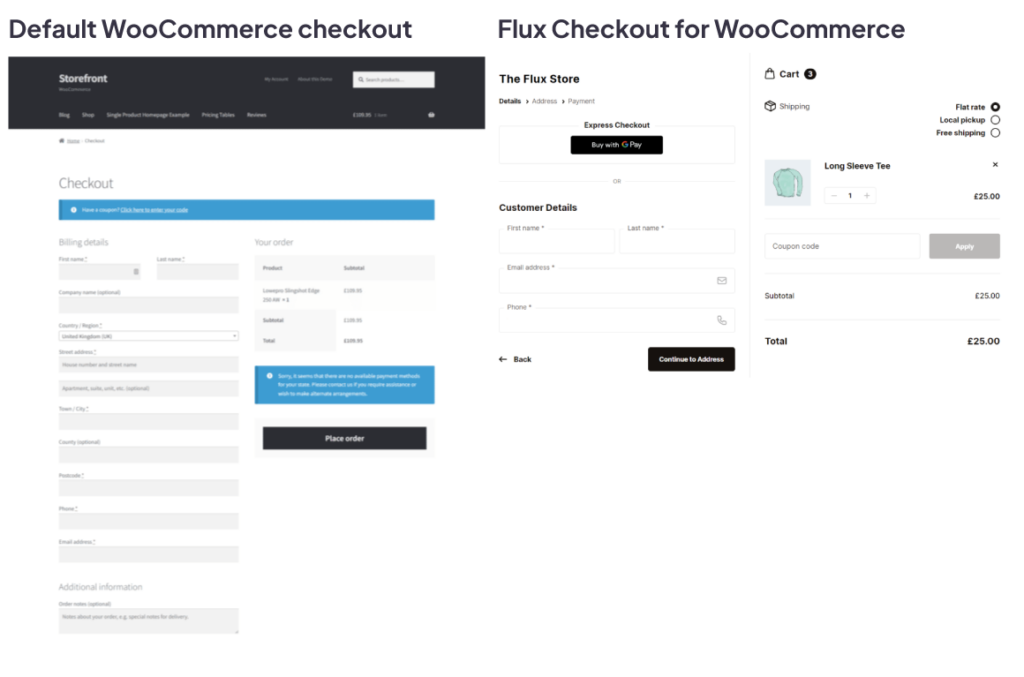
WooCommerce, by default, comes with a one-page checkout. A one-page checkout, by definition, has all the checkout information the customer needs to fill in on one page.
Everything from the billing & shipping info to payment methods, order review, and more can all be found on this one checkout page.
When all the checkout fields are lumped together like this, it can make the checkout form overwhelming for the customer. It can also make it seem like the customer has a lot of work to do, when in reality, they don’t.
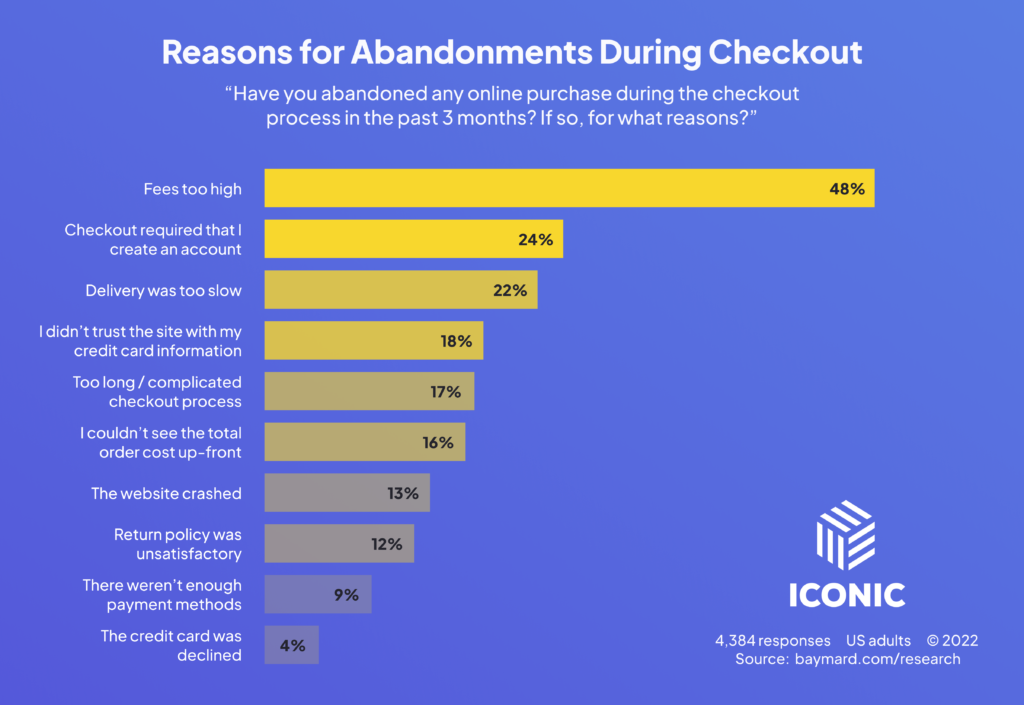
A one-page checkout that’s this overwhelming, especially one that also displays the site menu, footer, and sidebar, can result in a higher rate of checkout abandonment (when customers leave before completing their purchase).
The benefits of a multi-step checkout
In comparison, a multi-step checkout breaks each stage of the checkout process into manageable bite-sized chunks. Sections/checkout flow steps like the following:
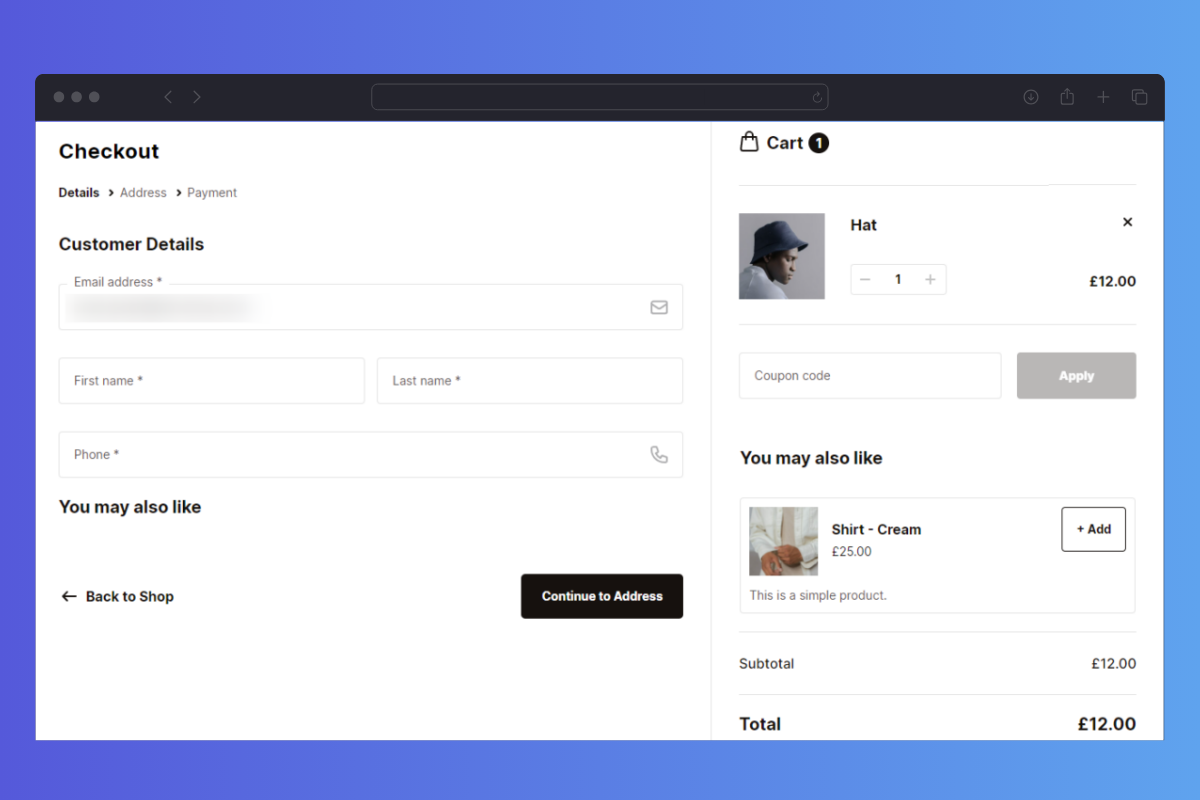
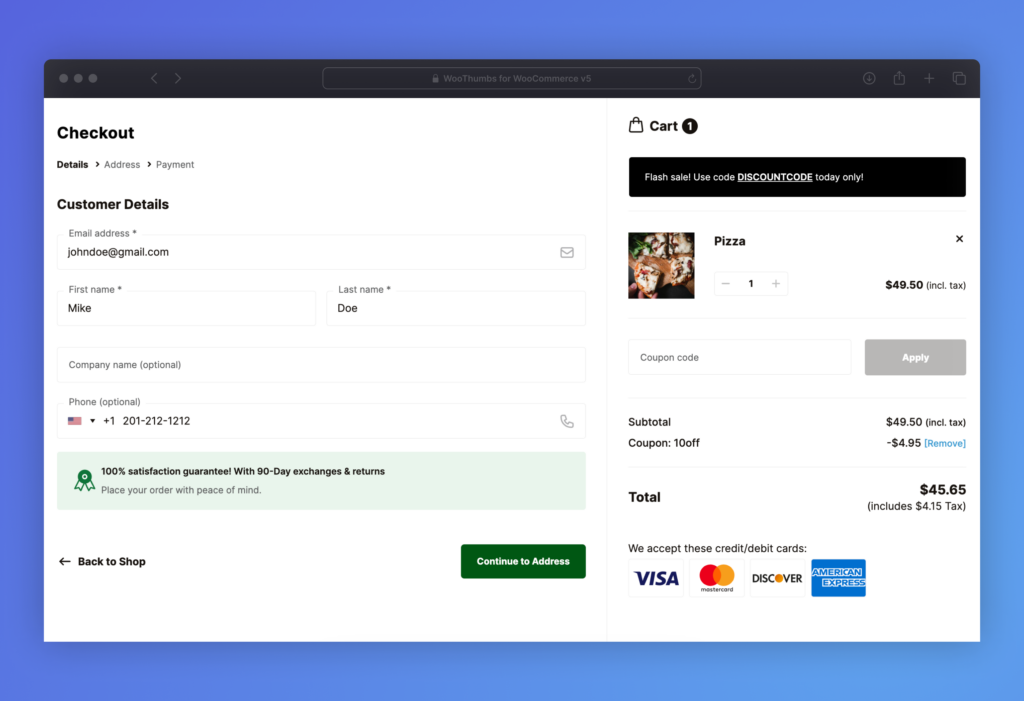
- Details – where customers input their name, email address, and phone number. They can also log in with a login form here, create an account, or checkout as a guest.
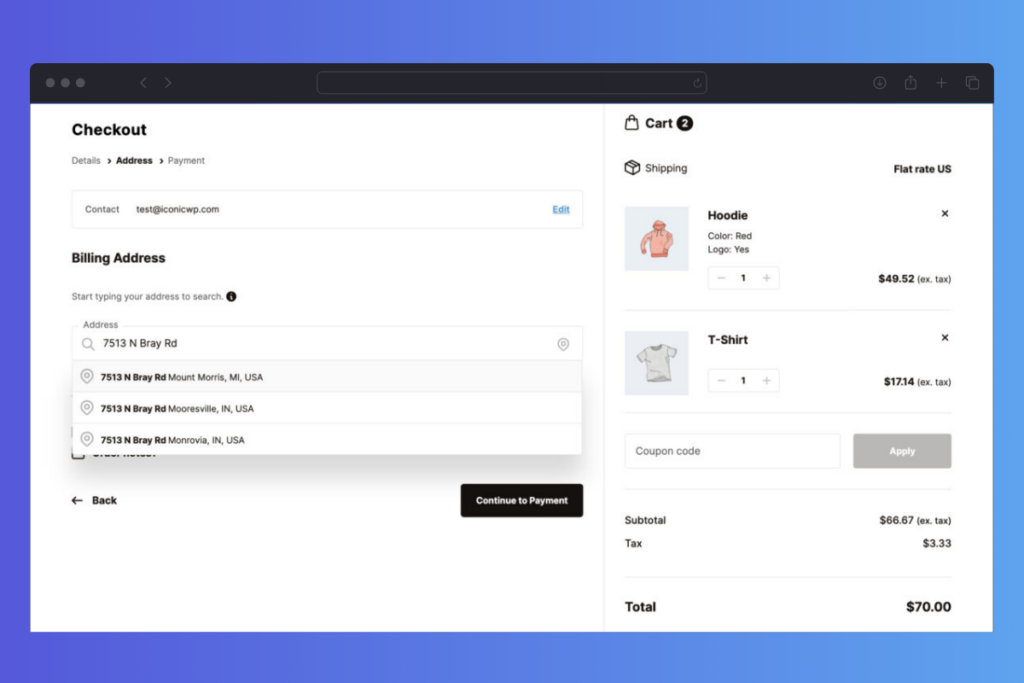
- Address – this is the shipping step, where customers input shipping and billing details.
- Payment – the payment step is where customers select their payment gateway and finish up.
Depending on the multi-step checkout plugin you use for your WooCommerce checkout page, you’ll also see the order review, which contains the product pricing, coupon area, and more.
A multi-step checkout won’t just prevent cart abandonment. It will also improve your conversion rate, allowing you to make more sales, all with this one change.
Want to see what other important metrics you should be tracking in your ecommerce store? Read our ecommerce metrics guide.
So with this in mind, let’s get your WooCommerce multistep checkout up and running. We’ll do it with the WooCommerce plugin we recommend, Flux Checkout for WooCommerce.
The best WooCommerce multistep checkout plugin, Flux Checkout
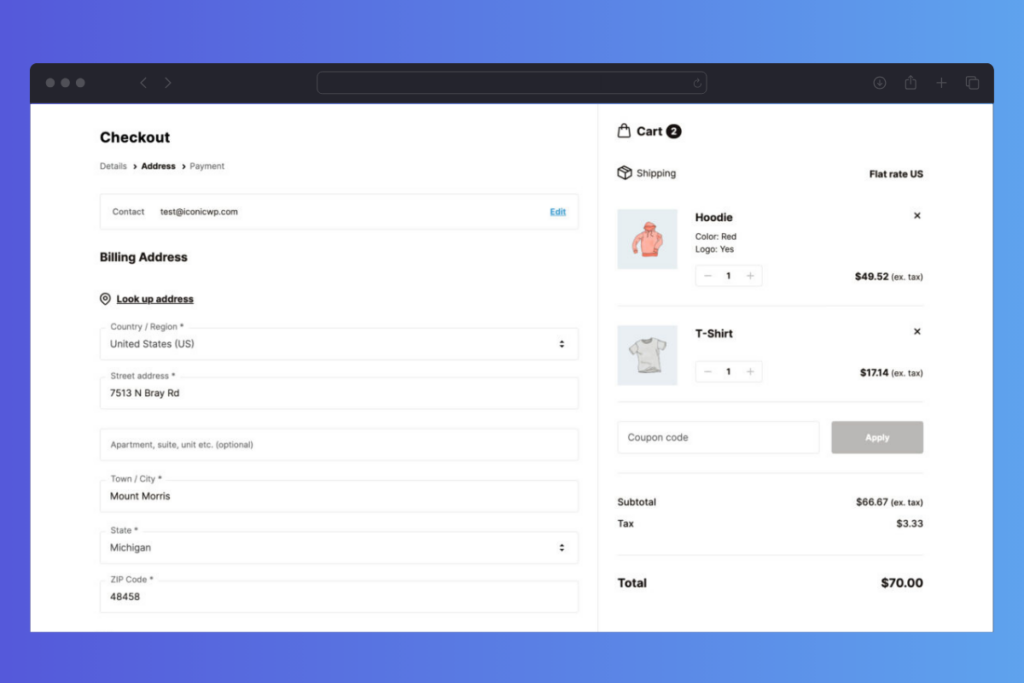
Flux Checkout upgrades the default WooCommerce checkout into one that’s not only multistep but fast and designed to convert.
When customers are ready to complete their order, instead of being presented with a bulky and daunting checkout, they’ll be presented with a slick and modern checkout page.
With just 3 steps, this checkout is designed to guide your customers through a simple process.
It also makes the checkout process as fast as possible by auto-filling the customer’s address and adding prompts to help them know what they need to do next.
It’s user-friendly, easy to understand, and responsive/ready to use on mobile devices from the get-go.
How Flux Checkout works for store owners
For store owners, Flux checkout couldn’t be simpler. It fits seamlessly with your existing theme. Better yet, can be customized to fit right in.
You can customize Flux Checkout by:
- Selecting which checkout design you’d like from our range of checkout templates/themes.
- Change the checkout header text.
- Update the font to fit in with your theme.
- Change the button colors, primary colors, and accent colors.
- And more.
So, now we know the benefits of using the multi-step checkout Flux Checkout over the standard WooCommerce checkout, let’s add it to your store.
How to add a multistep checkout to WooCommerce
To add a multistep checkout to your WooCommerce store, you’ll need to:
- Install the WooCommerce multistep checkout plugin, Flux Checkout for WooCommerce.
- Adjust and customize its settings to suit your store.
That’s it. Below we’ll outline these steps in detail so you can create a better experience for your customers.
Step 1: Install Flux Checkout for WooCommerce
To get started, purchase Flux Checkout for WooCommerce from the Iconic store: iconicwp.com/products/flux-checkout-for-woocommerce
Flux Checkout for WooCommerce
Flux Checkout transforms the default WooCommerce checkout into one that’s lightning-fast, distraction-free, and reduces checkout abandonment.
Then follow these steps:
- Go to Plugins > Add New > Upload Plugin.
- Choose the zip file you downloaded, upload it, and click Activate.
- Once activated, you’ll need to enter your license key.
Now that we have Flux Checkout for WooCommerce installed, we can move on to adjusting your settings.
Step 2: Adjust and customize your settings
Now we have Flux checkout enabled on your store. We’ll next want to adjust a few settings to make sure your customers get the most from your new multi-step checkout.
So to fit your new checkout design with your WordPress theme, do the following:
- Go to WooCommerce > Flux Checkout.
- Click the General tab. Here you’ll be able to:
- Enable or disable address autocomplete and go through the steps of setting that up.
- Decide which fields you want to adjust.
- Decide if you want to store checkout data in the browser.

Next, you’ll be able to change the header settings. Click the Styles tab at the top. Here you’ll be able to:
- Select which theme you want to use for your checkout. Flux has a few different designs to pick from, depending on the style of your store.
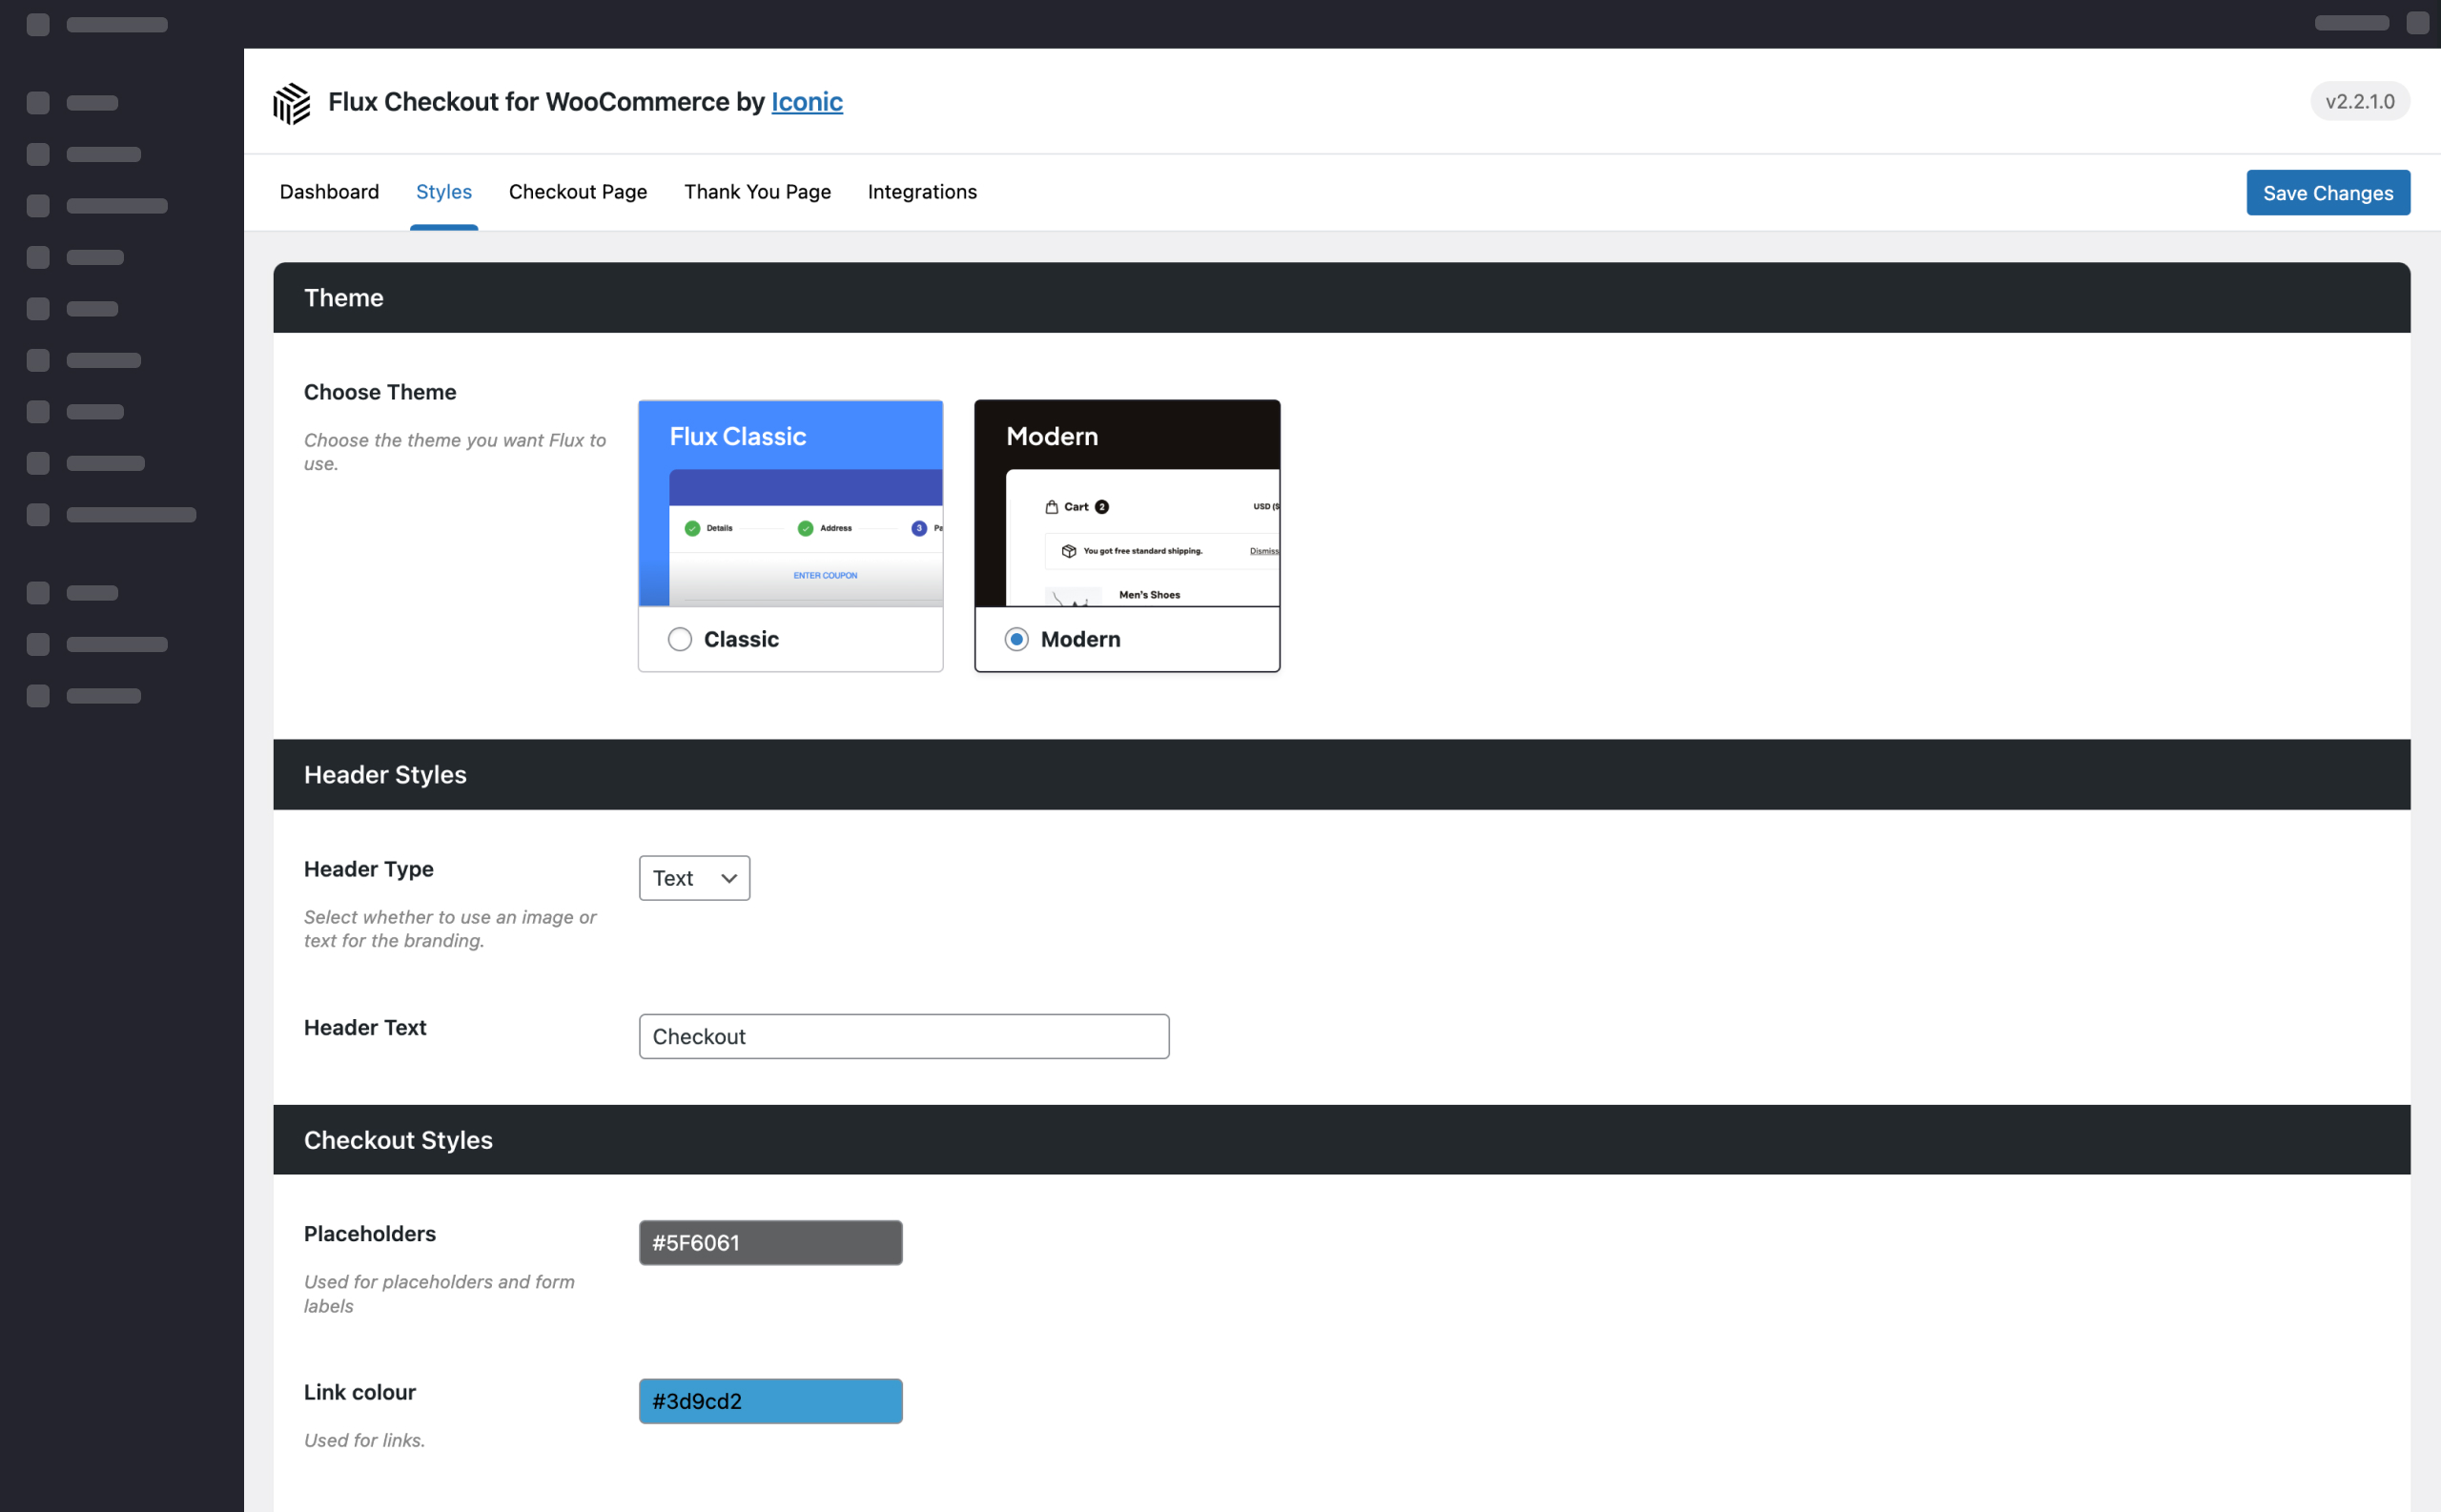
- Once selected, the settings below will change. Here you’ll be able to change the following:
- The header type, rename the header text, pick your font family, color, and more.
- Change your checkout styles. Depending on the theme you selected, these will vary but include everything from button colors (including Back to Cart button), link colors, and placeholder colors.
- Once you’ve customized your checkout to integrate with your store’s look and feel, click Save Changes and check your newly updated checkout.
Add a multistep checkout for WooCommerce
That’s it! Your ecommerce store now has a multistep checkout designed to prevent distraction and optimize conversions.
With this up and running, you’ll have a slick checkout, making the purchasing process quick, easy, and straightforward for your customers, resulting in more sales for your online store.
Make these changes quickly and easily with Flux Checkout for WooCommerce.
Flux Checkout for WooCommerce
Flux Checkout transforms the default WooCommerce checkout into one that’s lightning-fast, distraction-free, and reduces checkout abandonment.

Gina Lucia is our in-house Content Manager at Orderable. She writes articles, user guides, technical documentation, and creates videos on everything WooCommerce and Orderable.
Gina has been working in the WordPress/WooCommerce space since 2012 when she developed WordPress websites for clients large and small.
For the past 8 years, she’s been writing about everything WordPress and WooCommerce, becoming an expert in what makes a WooCommerce store succeed.
When not writing, Gina loves to tend to her vegetable garden, read, or travel to mainland Europe.