
? If you’re looking to create a custom checkout page in WooCommerce, or customize your existing one, this article has your back.
In this guide, we’ll walk you through the following:
- Why you should customize the default WooCommerce checkout page.
- How to customize the checkout page using default settings.
- How to customize your checkout page using a plugin.
If you run an online store using WooCommerce, creating a custom checkout page is essential to provide your customers with a smooth and personalized shopping experience. Fortunately, there are many ways to customize the checkout page, including using the default settings and plugins like Flux Checkout for WooCommerce.
In this article, we will guide you through creating a custom checkout page in WooCommerce using both the default settings and the Flux Checkout plugin. We’ll also cover the benefits of customizing the checkout page, such as reducing cart abandonment and increasing conversions.
Flux Checkout for WooCommerce
Flux Checkout transforms the default WooCommerce checkout into one that’s lightning-fast, distraction-free, and reduces checkout abandonment.
So before we get into the ‘how,’ let’s address the ‘why.’ Because customizing the default WooCommerce checkout page has some serious benefits.
Why customize the WooCommerce checkout page?
WooCommerce comes with a default one-page checkout, and while this does the job for many brand-new or small ecommerce stores, for stores looking to improve checkout abandonment, it’s essential to give it an upgrade.
By creating a custom checkout page or customizing an existing one with the techniques in this article, you’ll be able to do the following.
Improve user experience
The checkout page is the final step in the customer’s journey after the shopping cart and before purchasing. If this step is complicated or confusing, it can lead to cart abandonment and lost sales.
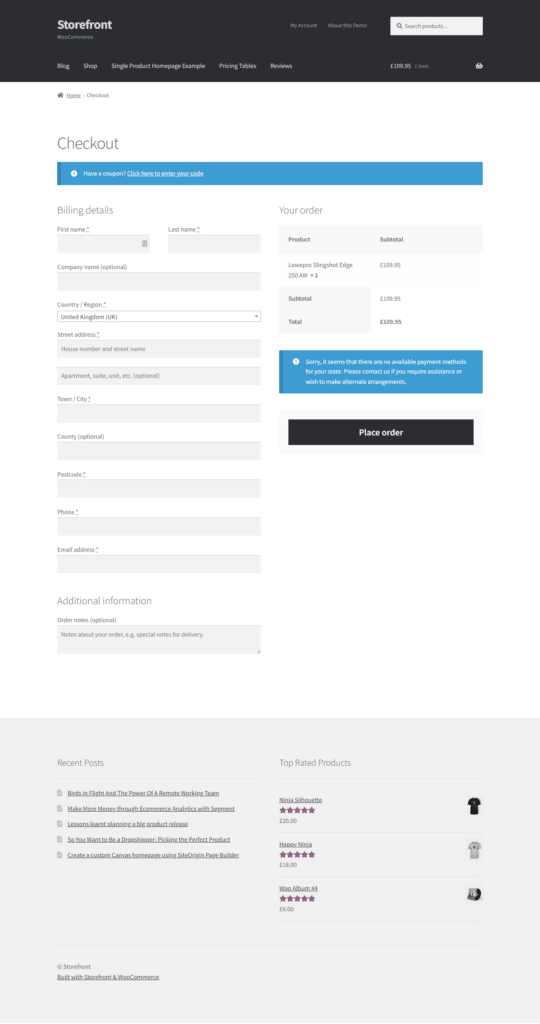
The default one-page checkout that comes with WooCommerce can be overwhelming, confusing, and distracting for the following reasons:
- It retains your website header, footer, and sidebar. This distracts customers from the job at hand, checking out.
- It has all checkout fields on one page or in one step. This makes the customer think filling out the checkout form text fields is a bigger job than it actually is. It can also overwhelm customers and cause them to abandon the checkout when they don’t need to.
- The default WooCommerce checkout contains required fields that might just not be needed for your online store (like the business address and coupon fields).
? A smartly designed checkout page could help your ecommerce site increase its conversion rate by 35.26%.
So by customizing this checkout or replacing it entirely, you’ll have much more control over how your customers move throughout your checkout process and improve their user experience at the same time.
Increase conversions and your average order value
Once a customer reaches the checkout, your ability to make an additional sale doesn’t stop there.
This section of your website is a powerful selling tool. After all, once customers are at the checkout, they’re already showing their intent to buy.
For this reason, the checkout becomes a powerful place to add cross-selling and upselling sections. By adding single product cross-sells as offers at the checkout, you’ll be able to increase your average order value without the effort.
? In a HubSpot blog survey, more than 500 retailers reported that cross-selling and upselling are responsible for up to 30% of their revenue.
Plus, by improving your checkout with the techniques in this article, you’ll be able to increase your conversion rate by using some of the ecommerce industry’s best practices.
So now we know why you should create a custom checkout page in WooCommerce, we’ll walk you through how to do it. Starting with some of the default settings you can customize in WooCommerce.
Customize the WooCommerce checkout page with default settings
By default, WooCommerce has a variety of basic things you can tweak to customize your checkout to suit you. Bear in mind that these are fairly minor in terms of customization. If you want to overhaul your checkout page, we recommend skipping to the next section.
Set up custom shipping details and zones
Within WooCommerce, you can customize and create shipping field options for your customers. Doing this will allow your customers to select a shipping option that suits them. These include local pickup, free shipping, and more.
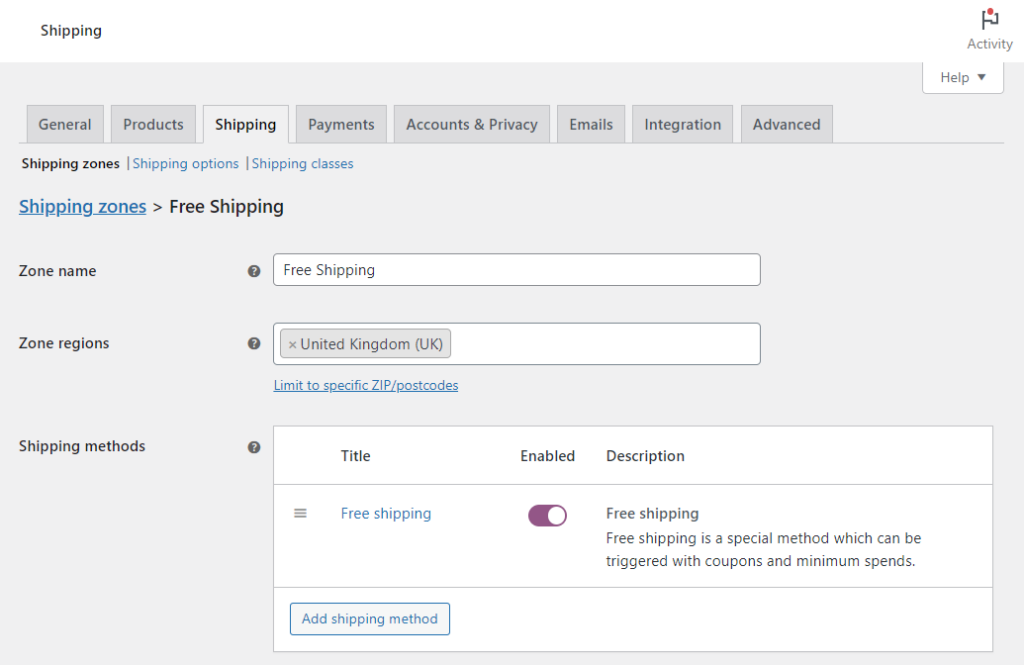
? In a survey conducted by Deloitte, 77% of the respondents admitted that free shipping is one of the top reasons they shop online.
These can be found by going to WooCommerce > Shipping from your WordPress dashboard.
Include additional payment methods
The type of payment options you offer at the checkout matter more than we think. By including the most convenient payment methods for your specific customers, you could significantly reduce checkout abandonment.
These additional payment methods can be added using WooCommerce’s default settings. Go to WooCommerce > Payments and customize which payment method you want to include.
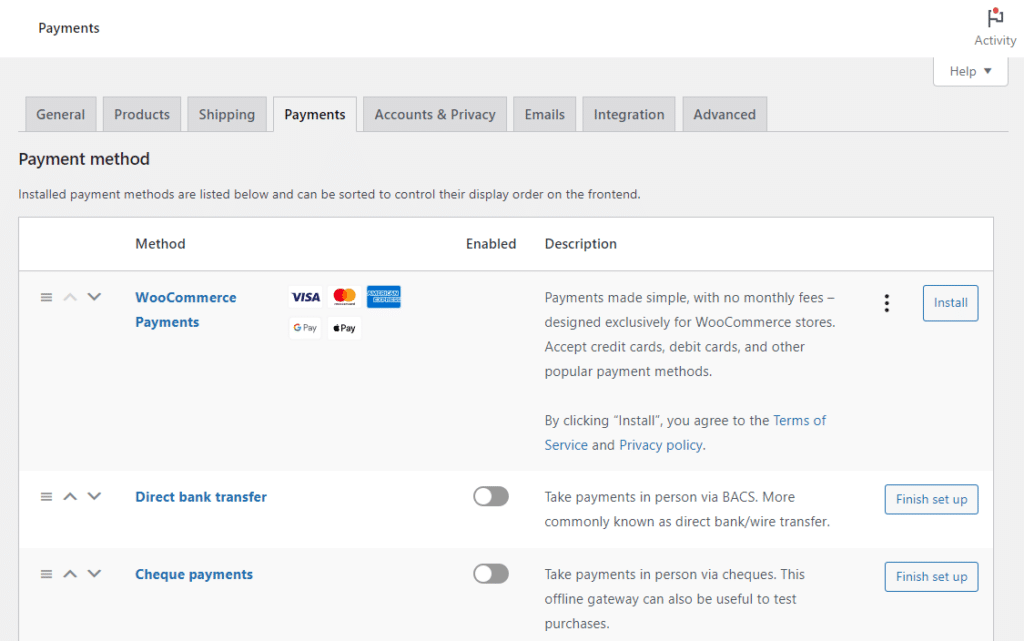
At this point, you can also install some add-ons that allow you to include some of the most common payment gateways available for ecommerce stores. Including PayPal, Google Pay, Apple Pay, and more.
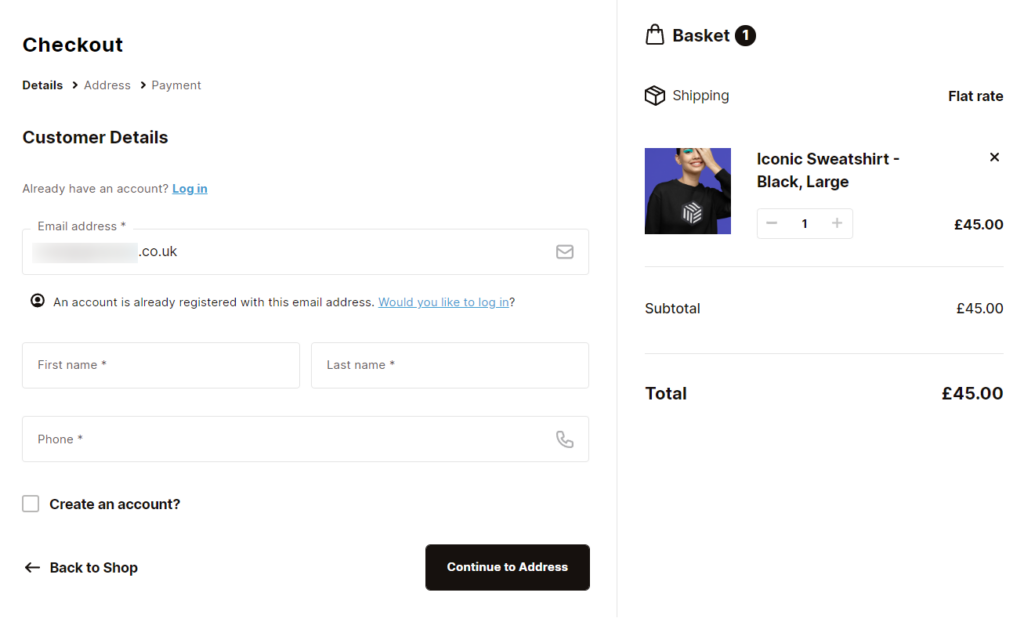
Customize how customers create accounts/guest checkout
WooCommerce, by default, also allows you to set how customers create accounts in your online store.
If you’d like customers to be able to use guest checkout or create an account, you can find all the settings you need by going to WooCommerce > Accounts & Privacy. Here you can customize how much information you require from customers to create an account.
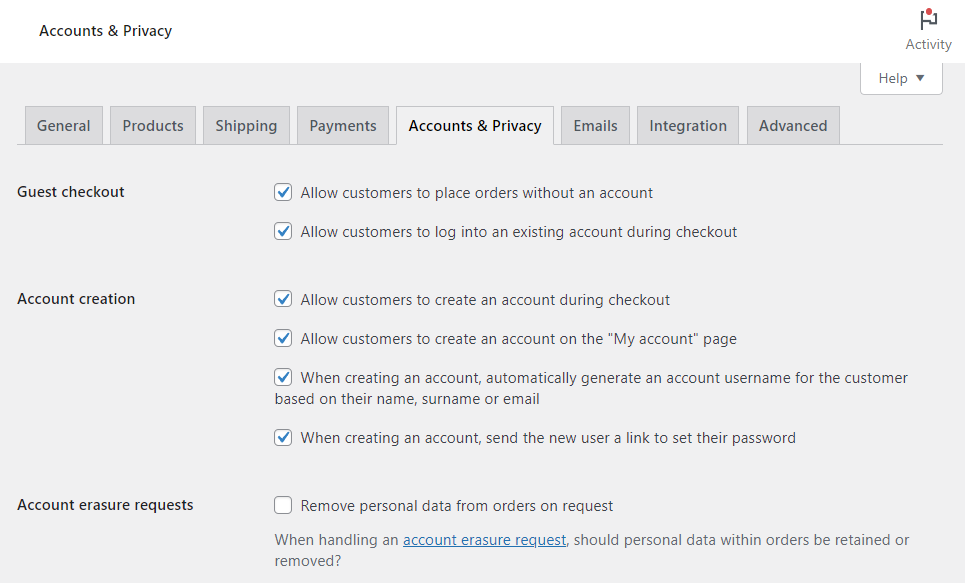
? Around 24% of users have stated that they have abandoned a cart because of being forced to make an account.
By tweaking these settings, you’ll make the checkout flow much smoother for your new customers.
Remove checkout fields with the default checkout field editor
WooCommerce also allows you to remove a small selection of WooCommerce checkout fields should you want to. By going to Appearance > Customize > WooCommerce > Checkout, you’ll find these settings.
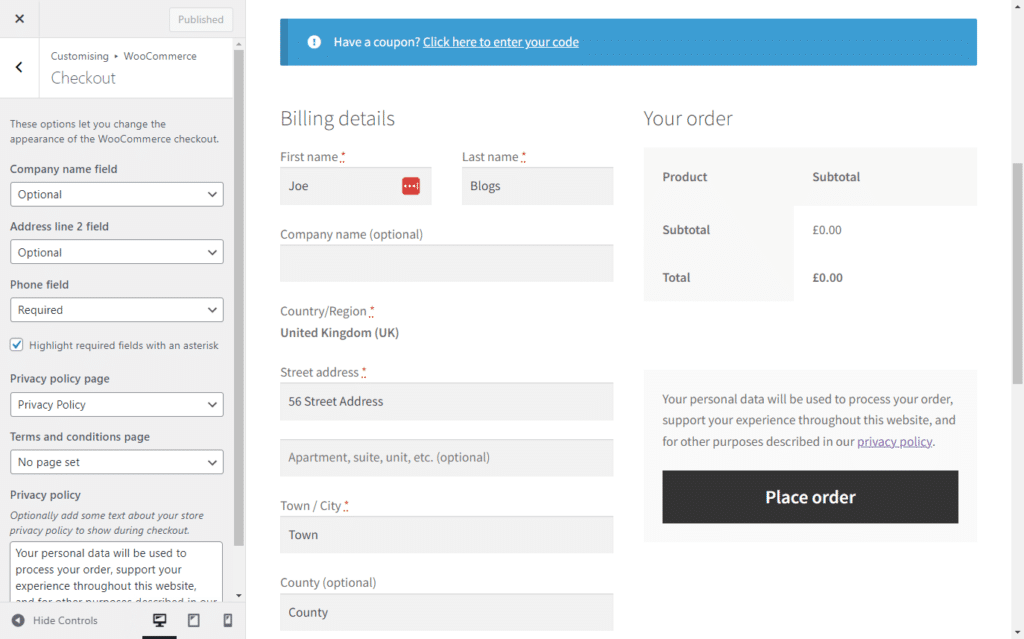
Here you’ll be able to disable or enable the company name, second address line, and phone number fields.
? A streamlined checkout page can boost a store’s conversions by 35% while reducing the cart abandonment rate.
Doing this will reduce the amount of space your checkout takes up on the page while reducing the amount of unnecessary information you’ll collect from your customers.
Customize the WooCommerce checkout page with code
If you’re a developer, have some basic coding knowledge, or have access to someone who does, there are plenty of ways to customize the default WooCommerce checkout.
For example, you could use custom CSS to change the background colors, button colors, placeholder field styles, radio buttons, checkbox styles, and so much more.
If you do this, we recommend you create a child theme for your WordPress site and add the new CSS there.
Alternatively, if you’re using a page builder like Elementor, some of these customization options come built-in.
However, if you’re looking for more customization options than what’s available by default or don’t have access to someone with custom coding knowledge, your best bet is a WooCommerce plugin.
How to create a custom checkout page in WooCommerce
To truly customize the WooCommerce checkout page, we recommend using a WooCommerce checkout plugin to do it.
The checkout plugin you pick should give you plenty of options for customization but also use checkout best practices to ensure your checkout does what you want it to do. Namely, reduce checkout abandonment and increase sales for your ecommerce store.
In this case, we recommend the plugin Flux Checkout for WooCommerce.
Create a custom checkout page with Flux Checkout for WooCommerce
Flux Checkout for WooCommerce is a WordPress plugin that completely replaces the default WooCommerce checkout with one that’s lightning-fast and distraction-free.
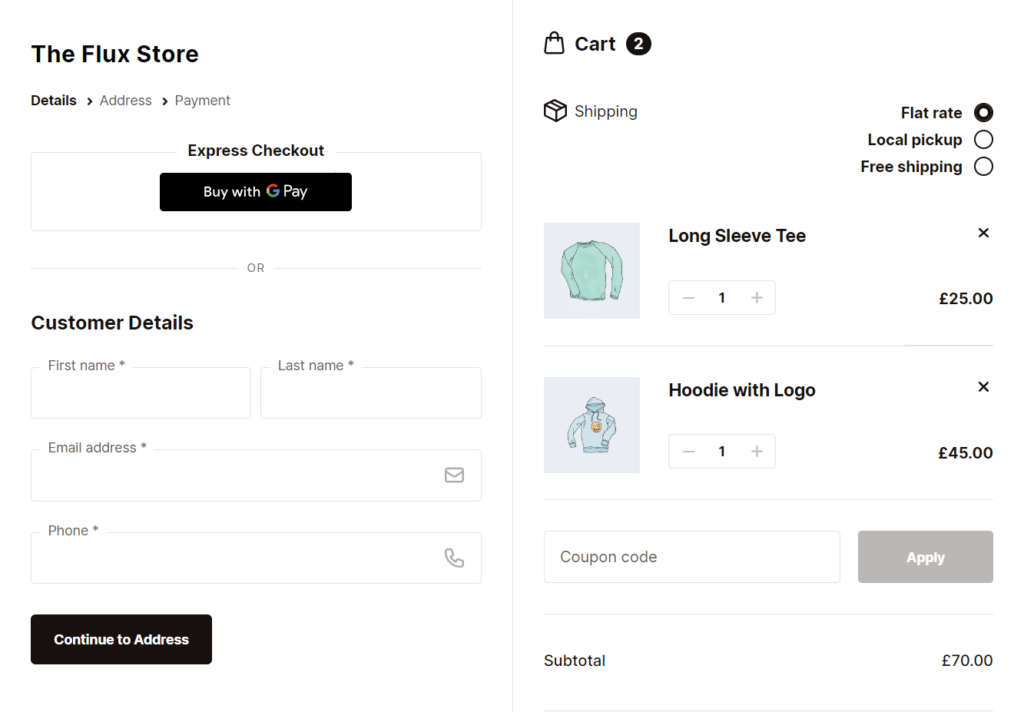
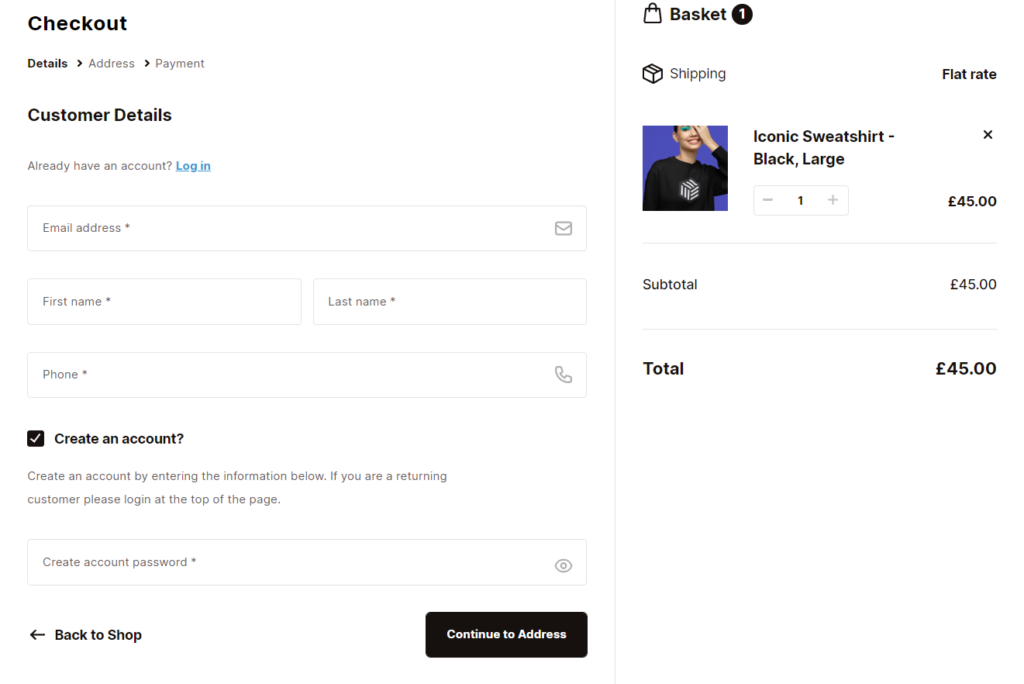
This checkout changes the default one-page checkout into a multi-step one that guides your customers through the process for a better checkout experience.
Flux Checkout for WooCommerce
Flux Checkout transforms the default WooCommerce checkout into one that’s lightning-fast, distraction-free, and reduces checkout abandonment.
Not only that, but Flux Checkout also does the following:
- Reduces distractions: Flux Checkout completely removes your site’s header, footer, and sidebar. Doing this keeps customers focused on the task at hand – clicking place order.
- Streamlined design: Flux Checkout transforms the checkout into one that’s modern and easy to use. Form fields like shipping address and order notes have been simplified, and customers can see their progress with visible cues.
- Pick from multiple checkout style templates: Flux Checkout offers two different checkout style templates, Modern and Classic. You can choose the one that best suits your store’s style and customize it to match your brand.
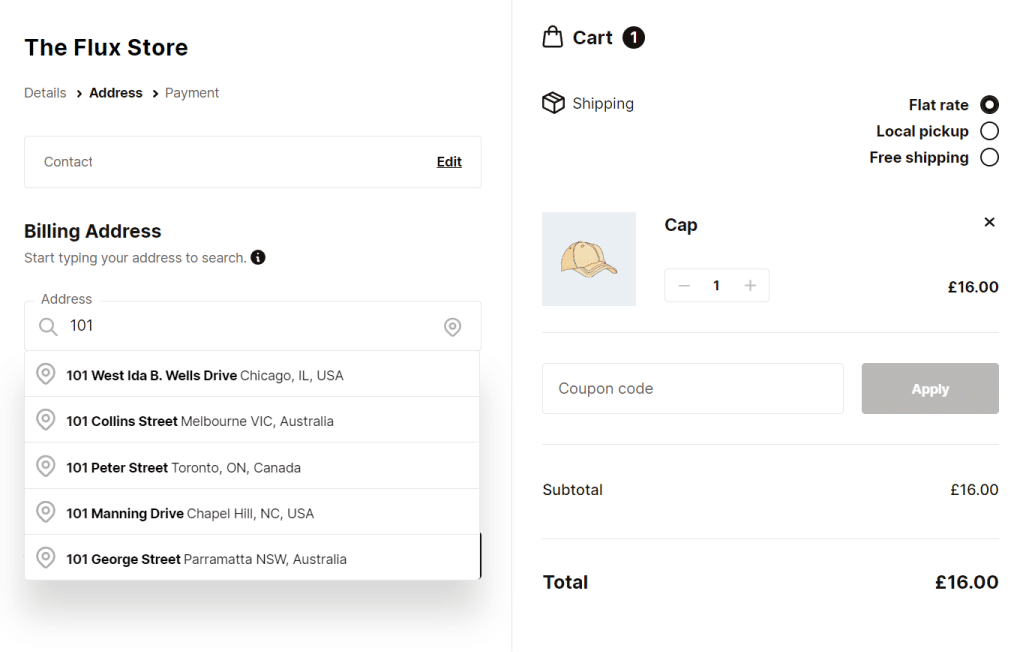
- Address autocomplete: Flux Checkout integrates with Google to provide address autocomplete for your customers. This makes it easy for customers to enter their addresses quickly and accurately, reducing the likelihood of errors and providing a more seamless checkout experience.
- Customization options: Flux Checkout provides extensive customization options, allowing you to customize the checkout page to match your brand and provide a personalized shopping experience for your customers.
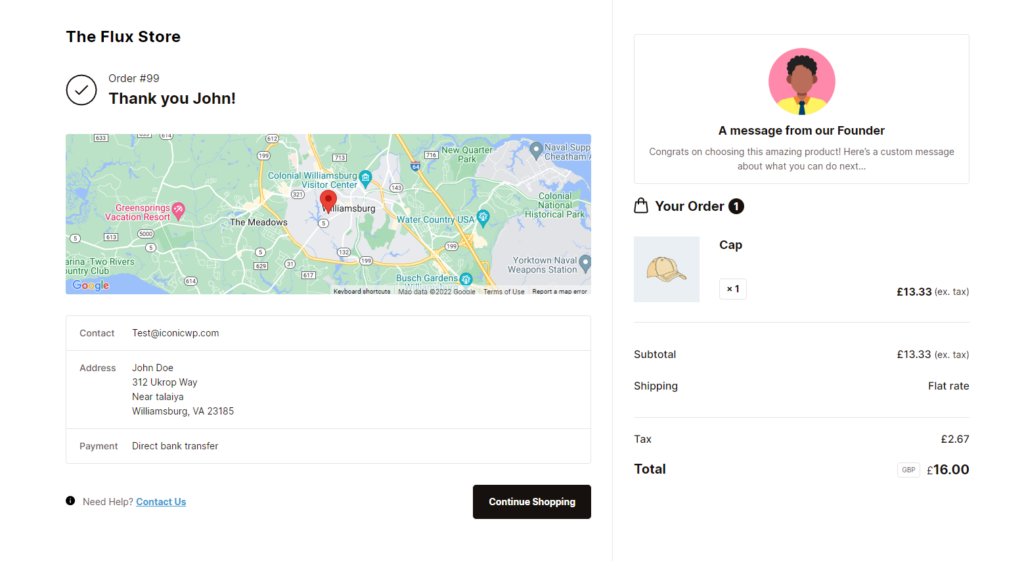
- Customizable thank you/order completion page: Flux Checkout also allows you to customize the thank you/order completion page. You can add custom text, images, and links to this page, providing customers with additional information about their purchase or offering them a discount on their next purchase.

So now we know what Flux Checkout for WooCommerce can do, so let’s set it up and running with the following tutorial.
Step 1: Install and activate the Flux Checkout plugin
To get started, you need to install and activate the Flux Checkout plugin.
You can get Flux Checkout from the Iconic site: iconicwp.com/flux-checkout-for-woocommerce
Flux Checkout for WooCommerce
Flux Checkout transforms the default WooCommerce checkout into one that’s lightning-fast, distraction-free, and reduces checkout abandonment.
Then follow these steps:
- Go to Plugins > Add New > Upload Plugin.
- Choose the zip file you downloaded, upload it, and click Activate.
- Once activated, you’ll need to enter your license key.
Next, we’ll need to customize Flux Checkout to suit your WooCommerce store.
Step 2: Customize your WooCommerce checkout design
Once installed, customizing Flux Checkout to suit your store’s needs is straightforward.
To do this, take the following steps:
- From your WordPress dashboard, go to WooCommerce > Flux Checkout and click the Styles tab/link at the top of the page.
- Pick which theme you’d like for Flux Checkout. This will change the look and feel of your checkout.
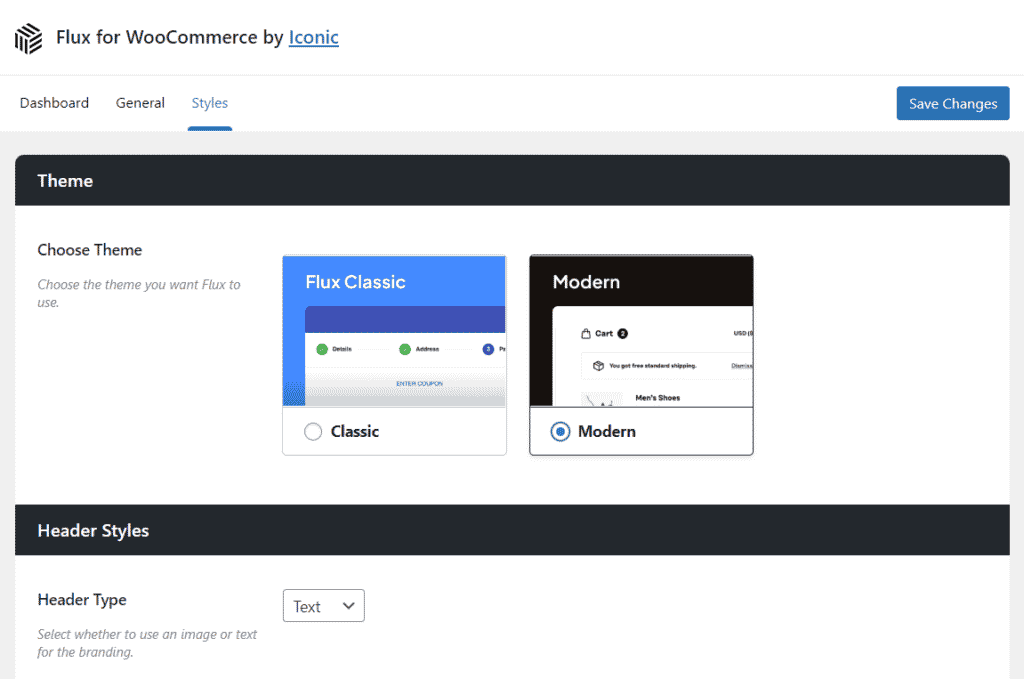
- Once selected, the settings below will change. Here you’ll be able to change the following:
- The header type, rename the header text, pick your font family, color, and more.
- Change your checkout styles. Depending on the theme you selected, these will vary but include everything from button colors, link colors, and placeholder colors.
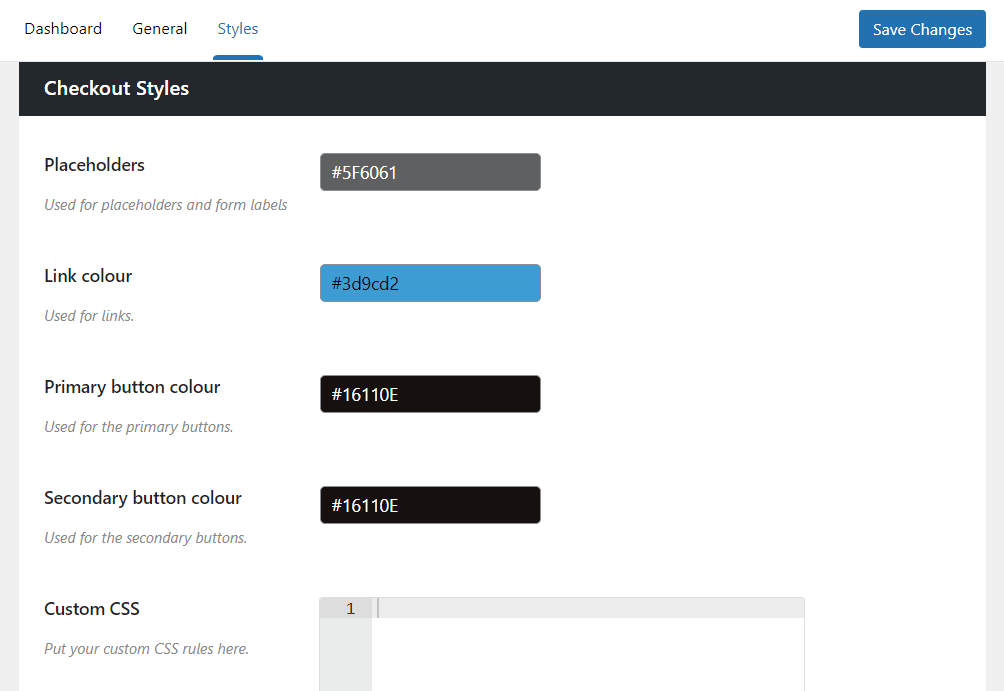
- Once you’ve customized your checkout to integrate with your store’s look and feel, click Save Changes and check your newly updated checkout.
Step 3: Customize the thank you/order complete page
Next, and this is optional, we’ll make some changes to the order complete page.
To do this, take the following steps:
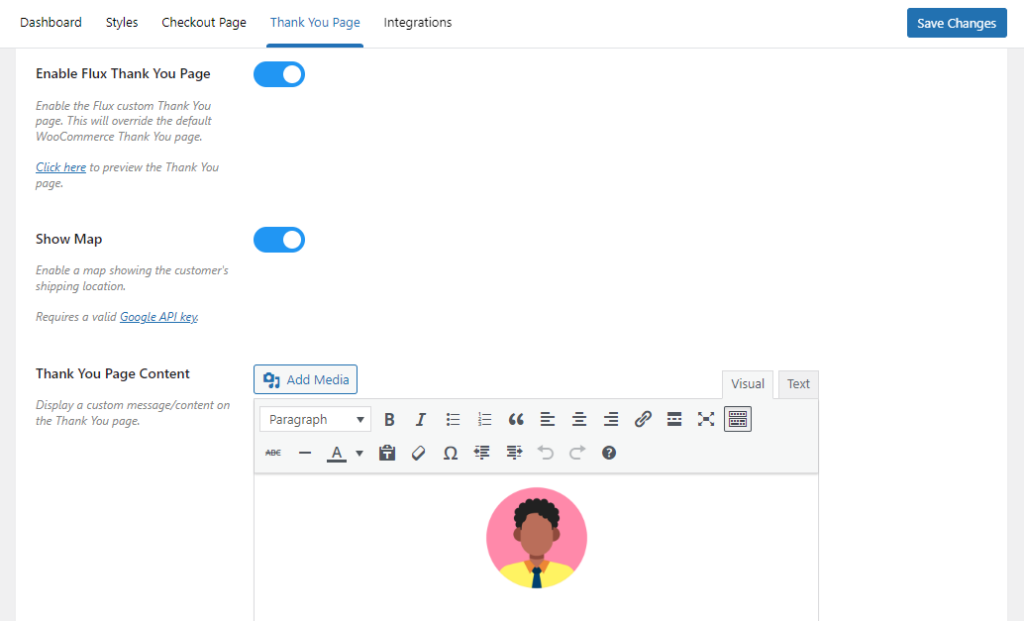
- From your WordPress dashboard, go to WooCommerce > Flux Checkout and click the Thank You Page tab/link at the top of the page.
- Then click the Enable Flux Thank You Page toggle button to replace the default WooCommerce checkout thank you page.
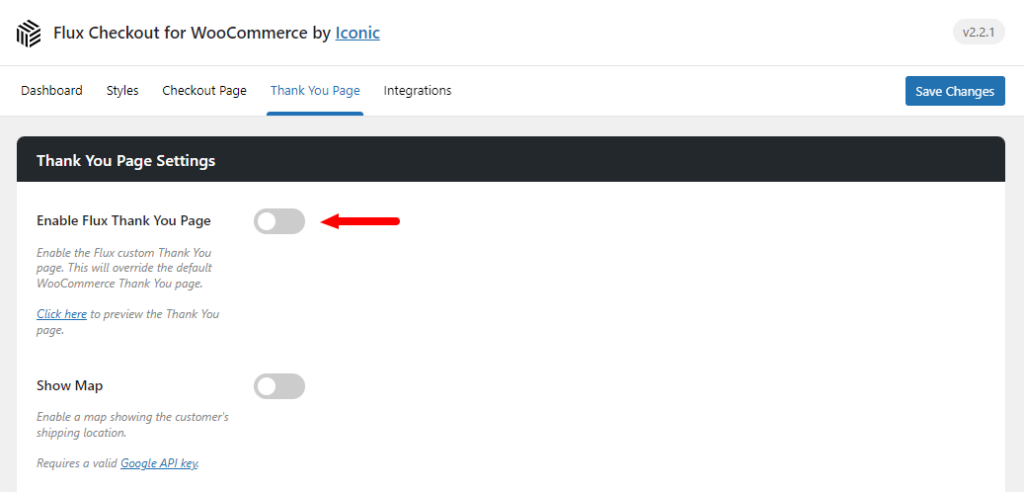
- Once done, you’ll be able to customize the Thank You page with the following settings:
- Show Map: Use this setting to toggle the map to show on your Thank You page.
- Thank You Page Content: You can add any rich content of your choice. Use this to provide information about the delivery instructions, promotional content, or anything else you’d like to share with your customers.
- Content placement: Use this setting to decide the placement of the content. Including: After order status, Before Customer details, After Customer details, Before Product details, and After Product details.
- Contact Page: Select a page that will be linked to the Contact Us button on the Thank You page.
- That’s it. Once you’re happy with your changes, click the Save Changes button at the bottom of the page.
Create a custom WooCommerce checkout page today
Whether you choose to use default WooCommerce settings or Flux Checkout for WooCommerce, customizing the checkout page can help to increase conversions, reduce cart abandonment, and build customer loyalty.
Flux Checkout for WooCommerce is a powerful plugin that provides several features and benefits to enhance the checkout process for your WooCommerce store.
With customizable checkout templates, a distraction-free multi-step checkout, address autocomplete, and a customizable thank you/order completion page. Flux Checkout provides a seamless and personalized checkout experience for your customers.
Flux Checkout for WooCommerce
Flux Checkout transforms the default WooCommerce checkout into one that’s lightning-fast, distraction-free, and reduces checkout abandonment.

Gina Lucia is our in-house Content Manager at Orderable. She writes articles, user guides, technical documentation, and creates videos on everything WooCommerce and Orderable.
Gina has been working in the WordPress/WooCommerce space since 2012 when she developed WordPress websites for clients large and small.
For the past 8 years, she’s been writing about everything WordPress and WooCommerce, becoming an expert in what makes a WooCommerce store succeed.
When not writing, Gina loves to tend to her vegetable garden, read, or travel to mainland Europe.