
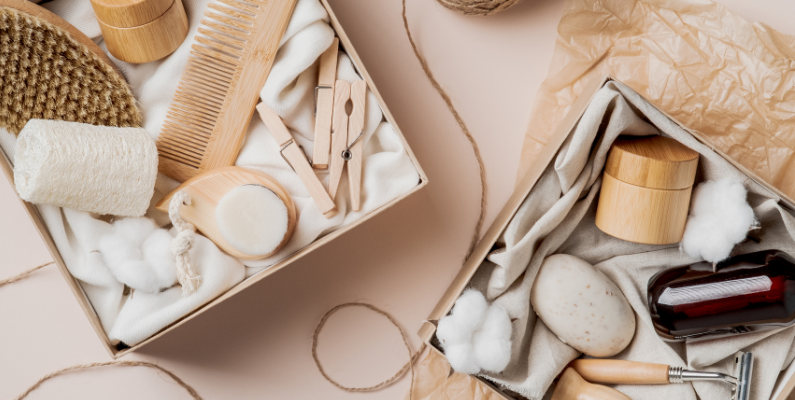
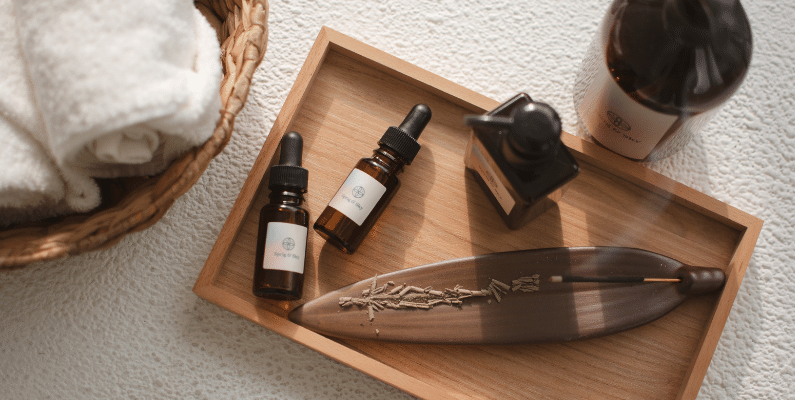
Looking to get started with or improve your ecommerce product photography this year? This guide is for you.
Great product photos sell your products like nothing else can. Whether you’re launching your first store or levelling up an existing one, high-quality ecommerce photography can make the difference between a bounce and a buy.
In this guide, you’ll learn:
- Why product photography matters (and how it affects your sales).
- DIY tips to take better photos with any camera.
- How to display your photos beautifully in WooCommerce.
Ready to turn browsers into buyers? Let’s start with why images matter more than ever in 2026.
Why is product photography important for ecommerce sales?
Product photography is the use of clear, high-quality images to showcase products online, helping boost sales, build trust, and reduce returns.
What is ecommerce product photography (and why does it matter)?
Ecommerce product photography is the process of taking clear, high-quality images that accurately represent the items you sell online. These photos are used on your product pages, ads, social media, and other marketing channels to help potential customers understand and trust your product before buying.
In short, great ecommerce photography helps:
- Improve conversions by showcasing details customers care about.
- Build trust by making your store look more professional.
- Reduce returns by accurately representing the product.
Let’s look at these in a little more detail.
How can great product photography attract more interested customers?
Clear, professional product photos grab attention, increase clicks, and can boost conversion rates by up to 60%.
Showcasing high-quality photographs can catch the attention of 93% of interested buyers who look at product images first before they can buy.
These customers can come from your social media platforms, ads, emails, etc.
High-quality images can also help customers decide if they buy a product or not. So, investing in high-quality images will attract more customers to your shop and boost your conversion rates by up to 60%.
Sounds great, doesn’t it?
How do quality product photos build trust with customers?
High-quality images show your products in the best light, increasing confidence in your brand and encouraging purchases.
Highlighting specific product features, taking lifestyle shots, featuring branded packaging, and so on give your customers a taste of what to expect. It also boosts your brand identity and increases their confidence when purchasing online.
On the contrary, poor-quality images have the opposite effect. Even if your product is truly exceptional, it will likely deter customers from buying it if you present poor-quality images.
Free Download: Ecommerce Website Checklist
Build your online store with confidence using this free ecommerce website checklist.
This checklist is designed to guide you through every stage of building a successful ecommerce site, from foundational setup to understanding conversion rates.

How can better product photos improve the shopping experience?
Multiple, detailed images help shoppers visualise your products, making their buying journey more engaging and informed.
Accurately presenting detailed photos of your products can also improve the overall shopping experience for potential customers. For instance, taking multiple photos of your product from different angles can give customers a more accurate and detailed view of the product. It can also show them how to use it, and display various styling options.
This approach helps customers understand your products in detail, making their shopping experience more engaging and informative.
If you’re looking to capture high-quality product shots that catch the eye, we have five useful tips to help you finesse your product photography skills and reap these benefits and more.
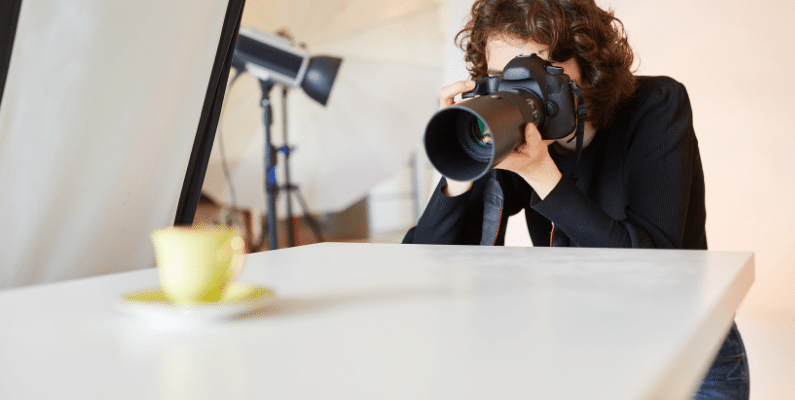
How can I take better ecommerce product photos?
In this section, we’ll cover five product photography tips that should turn you into a professional photographer, of course, with some effort on your part. So brace yourself!
With the right approach, you don’t need a pro studio to get pro results. These tips will help you shoot images that convert.
Tip 1: How do you decide the right style for ecommerce product photos?
Choosing the right style means matching your images to your ideal customer’s preferences. Their age, location, lifestyle, and interests.
The first step to capturing high-quality ecommerce photos is to brainstorm who the ideal customer for your product is. You need some clarity over who they are and what they like.

Why is it important to know who your product is for before taking photos?
If you have clarity over who your product is for and what they like, you can easily decide on the style or type of photography that will create excitement around your product.
For instance, you can opt for the traditional plain white background shots that are typically seen on marketplaces like Amazon. Or, you can take lifestyle photos to let people see themselves using it in their daily lives.
Essentially, the type of product photography you choose should connect you with the right audience while evoking an interest in your product.

How can audience details shape your product photography style?
Your audience’s age, location, and lifestyle can guide choices like background color, props, and whether to use lifestyle or plain shots.
We can break this down based on:
- Your customer’s age. The style of photography you’ll use to sell items to children slightly varies from how you’d present your products to Gen Z, millennials, or a mature age group.
You can use bright, colorful backgrounds for product items that are aimed at children. A white background can appeal to mature customers who only want to focus on the product.
- The location of your audience. This will be where most of your customers live, for example, cities, villages, towns, etc. Then, you have to consider things like local customs, traditions, local climate, etc.
- Interests. Reflecting on what might interest customers in your product can help you determine which type of product photography to use.
If your audience is interested in jewelry, you can do close-up shots that highlight the intricate details and features of your items.
- Customer behavior or lifestyle. This is what your customers do when they interact with your product. Or how your product fits into their daily lifestyle.
Looking to improve all the content on your product page? Check out our How to Create Better Product Page Content guide.
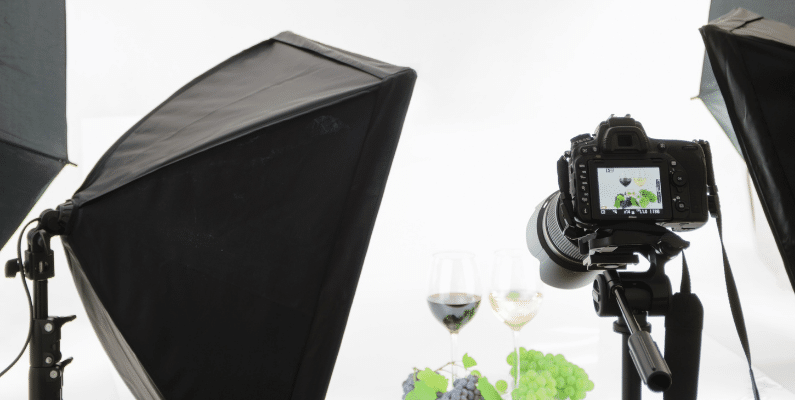
Tip 2: Is natural light better for ecommerce product photography?
Natural light in product photography refers to using sunlight, rather than artificial lighting, to illuminate your products during a photoshoot. It creates a soft, realistic look that helps products appear more true-to-life, especially for lifestyle or minimal setups.
Using natural light is ideal for:
- Keeping your setup simple while still achieving professional results.
- Budget-friendly product photography (no expensive gear needed).
- Capturing soft shadows and flattering tones.

Is natural light better for ecommerce product photography?
Natural light is the best light source for product photography because it creates a softer, more appealing natural look that is flattering to the products. The final result is product images that appear more natural, just as the human eye would see the product in real life.
Another benefit of using natural light for product photography is it’s free and easily accessible. This makes it an ideal option for ecommerce businesses on a tight budget who don’t want to splurge money on expensive lighting equipment.
By taking advantage of natural light, you can still get high-end images comparable to those from a professional photography studio, all without stretching your budget with costly equipment rentals or purchases.
But there’s a catch. Since you can’t control the weather, you have to wait for a sunny day to get the best natural light.
How can you use natural light for better product photos?
Good product photography can be achieved using soft, diffused natural light.
For instance, if you’re taking a picture under natural light, you can do this by a large window that gets a lot of natural sunlight on an overcast day. If the light is too strong (on a cloudless day), drape over a light sheet or paper, known as a diffuser, against the window to diffuse and soften the light to create a less harsh effect.
Note: To capture high-quality product images, it’s important to avoid direct sunlight as it can create dark and unattractive shadows.
Also, make sure to have a reflector to intensify sunlight on a cloudy day and fill in shadows. You can control the amount of natural light that bounces back by moving your reflector further away or closer to your product.
Another useful tip is to avoid lighting from the front. Instead, light from the side of your product to create depth and bright spots that highlight the unique features of the product.
What should you use if natural light isn’t available for product photos?
Sometimes, sufficient sunlight isn’t always available, for example, during seasons like winter. Or you want to shoot when the sunlight isn’t at its peak. In such cases, artificial lighting from strong bulbs may be a better option.
| Lighting Type | Pros | Cons | Tools to Try |
|---|---|---|---|
| Natural Light | Free, soft, flattering | Weather dependent, inconsistent | Window, diffuser, reflector |
| Artificial Light | Consistent, controllable | Can be expensive, requires setup | Weather-dependent, inconsistent |
You can mimic artificial lighting to resemble the effect of natural light using at least two softboxes in your photography studio. Softboxes help soften the shadows. If the shadows are too intense or persist, you can always use a sheet of white cardboard to diffuse the light further.
Try entry-level tools like the Neewer Softbox Kit or Godox LED Panels for reliable results on a budget.
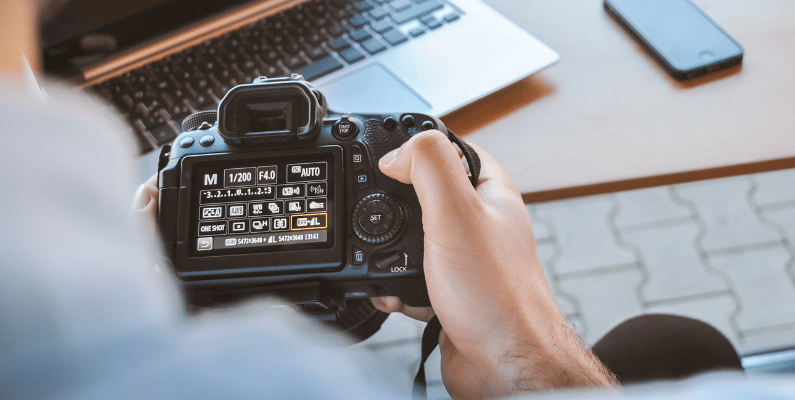
Tip 3: Why are camera settings important in product photography?
After you have your lighting setup just right, the next step is to adjust your camera settings to get the most out of your pictures.
The main settings you should master to make the most of natural lighting are aperture, ISO, white balance, and shutter speed.
Why adjusting camera settings is important in product photography
As an ecommerce product photographer, your ultimate goal is to capture stunning product photos with precise detail and clarity, exactly how you envision them. Adjusting your camera settings can help you achieve this easily.
Getting the right white balance, depth of field, ISO, and other essential camera settings can significantly improve the quality of your product photos.
These settings enable you to capture images in focus, eliminate any blur, capture photos with the right amount of light, and ensure that the colors in your photos are true to life.

What are the best camera settings for ecommerce product photography?
The best settings usually include a small aperture (f/8–f/11), low ISO (100–200), accurate white balance, and a tripod for slow shutter speeds.
Natural lighting camera settings
The main settings you should master to make the most of natural lighting are:
- Aperture (depth of field). The aperture is the opening of the camera lens through which light passes. Because of this, you need to adjust it depending on the product item you want to capture. For example, set a wider aperture to blur a section of your product. But if you want to capture a focused, sharp photograph, keep a smaller aperture.
- ISO setting. This setting represents your camera’s sensitivity to light. So, keep your ISO setting as low as possible for higher image quality. If the ISO setting is too high, images start to look grainy or pixelated. But, in the case of outdoor shooting, you require a higher ISO setting.
- White balance. If you’re a beginner, you probably want to use the auto white balance, so the camera automatically chooses the right setting according to the lighting condition you’ve set. But, if it isn’t perfect, you can manually adjust the white balance to reflect what you see.
- Shutter speed. Will decide how long the shutter is open when taking photos. Longer shutter speeds generally help your camera pick up more light and capture crisp photos.
How should you adjust camera settings for natural lighting?
| Setting | Recommended Value | Purpose |
|---|---|---|
| Aperture (f-stop) | f/8 or f/11 | Keeps full product in sharp focus |
| ISO | 100–200 | Reduces grain/noise in images |
| White Balance | Auto or Manual (tweak) | Ensures accurate color representation |
| Shutter Speed | Slow (with tripod) | Lets in more light without blur |
If you’re on a budget, give your high-resolution smartphone camera a try. At the very least, you can take some good-quality photos and leave the rest up to image editing.
Note: Don’t use a camera flash as you already have natural sunlight. Additionally, choose between JPEG and RAW image formats depending on intended use, editing requirements, etc. For the highest image quality, choose the RAW format.
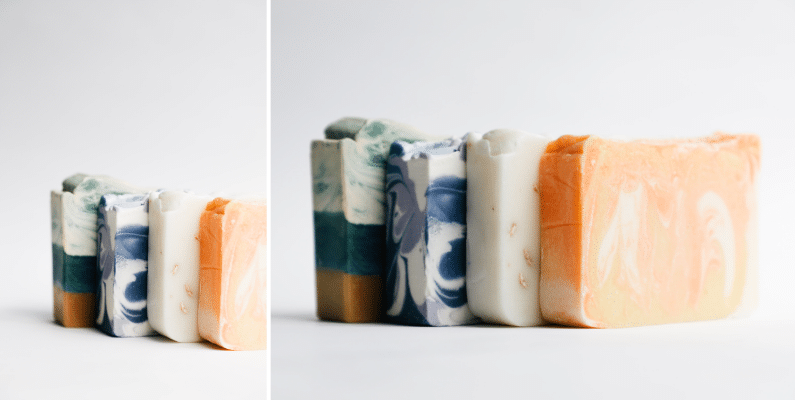
Tip 4: Take multiple photos from different angles
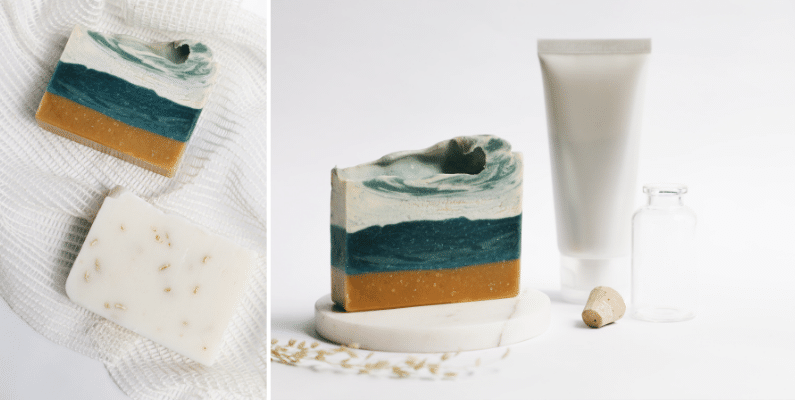
One photo is never enough. To represent each product fully, get it from different angles by taking multiple photos from the front, top, sides, close-up, slanted, or back angle.
Why should you take multiple angles in ecommerce product photography?
Multiple angles give customers a full 360° understanding of a product’s size, shape, and features, helping them feel confident to buy.
For instance, if you’re taking photos of a shoe, shooting from the side can emphasize its overall shape, while a top-down angle can showcase details like the arrangement of laces. From a front angle, the focus might be on the toe box and material texture, while a rear angle could highlight the heel design or branding.
Capturing multiple photos of your product from different angles gives customers an all-around view of the product and extra product information or details.
For instance, a Field Agent survey found that 60% of online shoppers In the US need to see 3 – 4 images of a product before making a purchase decision.
How can you take multiple product photos from different angles?
The following are several different angles you can try to show highlight features or important details of your product:
- The front angle is one of the most commonly used angles. It’s easy to take and it shows the product’s overall key features.
- The overhead angle offers a bird’s-eye view, highlighting the product’s shape, symmetry, and any surface details.
- The back angle focuses on the rear features of the product, such as the heel design, branding, or any additional elements not visible from the front. It provides a complete view of the product from behind.
- Side angle. This angle highlights the side features of the product like its width, height, and any side details or embellishments. This angle helps customers visualize the product’s dimensions and overall form.
- Slanted (45-degree view) angle shows your product from a slightly elevated position to capture both the top and side features.
- Close-up shots lets you zoom in on intricate details or textures of the product. Close-up shots let customers examine the product’s quality, material, and craftsmanship up close, enhancing their understanding and appreciation.
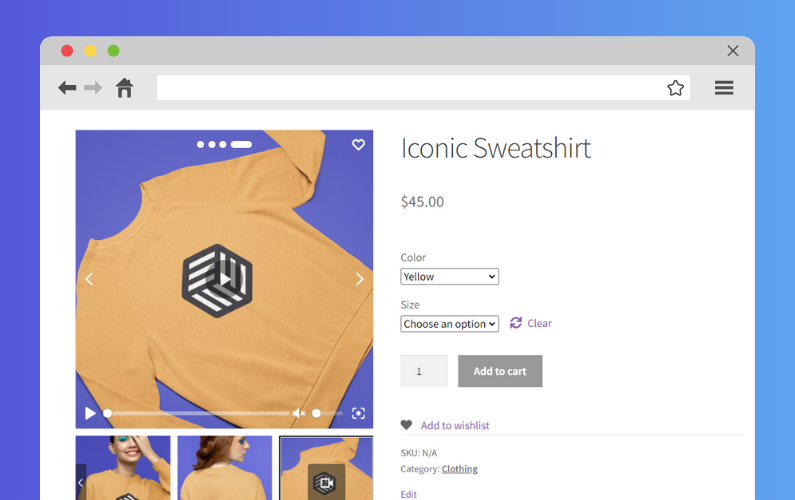
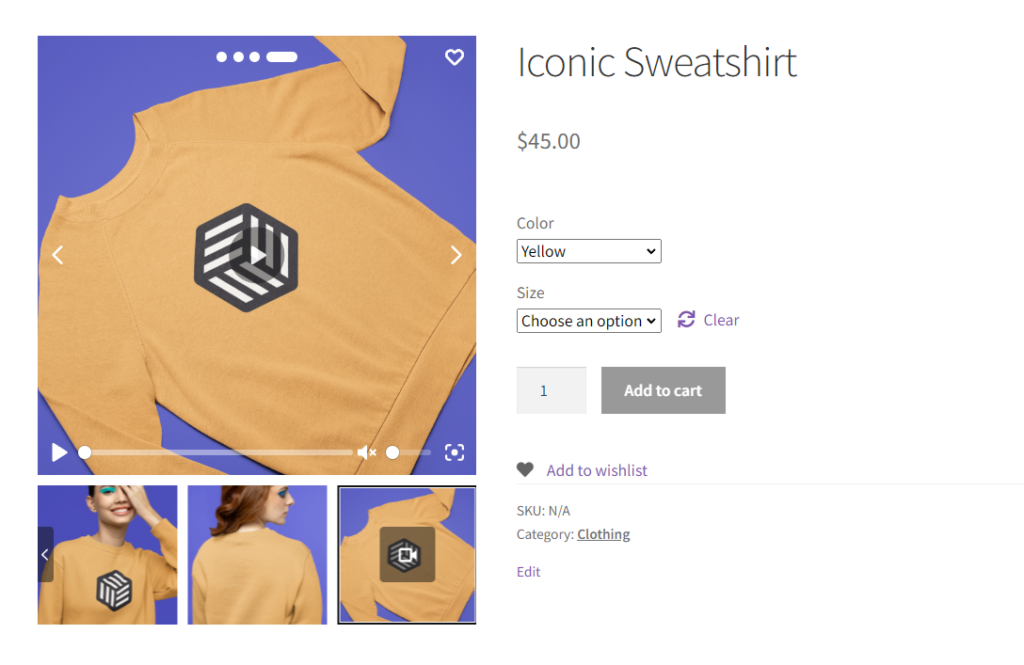
Display multiple photos per product variation with WooThumbs
Since you have multiple photos of one product taken from different angles, you can display them in your shop using WooThumbs for WooCommerce.
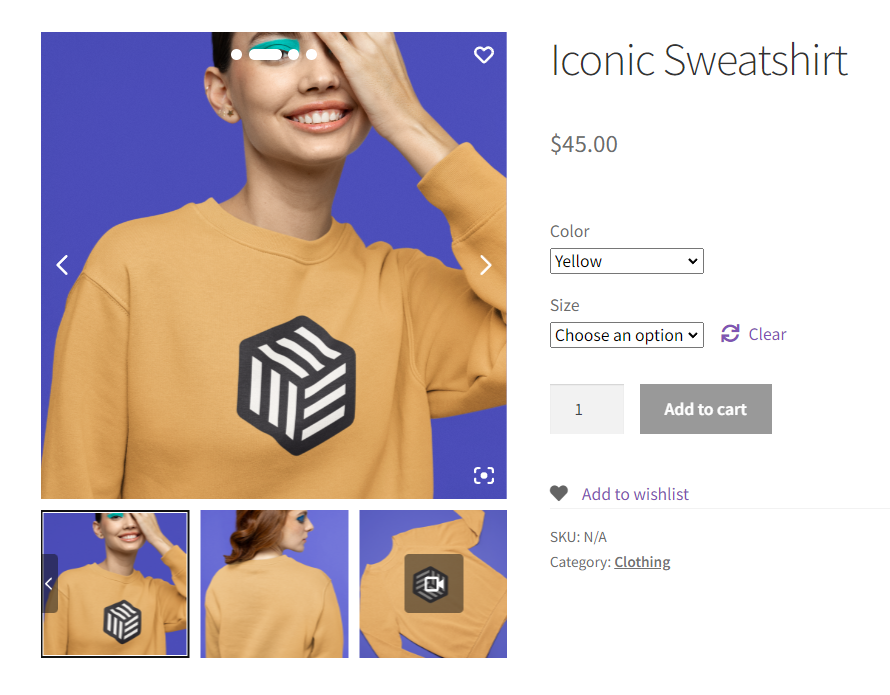
What is WooThumbs for WooCommerce?
WooThumbs for WooCommerce is a plugin that upgrades the default WooCommerce product image gallery. It gives store owners more control over how product photos are displayed, including zoom features, gallery layouts, variation image support, and more.
With WooThumbs, you can:
- Display multiple images per variation.
- Add hover and click-to-zoom functionality.
- Show videos, stacked layouts, and full-screen lightboxes.
- Customize every detail of your product gallery without code.
| Feature | Default WooCommerce | WooThumbs for WooCommerce |
|---|---|---|
| Multiple images per variation | ❌ Not supported | ✅ Yes |
| Zoom options | ❌ Basic or none | ✅ Hover, inner, outer, follow |
| Gallery layouts | ❌ Limited | ✅ Stacked, slider, fade |
| Full-screen image view | ✅ Basic lightbox | ✅ Lightbox + dedicated icons |
| Video support | ❌ No | ✅ Yes |
| Mobile optimization | ⚠️ Depends on theme | ✅ Fully responsive |
WooThumbs for WooCommerce is the easiest way to enhance product variation galleries without custom development or code.
We’ll talk about WooThumbs for WooCommerce a little more later.
WooThumbs for WooCommerce
Customize your WooCommerce product image gallery in minutes with a new layout, embedded video, multiple images per variation, and more.
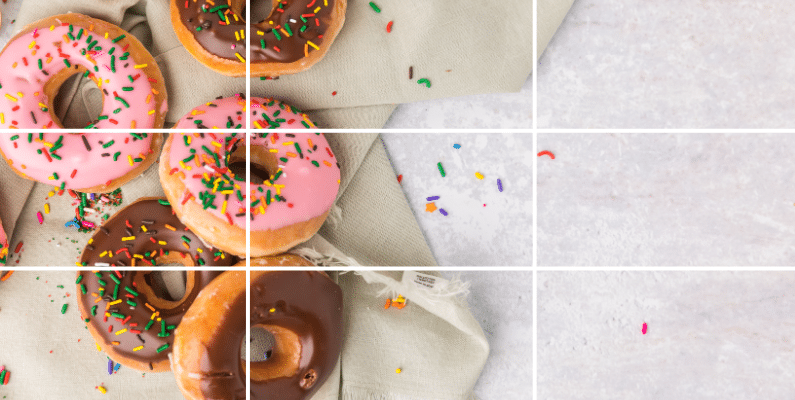
Tip 5: Rule of thirds
The rule of thirds is a photography guideline for composing your product images.
What is the rule of thirds in product photography?
The rule of thirds is a product photography technique where the frame is divided into nine equal parts using two horizontal and two vertical lines. The most important elements of the photo are then aligned along these lines or their intersections to improve visual composition.
This creates a more balanced and visually appealing composition rather than placing subjects directly in the center of the frame or guessing where your product will appear in the final image.
Why is the rule of thirds important in ecommerce product photography?
The rule of thirds can improve the composition of your photo by adding balance, key points of interest, and visual appeal.
For instance, let’s imagine you’re photographing a watch. Instead of placing it dead center in the frame, you can position the watch slightly off-center along one of the vertical gridlines.
This draws the viewer’s eye to the watch while allowing space for other essential elements. Like the watch’s brand logo or accompanying accessories that should be included in the frame.
By following the rule of thirds, you create a more dynamic and engaging composition that draws the viewer’s eye to your subject.
How do you apply the rule of thirds to product photography?
Up to this point, we can assume that you’ve already decided on the angle, focal point (main subject), and background for your photo. This can be considered as the planning phase, and you can finish it off by sketching a rough structure of your photo with grid lines if you prefer.
Alternatively, you can simply enable the grid display setting on your DSLR camera’s menu to apply the rule of thirds. Then, use the gridlines to position your product or main subject along the grid intersections, slightly off-center.
Tip: The grid intersections are usually four in number and are the areas in the photograph that have the most appeal to a viewer. So, to capture this appeal, you should frame your shot so your main subjects are placed in these key areas.
How should you edit ecommerce product photos after shooting?
Post-processing, like adjusting colors, cropping, and removing distractions, makes images look polished and keeps file sizes fast-loading.
After capturing some nice shots, the final step is retouching your pictures for color correction, removal of unwanted objects, etc. These image optimization techniques reduce the file sizes of your images and boost site speed and SEO. Photo editing software like Adobe Photoshop or Lightroom simplifies the editing process.
Once you’ve composed your shots using the rule of thirds, WooThumbs for WooCommerce helps present them beautifully using layout styles that highlight your composition.
Up next! Let’s display your images to maximize their impact and entice potential customers to visit your online store.
How can I use WooThumbs for WooCommerce to display product photos better?
Now that you’ve improved your product photography. You’re ready to display your product images in your ecommerce store and make the most out of your photoshoot.
That’s where the WooThumbs for WooCommerce plugin steps in. It’s key when displaying your product images to customers!
What features does WooThumbs for WooCommerce offer for product images?
WooThumbs for WooCommerce gives you full control over how your product gallery looks, feels, and functions. Something standard WooCommerce galleries can’t do.
With WooThumbs installed, it’s easy to feature zoom effects, modern gallery layouts, and multiple image variations per product. You can display everything from close-ups to lifestyle shots without touching a line of code.
WooThumbs for WooCommerce is one of the most comprehensive WooCommerce gallery plugins available, used by thousands of ecommerce stores to improve image display, layout, and interactivity.
These features enable customers to browse through all your WooCommerce product images in an easy-to-use gallery when they visit your product page. They can also view multiple image variations of the same product in more detail. Resulting in a way to make informed buying decisions that increase your conversion rates.
WooThumbs for WooCommerce enables you to streamline the visual representation of your products using the following features.

Enhanced product image gallery layouts
Thousands of WooCommerce store owners use WooThumbs to upgrade their product galleries with interactive, on-brand layouts that drive more conversions.
Some of the customizations you’ll be able to do include:
- Deciding the order in which your images will appear.
- Switching the layout option from a horizontal carousel (product gallery slider) to a modern stacked product gallery.
- Choose between a horizontal slider, vertical slider, or fade effect for your product gallery.
- Adjust thumbnail spacing, icon colors, transition speeds, and more.
Most importantly, these product image gallery layouts are compatible with mobile devices to provide a seamless mobile shopping experience for your customers.
WooThumbs for WooCommerce
Customize your WooCommerce product image gallery in minutes with a new layout, embedded video, multiple images per variation, and more.
Use image zoom functionality to examine your images
This plugin offers multiple zoom-in options so that customers can closely examine product details and its texture. These options include hover, inner, outer, and following zoom options.
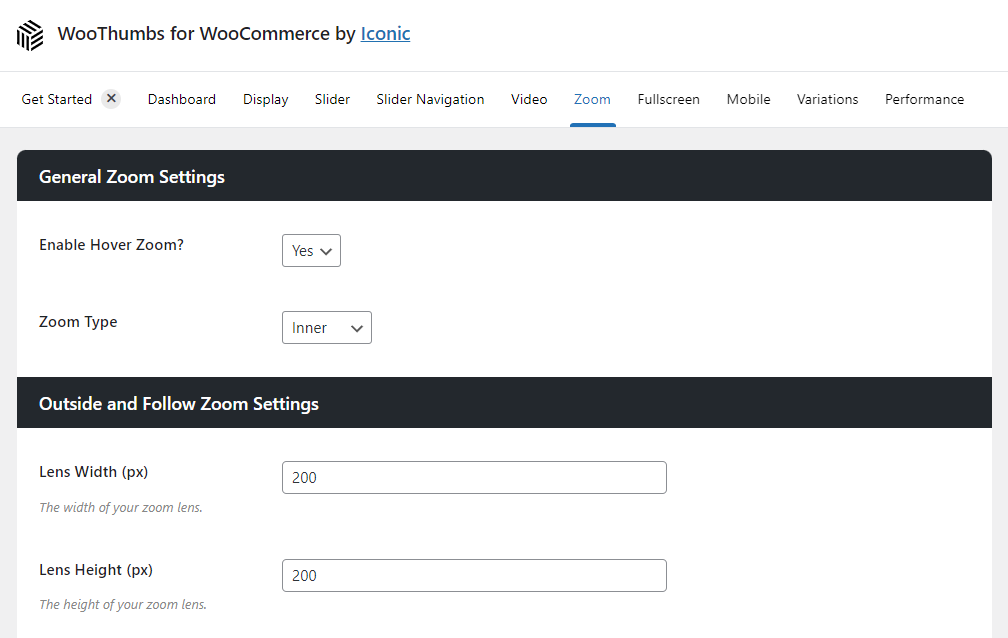
? Around 86% of customers use product photos to decide which products to choose and buy.
So, if a customer can prove for themselves the quality of your product with their own eyes. They’re more likely to purchase if it’s high-quality and meets their standard. Many online retailers can benefit from this feature.
Showcase multiple angles and product features
WooThumbs for WooCommerce has a feature that enables you to add multiple photo angles and product features to provide your customers with more information about the items you’re selling.
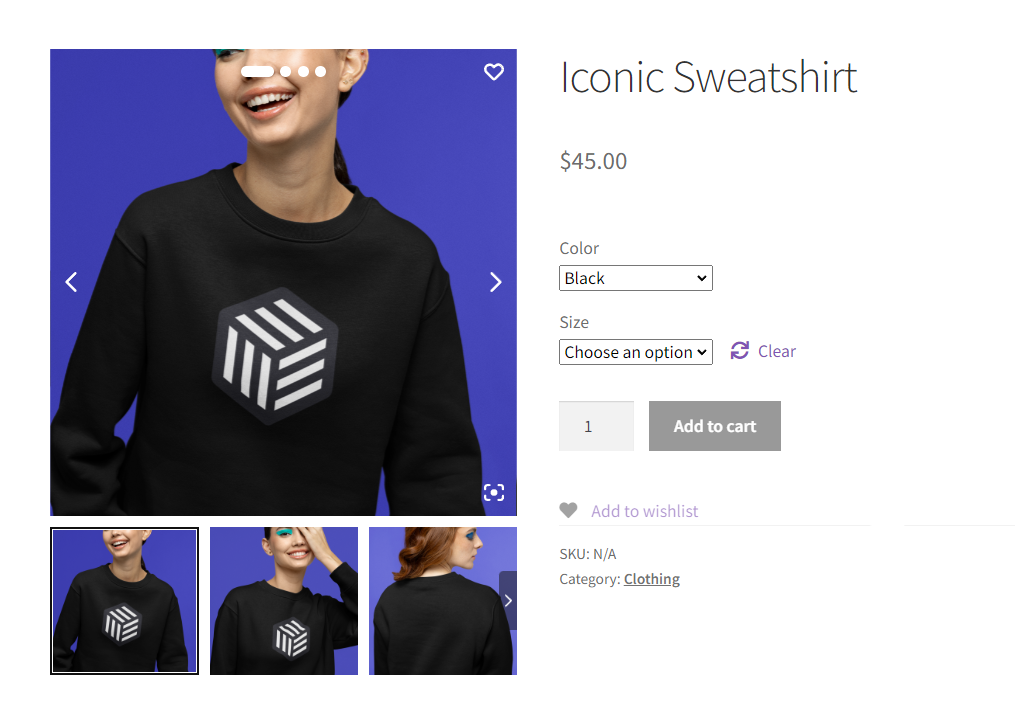
These various product shots are better than any detailed product description. They allow your customers to pick up the product they’re interested in and quickly check it out from every angle. Improving their shopping experience.
Display images in full-screen mode for a better browsing experience
While this basic image viewing feature is available in standard WooCommerce, WooThumbs for WooCommerce takes it a step further. Not only does it allow customers to view product images in full-screen mode.
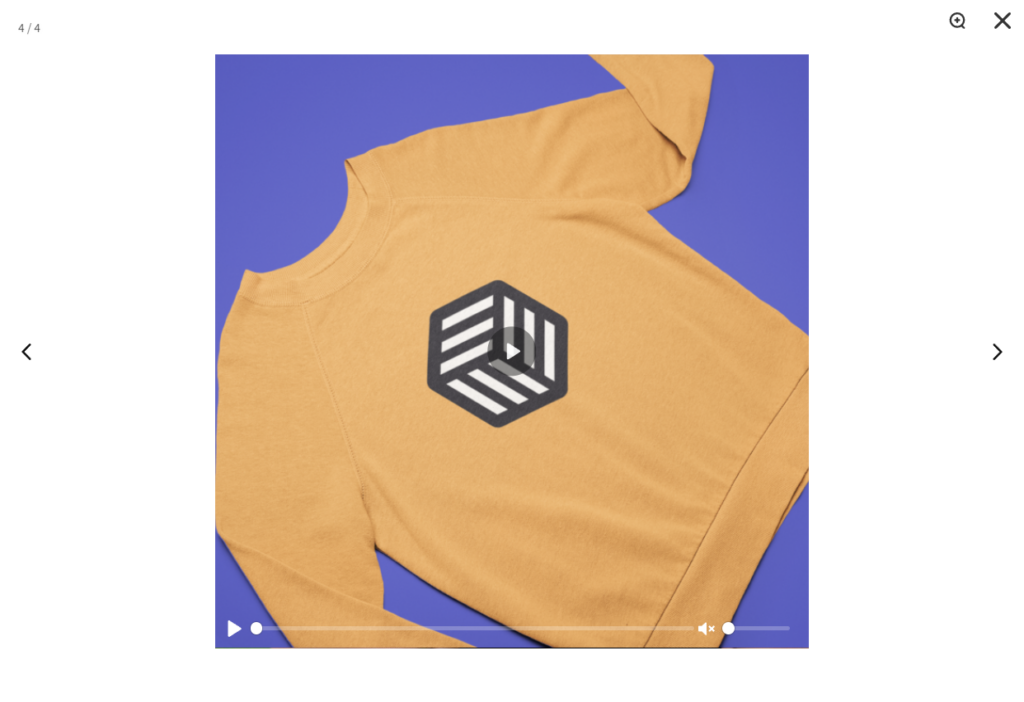
WooThumbs also adds a prominent ‘enlarge’ icon on each image thumbnail in the gallery which when clicked, opens up a full-screen lightbox. Then, customers can use on-screen arrows to easily navigate the entire gallery.
The same also goes for product videos. If you have some to show, WooThumbs for WooCommerce lets you display short high-quality videos with key pieces of information you think customers need to know quickly.

FAQs about ecommerce product photography
Here are quick answers to common product photography questions so you can improve your images right away.
You don’t need a professional DSLR to get started. Many modern smartphones have cameras that are more than capable of capturing high-quality product photos. That said, if you want more control over settings like aperture and shutter speed, a DSLR or mirrorless camera is ideal.
Aim for at least 3–5 high-quality images per product. Include a mix of angles: front, side, top-down, and close-ups of key features. If your product has variations (like color or size), include images for each variation where possible.
Use 800×800 px or larger (square ratio works well) and save as JPEG or WebP. Larger source images enable zoom features while compression keeps pages fast. See our image size blog post for more details.
The default WooCommerce setup only allows one image per variation. To add multiple images for each variation, use a plugin like WooThumbs for WooCommerce. It lets you show a complete image gallery for every product variation, no code needed.
Natural light is great for realistic, soft tones, but it’s weather-dependent. Softboxes or LED panels can reliably mimic daylight when you need consistency.
A plain white background is best for marketplace clarity; lifestyle or textured backdrops help with brand storytelling. Use both if you can, white for catalog, lifestyle for marketing.
Use f/8–f/11, ISO 100–200, a tripod, and accurate white balance. This combo keeps products sharp, reduces noise, and maintains true-to-life color.
Improve your ecommerce product photography today
In summary:
- Clear, professional product photos increase trust and conversions.
- You can achieve great results with natural light and a phone camera.
- Use WooThumbs for WooCommerce to showcase your images beautifully.
Improving high-quality product photography is necessary to grab attention, build trust, and convert customers in online marketplaces. Our complete guide makes it a lot easier, even for startup stores, to capture high-quality pictures with useful tips that will engage their customers.
WooThumbs for WooCommerce tops it off by letting you display high-quality images you’ve captured in fully customizable, modern product image galleries. It’s trusted by ecommerce brands worldwide to improve customer experience and boost conversions using smarter visual presentation.
WooThumbs for WooCommerce
Customize your WooCommerce product image gallery in minutes with a new layout, embedded video, multiple images per variation, and more.

Gina Lucia is our in-house Content Manager at Orderable. She writes articles, user guides, technical documentation, and creates videos on everything WooCommerce and Orderable.
Gina has been working in the WordPress/WooCommerce space since 2012 when she developed WordPress websites for clients large and small.
For the past 8 years, she’s been writing about everything WordPress and WooCommerce, becoming an expert in what makes a WooCommerce store succeed.
When not writing, Gina loves to tend to her vegetable garden, read, or travel to mainland Europe.