
If you’re looking for the perfect WooCommerce product image size, want to optimize your WooCommerce product images, or just want some product image tips, this guide is for you.
Here’s what we’ll cover:
- What the default WooCommerce product image sizes are.
- The best product image size to upload in WooCommerce. Including formats to use.
- How to change the WooCommerce product image size.
- Common WooCommerce image problems/troubleshooting.
Images are one of the most important parts of any online store. However, there are so many different WooCommerce product image size types used in WooCommerce that it’s not always easy to figure out where you can change them.
Because WooCommerce images can get a little complicated, we’ve put together this guide to go over each aspect of WooCommerce images, so you can skip ahead to the part that suits you.
The plugins mentioned in this guide:
- WooThumbs for WooCommerce – Change your WooCommerce product image sizes without the hassle and improve your WooCommerce product gallery.
- Image Swap for WooCommerce – Add flip and hover product image effects to your WooCommerce category pages.
Visual learner? Watch the video companion to this guide here:
WooCommerce product image sizes in a nutshell
If you’re looking to optimize your WooCommerce product images, here’s everything you need to know:
- Default WooCommerce image sizes are 324 pixels by 324 pixels (catalog) and 800 pixels by 800 pixels (gallery).
- Change your image size using a crop ratio in the WordPress customizer image settings. Appearance > Customize > WooCommerce > Product Images.
- Customize your image sizing further with the WooThumbs for WooCommerce plugin (pixel dimensions and more).
To see all these in more detail, keep reading.
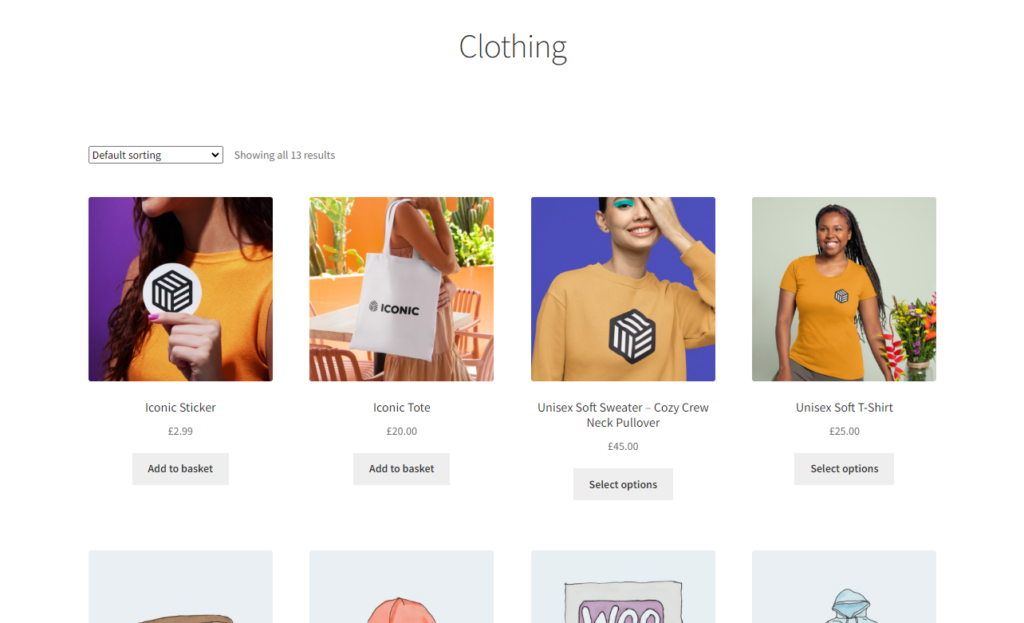
What are the default WooCommerce product image sizes in 2026?
If your WooCommerce theme (or child theme) is controlling the size of your images, the default image dimensions are usually the following:
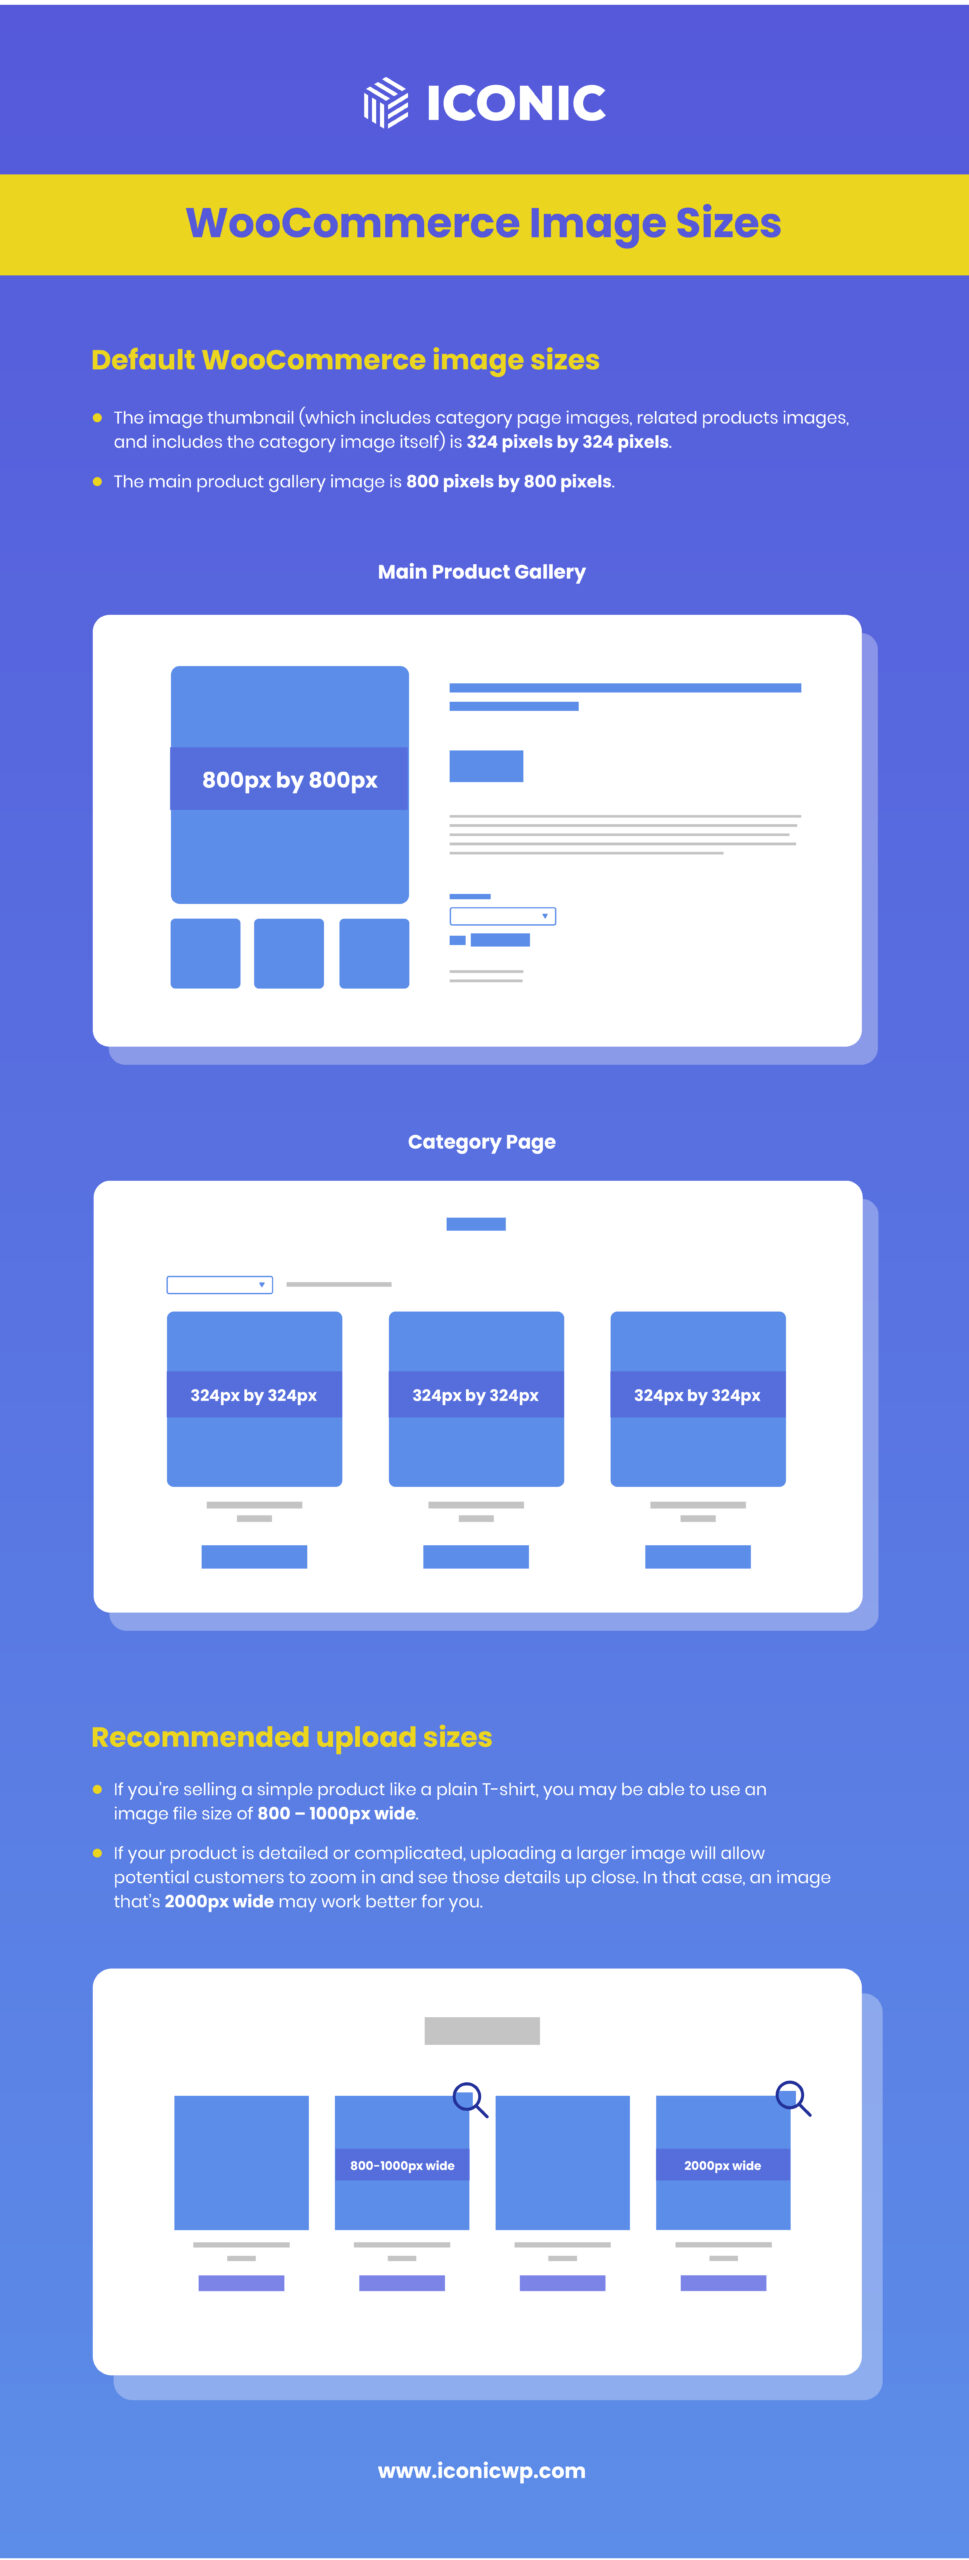
- The image thumbnail (which includes category page images, related products images, and includes the category image itself) is 324 pixels by 324 pixels.
- The main product gallery image is 800 pixels by 800 pixels.
As soon as you make any changes to these settings, WooCommerce will automatically generate the new image sizes (regenerate thumbnails). This may take a little while to process, but it runs in the background.
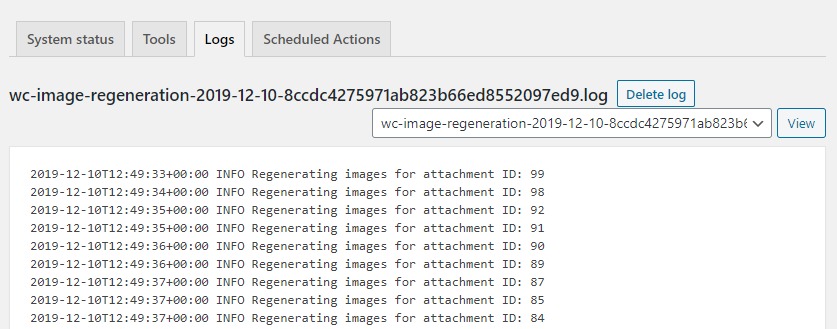
If you want to see the status of the background regeneration from your WordPress dashboard, go to WooCommerce > Status > Logs and select the log beginning with wc-image-regeneration from the dropdown menu.
Note: If you want more control over these sizes, you can use the plugin WooThumbs for WooCommerce. We’ll talk a little more about that later.
What’s the ideal WooCommerce product image size to upload in 2026?
The best size for WooCommerce product images depends on your store’s theme and whether you’re using an image zoom plugin like WooThumbs.
- If you’re selling a simple product like a plain T-shirt, you may be able to use an image file size of 800 – 1000px wide.
- If your product is detailed or complicated, uploading a larger image will allow potential customers to zoom in and see those details up close. In that case, an image that’s 2000px wide may work better for you.
| Image Size | Impact on Store | Recommended Use |
|---|---|---|
| Too Small (e.g. 300px wide) | Pixelated or blurry display | Avoid unless icons or badges |
| Ideal (800–1200px wide) | Clear, loads fast, good quality | Simple product images |
| High-Res (1600–2000px wide) | Sharp zoom, slower load time | Detailed items + zoom plugins |
| Oversized (3000px+) | Slows site, hurts SEO | Resize before uploading |
Note: Never upload an image that’s too large. An oversized image will slow your site down and, as a result, will likely affect sales.
What’s the best format for WooCommerce product images: JPEG, PNG, or WebP?
A question might arise when creating your product images: What file type should I use?
There are three image file types typically used for product images: PNG, JPEG, and WebP. The size of the images matters, but if you’re looking for quality, the file type does, too. So, let’s go through each of these.
JPEG and JPG: Best for general product images
The JPEG file type should be your go-to for product images. This file type is small in size, so it won’t slow down your website, even if the actual pixel size of your image is large.
This kind of file type is perfect for your general product photography.
PNG: Best for screenshots and images with text
The PNG file type, while higher quality than JPEG, should be used with caution. If used for your general product images, and the size of your image is large, the file will likely also be large in terms of file size – slowing down your site.
WebP: Best overall
WebP is the latest image format for your website. It offers the best image compression without losing quality. Compared to PNGs, WebP pictures are generally 26% smaller in size.
The easiest way to convert your images to WebP is to use a WordPress plugin to help you get it done. A few examples are WebP Express and Smush, which offers a premium version on their pricing page.
| Format | Best For | Pros | Cons |
|---|---|---|---|
| JPEG | General product images | Small file size, good quality | Can lose clarity on zoom |
| PNG | Screenshots, logos, transparency | High quality, supports transparency | Larger file size |
| WebP | All-round product images | Best compression with high quality | Requires conversion plugin |
Want to learn how to improve your product photos? Read our ecommerce product photography guide.
Free Download: Ecommerce Website Checklist
Build your online store with confidence using this free ecommerce website checklist.
This checklist is designed to guide you through every stage of building a successful ecommerce site, from foundational setup to understanding conversion rates.

How do I change the product image size in WooCommerce?
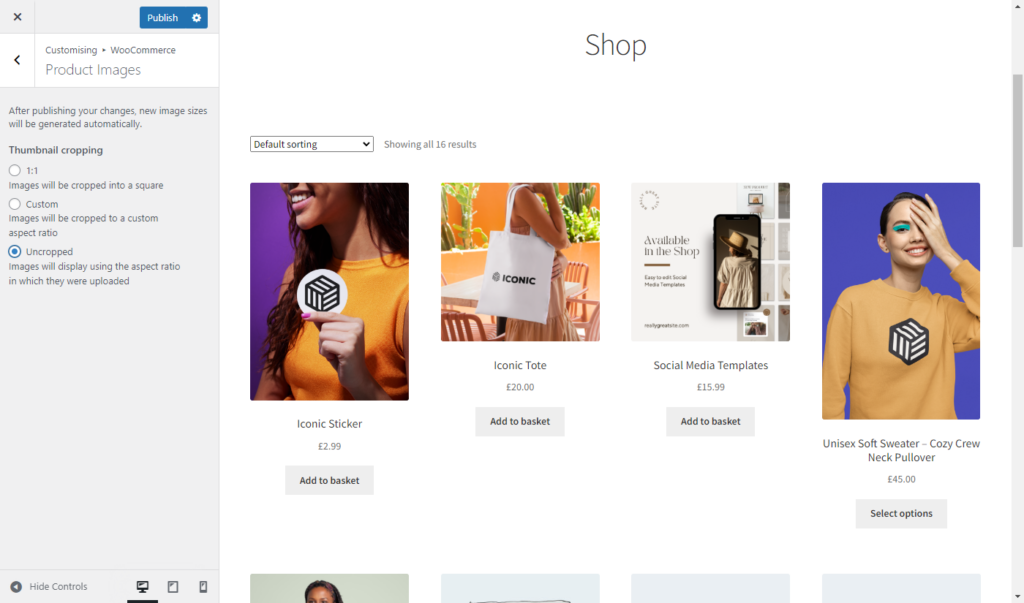
Image sizes can be changed in the Customizer. Go to Appearance > Customize > WooCommerce > Product Images.
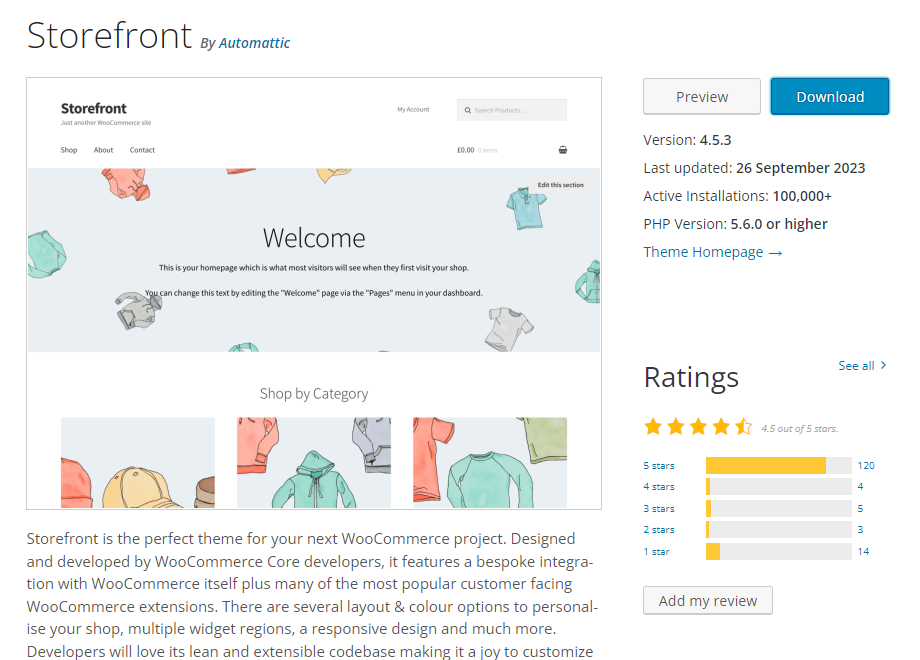
If you’re using a default WooCommerce theme like Storefront, you’ll only see product thumbnail cropping options here.
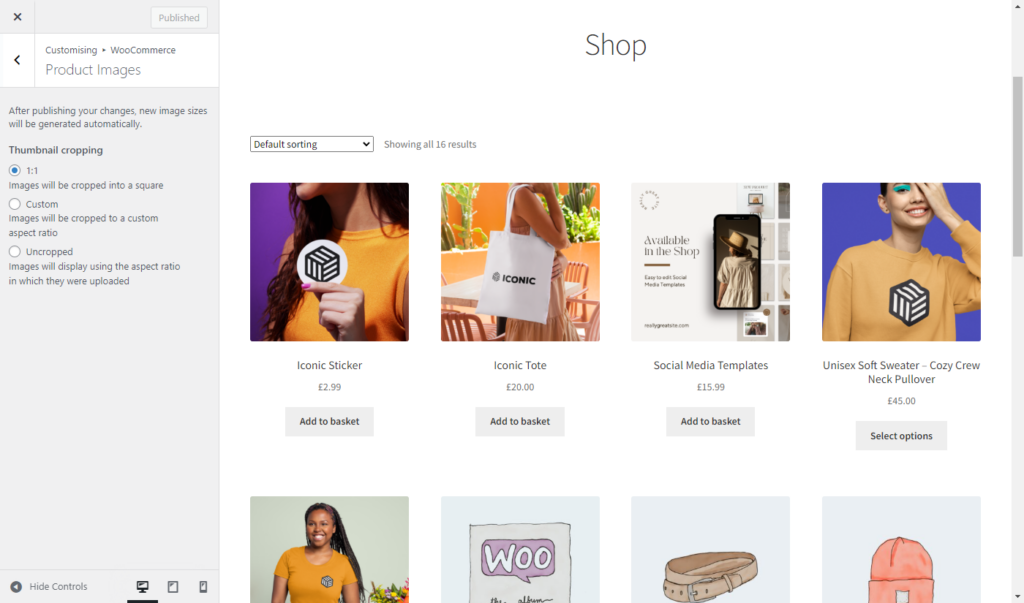
These allow you to set the shape/ratio your thumbnails will be cropped to on the catalog/category pages:
- 1:1 – Images will be cropped into a square.
- Custom – Images will be cropped to a custom aspect ratio.
- Uncropped – Images will display using the aspect ratio in which they were uploaded.
If you’re using a different WordPress theme, you might see things like thumbnail image size options (Main image width, Thumbnail width, and Thumbnail cropping).
Image heights have intentionally been removed, as they are calculated automatically based on your settings. It’s worth noting that your main featured image or single product image no longer has crop settings. They will always show uncropped.
How do I change WooCommerce image sizes using a plugin like WooThumbs?
If you’d like more control over the image sizes in your WooCommerce store, you can download a product image WordPress plugin to help with that.
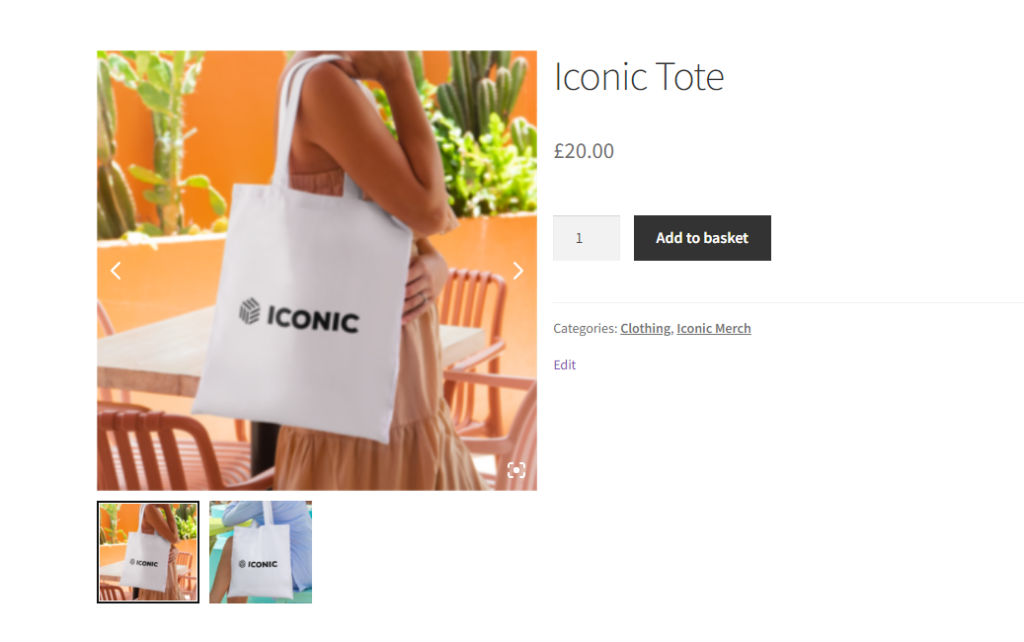
WooThumbs for WooCommerce allows you to change or resize your WooCommerce image sizes on the single product page with a few easy settings.
As a bonus, it also allows you to:
- Have multiple images for each product variation.
- Add image zoom to your product images.
- Customize your WooCommerce product gallery.
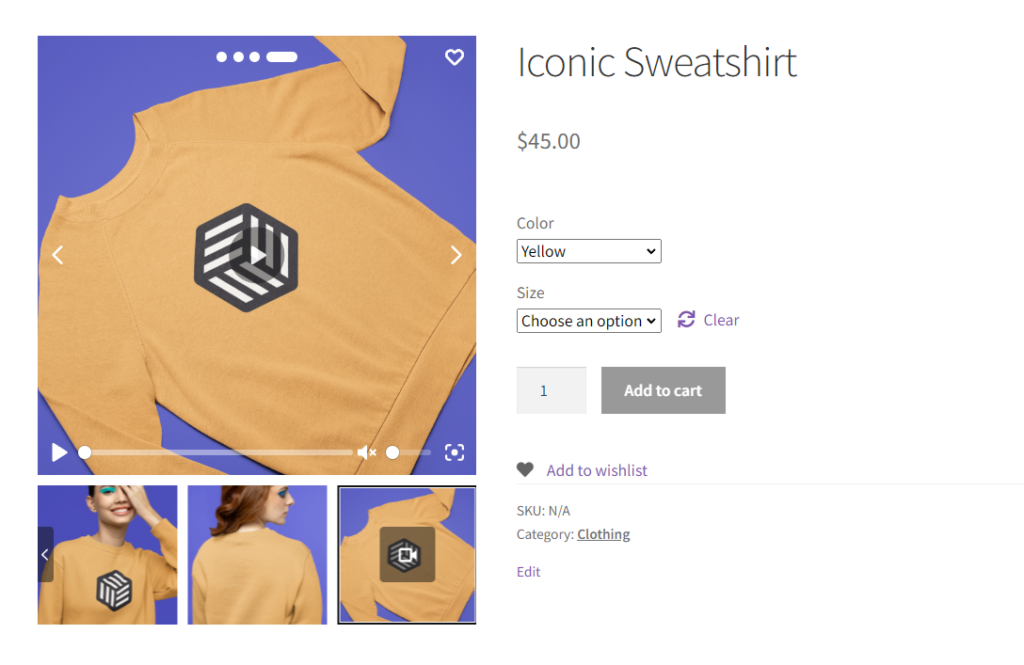
- Add video to your product gallery and more.
Install the WooCommerce plugin, WooThumbs for WooCommerce
You can get WooThumbs for WooCommerce here: iconicwp.com/woothumbs
Then follow these steps:
- Go to Plugins > Add New > Upload Plugin.
- Choose the zip file you downloaded, upload, and then click Activate.
- Once activated, you’ll need to enter your license key.
Now that we have WooThumbs installed, we can move on to changing your image sizes.
To change your WooCommerce image sizes with WooThumbs, do the following:
- Go to WooCommerce > WooThumbs > Display.
- Scroll down to the Image Sizes section.
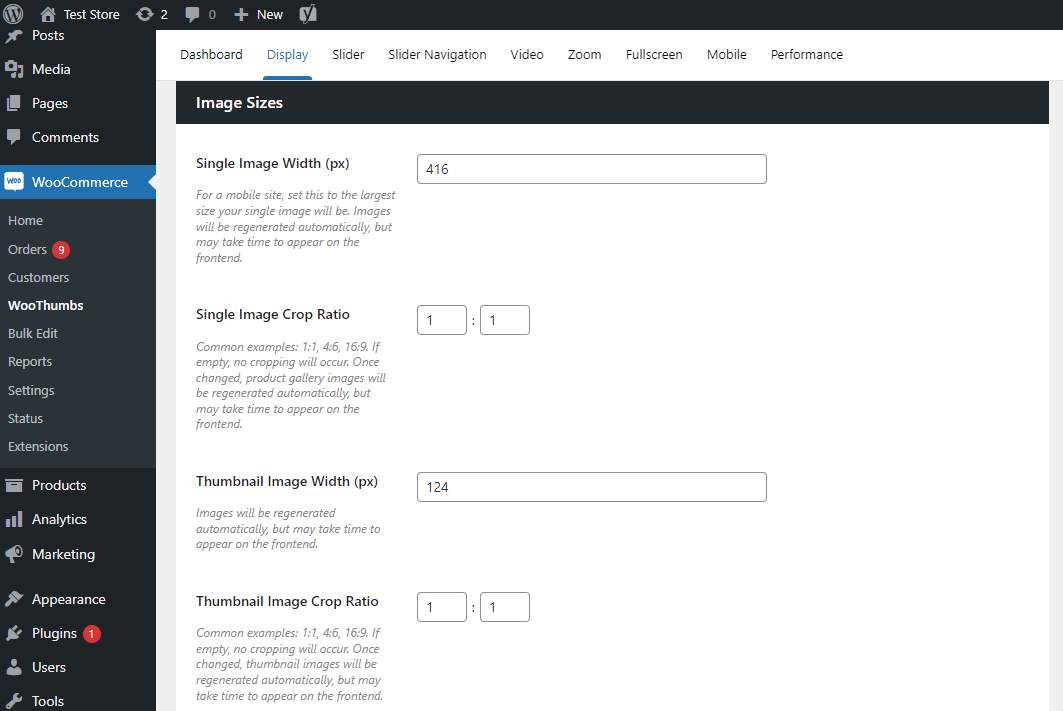
- Enter your desired size in the Single Image Width (px) field.
- Click Save, and it will trigger the background image regeneration process for your single image thumbnails, and the WooThumbs image cache will be cleared automatically once complete.
- Here you can also set the Single Image Crop Ratio. For example, you could enter 1:1, 4:6, or 16:9 to crop your image in different ways.
How to set or change the image size of your WooCommerce product gallery
WooThumbs for WooCommerce also allows you to set the image sizes in your product gallery.
- Go to WooCommerce > WooThumbs > Display.
- Scroll down to the Image Sizes section.
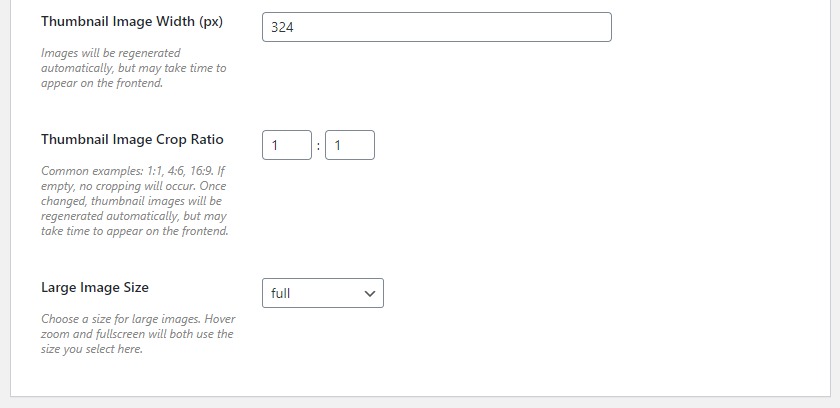
Here you will see various settings that you can change for your WooCommerce product gallery. Including:
- Thumbnail Image Width (px) – Width of the product gallery thumbnails. This won’t affect any other image sizes on your site.
- Thumbnail Image Crop Ratio – How your product gallery thumbnails will be cropped. For example, the aspect ratio of 1:1, 4:6, or 16:9.
- Large Image Size – Choose a size for your large images. Hover, zoom, and full screen will both use the size you select here.
In summary, here are the WooCommerce image sizes you can change with WooThumbs for WooCommerce:
| Setting | What It Controls | Tips |
|---|---|---|
| Single Image Width | Use a consistent ratio with single image | Use 1000–1600px for best results |
| Single Image Crop Ratio | How the main product image is cropped | Use 1:1 for square, or 4:6/16:9 for custom |
| Thumbnail Image Width | Width of gallery thumbnails | Should be smaller than Single Image Width |
| Thumbnail Crop Ratio | Cropping ratio for gallery thumbs | Used for zoom and full screen |
| Large Image Size | Used for zoom and fullscreen | Should match or exceed Single Image Width |
How to set the WooCommerce category image size
In WooCommerce 3.3+, catalog image sizes have been removed. Instead, the catalog or product category page uses the same settings as the thumbnail settings.
To change this, go to Appearance > Customize > WooCommerce > Product Images > Thumbnail Width.
Note: This might not show for you. It depends on your theme and its settings.
Want to make your product pages even more engaging? With this guide on adding a featured video to your product gallery, you can show your product in action and help customers make faster buying decisions.
Add WooCommerce product image hover effects to your category pages
Once you have your product images sized on the category page, it’s worth exploring how you can maximize their ability to make you sales.
With Image Swap for WooCommerce, you can add product image hover effects to your category pages. These will allow customers to hover over, or click your product images on the front end of your store and be shown additional images right from the shop page.
You’ll also have the option to add a zoom effect to these images so customers can see your product in detail before clicking through.
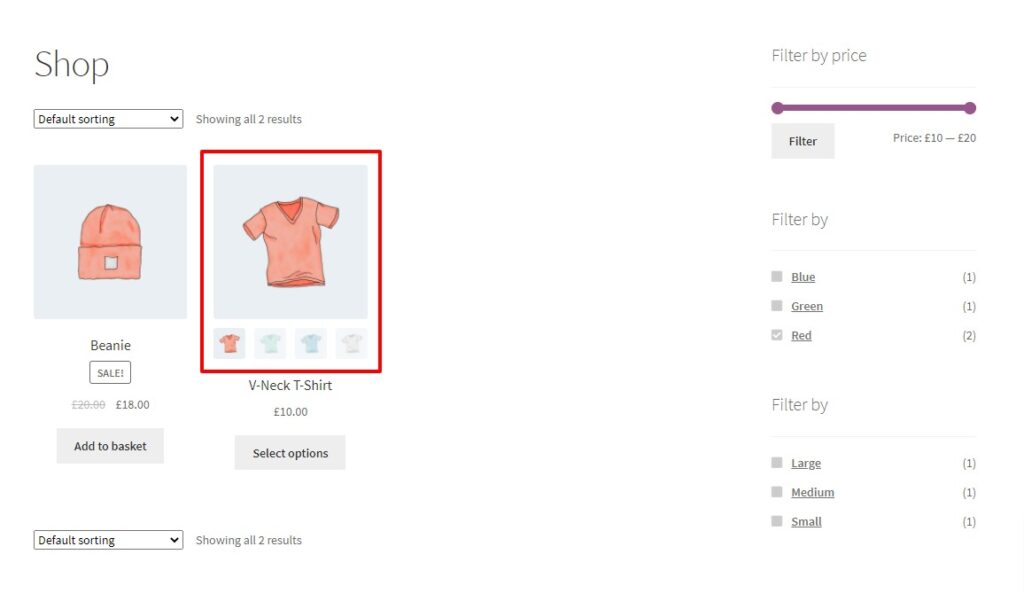
With Image Swap installed, you’ll save customers time, unnecessary clicks, and frustration.
Curious? Get Image Swap for WooCommerce here:
Image Swap for WooCommerce
Add gallery-like image swap effects to your product images on the shop, catalog, search, and filter results pages with Image Swap for WooCommerce.
What are the benefits of setting your WooCommerce product image sizes?
The primary benefits of setting your WooCommerce product image sizes are:
- Preventing image blurriness — images that are the wrong size can appear blurred, giving a bad first impression to your buyers.
- Speed — the larger an image, the longer it takes to load, and it’s a well-known fact that slow websites result in decreased SEO (search engine optimization) and search engine ranking. Resulting in less revenue and dissatisfied customers.
How to create WooCommerce product images that won’t slow down your site (before uploading them)
Product images can be a major cause of slow website loading times, which can negatively impact customers’ experience and search engine ranking.
The good news is that, in addition to the techniques in this article to improve image sizes within your WooCommerce store, there are some things you can do before you even upload your images.
Choose the right file format
When it comes to product images, the file format you choose can have a big impact on the size of the file and how fast it loads on your site. The JPEG format is generally the best choice for photographs, as it offers a good balance between quality and file size. See our image file format section for more details.
Want to improve your product photography? Our ultimate guide to ecommerce product photography covers everything from lighting and composition to editing tips. Perfect if you’re starting from scratch or want sharper, more persuasive images.
Resize your images before uploading them
Images taken directly from a camera or other source are often much larger than they need to be for your website.
Resizing images to the maximum dimensions you need for display on your site can greatly reduce their file size and improve load times. We talked about this earlier, but if you’re selling a simple product like a plain t-shirt, you may get away with an image size 800 – 1000px wide.
If you’re selling something with a lot more details and using good image zoom, then you might want your product image to be much larger than that (to make sure it’s high-quality).
Figure out the maximum size your product images need to be, and never upload anything larger than that.
Compress your images
This step can be done before you upload your product images to WooCommerce or on your website.
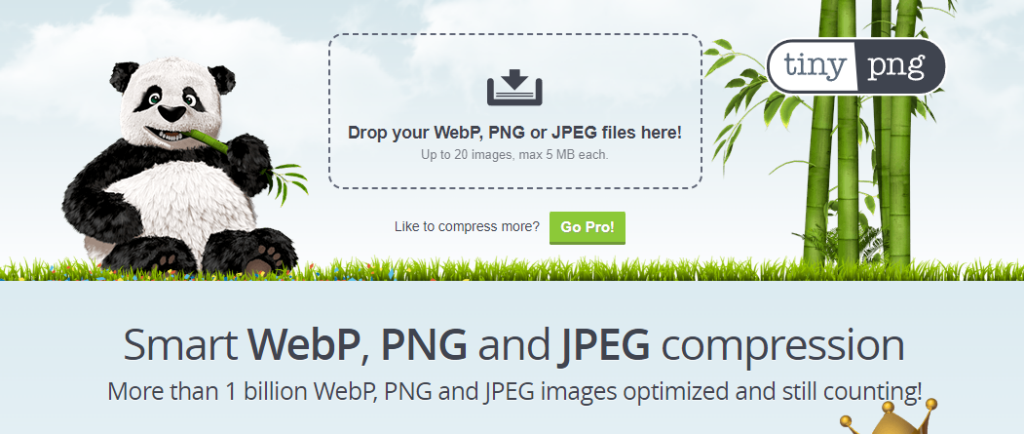
If you want to do the work beforehand, you can use a tool like TinyPNG to individually compress your images before uploading. This won’t change the quality of your images. It will just reduce their file size. The only downside is that this is a manual process, so could take some time to do.
Alternatively, you can install a plugin like Smush to compress your product images as you upload them. You can adjust the settings within Smush to take care of this job automatically.
FAQ: Common WooCommerce image problems
Sometimes, when customizing your WooCommerce product images, you may run into a few problems, some of which can be fixed fairly quickly.
We’ve put together some of the most common here, but if you have any more, please leave a comment below, and we’ll see how we can help.
| Problem | Likely Cause | Fix |
|---|---|---|
| Product images appear blurry | Low-res uploads or automatic upsizing | Use consistent image sizes and configure cropping in the Customizer |
| Images show at different sizes | Uploaded images have different dimensions | Use consistent image sizes and configure cropping in Customizer |
| Image size changes don’t apply | WordPress is still using old thumbnails | Regenerate thumbnails using WooCommerce > Status > Tools |
| Cropping looks wrong | Cropping ratio not set correctly | Upload higher-res images and set the correct thumbnail sizes |
See these all in more detail below.
Why are my WooCommerce product images showing at different sizes?
If your product images are showing up as different sizes in your WooCommerce store, there are a few things you can do:
- Make sure all your product images are the same size before you click upload images. Our recommendation is to create a template using an image editor that you can use for every product image.
- Make sure you’ve set your thumbnail sizes and thumbnail cropping in the WordPress Customizer settings as outlined above.
How do I hard crop WooCommerce thumbnails?
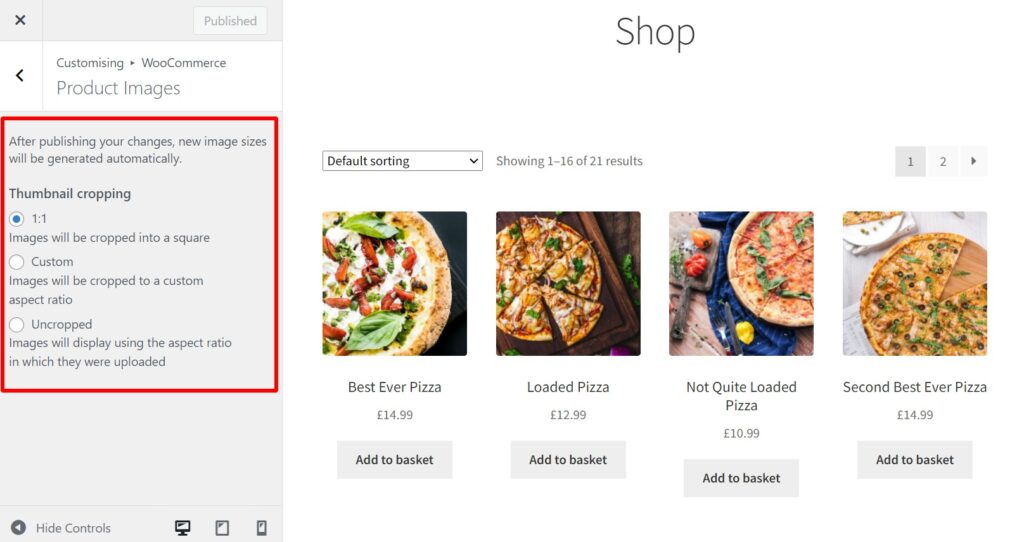
To change how your thumbnails are cropped in WooCommerce, do the following:
- Go to Appearance > Customize.
- Then go to WooCommerce > Product Images.
- Select the desired cropping setting in Thumbnail cropping. You can experiment here and see changes in real time.
- Once happy, click Publish, and your changes will be live.
How do I make WooCommerce product images look less blurry?
If your WooCommerce product images are blurry then you’ll want to check a few things:
- Is your image quality good in the first place? Check the quality of your product image. If it’s low quality, when added to your WooCommerce store, it won’t look as crisp and clear as you’d like.
- Check your thumbnail settings. If your settings are looking for a 500px image for your product page and a 150px image on your catalog page, but you only upload a 150px image, then WooCommerce will automatically enlarge your image, causing it to look blurry.
To fix this problem, our tutorial for fixing WooCommerce blurry images will help.
How can I set a specific product image size for my WooCommerce shop page?
To set a specific product image size for your WooCommerce shop page, do the following:
- Go to Appearance > Customize.
- Then go to WooCommerce > Product Images.
- Select the desired cropping setting in Thumbnail cropping.
- Once happy, click Publish, and your changes will be live.
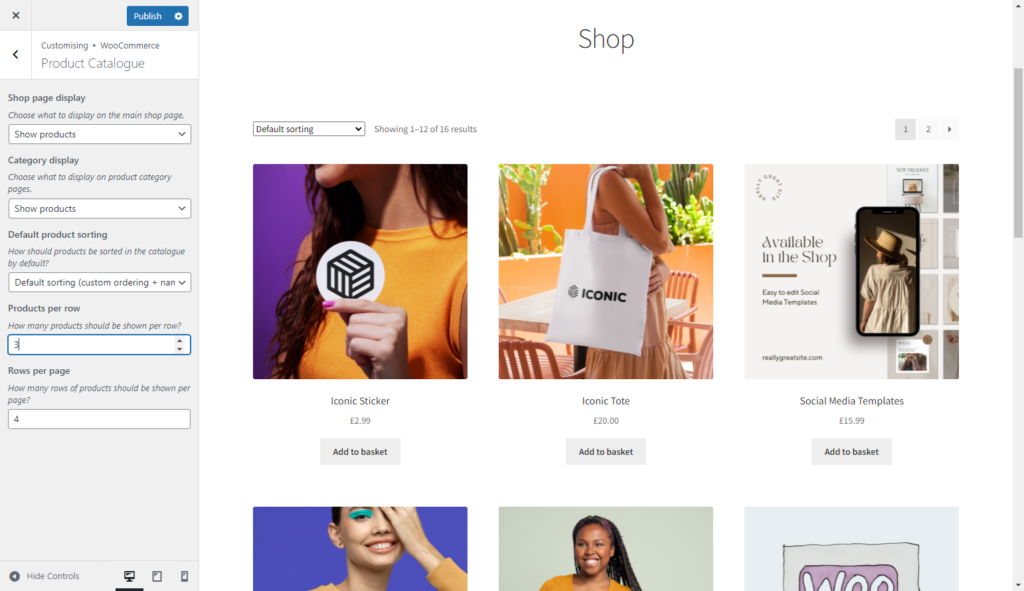
You can change how large and small these appear by going to:
- Go to Appearance > Customize.
- Then go to WooCommerce > Product Catalogue.
- Then, change the Products per row setting to a higher or lower number to make your product images automatically change size to fill the space.
- Once happy, click Publish, and your changes will be live.
Why is my product image size not changing in WooCommerce?
If your product image size is not changing even after you’ve uploaded new images or changed your settings, you might need to regenerate your thumbnails.
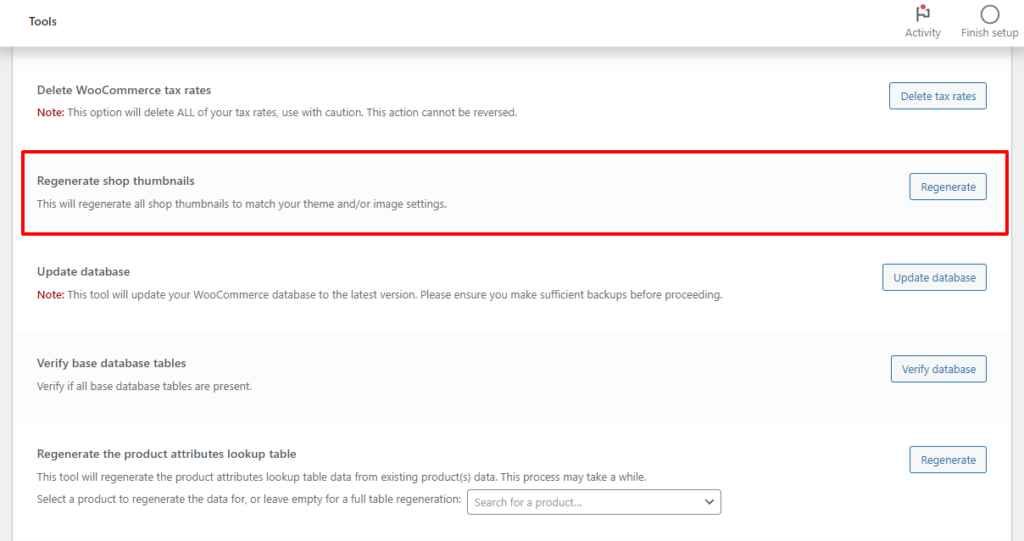
To update your product image sizes, take the following steps:
- Go to WooCommerce > Status > Tools > Regenerate shop thumbnails.
- Then click the Regenerate button next to it.
You can also clear the cache in WooThumbs (if you’re using it) by going to WooCommerce, WooThumbs, clicking on the dashboard or performance tab, and clicking the clear image cache button.
Even with these two cleared, changes may take a little time to show, so be patient.
Get to grips with WooCommerce product images
In this guide, you’ve learned how to manage WooCommerce product image sizes. We’ve explained how to change product and gallery image sizes, how to improve these with a WooCommerce product image plugin, and gone through some common problems you may come across.
Store owners know how important product images are when it comes to making sales in your ecommerce store, so make sure yours are working well with this guide.
Product images are just one part of a great product page. For tips on descriptions, formatting, and customer-focused content, check out our guide on creating better product page content that converts.

Gina Lucia is our in-house Content Manager at Orderable. She writes articles, user guides, technical documentation, and creates videos on everything WooCommerce and Orderable.
Gina has been working in the WordPress/WooCommerce space since 2012 when she developed WordPress websites for clients large and small.
For the past 8 years, she’s been writing about everything WordPress and WooCommerce, becoming an expert in what makes a WooCommerce store succeed.
When not writing, Gina loves to tend to her vegetable garden, read, or travel to mainland Europe.