
Are your WooCommerce images blurry? Yikes! That’s not good for user experience at your store.
Don’t worry, though. As long as your product images weren’t blurry when you uploaded them, you’ll be able to fix your blurry WooCommerce images in no time – and I’ll show you how.
I’ll cover two different fixes for blurry WooCommerce images, depending on your needs:
- The first fix will just go over what to do using default WooCommerce settings.
- The second fix will show you how you can use the WooThumbs plugin to not only fix your blurry WooCommerce images, but also get more control over how images look at different parts of your store to avoid blurry images in the first place.
Why Are Your WooCommerce Images Blurry?
Camera Shake
If you move the camera as you took your product image, unless the camera has incredible automatic stabilization, the shake from the camera will make your final image blurry.
While you could try fixing any camera shake in Photoshop, it’s generally easier to just re-take the photo. Why? Because editing images is a time-consuming process that, as a busy store owner, most probably isn’t one of your top priorities.
Low-Resolution Images
Found up the old camera that your parents gave you to take images with on a family vacation as a kid? Chances are it’s not suitable for taking product images.
Old cameras and devices are generally low resolution — some even with no autofocus! Leaving the resulting picture quality will be poor. While you could head to Google and try and find the best Photoshop tutorials, nothing can fix low resolution.
It’s The Thumbnails!
If you uploaded great-looking product shots to WooCommerce but then they suddenly became blurry, the issue almost always has to do with your thumbnail settings.
Thumbnails are a WordPress feature that automatically resize and crop the product images that you upload to your store. This helps you balance two important, but opposing, forces:
- Usability – you want your images to be large enough that shoppers can clearly see what’s happening. And – obviously – you don’t want them to be blurry.
- Page load times – if your images are too large, they’ll negatively impact the loading speed of your store. So you want to keep your images as small as possible without negatively impacting usability.
Here’s one example of an image that’s incredibly blurry:
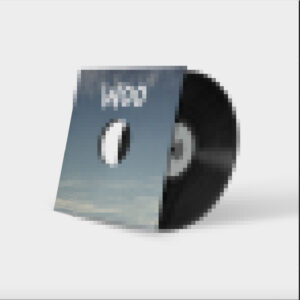
Not great right? That’s why for those reasons above, WooCommerce automatically uses different thumbnail sizes depending on where an image shows up. Think about it – you don’t need a large image on your catalog page, but you do probably want larger images on your single product pages.
So how does that connect to the situation where your WooCommerce images are blurry?
Basically, the issue happens when the WooCommerce thumbnail size is too small for where you, or your theme, are trying to display the image.
For example, if your theme uses 250×250 px images on the catalog page, but your WooCommerce catalog images thumbnail is set to 75x75px, then you’re going to get blurry WooCommerce images because your theme is trying to enlarge a 75px image to be 250px.
By default, WooCommerce gives you two different thumbnail sizes:
- Main image – this controls the main product image on the single product page.
- Thumbnail – this controls the size for your catalog, category page, and single product gallery thumbnails.
Unfortunately, that means, by default, you have to use the same image size and cropping settings in all three areas, which isn’t ideal.
In this first WooCommerce blurry images fix, I’ll just show you how to unblur your images and ignore the issue in the sentence above.
Then, in the second method, I’ll show you how you can not only fix blurry images, but also get more control over the image size and crop settings for different areas of your store.
How To Fix WooCommerce Blurry Images Using Core Functionality
To access the default WooCommerce image sizes, you now need to use the WordPress Customizer as of WooCommerce 3.3.
Step 1: Access the Customizer
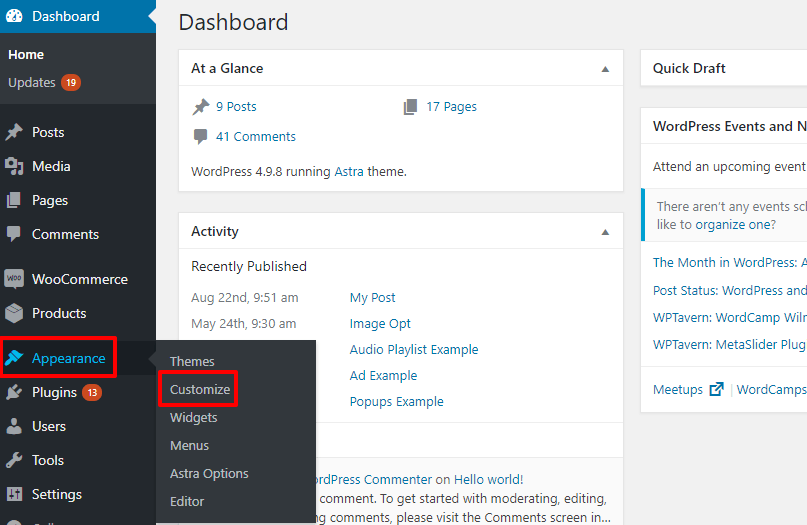
To access the WordPress Customizer, go to Appearance → Customize in your WordPress dashboard:
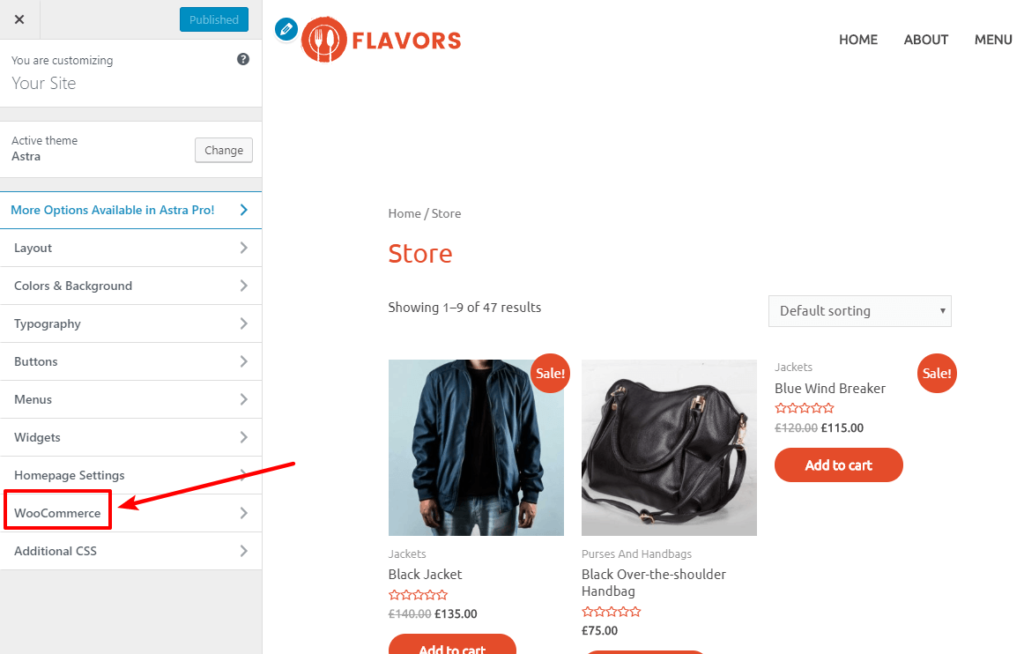
Once you’re in the WordPress Customizer, click on the WooCommerce option:
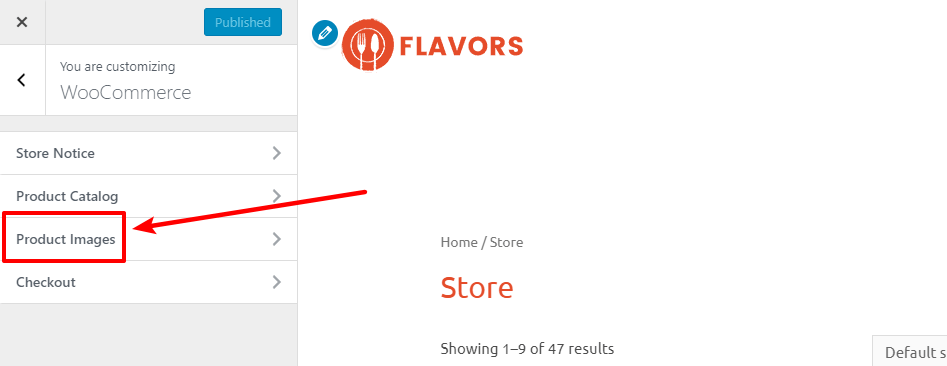
Then, select Product Images:
Step 2: Finding the right size for your product images
Then, you can enter values for your Main image width and Thumbnail width, as well as select how to crop thumbnail images:
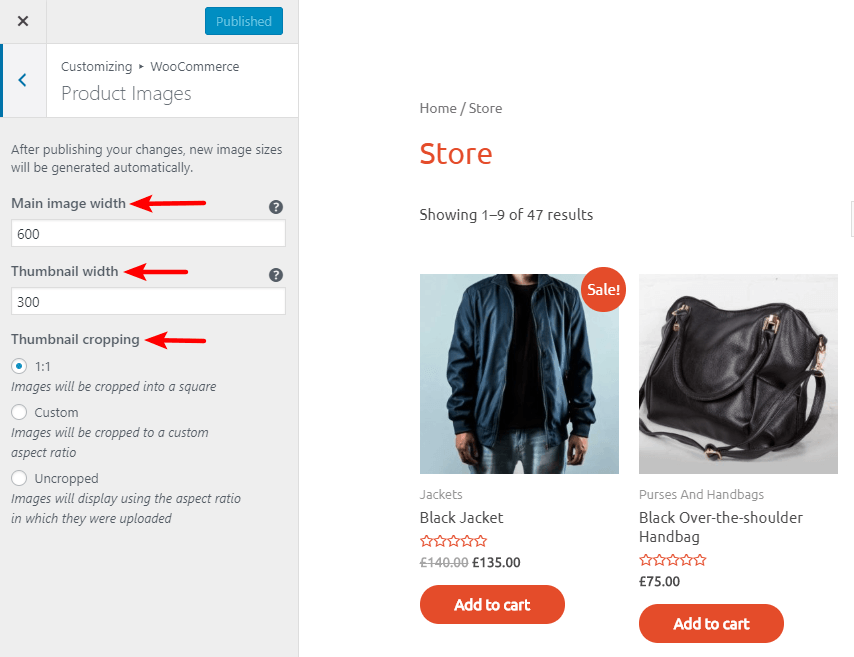
When in doubt, the values in the screenshot – 600px and 300px, respectively – are good defaults.
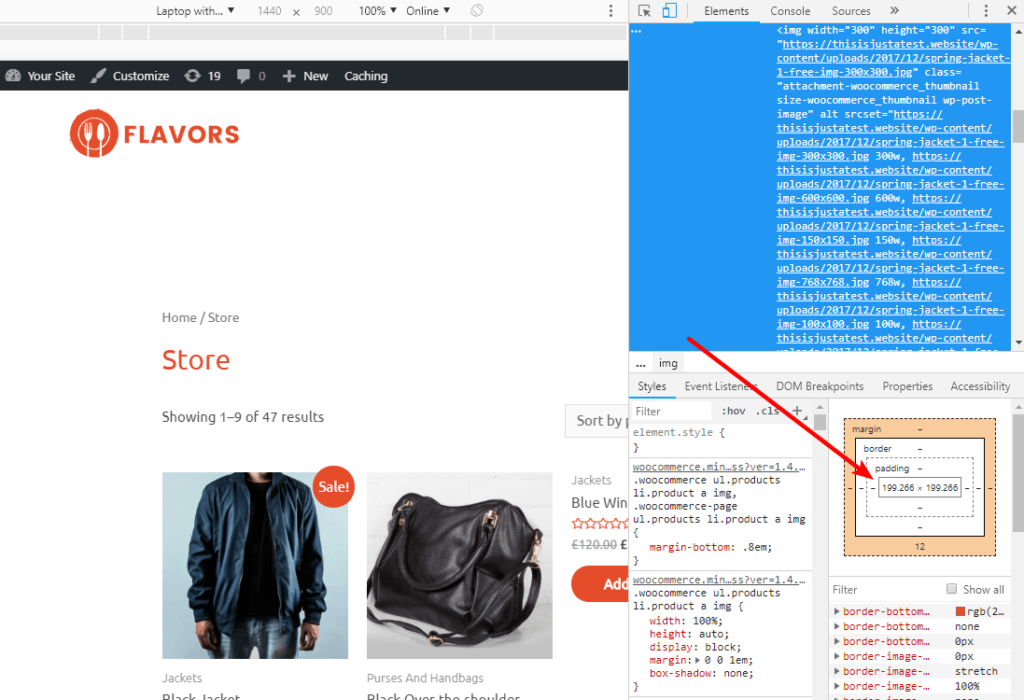
If you’re handy with your browser’s developer tools, you can also Inspect images in your theme to get the exact sizes:
To support Retina devices, you should actually make your thumbnails double the size of your theme’s images.
Step 3: Publishing your new WooCommerce product images
Once you’re finished, click the Publish button in the WordPress Customizer to make your new thumbnail sizes live.
WooCommerce will then automatically regenerate your site’s thumbnails according to the new sizes that you set. If you have a lot of images, this might take some time (don’t worry – it will run in the background. It just means that the change won’t be instantaneous – you’ll need to wait a bit).
Once WooCommerce finishes regenerating your thumbnails, you should no longer have blurry images at your WooCommerce store.
How To Fix WooCommerce Blurry Images With WooThumbs
The above method is totally fine if you’re happy using the same thumbnail size and cropping aspect ratio for your store’s…
- Catalog images
- Category pages
- Single gallery thumbnails
That setup might not work for your store, though.
If you want more control, the WooThumbs plugin lets you create three thumbnail sizes and crop aspect ratios (vs. WooCommerce’s two thumbnail sizes).
You can create separate thumbnail sizes for:
- Single product image
- Product thumbnail (used for catalog/category pages)
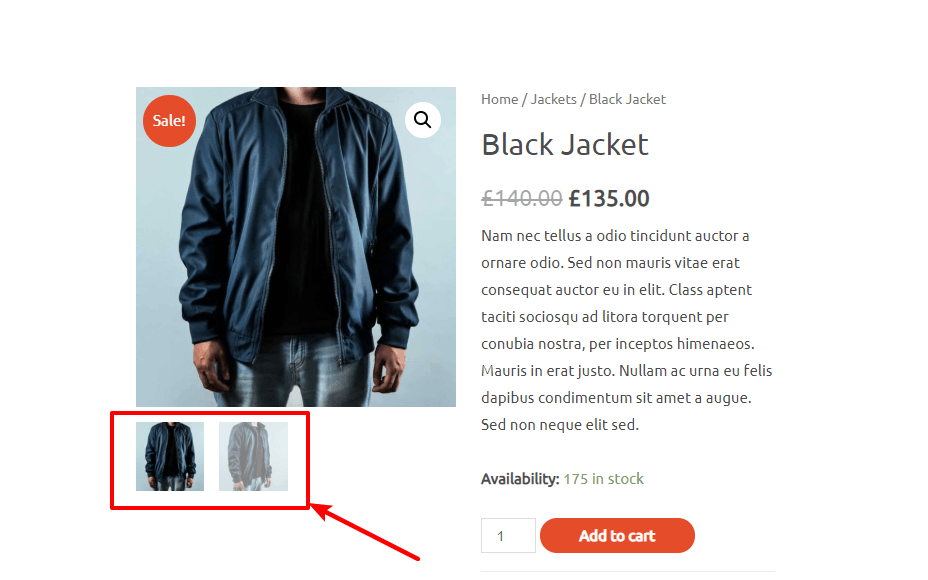
- Gallery thumbnail (the new one – used exclusively for the single product gallery thumbnails)
Here’s an example of where the new change comes into effect:
So not only are you fixing your blurry WooCommerce images, you’re also getting more control over how your store’s images work. And beyond that, you also get Retina support for your thumbnails, which means your store’s images will look great on Retina screens without requiring any extra effort on your part!
Here’s how to fix blurry WooCommerce images with WooThumbs…
Step 1: Configuring the Settings
Once you’ve installed and activated the WooThumbs plugin (get it here), go to WooCommerce → WooThumbs to configure the plugin’s settings.
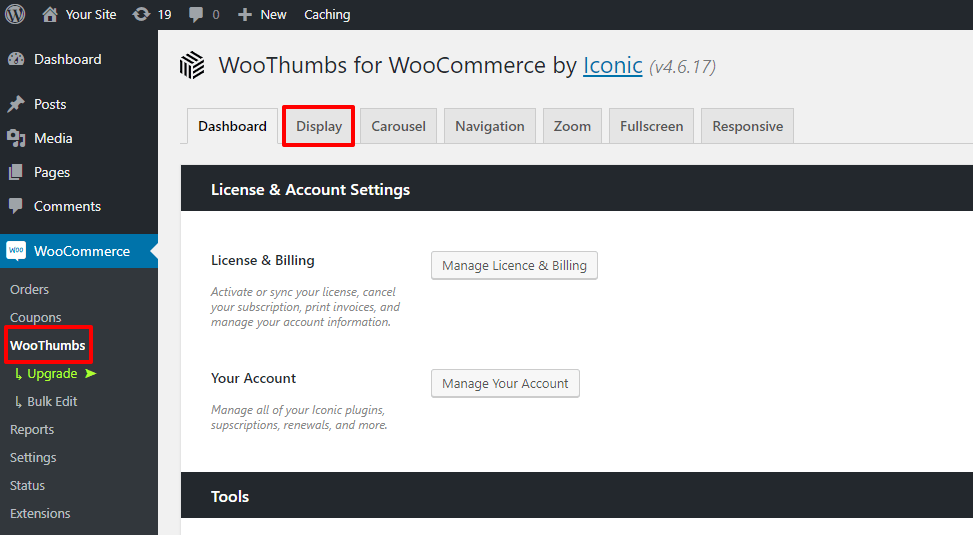
Go to the Display tab and configure the size and crop ratio for:
- Single Image – the single product image size.
- Thumbnail Image – the single product gallery image size.
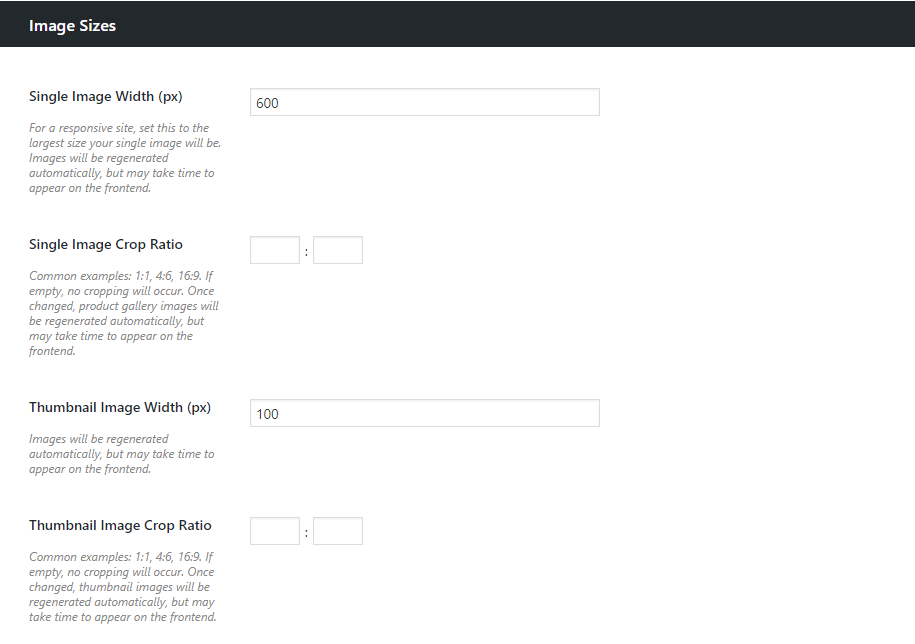
WooThumbs will automatically handle Retina support, so you don’t need to worry about doubling your thumbnail sizes or anything.
Do I need to regenerate my thumbnails?
Once you save your thumbnail sizes, WooThumbs will automatically regenerate your store’s thumbnails (remember – this just means you might need to wait a little while for the regeneration process to complete before your store’s blurry images disappear).
For catalog/category thumbnails, you can still use the same core WooCommerce setting that you saw in the previous method.
That’s it! No more blurry images in WooCommerce and done in just one step! No long or complicated process needed.
Head here to learn more about the other ways in which the WooThumbs plugin can improve your store, like:
- Multiple images per variation
- Product video
- Better product image zoom
- Product image carousels
- WooCommerce thumbnail sliders
- Different thumbnail positions
- And more!
If you have any other questions about how to fix blurry images in WooCommerce, let me know in the comments!
