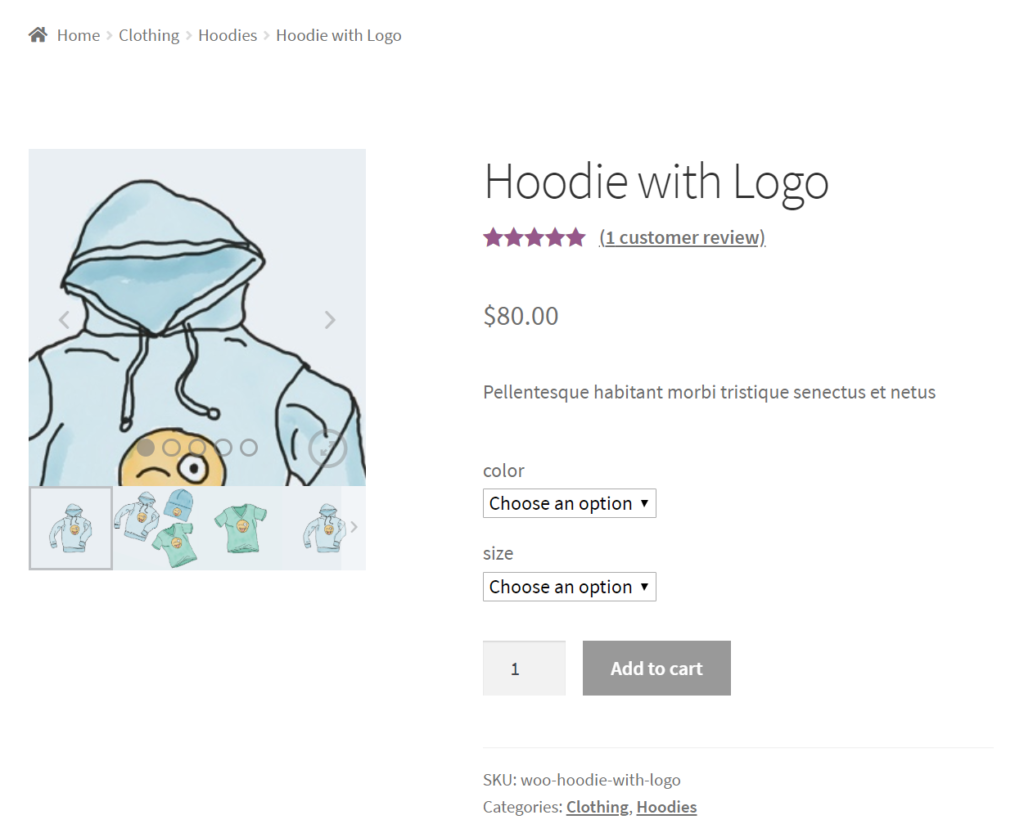
When running an online store, allowing customers to see as much of your product as possible is vital to increasing sales. So it goes without saying that adding image zoom to your WooCommerce store is a must.
However, in a standard WooCommerce install, the image zoom feature is basic and hard to use.
So by the end of this article, you’ll know exactly how to add the best possible image zoom to your WooCommerce store. As a bonus, you’ll also be able to upgrade your entire WooCommerce gallery while you’re at it.
Plus, you’ll be able to get it done in just 2 steps with the product gallery plugin, WooThumbs for WooCommerce.
WooThumbs for WooCommerce
Customize your WooCommerce product image gallery in minutes with a new layout, embedded video, multiple images per variation, and more.
The advantages of adding image zoom to your WooCommerce store speak for themselves. You’ll be able to:
- Allow visitors and potential customers to get a better look at the product before they add it to their cart.
- Enhance online sales by reducing friction and making the customer’s purchasing decision easier.
- Make it easier for customers to view clear product information and get a better idea of what they’ll receive. Increasing trust.
What WooThumbs for WooCommerce Can Do
WooThumbs for WooCommerce doesn’t just allow you to use advanced image zoom for your product images. It also lets you customize your entire WooCommerce product gallery with features such as:
- New layouts. Change the layout of your gallery from where the thumbnails are positioned, to how big it is, icon colors, and more.
- Embedded video. Embed or link to product videos and display them within the gallery itself.
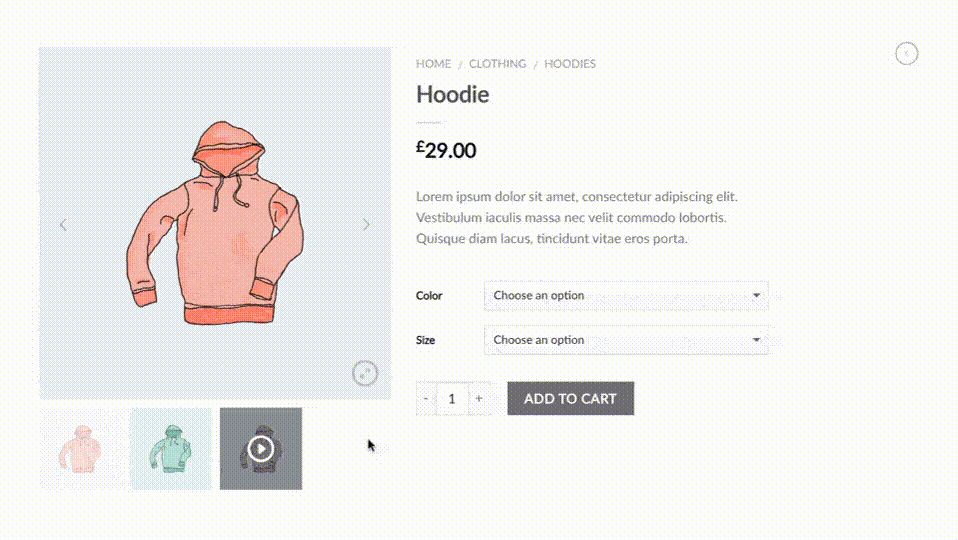
- Multiple images per variation. If you sell products with variations (such as clothes), WooThumbs for WooCommerce allows you to add multiple images for each variation.
So now we know the additional benefits of using WooThumbs for WooCommerce, lets get it installed on your store with image zoom.
How to Install WooCommerce Image Zoom
To add image zoom to your WooCommerce store, you’ll need to:
- Install the product gallery plugin, WooThumbs for WooCommerce.
- Adjust your product image zoom settings.
- (Optional) Adjust your product gallery settings.
That’s it. Below we’ll outline these steps in detail so you can start making more sales for your online store.
Step 1: Install WooThumbs for WooCommerce
To get started, purchase WooThumbs for WooCommerce from the Iconic store: iconicwp.com/woothumbs
WooThumbs for WooCommerce
Customize your WooCommerce product image gallery in minutes with a new layout, embedded video, multiple images per variation, and more.
Then follow these steps:
- Go to Plugins > Add New > Upload Plugin.
- Choose the zip file you downloaded, upload, and then click Activate.
- Once activated, you’ll need to enter your license key.
Now that we have WooThumbs for WooCommerce installed, we can move onto amending your image zoom settings.
Step 2: Adjust your product image zoom settings
Once you have WooThumbs installed on your WordPress site, head over to WooCommerce > WooThumbs > Zoom from the admin panel. From here, you can customize your image zoom settings.
These are split into four categories:
- General zoom settings.
- Outside and follow zoom settings.
- Outsize zoom settings.
- Follow zoom settings.
We’ll go through each of these in turn so you can start using them in your online store.
General zoom settings
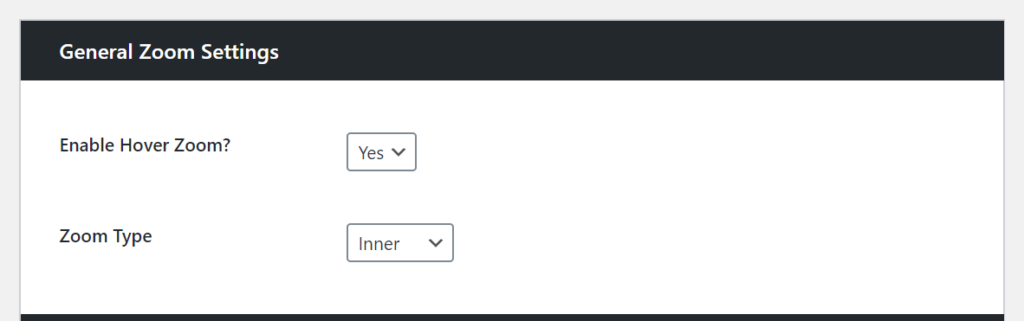
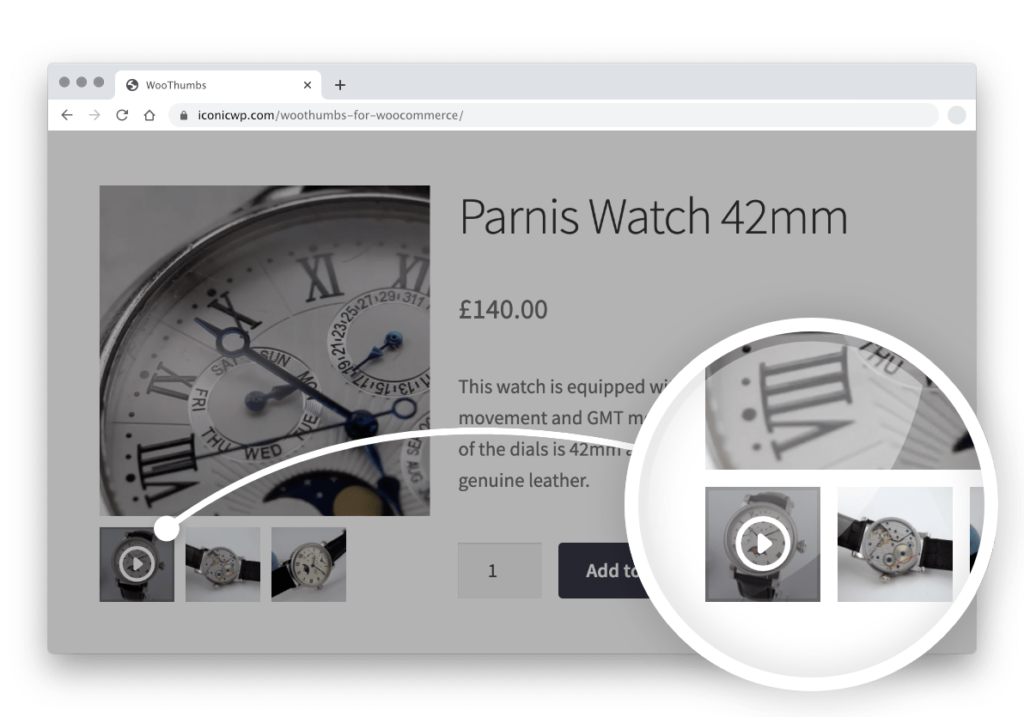
Use these to enable zoom on-hover and the zoom type. Zoom on-hover means that the product image will zoom in when the visitor hovers over it with their mouse. You can also choose between three zoom types – inner, outside, or follow – using the dropdown menu.
Outside and follow zoom settings
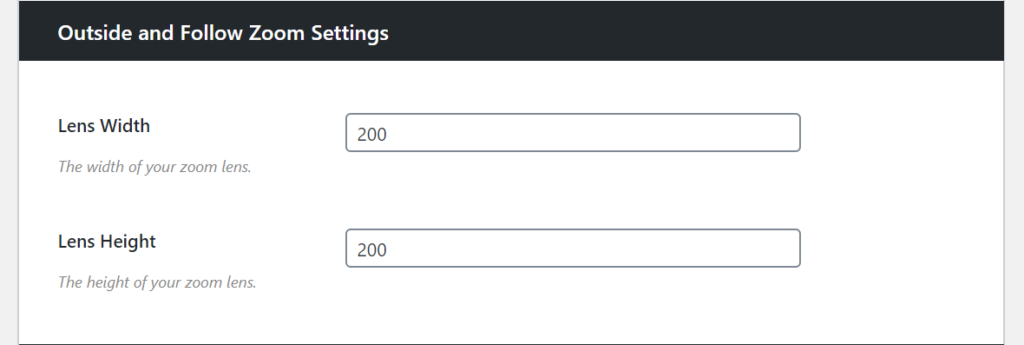
This adds a zoom box outside of the main product image box that appears when visitors hover over the product image. You can use these settings to change the lens width and height.

Outsize zoom settings
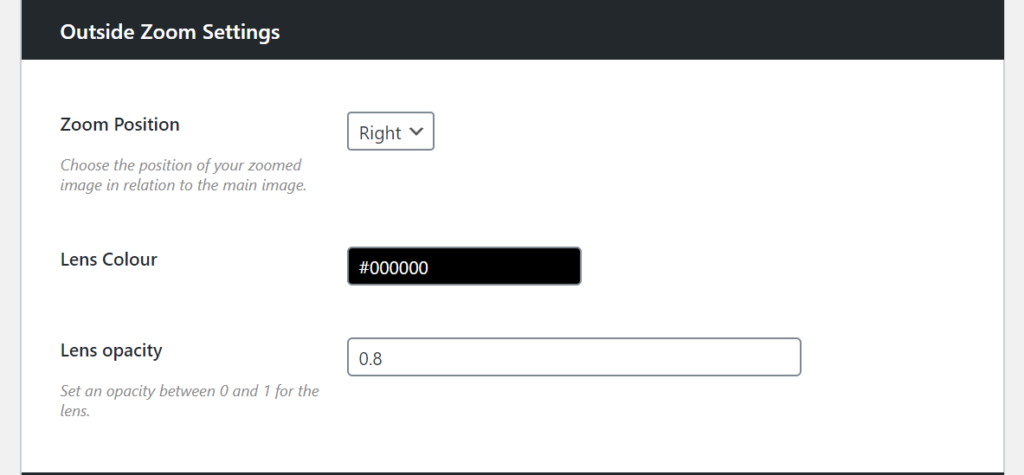
These settings let you customize where the zoomed image should appear relative to the main product image. You can also change the lens color and lens opacity of the zoom window.
Follow zoom settings
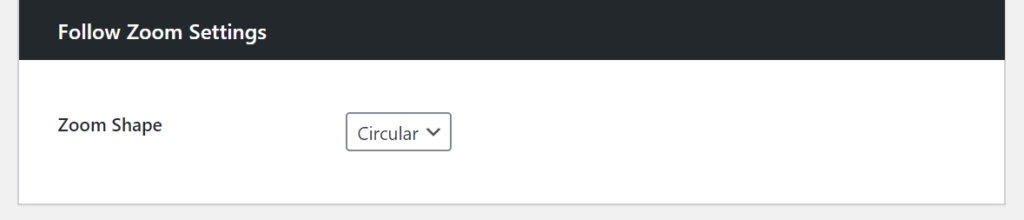
Use this option to select a follow zoom shape. You can choose between a circular or square shape.
Bonus: Fullscreen settings
Some online store owners might want to make the main product image open up in fullscreen. With WooThumbs, you can do that from the Fullscreen tab on the plugin settings page. From here, you can choose to enable fullscreen, click anywhere, and image title.
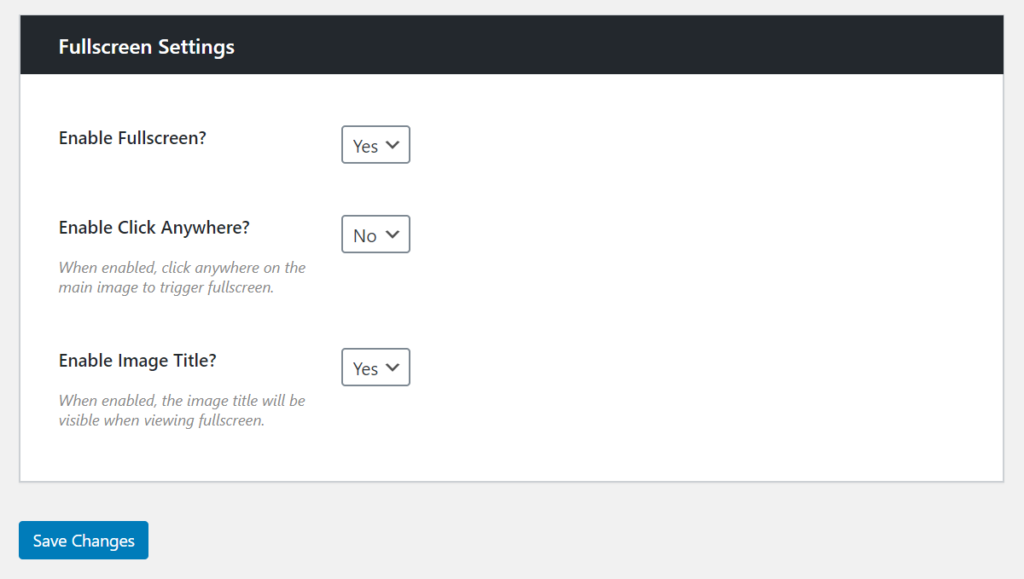
Enabling all three options means that visitors can click anywhere on the main product image to trigger fullscreen. The product image title will also appear in the full-screen lightbox view.
(Optional) Step 3: Adjust your product gallery settings
Now that we’ve adjusted the zoom settings using WooThumbs for WooCommerce, next we’ll go through some additional settings you can adjust to fully customize your product gallery.
Display settings
Head over to WooCommerce > WooThumbs > Display from the admin panel. From here, you can change your product gallery display settings.
Display settings
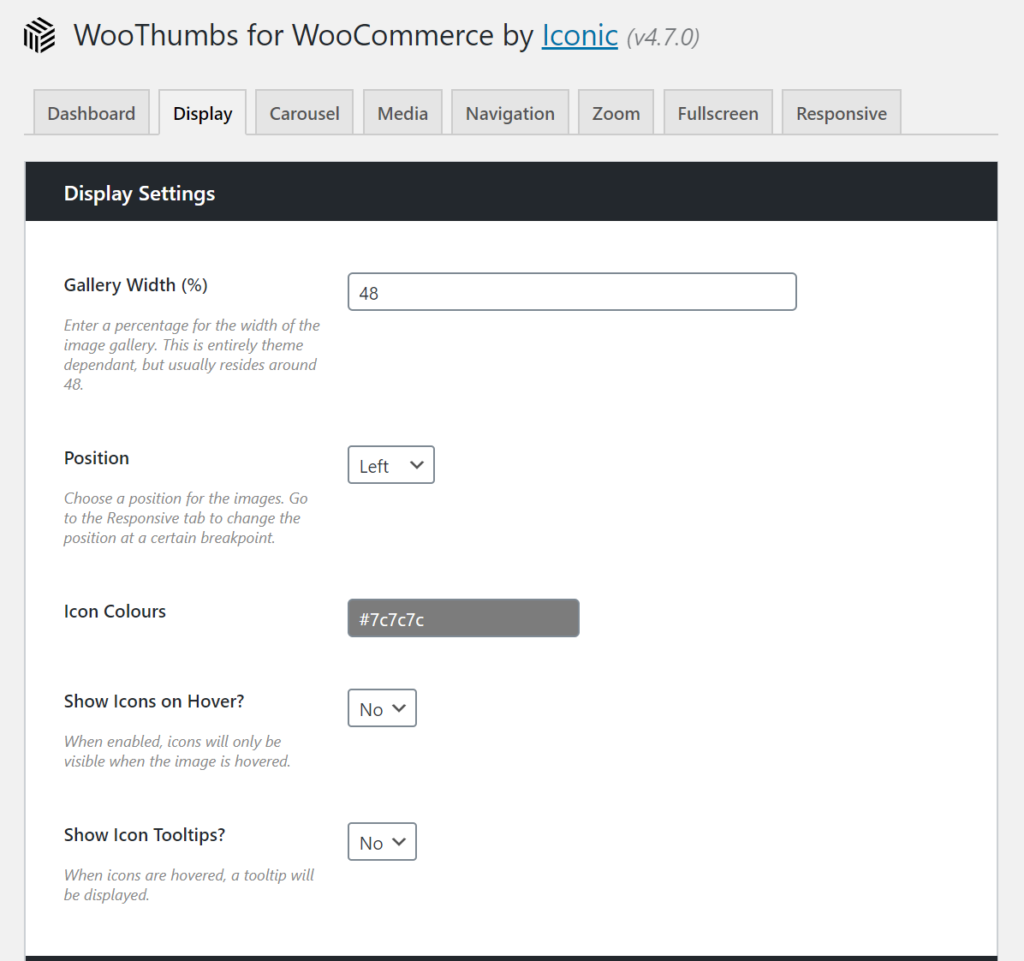
You can set the gallery width (in percentage) and choose a position for the product images. In addition to this, WooThumbs also lets you change icon colors and decide whether you want icons to appear on-hover. Finally, you can choose to show tooltips on hover, as well.
Image sizes
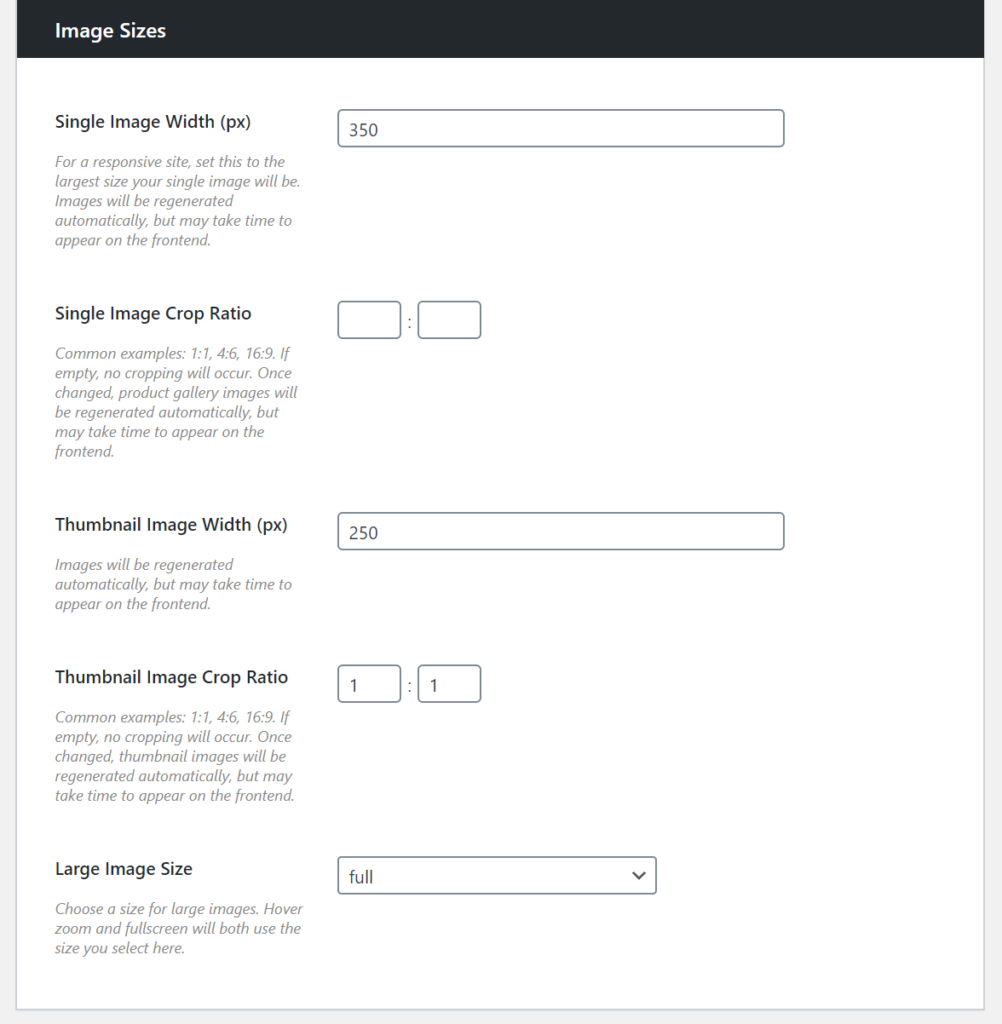
From the same screen, you can configure the default single image width, crop ratio, thumbnail image width, thumbnail crop ratio, and the size of large images.
Carousel settings
One of the neat features on offer with the WooThumbs plugin is that it lets you change the carousel (slider) settings without having to mess around with HTML, CSS, or JavaScript code. Simply head over to WooCommerce > WooThumbs > Carousel to modify:
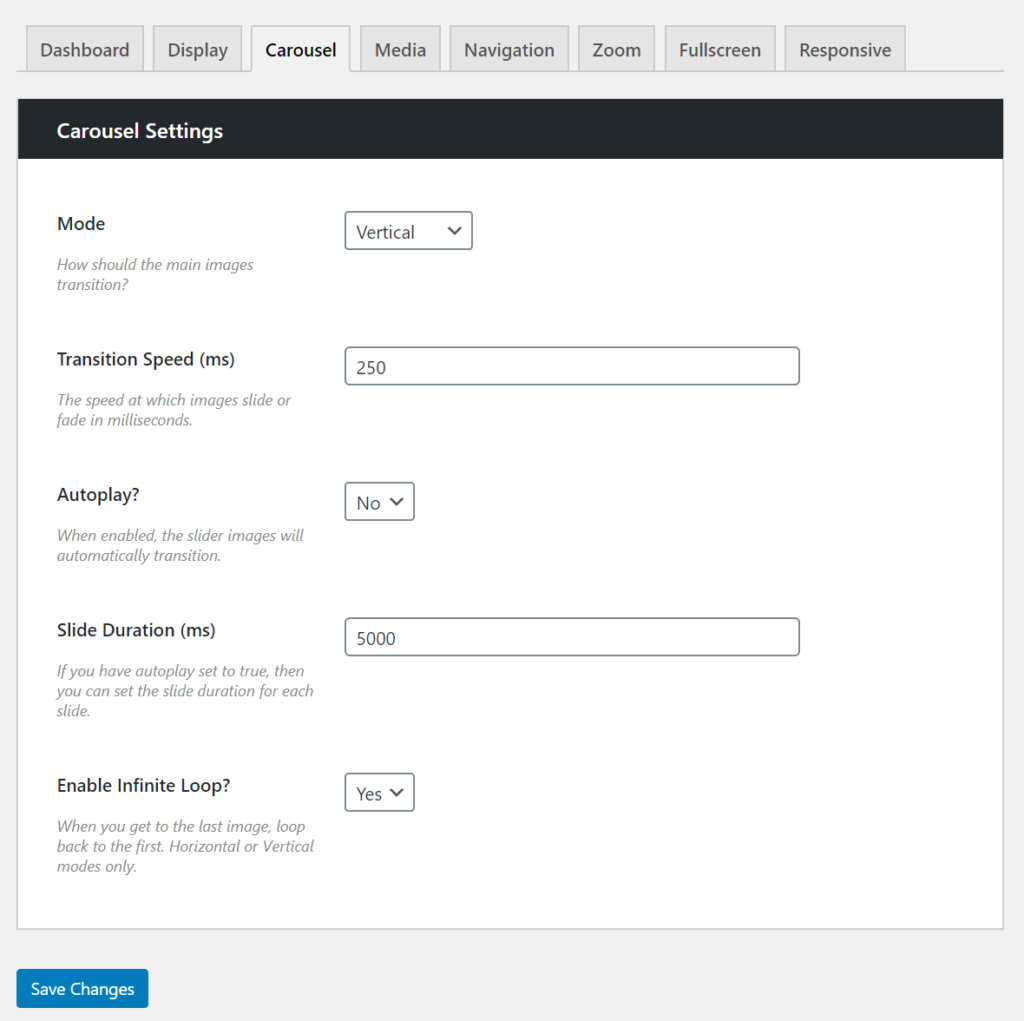
- Mode. Use the dropdown menu to select a transition mode i.e. horizontal, vertical, or fade.
- Transition speed. You can use this to configure how fast the image should slide or fade.
- Autoplay. This lets you decide whether the slider should transition automatically or on-click.
- Slide duration. If you choose to enable autoplay, you can use this setting to set the slide duration for each image.
- Infinite loop. Enable this option if you want the carousel to loop back to the first product image when the visitor reaches the last image. This delivers a good user experience.
Click the Save Changes button to proceed.
Media settings
These are the settings that are applied if you choose to embed product videos into your product image galleries.
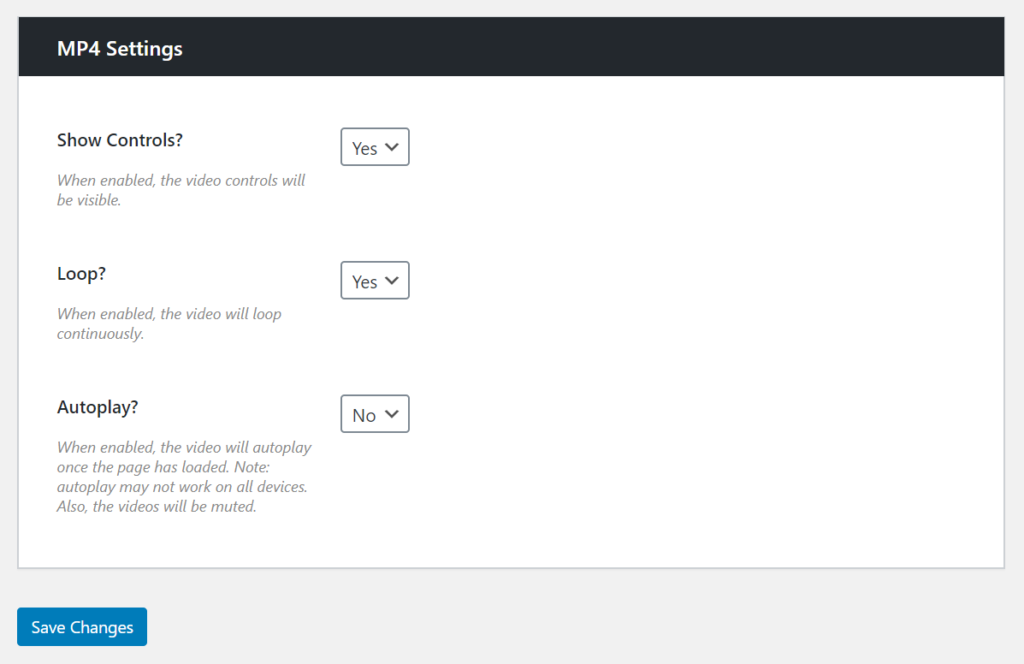
You can choose to show or hide video controls, loop the video continuously, and enable (or disable) autoplay.
Navigation settings
The next step is to customize the WooThumbs navigation settings. These determine how visitors and potential customers navigate through the image gallery on the product page.
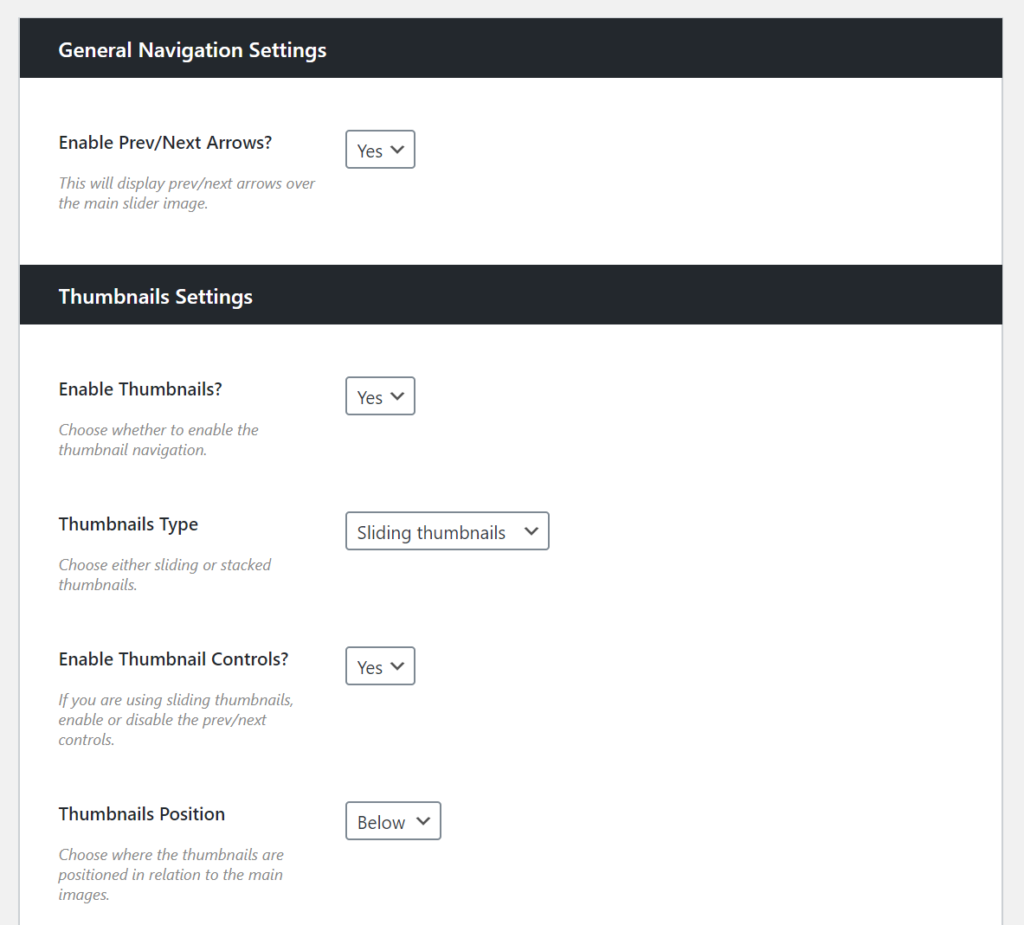
The general navigation settings let you enable or disable the Prev/Next arrows. We recommend leaving this option enabled.
You can also customize various navigation settings for the thumbnail images that appear directly under the main product image. These include:
- Enabling thumbnails.
- Choosing a thumbnail type i.e. sliding or stacked.
- Enabling thumbnail controls.
- Whether you want thumbnails to appear above, below, to the right, or to the left of the product image.
- Setting thumbnail width, count, transition speed, and spacing.
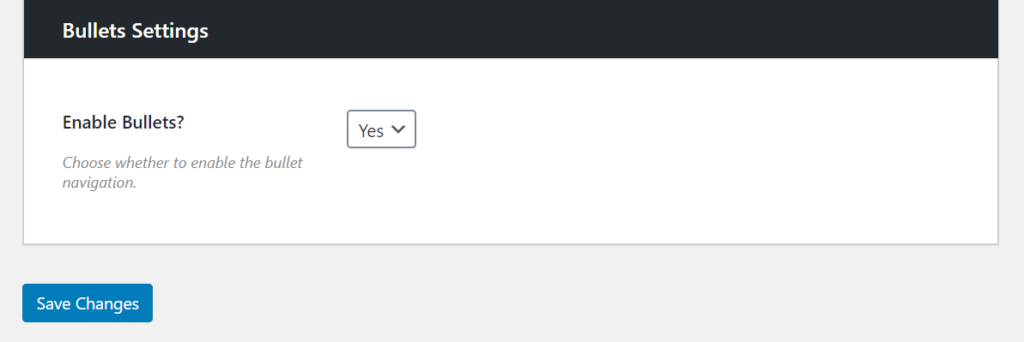
Finally, the WooThumbs plugin lets you show bullet navigation in addition to the Prev/Next arrows and the thumbnails.
How to add image zoom to your WooCommerce category pages
We’ve already outlined the benefits of using image zoom in your WooCommerce store, but it doesn’t have to be used on the single product page only.
In fact, image zoom can also be included on your category pages with the plugin Image Swap for WooCommerce.
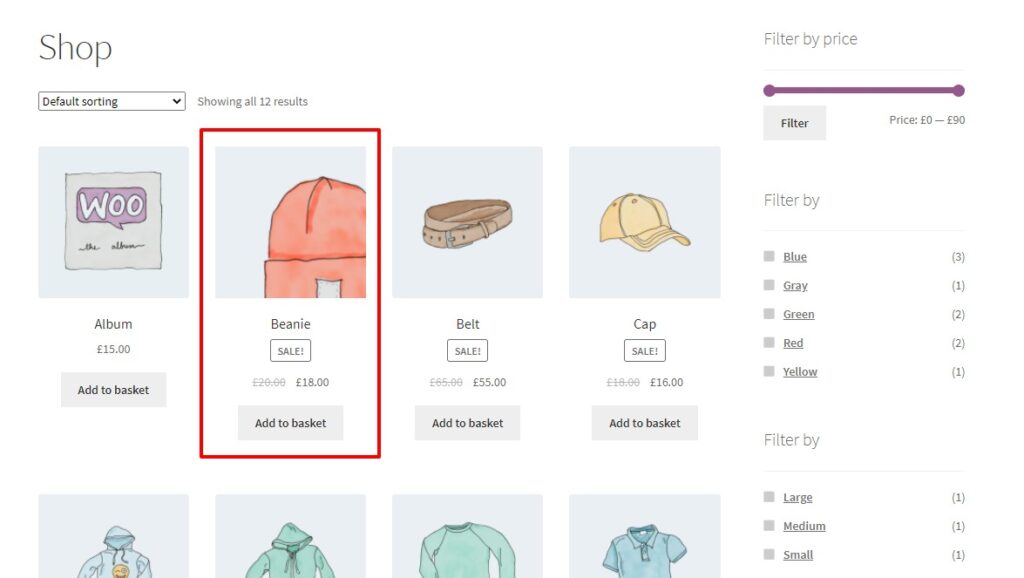
With Image Swap installed, you’ll be able to add image zoom to the product images on your category and shop pages. This way customers will be able to see your product details without having to make a single click, saving them time and frustration. Not bad!
Curious? Get your 14-day free trial of Image Swap for WooCommerce here:
Image Swap for WooCommerce
Add gallery-like image swap effects to your product images on the shop, catalog, search, and filter results pages with Image Swap for WooCommerce.
Set up WooCommerce image zoom today
That’s it, you now have image zoom installed on your WooCommerce store. As a bonus, you have a fully customized product image gallery designed to increase sales and improve user experience.
Get these changes up and running quickly with WooThumbs for WooCommerce.
WooThumbs for WooCommerce
Customize your WooCommerce product image gallery in minutes with a new layout, embedded video, multiple images per variation, and more.
