How to Add Global Attribute Swatches
If you want to add swatches to your attributes store-wide or globally, then you can do so with WooCommerce Attribute Swatches.
This is particularly useful if you have a lot of products using the same attributes. Adding global swatches can save you a lot of time!
So, to add global attribute swatches, take the following steps:
- From your WordPress dashboard, go to Products > Attributes. If you already have an attribute to use, click Edit on the relevant attribute and skip to step 3. If not, do the following:
- Enter your attribute name into the Name field and fill out the rest of the fields.
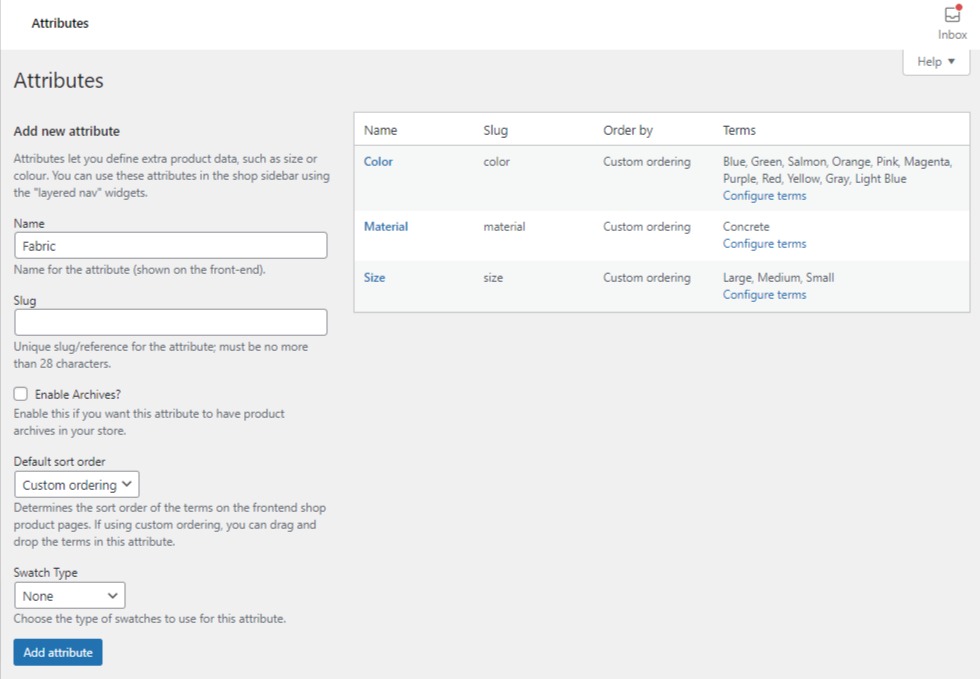
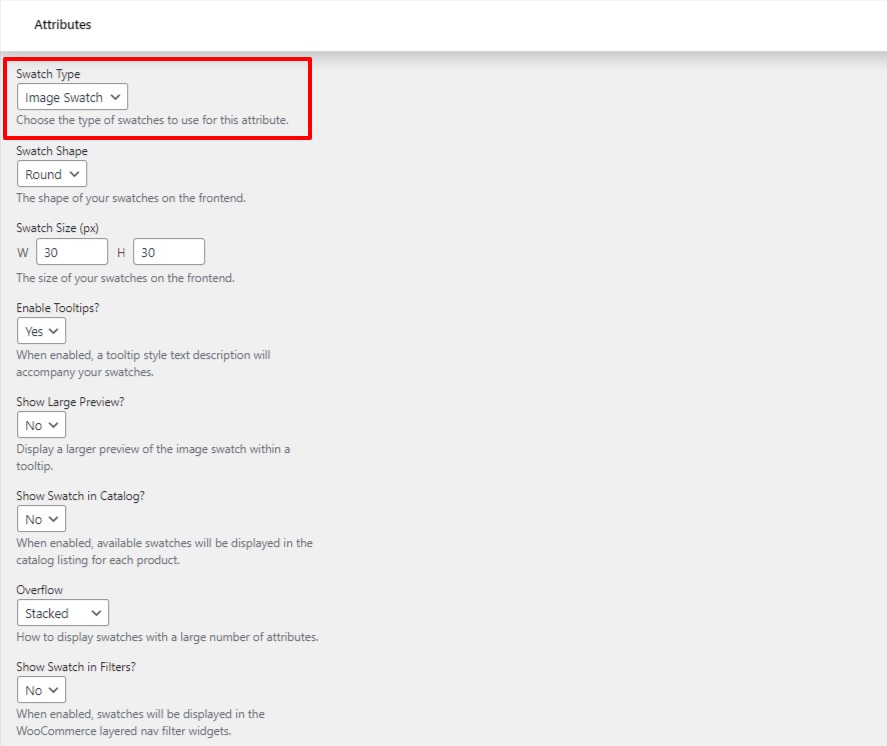
- Then, scroll down until you see Swatch Type. If you select Image Swatch or Color Swatch, you’ll see a few additional fields appear:
- Swatch Shape – Choose if you want your swatches to be round or square.
- Swatch Size (px) – Add a custom size for your swatches in pixles.
- Enable Tooltips? – Select Yes if you’d like the attribute name to be displayed on hover.
- Show Large Preview? – Select Yes if you’d like to show a larger swatch within a tooltip (only for image swatches).
- Show Swatch in Catalog? – Select Yes if you’d like available swatches to be displayed in the catalog listing for each product.
- If you select Yes, you’ll also be able to change if you want the swatch to link to the product page, or to change the product image.
- You’ll also be able to change how they display in the catalog (stacked, in a single line, or in a slider).
- Show Swatch in Filters? – Select Yes if you’d like these swatches to display in the filter sidebar of your WooCommerce store.
- Once you’re happy with your settings, click the blue Add Attribute or Update button at the bottom of the page.
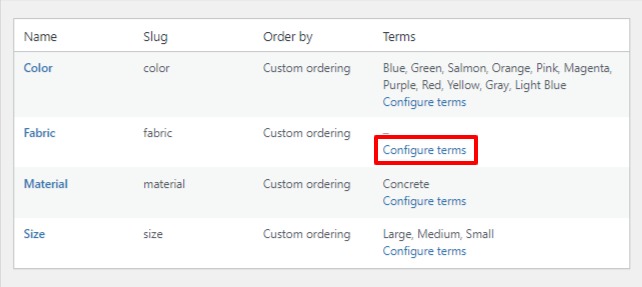
If you chose a visual swatch type for your attribute (color or image), you can now choose the color or image for your attribute terms.
- From the attribute table on the Attributes page you’re still on, click the blue Configure Terms link in the Terms column. If you already have attribute terms, skip to step 3.
- Enter your attribute term name into the Name field.
- Now you can either select your Colour Swatch using the color picker, or add/upload an Image Swatch using the + icon.
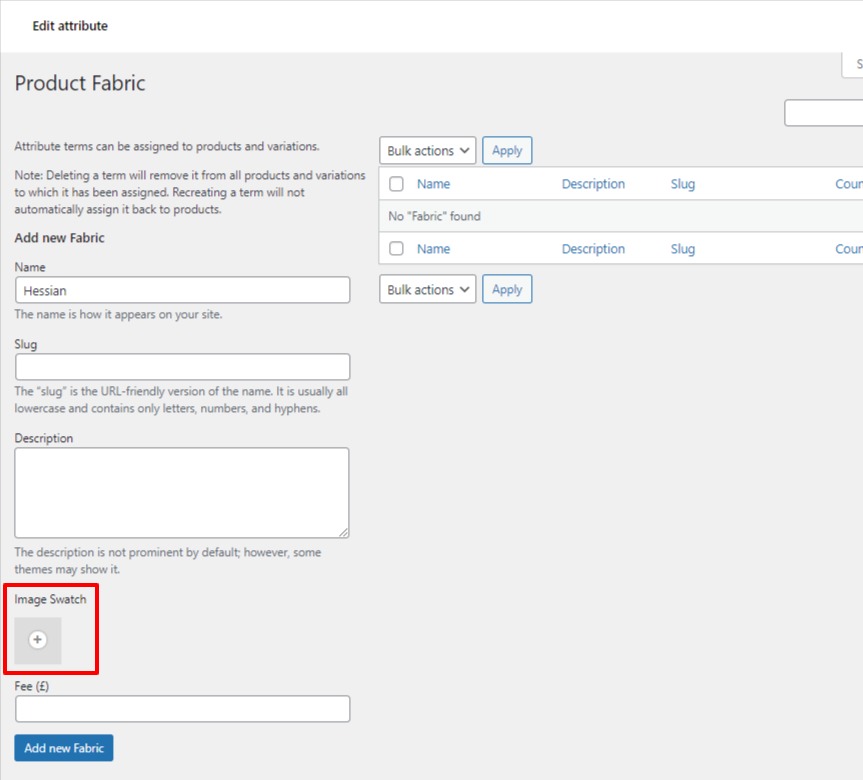
- Once you’re happy with your new swatches, click the blue Add New [attribute name] or Update button.
WooCommerce Attribute Swatches
Replace the default WooCommerce variation dropdown menu with variation swatches for WooCommerce. Add color swatches, image swatches, and modern text buttons to your variable product pages.
Was this helpful?
Please let us know if this article was useful. It is the best way to ensure our documentation is as helpful as possible.