
Wondering how to start an online clothing store in 2026? This guide is for you.
👋 We’ll walk you through the ultimate guide detailing what you’ll need to do to start an online clothing store. Plus, once you’ve set up your store, we’ll also show you how to boost sales and improve customer experience with the help of some user-friendly WooCommerce plugins.
Here’s what we’ll cover in this guide:
- How to plan and prep your online clothing store.
- Why start an online clothing store with WordPress and WooCommerce?
- How to start an online clothing store with WordPress and WooCommerce.
- Plugins and extensions to use with your WooCommerce clothing store.
Before we start creating your online clothing store, let’s first take a moment to look at how to plan and prep it.
How to plan and prep your online clothing store
So, you’ve decided to start your own online clothing store. Selling clothes and other apparel online is a very lucrative, fun, and creative business. Although brick-and-mortar stores are still the norm, more customers are shopping online.
📈 Studies show that 46% of all apparel sales in the US are made online – and this is expected to keep on rising.
This shows that the best time to start selling clothes online is now. Online boutiques have so much potential; you can capitalize on this to make as much revenue as possible.
But before you even start building your online clothing store, you’ll need to figure out a few things first. Let’s go over a few of them.

Put together a business plan
Setting up a successful online clothing store starts with putting together a solid business plan. We all know that business planning is the first thing you should do when starting a new business.
📈 Research reveals that 25% of small businesses without a business plan collapse within 2 years of startup.
To create a strong business plan, here’s what you should consider:
- Your business model -Start by deciding how your online clothing business will operate and generate revenue. You can choose to store inventory and sell directly to customers as an online retailer or venture into dropshipping.
- Your potential customers – Who is the target audience or customers for your product or service? After knowing who your target market is, determine what they like so that you can adjust your products and services to suit their preferences.
- Decide your clothing niche – Knowing your customers and their preferences will help you determine the clothing niche you’ll focus on. If your customers are primarily Millenials or Gen Z, you might want to look into the trending casual wear. You can also choose to operate a clothing brand or start your own clothing line of handmade items, just like Etsy. For this, you’ll also need to determine where you’ll be getting your products.
- Determine your distribution channels – How will your online boutique deliver products to customers? You’ll need to decide if you’ll have delivery, local pickup, or both options enabled in your ecommerce store. Depending on your resources, you can do this in-house or outsource to a delivery provider.
Create an effective marketing strategy
You’ll need to develop an effective marketing strategy to reach out to new customers and promote your ecommerce business to existing ones.
Since you’ll be selling online, you have to prioritize online marketing strategies like:
- Email marketing – An email marketing strategy that will allow you to deliver your promotions and newsletters directly to your customers’ email inboxes is a must. This way, you’ll boost sales and foster customer loyalty.
- Influencer marketing – If you’re selling clothes to Millenials or Gen Z, investing in influence marketing is a good idea. After all, 72% follow influencers on social media.
- Social media marketing – Create social media accounts where you’ll post updates on your business and engage with your customers.
Most importantly, you’ll want to make your ecommerce store easy to find by employing the best search engine optimization (SEO) practices. As a result, customers will be able to find your business easily through Google searches.
This is a very broad overview, but once your business plan has been fleshed out, it’s time to take a look at your online store.
Decide what you need your online store to have
Next, you’ll want to figure out the features your ecommerce site needs to have when you first set it up.
This includes:
- Search and filters – to help customers find what they’re looking for easily.
- A smooth and secure checkout – to allow customers to checkout easily and freely without any security concerns.
- Multiple payment gateways – such as PayPal, Amazon Pay, and credit cards, to give customers the option to select their preferred payment option.
- Return and exchange policies – define the conditions under which customers can return the clothes they’ve bought or exchange them for others in your store.
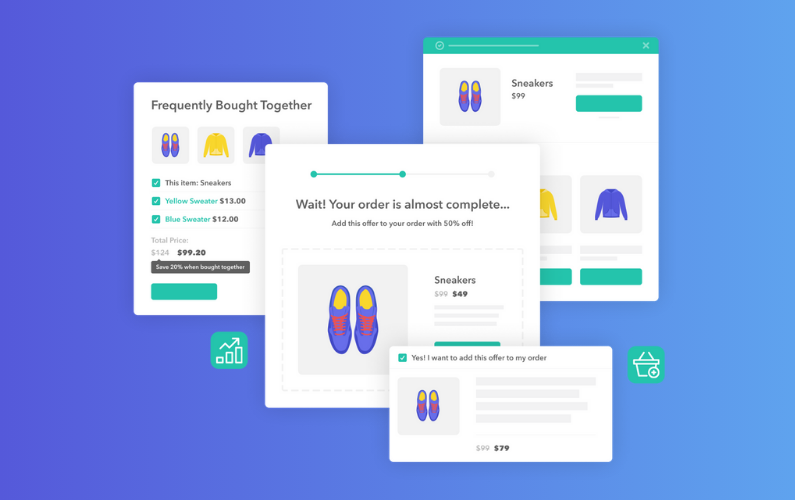
- Cross-selling and upselling – these features will allow your store to earn more revenue and increase its profit margin.
Now that you know what your ecommerce store needs to have, the next step is to choose the ecommerce platform on which you’ll build your online store.
The platform you go with should allow you to have all of the above features in your online store and more, which is why we highly recommend WordPress and WooCommerce.
Why start an online clothing store with WordPress and WooCommerce?
WordPress is hands down the most powerful website builder, and it comes as no surprise that it powers about 45% of all active websites.
📈 Similarly, Statista reports that WooCommerce has a 39% market share, making it the leading ecommerce software platform in 2023.
Judging by these numbers, WordPress and WooCommerce are extremely popular options for creating websites. Their popularity boils down to two main reasons. These are the reasons why we highly recommend them for creating your online boutique.
WordPress is easy to use
If you’re a beginner, you’ll love WordPress. It is user-friendly, and it will give you an easy time when setting up your online clothing boutique. You can access all of its features directly from its intuitive dashboard.
Also, it has a visual editor that allows you to create and edit your online store’s content in real-time – all without writing any code. On top of that, WordPress has several themes and templates that you can import and use on your online store. This way, you don’t have to start building it from scratch.
The best feature of WordPress is its extensibility. This means it has numerous plugins that you can install to extend its features beyond the default offering. One of these plugins is WooCommerce.
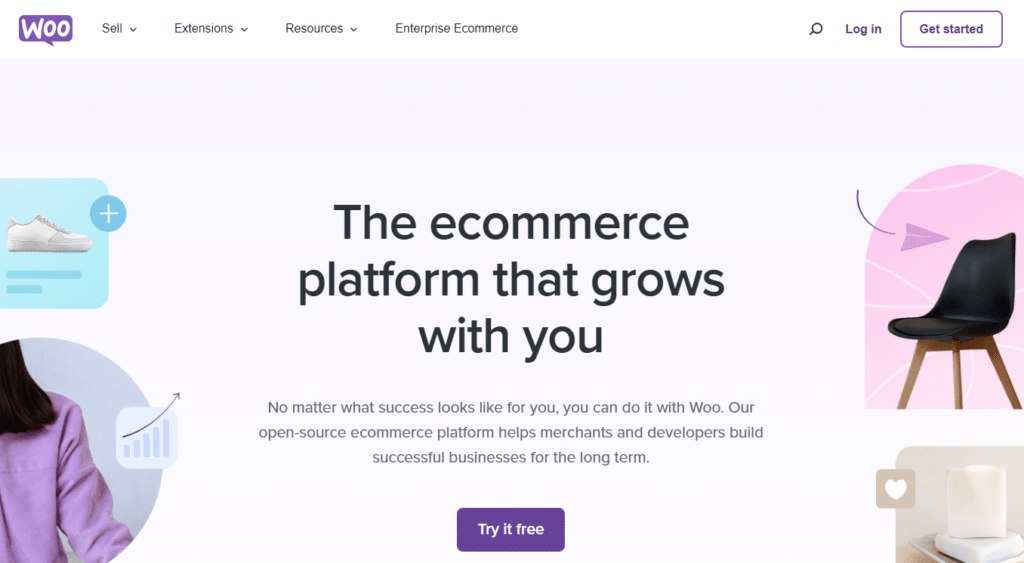
WooCommerce adds ecommerce features to WordPress, allowing you to create an ecommerce website on this platform. With WooCommerce, you can turn your WordPress site into a fully functional online clothing store. It gives your store the ability to add and manage products, process payments, and more.
WordPress is cost-effective
Once you get your domain name and hosting, you won’t have to pay monthly fees to use WordPress and WooCommerce, unlike other ecommerce platforms like Shopify. To top it off, it has many free and budget-friendly themes and plugins you can use to add the features you want in your online shop.
By now, you’ve completed the prepping stage. It’s time to get busy and dive into the process of creating your online clothing store. We’ll walk you through how to start an online clothing store step-by-step in the next section.

How to start an online clothing store with WordPress and WooCommerce
So, we’ve picked WordPress and WooCommerce as the platform we’ll use to create your online clothing store. Assuming you’ve already registered for a domain name and got managed WordPress hosting, here are the steps you’ll take to create your online boutique.
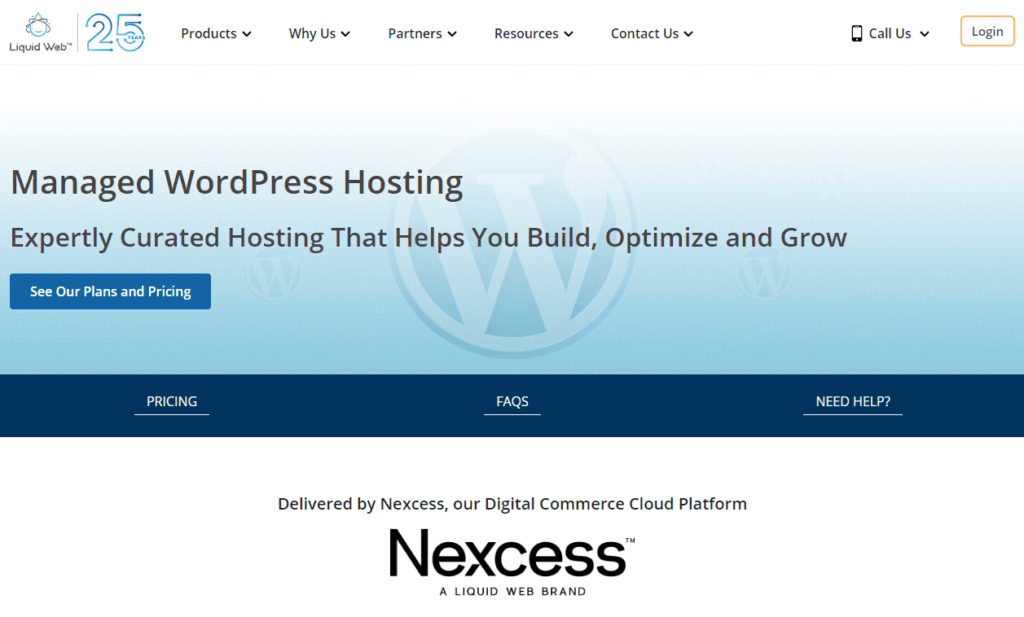
Note: Managed WordPress hosting is a specialized type of hosting designed specifically for WordPress sites. It adds several convenient features that make it easier to manage, secure, and speed up your WordPress website. There are numerous managed WordPress hosting providers, but we recommend Nexcess. It has cost-effective managed hosting plans, and it makes it easy to install your WordPress site.
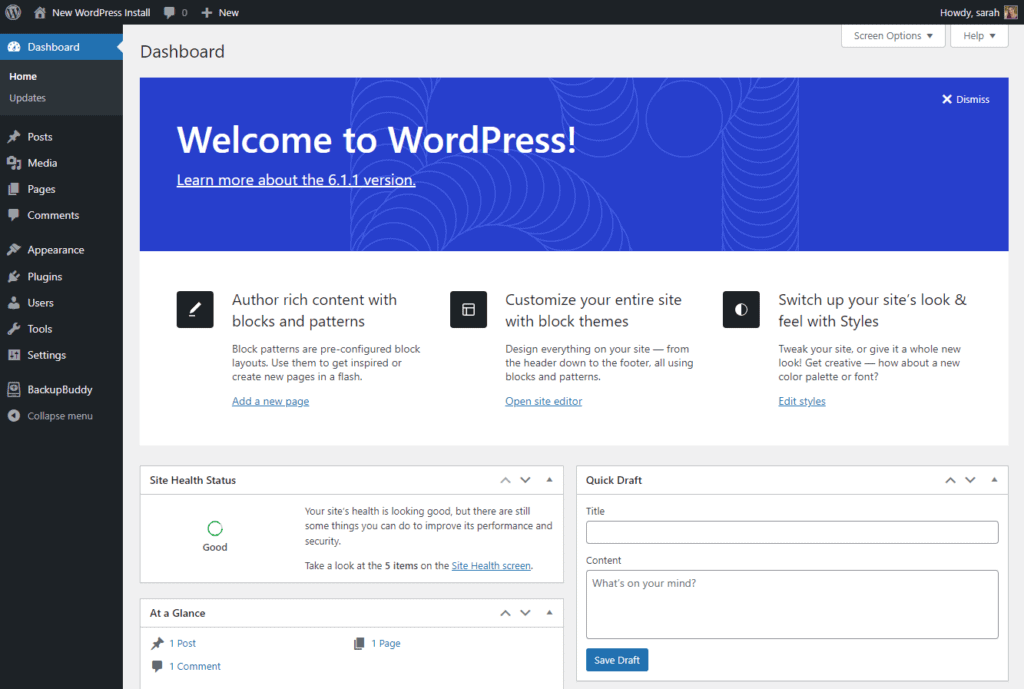
Step 1: Installing WordPress
After purchasing a managed WordPress hosting plan, Nexcess will automatically install WordPress for you. All you’ll have to do is retrieve the login details and log into your WordPress site.
To get your login details, you’ll have to log into your Nexcess client portal first, then follow these steps:
- From your Nexcess client portal, go to Plans > Menu > Environment.
- Next, click on the Application tab, here you’ll see the admin username and password for your WordPress site.
- To access the WordPress login page, type this on your browser myclothingstore.com/wp-admin – where myclothingstore.com represents your domain name.
- Enter the login details you retrieved from Nexcess to log into your WordPress site.
After logging into your WordPress site, you can now install WooCommerce.
Step 2: Installing WooCommerce
WooCommerce is a WordPress plugin, which means you can find and install it from the plugins section of your WordPress dashboard.
To install WooCommerce:
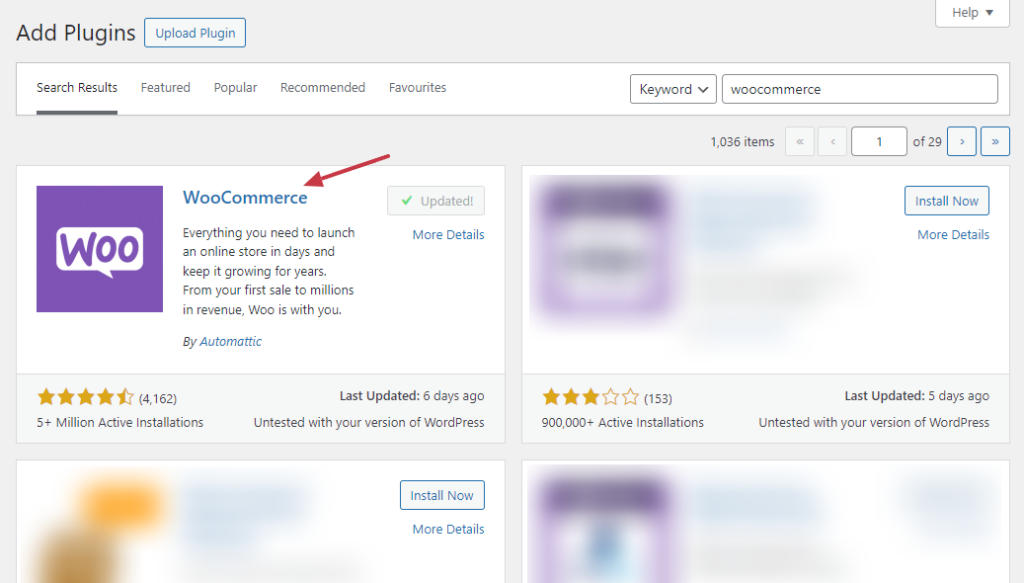
- Go to Plugins > Add New on your WordPress dashboard.
- Search for ‘WooCommerce’ and click Install Now once it appears.
- Click on Activate once the installation is done. Upon activation, WordPress will automatically launch the WooCommerce setup wizard.
- Here, you’ll be able to make basic store settings like:
- Store details – including the address, city, and postal code.
- Industry – Here, check the box that says ‘Fashion, apparel, and accessories’ since we’ll be creating a clothing store.
- Product types – Here, select the ‘Physical products’ option.
- Business details – Provide business details like the business name or brand name and provide information on the number of products you plan to sell.
The final step in the WooCommerce setup wizard is to select the theme. Skip this, as we’ll be doing it next.
Adding a theme to your website
A WordPress theme offers the fastest way to design a good-looking website for your clothing company. It gives your site a general appearance with pre-designed layouts, fonts, buttons, and other elements. This way, you won’t create your web pages from scratch. You can simply install a theme and edit it to suit your brand.
For your online clothing store, we recommend the following themes:
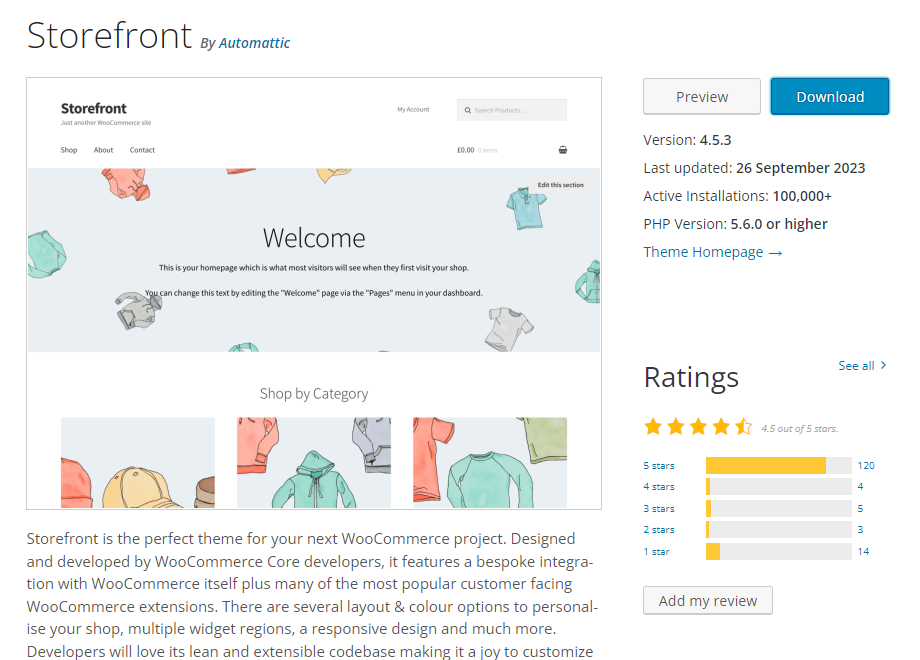
- WooCommerce Storefront – This is a simple theme that is perfect for beginners. It has a minimalist design that works well for any ecommerce store, including an online boutique. Storefront has been designed and developed by WooCommerce core developers, which means it integrates seamlessly with WooCommerce.
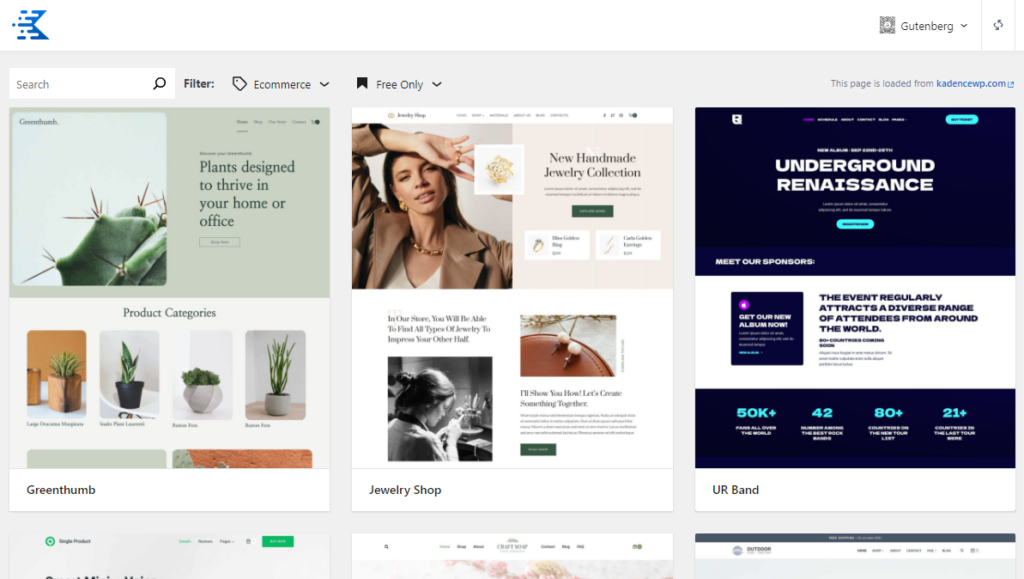
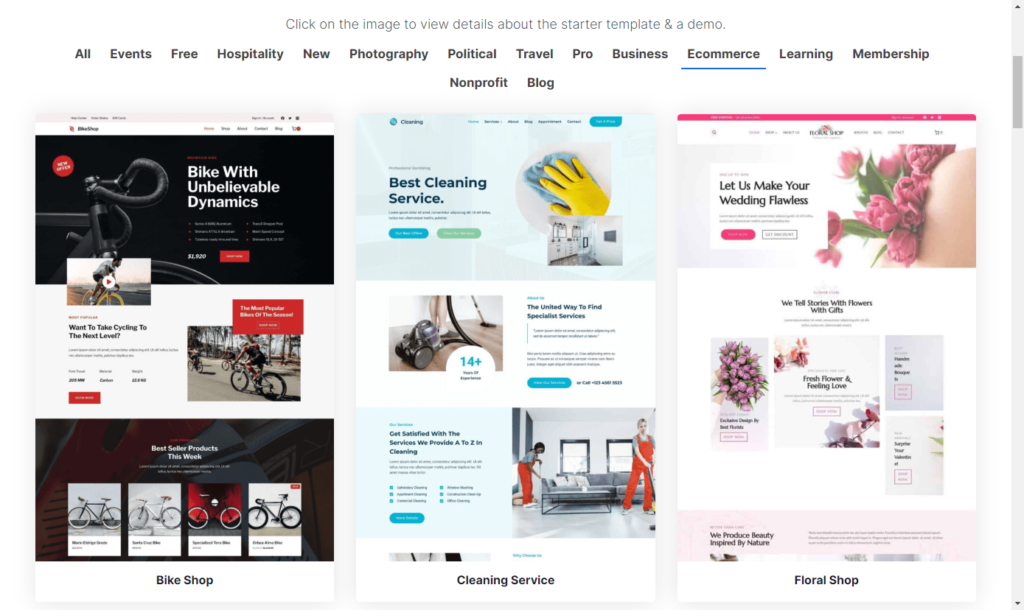
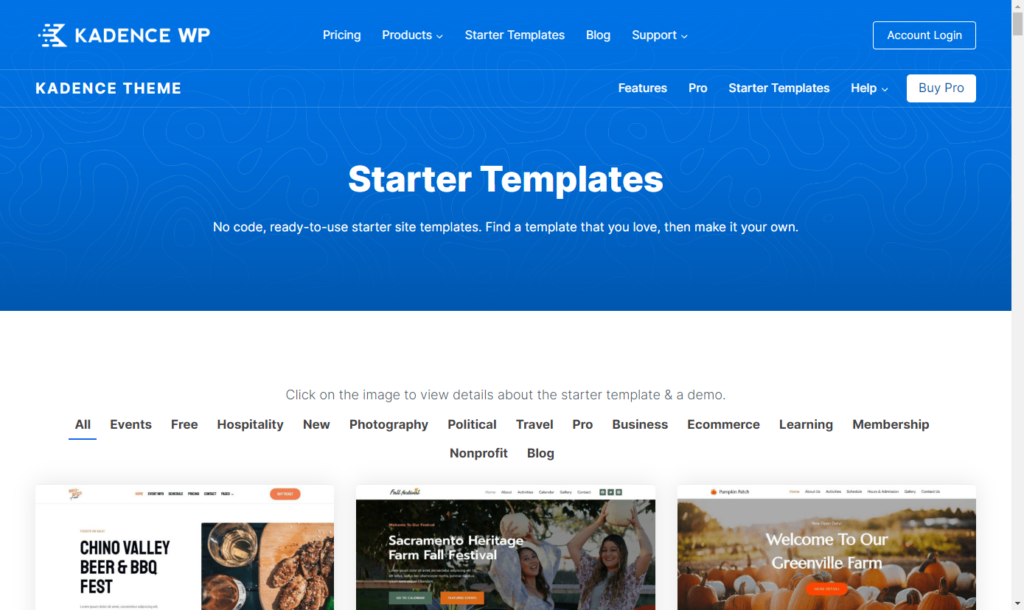
- Kadence Starter Templates – KadanceWP has several ready-to-use starter templates for different ecommerce niches, including an online clothing store. Depending on the type of apparel you’ll be selling, you can choose from either of these templates:
- Jewelry Shop – for selling Jewelry.
- Outdoor Shop – for selling hiking gear.
- Leather Shop – for selling leather products or formal clothes.
- Print Shop – this works well for casual wear, like print-on-demand t-shirts.
How to Install Kadence Starter Templates
Now, let’s install Kadance Starter Templates and see how we can add a theme to your WordPress site.
- Install the Starter Templates by Kadence WP plugin from the Plugins sections of your WordPress dashboard, just like we did for the WooCommerce plugin.
- To access the templates, hover over Appearance and click on Starter Templates.
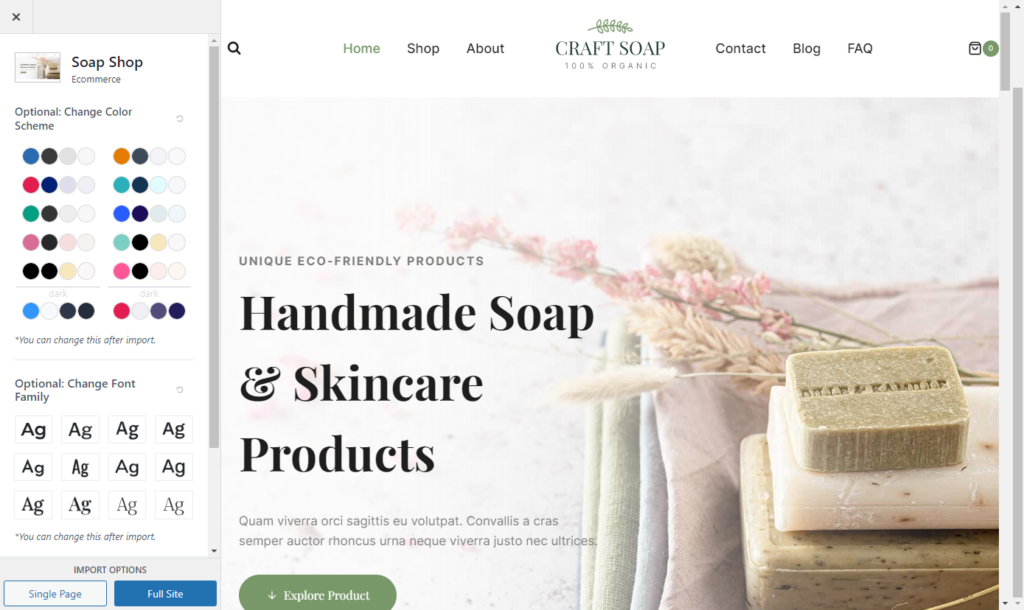
- Select your preferred template on the next page, for this guide, we’ll choose ‘Print Shop’.
- You can edit this theme by changing the color scheme, fonts, etc., using the settings on the left.
- Once done, click on the Full Site button on the bottom left to import this design.
After it is done importing, click on View Site to see what your website looks like.
Configure initial WooCommerce settings
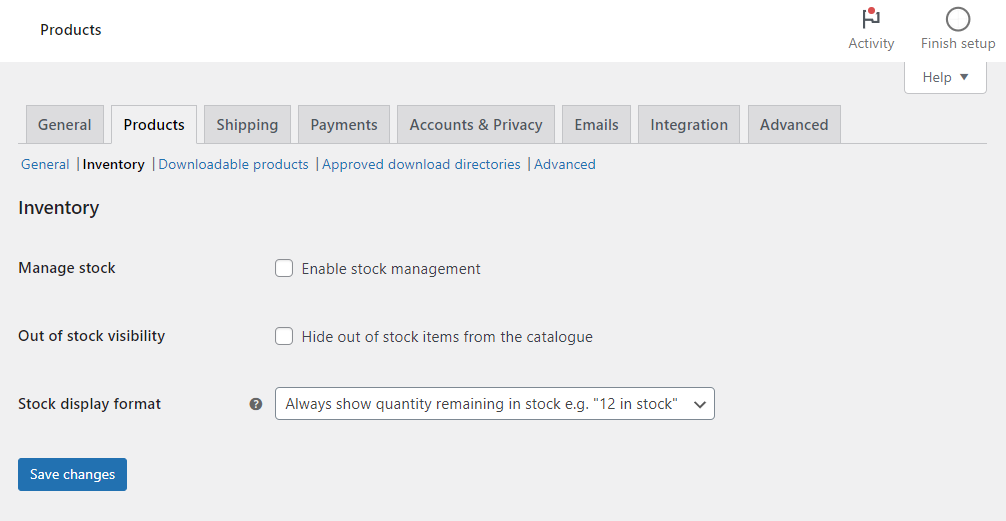
To complete the primary setup, go to WooCommerce > Settings and customize these settings:
- General settings – Configure general options like setting the default currency and its appearance, unit measurements, etc.
- Product settings – Enable or disable product reviews and ratings.
- Shipping – Specify areas you would like to ship to and the shipping methods.
- Payments – Set up and enable your payment methods.
- Emails – if you use email marketing to reach out to customers, click on this tab to set this up.
After completing these settings, remember to click on the Save Changes button at the bottom.
Step 3: Add your products
With the basic settings in place, you’re now ready to add products to your WooCommerce shop. These will be the clothing items that you sell to your customers through your online shop.
To create a new product, follow these simple steps:
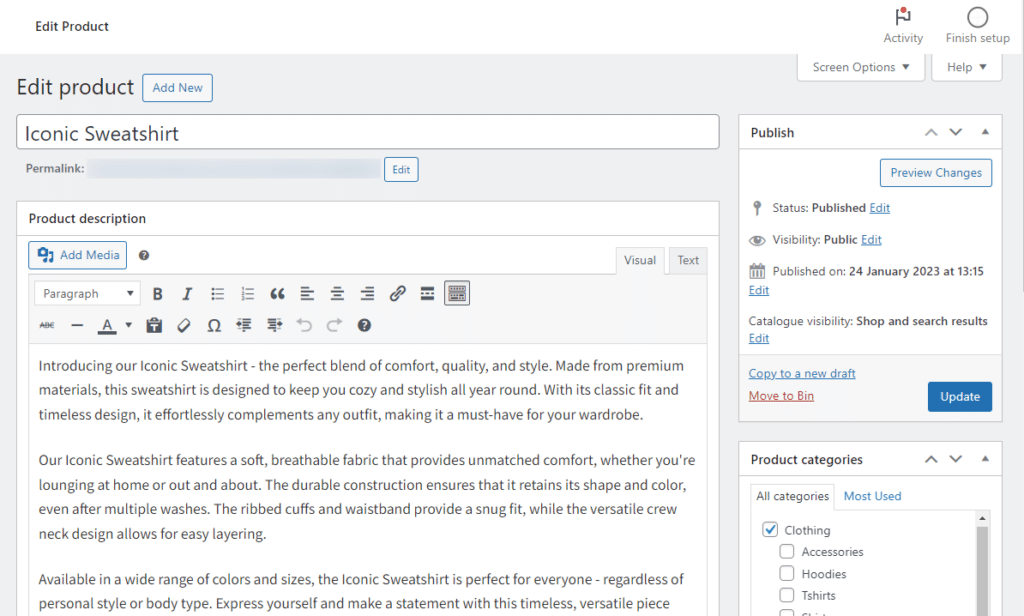
- Go to Products > Add New on your WordPress dashboard.
- Start by naming your product. Here, you’ll want to be a little more descriptive. For instance, if the product is a T-shirt, you might want to describe it a little, something like a ‘Black V-Neck Cotton T-shirt’.
- Next, add a description for your T-shirt in the product description section. Include information like the material and fabric, color options (if any), design details (embellishments or graphics), and a highlight of its best qualities, for example, comfort and feel.
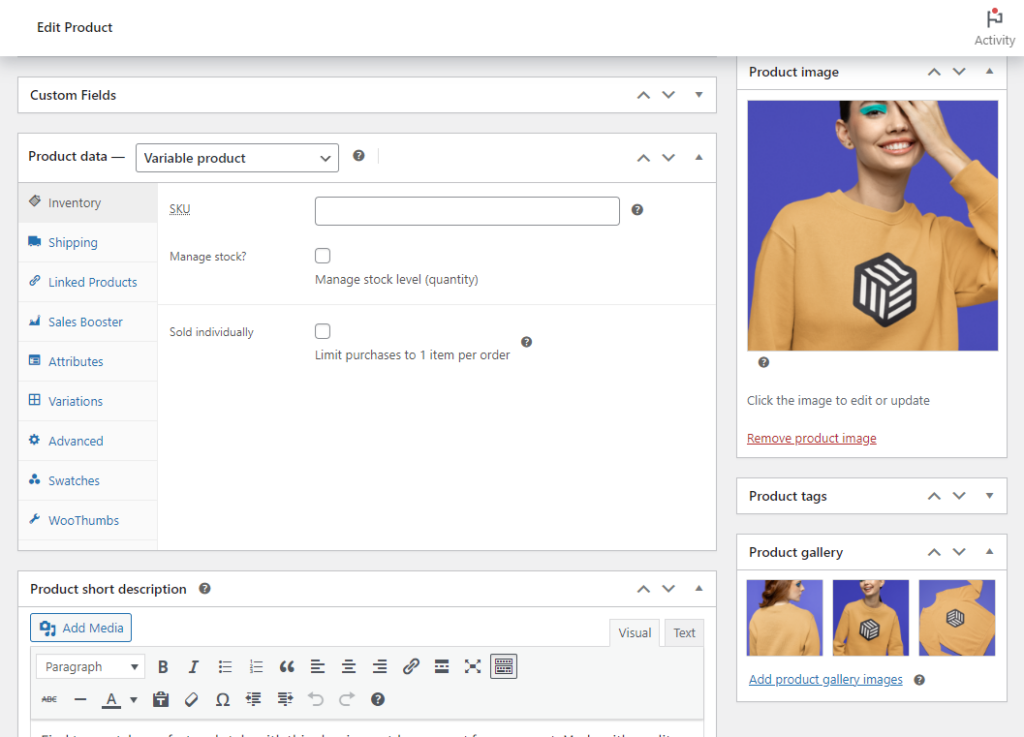
Select your product type
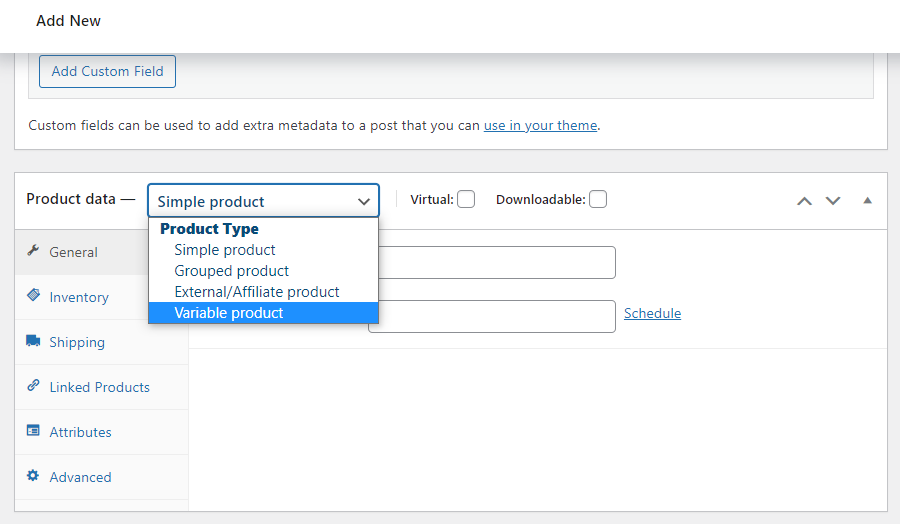
- Scroll down to the Product Data section. The details you’ll add here will depend on the type of product you want to create. You can create a:
- Simple product – Select this if you only have that one T-shirt and you want to sell it individually. Add the price of your T-shirt.
- Variable product – If this T-shirt has multiple color or size variations, you can create these variations by clicking the variations tab and adding them one after the other.
- Grouped product – Select this option if you want this T-shirt to be part of a set, let’s say when you’re creating a look with matching pants, shoes, and a jacket. Use the Linked Products tab to group these products.
- Find the Product Gallery section on the right side menu. Click on this link and upload your product images. Ensure the product images are high-quality to help sell your product.
- Just below the Product Gallery, you’ll see the categories and tags section. You can assign a category (for example, men’s or women’s outfits) and add tags to this product to make it easy to find.
- When you’re done, click on Preview to confirm if everything is okay on the product page, then Publish.
That’s it. You’ve created the first product. By following the same steps, you’ll be able to create other products on your online store.
Is the default WooCommerce setup enough to meet your clothing store’s specific needs?
We’ve learned how to start an online clothing store, but is the default WooCommerce setup enough to meet your clothing store’s specific needs?
Well, the short answer is no. But, the good news is that WooCommerce is extensible, just like WordPress itself. There are tons of WooCommerce plugins (extensions) that you can use to extend the default WooCommerce features. You can use these to improve every aspect of your WooCommerce shop.
Let’s take a look at some of the best ones and how you can leverage them to improve your online clothing store.
Plugins and extensions to use with your WooCommerce clothing store
After setting up your store, here are some plugins you can use to enhance it. These plugins will help you create a more appealing and user-friendly experience in your store. The result? More conversions and a higher profit margin.
Upgrade the default WooCommerce checkout page
As the business owner, the checkout is the most important part of your online boutique. Why? The checkout is where you make a sale and get rewarded for all the work you’ve done to get customers into your online clothing store.
📈 The ecommerce checkout is quite delicate. According to research, 65% of checkout sessions end without a sale. In other words, out of every 10 potential customers, more than 6 of them will leave the checkout without making a purchase.
While this can result from customers’ indecisiveness, some of it boils down to a poor checkout experience. So, to ensure that the potential customers you’re attracting are turning into paying customers, you’ll need to optimize your checkout.
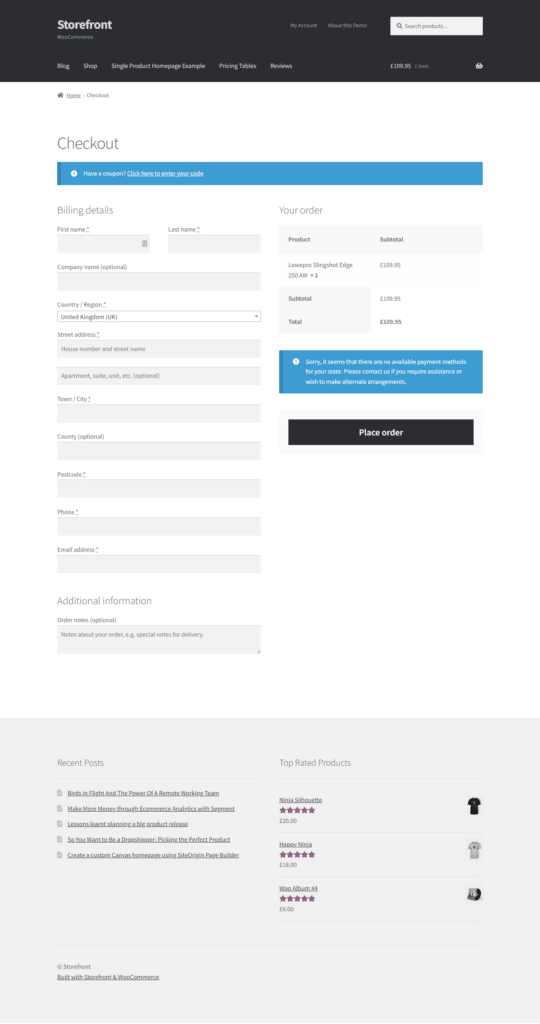
Does the default WooCommerce checkout need work?
There’s a lot to appreciate about the default WooCommerce checkout, but it is not enough to get your online boutique sufficient sales.
First, it looks more complicated than it should be, as it lumps all of the checkout steps on one page.
📈 Research from the Baymard Institute shows that a complicated checkout accounts for 18% of online shoppers who abandon their carts.
Customers have to do too much unnecessary work to complete a purchase since it has too many fields. All of the above will likely increase checkout abandonment, which is the last thing you’ll want.
Fortunately, you can upgrade your checkout and avoid losing your customers just before they’re about to buy with Flux Checkout for WooCommerce.
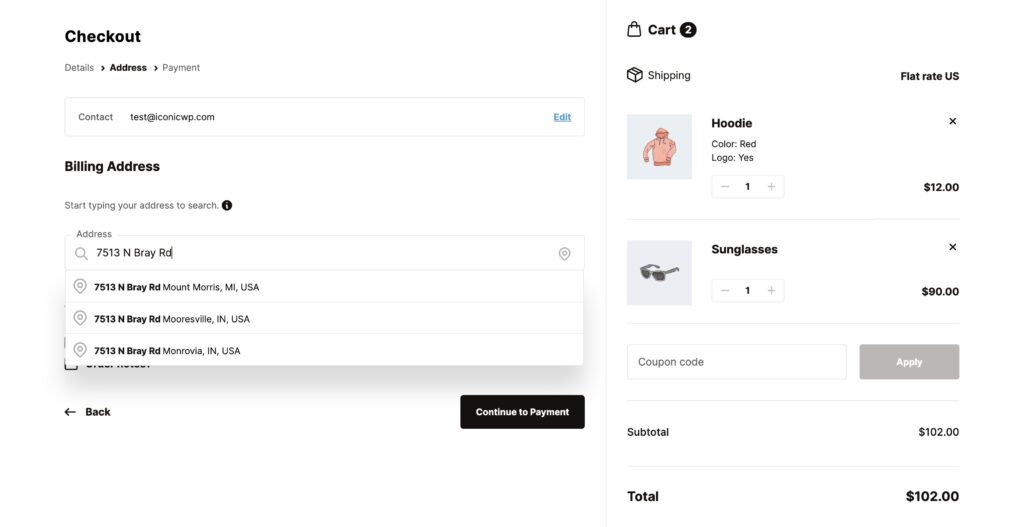
Get more potential buyers over the line with Flux Checkout
Flux Checkout is a WooCommerce plugin that upgrades each aspect of the default WooCommerce checkout to give you a simple, fast, distraction-free checkout. This checkout flow creates a seamless experience for shoppers, allowing you to get more conversions. Here’s how it does it.
Flux Checkout for WooCommerce
Flux Checkout transforms the default WooCommerce checkout into one that’s lightning-fast, distraction-free, and reduces checkout abandonment.
It improves the overall checkout design
Flux has well-designed checkout templates you can use to give your checkout a sleek and modern design. Every element and layout has been carefully designed to be visually appealing and user-friendly. The designs are mobile-optimized to ensure your customers have a seamless experience regardless of the device they use.
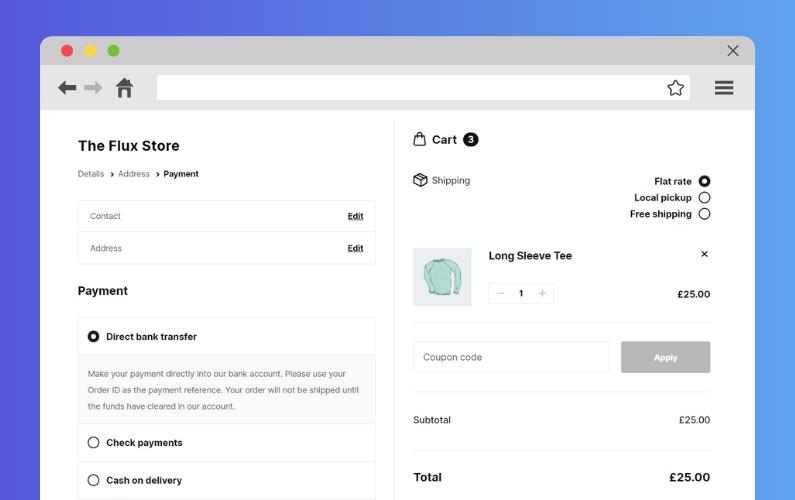
It simplifies the checkout flow
Flux breaks down the default one-page WooCommerce checkout into a multistep checkout. It presents the checkout steps in a series of simple steps, making it easier to complete. In addition, its address autocomplete feature makes it easy for customers to fill in their shipping and billing details.
It eliminates distractions
Unnecessary fields like separate street numbers, headers, footers, and sidebars will be hidden to allow customers to focus on completing the checkout.

It allows you to create a custom order confirmation page
With Flux, you can create a custom order confirmation page and add any custom content to this page. This includes coupons on a customer’s next order, links to your community forums, and other content that encourages customers to keep engaging with your business.
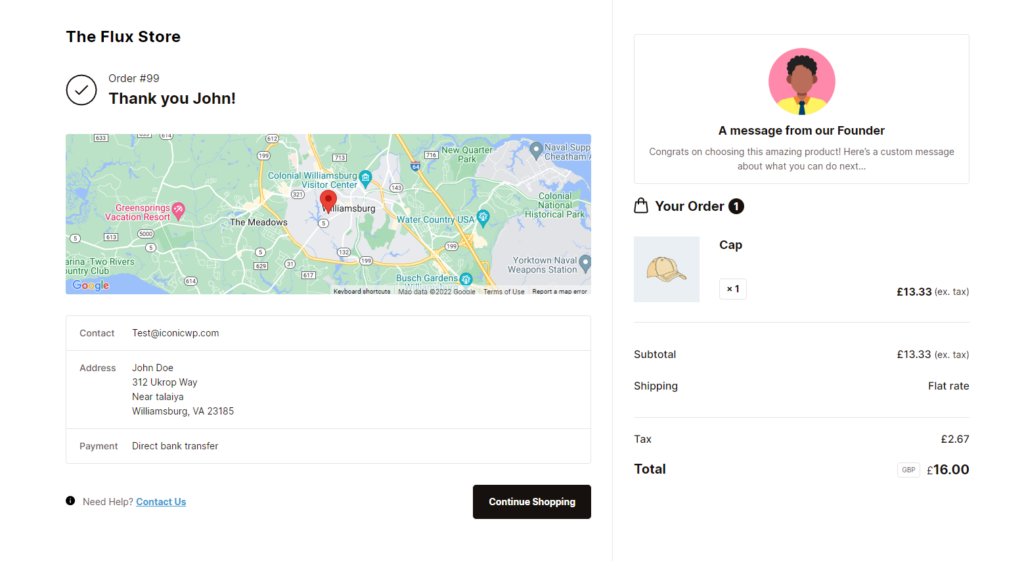
To avoid checkout surprises, Flux allows you to show shipping costs upfront in the order summary. By simply installing Flux and making a few settings, you’ll be able to boost conversions in your online boutique.
Flux Checkout for WooCommerce
Flux Checkout transforms the default WooCommerce checkout into one that’s lightning-fast, distraction-free, and reduces checkout abandonment.
Improve the WooCommerce product gallery
📈 Did you know that 75% of online shoppers rely on product images to make a purchasing decision? This comes as no surprise as they don’t get the opportunity to touch or feel the items before they buy them.
This means that when you improve your product gallery, you make it easier for customers to make a purchasing decision. A better product gallery showcases your products well, which is bound to increase your conversions.
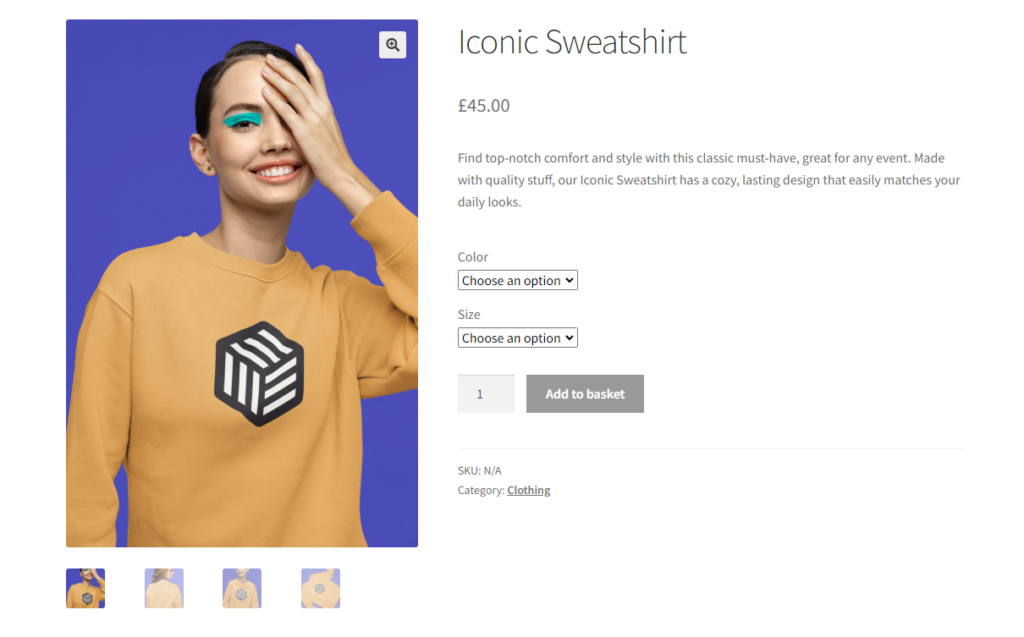
The limitations of the default WooCommerce product gallery
The default WooCommerce product gallery works pretty well to showcase your products to customers. However, it is extremely limited. There’s not a lot beyond basic features like image zoom and multiple products per image.
It has a limited set of customization options, leaving you stuck with the default design. Also, it has limited video support, and this makes it difficult to add product videos.
Fortunately, you can upgrade the default WooCommerce product gallery with the help of the WooThumbs for WooCommerce plugin.
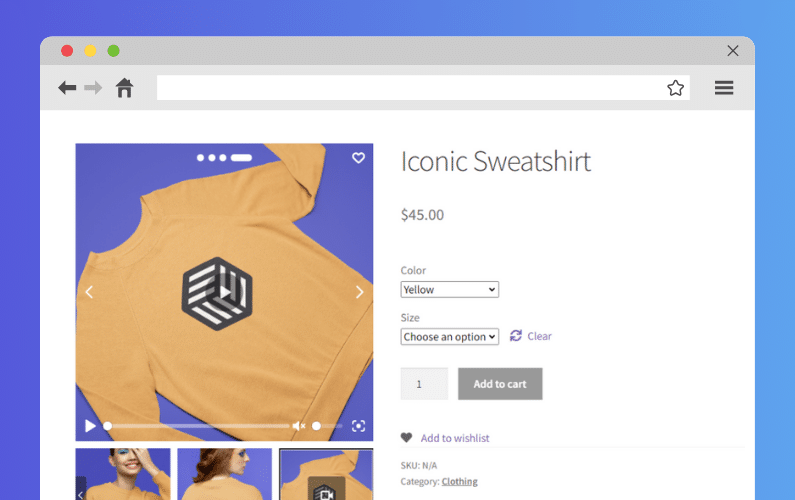
Create a high-converting WooCommerce product gallery with WooThumbs
If you’re looking to improve your WooCommerce product gallery to get more conversions, WooThumbs is just the plugin to help you do it. It gives you complete freedom over how your product gallery looks.
As a result, you can customize everything including:
- Placing the image thumbnails on different sections of the product page.
- Adding different image transitions.
- Optimizing image sizes so that your site remains fast.
- And so on.
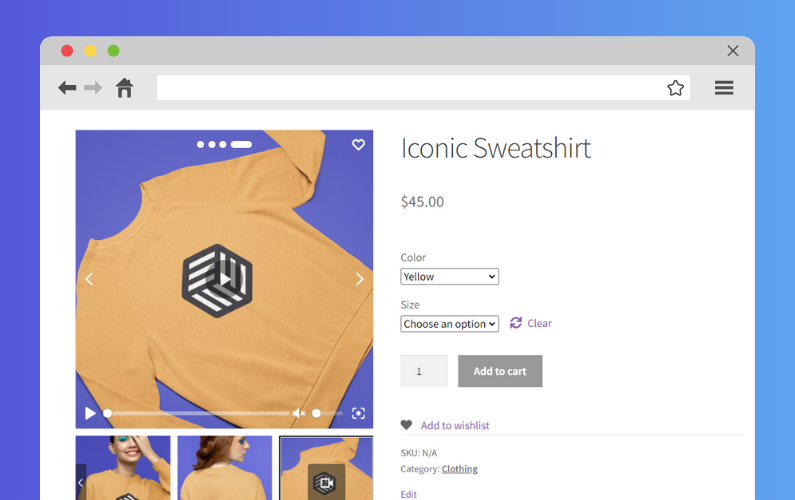
WooThumbs for WooCommerce
Customize your WooCommerce product image gallery in minutes with a new layout, embedded video, multiple images per variation, and more.
Customization options aside, you can also:
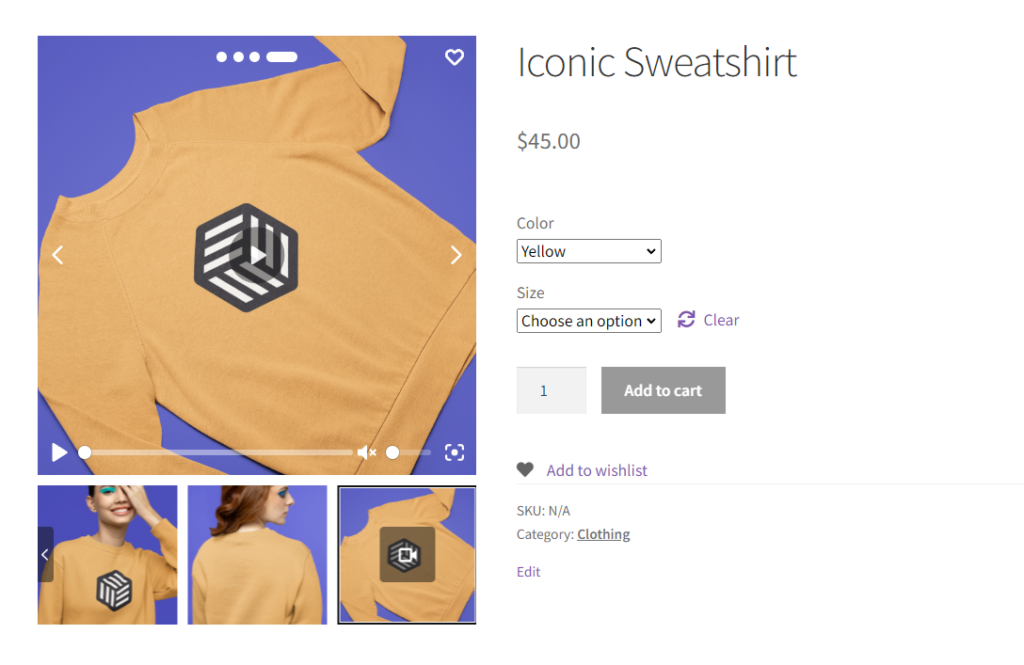
Add a product video
📈 Did you know that product video can boost your store’s conversion rates by 37%?
With WooThumbs, you can add videos of your clothing items to your product pages and watch your conversions rise. You can pull your product video from anywhere you like. This includes sources like YouTube and Vimeo.
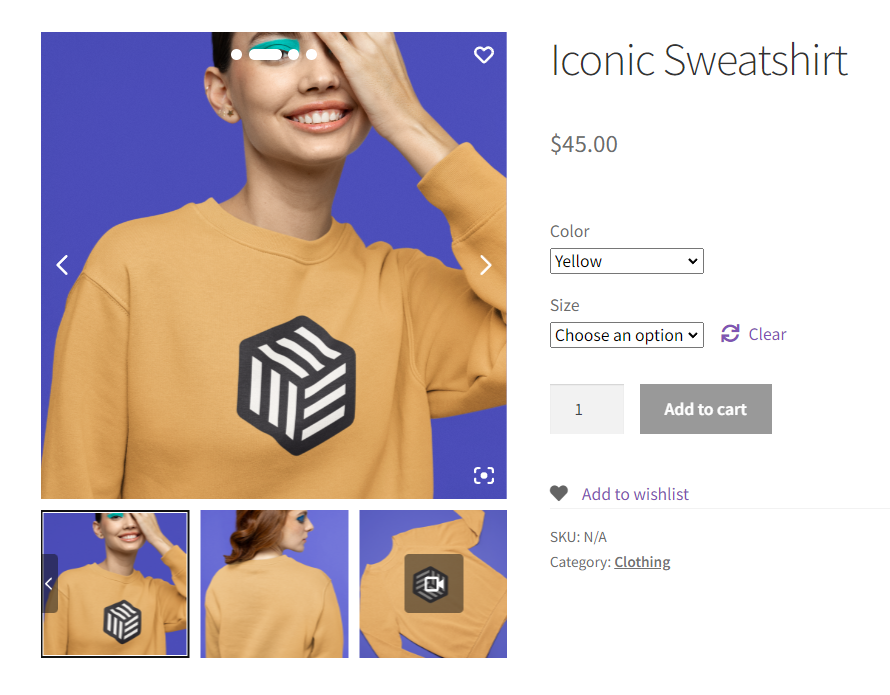
Add multiple images per product variations
For your variable products, WooThumbs allows you to add several images for each variation. Let’s say, you have a Sweatshirt in multiple colors, you can have multiple images for each color variation.
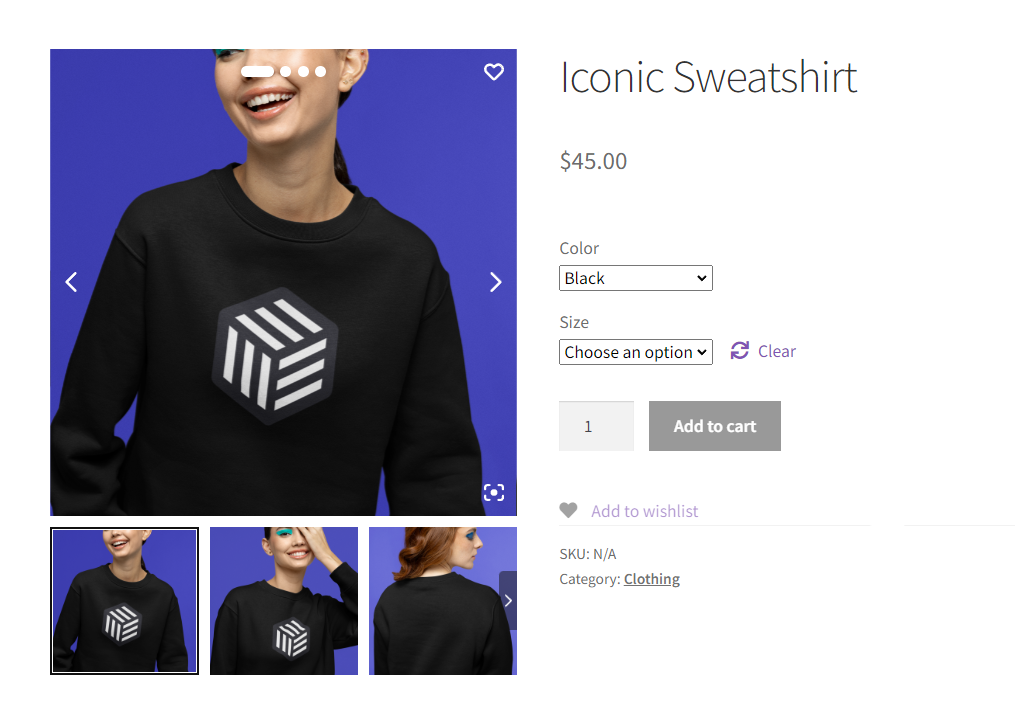
With WooThumbs, you can create a product gallery that gets customers excited about your product and improves conversions.
WooThumbs for WooCommerce
Customize your WooCommerce product image gallery in minutes with a new layout, embedded video, multiple images per variation, and more.
Improve product variations
Before making a purchase, customers will browse your online clothing shop to find what they’re looking for and discover new products they may need.
When doing this, most of them expect to discover what they’re looking for as quickly as possible.
📈 This is backed by research as 61% of site visitors will abandon a website if they can’t find what they are looking for within 5 seconds.
When you have several product variations in your online store, it can be difficult for shoppers to browse through and discover what they like – especially with the default WooCommerce setup.
The challenge with complex product variations in the default WooCommerce
By default, WooCommerce displays all product variations on a single product page. The only way to browse these products is by using dropdowns.
As a result, customers won’t have a pleasant experience browsing variable product options. This might cause some of them to abandon their carts.
To ensure this doesn’t happen, you can use WooCommerce Show Single Variations and WooCommerce Attribute Swatches to improve how WooCommerce presents product variations.
Improve variable product browsing and discovery with Show Single Variations and Attribute Swatches
You can help customers to find what they are looking for easily and have a pleasant experience while they’re at it by:
- Showing variable product options as single products.
- Adding attribute swatches.
Show product variations as single products
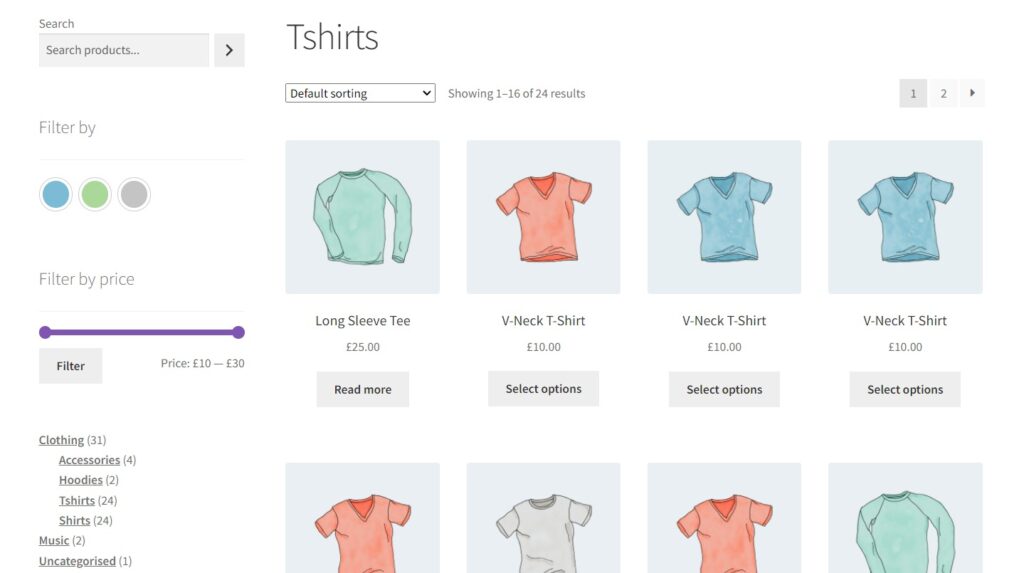
The WooCommerce Show Single Variations plugin enables you to display product variations as individual products on the following pages:
- Shop.
- Category.
- Search results and filtered results.
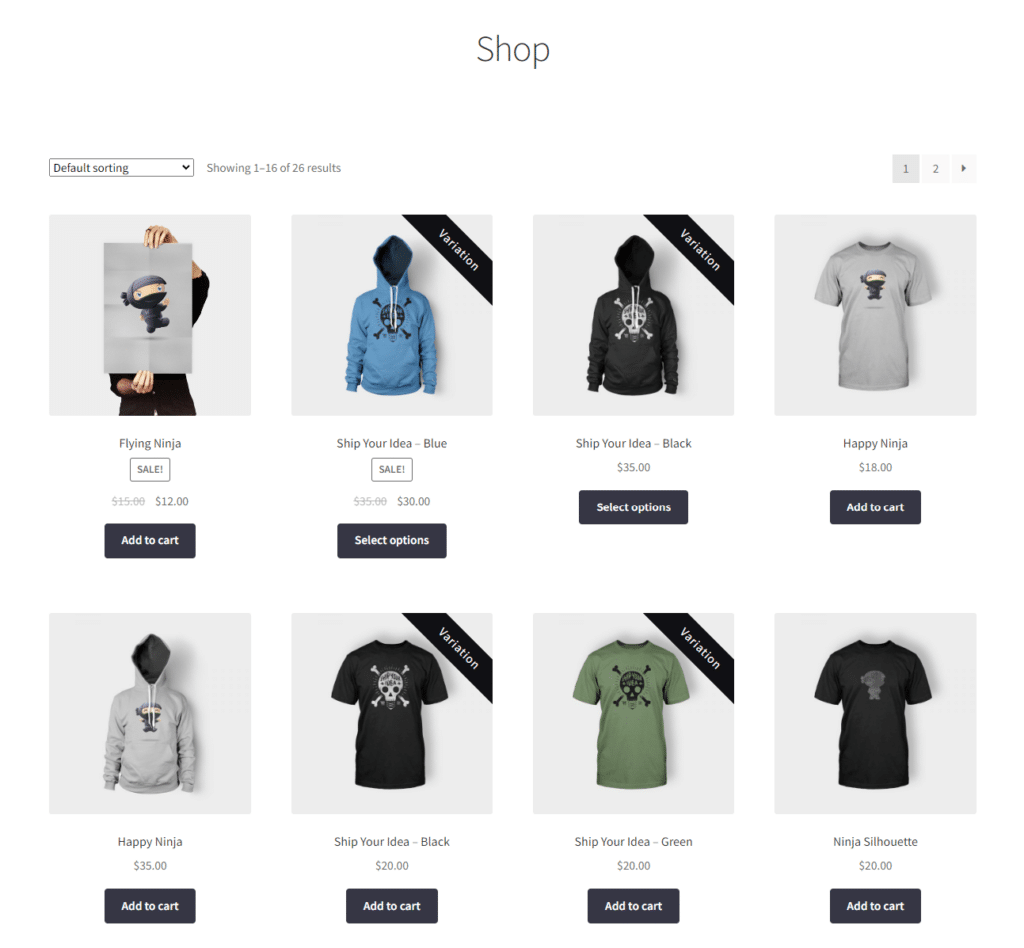
Customers can search for specific product variations, and they will accurately show up in the search and filter results. Then, they can add specific variations on the category pages directly to their carts without visiting the single product page.
You’ll have complete control over the variations that will be displayed on the pages mentioned above. With WooCommerce Show Single Variations, you’ll give your customers a straightforward shopping experience, helping them find what they’re looking for easily.
WooCommerce Show Single Variations
Show WooCommerce variations as single products on the shop page, category pages, search results, and filtered results with WooCommerce Show Single Variations.
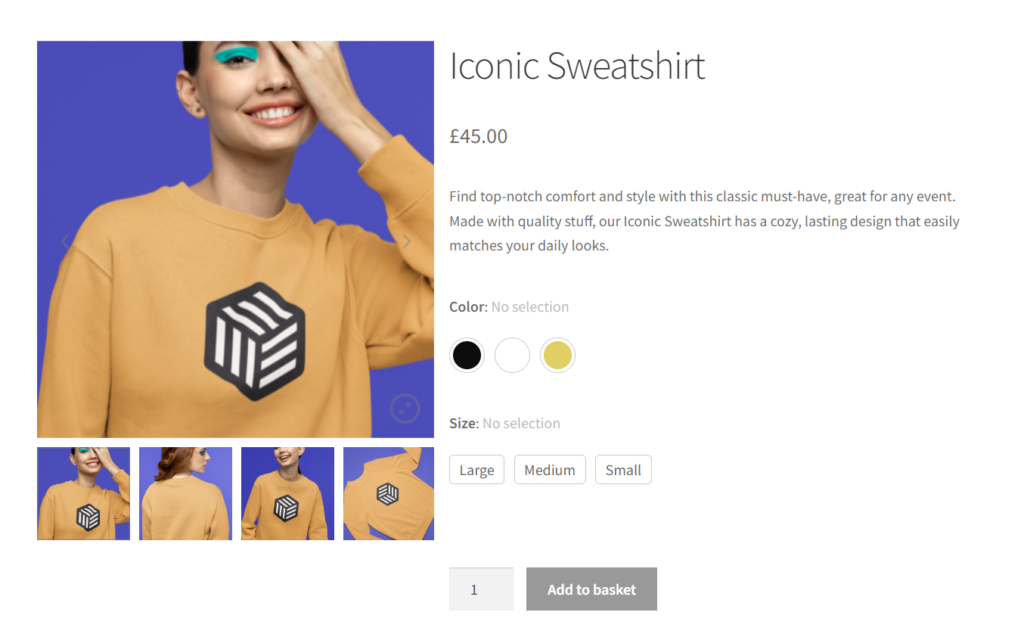
Replace attribute dropdowns with color, image, and text swatches
As mentioned earlier, customers can only use dropdowns to browse product variations in the default WooCommerce. This makes for a poor experience, especially when you have numerous variations.
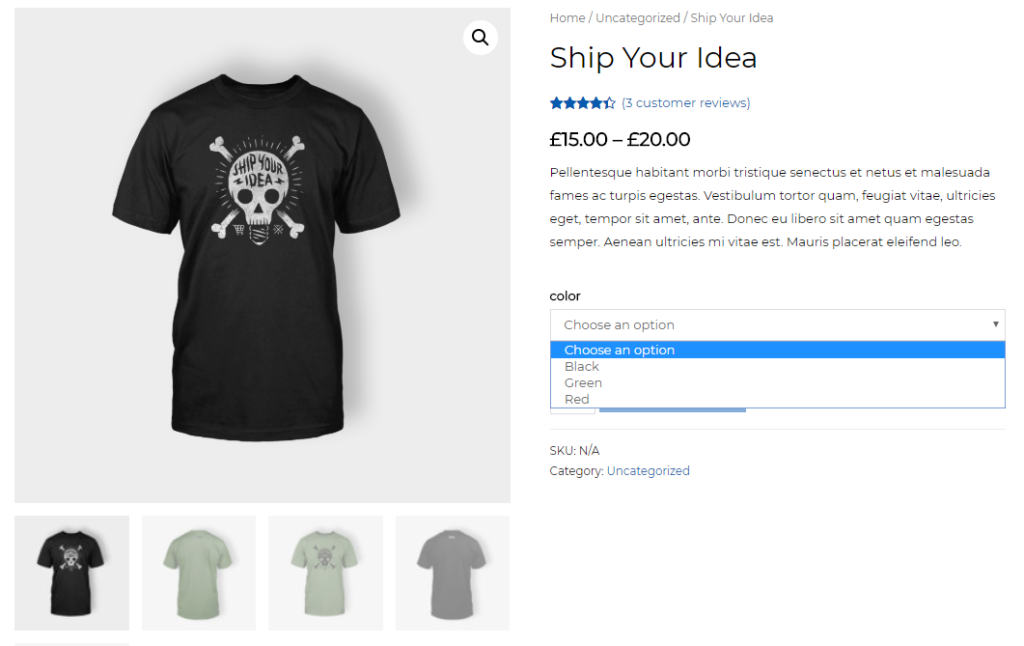
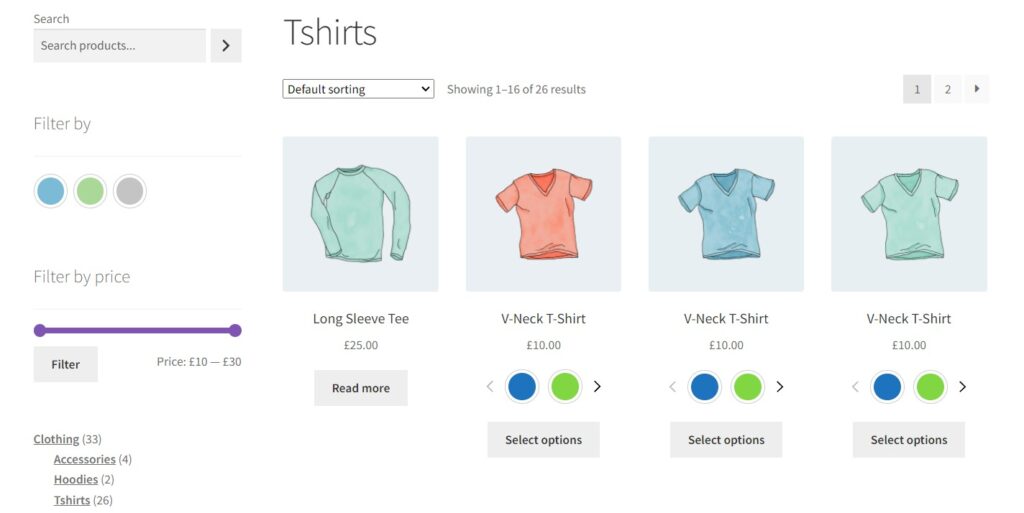
With WooCommerce Attribute Swatches, you can replace these dropdowns with color, image, and text swatches. These swatches make your product variations user-friendly, allowing customers to explore them in a visually appealing way.
Attribute swatches are not limited to the product page with this plugin. You can also add them to the shop page and product filters to help customers find what they’re looking for easily.
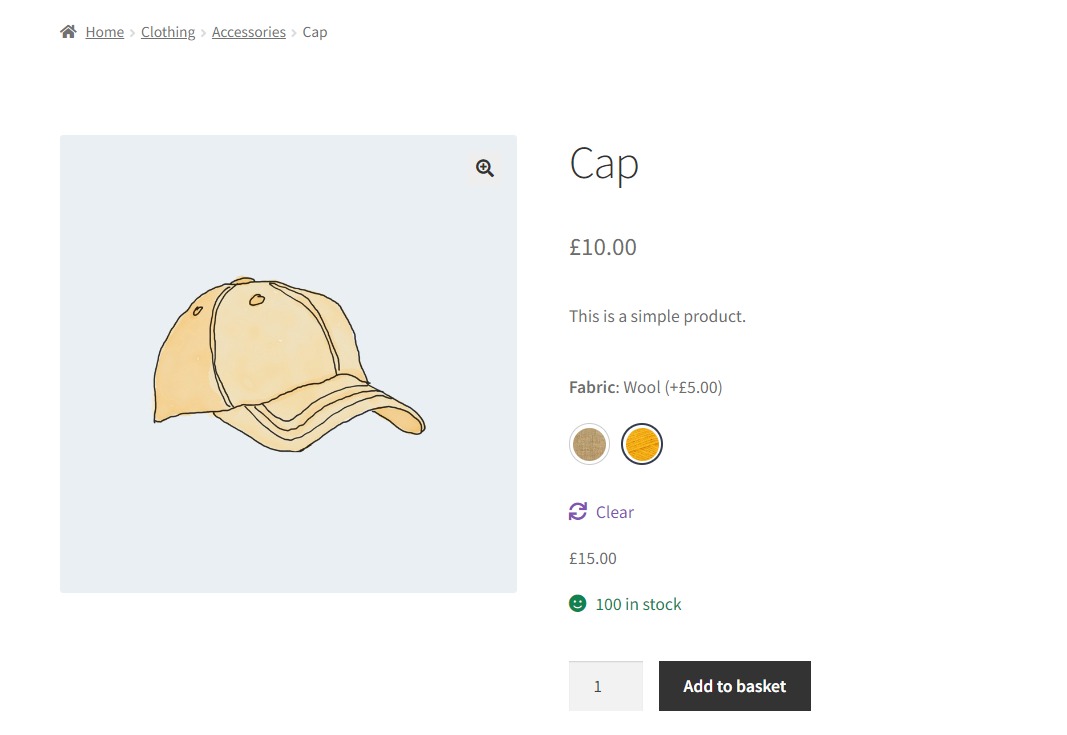
WooCommerce Attribute Swatches also allows you to add fees to your product attributes. Let’s say you have a sweater as a variable product with a material attribute. You can add $20 when the material is cashmere compared to when it is cotton.
WooCommerce Attribute Swatches make product product browsing and discovery enjoyable which can lead to more purchases.
WooCommerce Attribute Swatches
Replace the default WooCommerce variation dropdown menu with variation swatches for WooCommerce. Add color swatches, image swatches, and modern text buttons to your variable product pages.
Learn how to start your ecommerce website today
Starting an online clothing store might seem complicated, but WordPress and WooCommerce make it as simple as it gets. You can set up your online boutique in just a matter of minutes with a few clicks.
Once your store is set up, you can leverage the plugins mentioned in this guide to extend its features to boost customer experience, sales, and your profit margin. Join our All Access Club and get them all in one discounted purchase.
Or buy them one after the other here:
- Flux Checkout for WooCommerce – Upgrade your entire checkout flow for a smooth checkout experience.
- WooThumbs for WooCommerce – Improve your product gallery to encourage conversions.
- WooCommerce Show Single Variations – Improve variable product discoverability by showing variations as single products
- WooCommerce Attribute Swatches – Replace variable product attribute dropdowns with color, image, and text swatches for a better product browsing experience.
Get all 14+ of our plugins at one low price
Increase conversions & optimize your store with access to every plugin we make now and in the future.

Gina Lucia is our in-house Content Manager at Orderable. She writes articles, user guides, technical documentation, and creates videos on everything WooCommerce and Orderable.
Gina has been working in the WordPress/WooCommerce space since 2012 when she developed WordPress websites for clients large and small.
For the past 8 years, she’s been writing about everything WordPress and WooCommerce, becoming an expert in what makes a WooCommerce store succeed.
When not writing, Gina loves to tend to her vegetable garden, read, or travel to mainland Europe.