
The WooCommerce confirmation page, often the final touchpoint in a customer’s shopping journey, holds untapped potential.
Beyond confirming a purchase, this page can be a pivotal moment in the customer’s experience with your online store.
In this guide, we’ll walk you through:
- Why edit the standard WooCommerce confirmation page?
- How to edit the WooCommerce confirmation page using default settings.
- How to create a custom thank you page using a plugin.
By optimizing this page, store owners can enhance the post-purchase experience and drive further engagement.
Ready to dive in? Let’s move on to the next section and explore the intricacies of the WooCommerce confirmation page.
Flux Checkout for WooCommerce
Flux Checkout transforms the default WooCommerce checkout into one that’s lightning-fast, distraction-free, and reduces checkout abandonment.
Why edit the standard WooCommerce confirmation page?
The WooCommerce confirmation page offers a unique space to further engage with your customers. Let’s explore the myriad of ways tweaking this page can benefit both your brand and your customers.

Strengthen brand identity
Your brand represents a promise to your customers. Personalizing the confirmation page to reflect your brand’s unique voice and style ensures consistency and reinforces trust.
It’s like adding a personal touch to every interaction, making your customers feel recognized and valued.
Enhance the customer journey
Every touchpoint with your customer is an opportunity to build trust and loyalty. You’re fostering a sense of security and appreciation by providing clear order details and guiding them on what to expect next, coupled with a heartfelt thank you note.
It’s akin to reassuring them every step of the way.
Create upselling opportunities
The allure of discovering something new is always enticing. By showcasing related products or exclusive offers on the confirmation page, you’re offering customers a glimpse into other products they might find interesting.
It’s a subtle way to spark curiosity and extend their shopping experience.
? According to GitNux, personalized recommendations can boost sales by 35%. This can also improve customer experience and make them more willing to shop again.
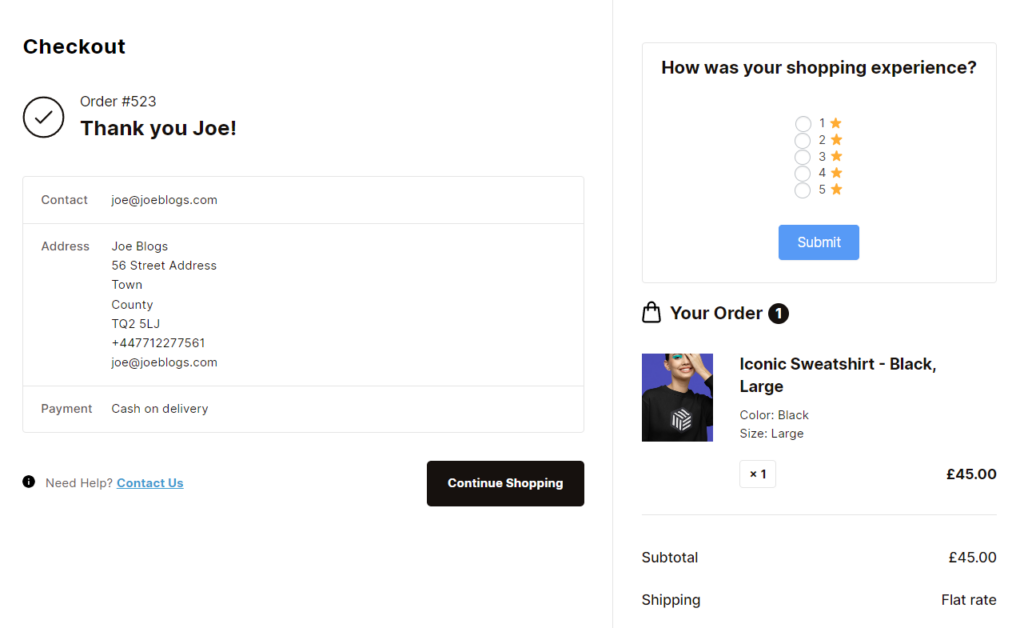
Gather valuable customer feedback
Feedback is a two-way street. Inviting customers to share their shopping experiences or leave reviews on the confirmation page shows that you value their opinions.
It’s a gesture that emphasizes the importance of their insights in shaping and refining your products.
Understanding these aspects can help store owners see the WooCommerce confirmation page as a space brimming with potential and opportunities.
How to edit the WooCommerce confirmation page using default settings
Before diving into advanced tools, let’s explore the customization options WooCommerce offers by default.
With just a few tweaks, you can make the order received page more aligned with your brand and improve the overall user experience.
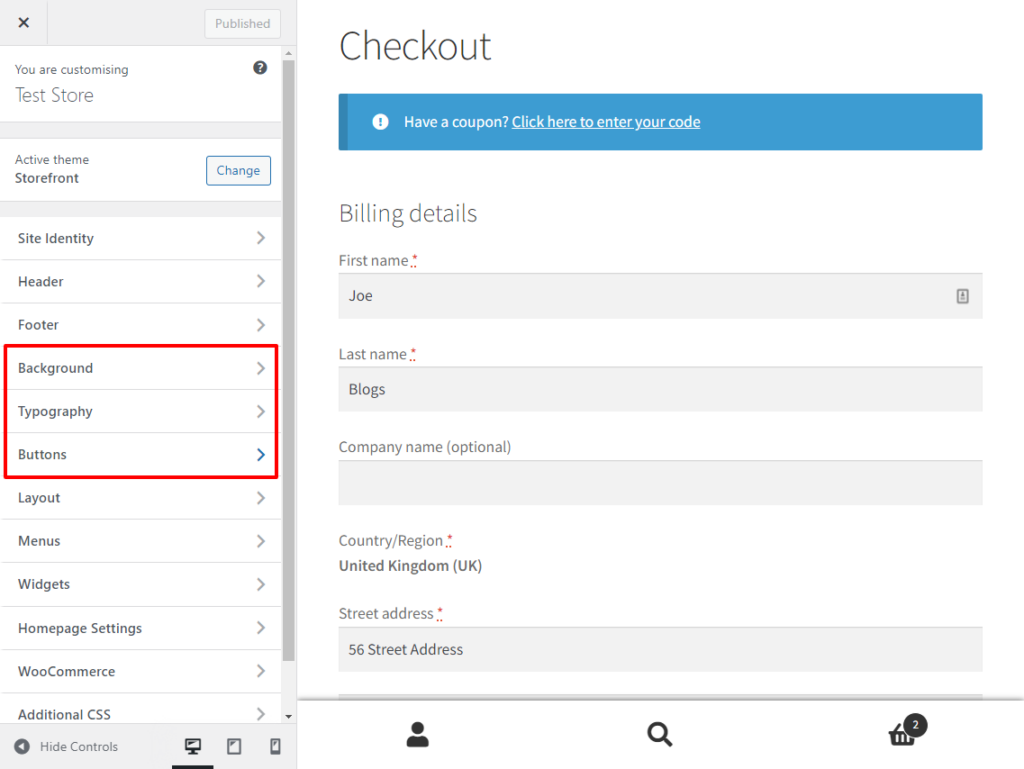
Using WooCommerce/WordPress customizer
The WooCommerce/WordPress customizer is a built-in tool that allows you to make basic changes to your WordPress website, including the confirmation page.
Here’s a brief guide on how to harness it:
- Accessing the customizer: Navigate to your WordPress dashboard. On the left-hand side, you’ll find the ‘Appearance’ tab. Click on it and select ‘Customize’. This will launch the WordPress Customizer.
- Navigating to design settings: Within the Customizer, you’ll find various sections with design options. Click on things like Buttons, Typography, and Background to make changes.
- Preview and publish: Before finalizing any changes, always preview them to ensure they appear as desired. Once satisfied, click ‘Publish’ to make the changes live.
It’s worth noting that while the Customizer offers a range of basic adjustments, for more intricate changes, you might need to explore other avenues.
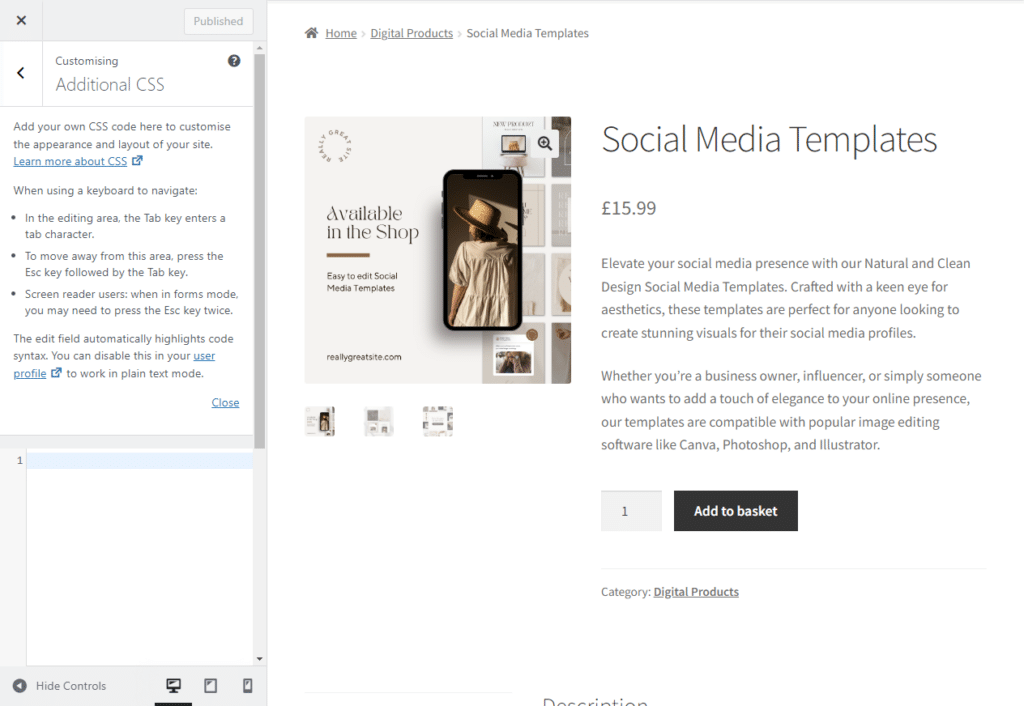
Custom CSS
For those who have a bit of coding knowledge or are feeling adventurous, custom CSS provides a way to make more specific design tweaks to the confirmation page.
Here’s a brief introduction:
- Accessing the custom CSS section: Within the WordPress Customizer, you’ll find an ‘Additional CSS’ section. This is where you can input your custom CSS code.
- Making specific tweaks: By adding specific CSS code, you can adjust elements like font sizes, colors, and spacing on the confirmation page. However, it’s essential to clearly understand what each code does to avoid disrupting the page’s layout or functionality.
- Proceed with caution: CSS is powerful, but it’s also easy to make mistakes. Always back up your site before making any changes, and consider consulting with a developer or using online resources if you’re unsure about a specific code.
While these methods provide basic customization, for a more tailored experience, plugins like Flux Checkout come into play.
How to create a custom thank you page using a plugin
Flux Checkout offers a whole host of features for those seeking a solution to revamp their WooCommerce confirmation page.
This powerful plugin enhances the checkout process and provides tools to create a memorable post-purchase experience for your customers.
What is Flux Checkout for WooCommerce?
Flux Checkout is designed to optimize the WooCommerce checkout process, reduce cart abandonment, and increase conversions.
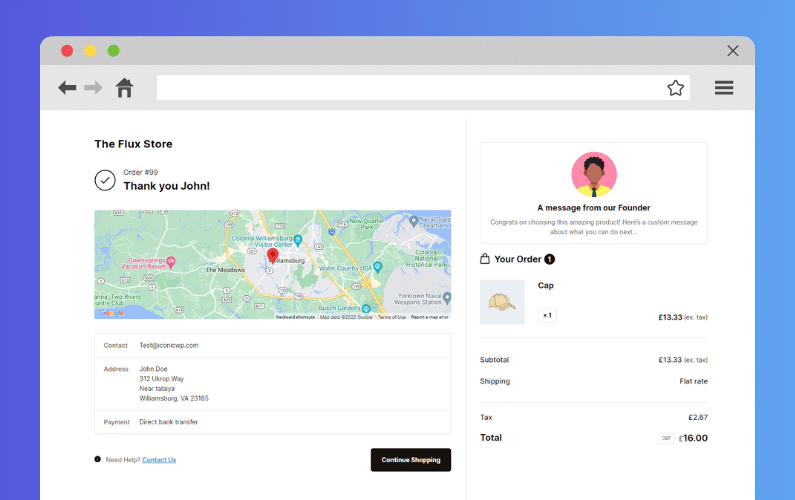
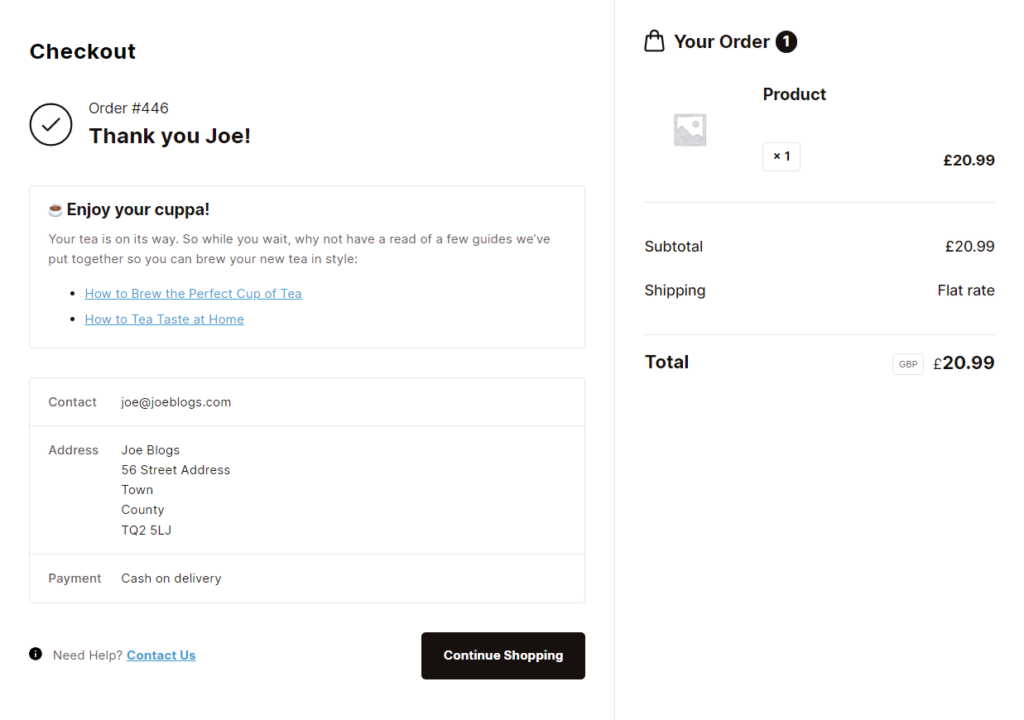
It offers a modern-looking Thank You page that’s cleaner than WooCommerce’s default page.
Flux Checkout for WooCommerce
Flux Checkout transforms the default WooCommerce checkout into one that’s lightning-fast, distraction-free, and reduces checkout abandonment.
Some of its standout features include:
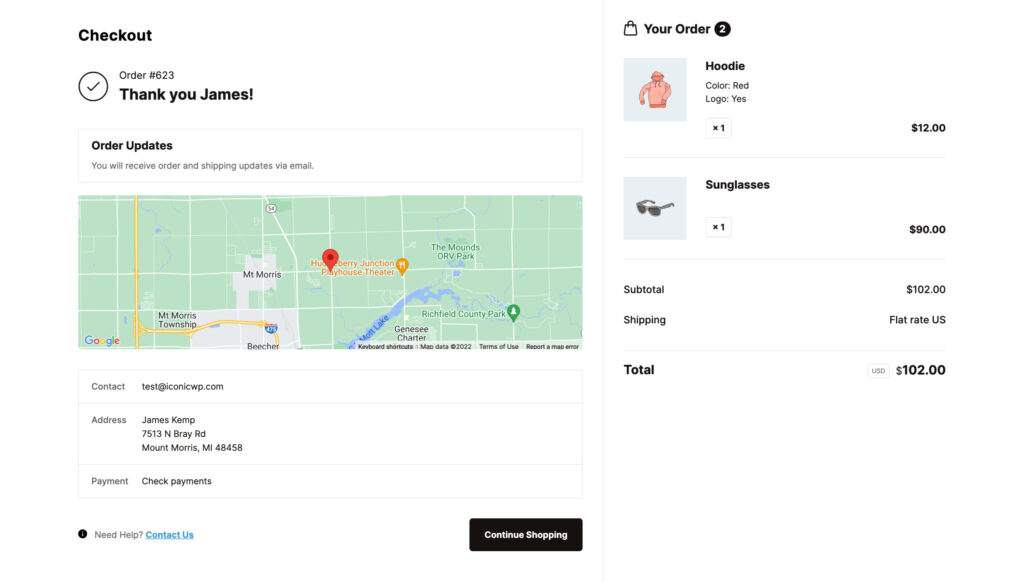
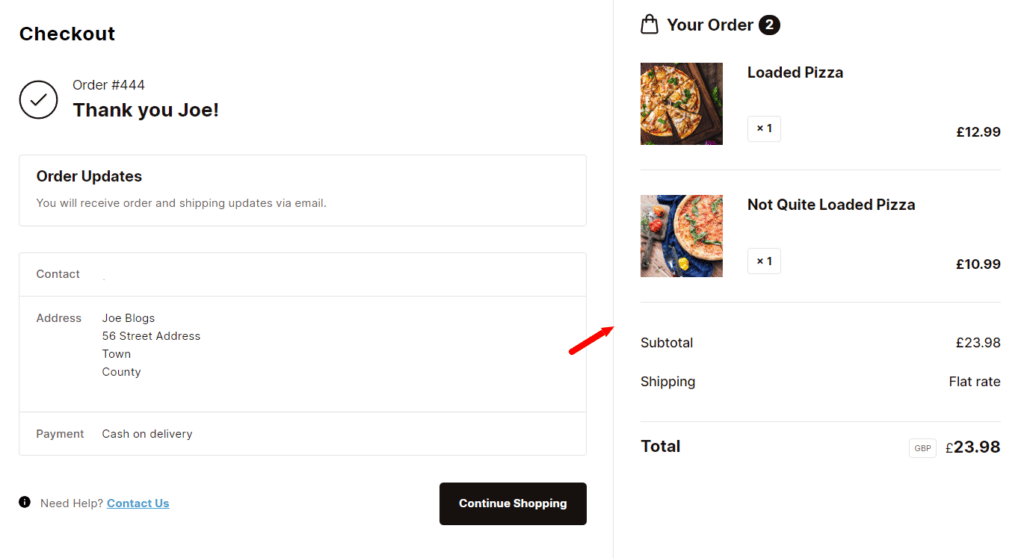
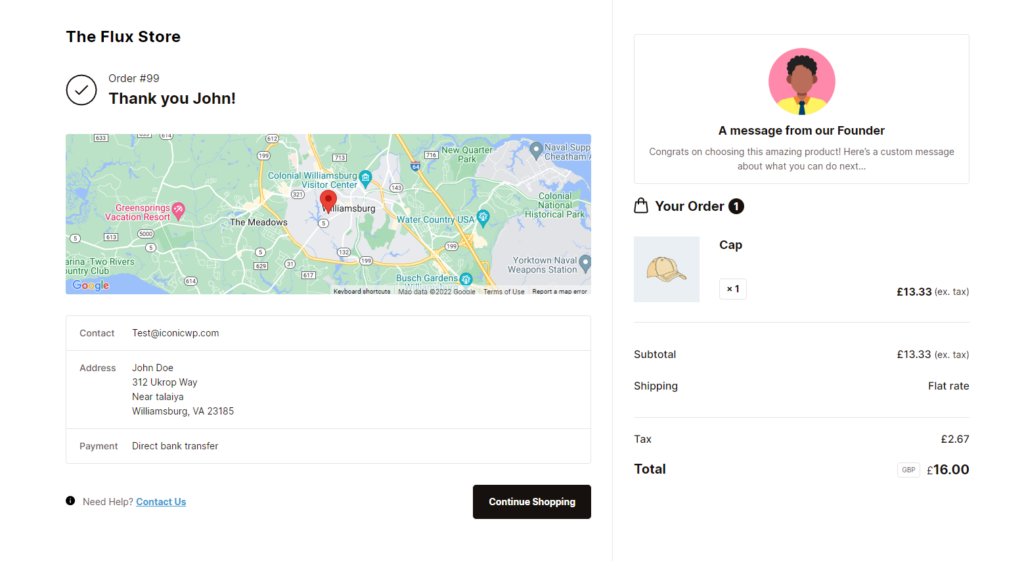
- Streamlined confirmation page content: All WooCommerce order content within the confirmation page is streamlined and easy to read. Your customer’s name, order number, payment method, customer details, order total, and more have all had a user-friendly makeover.
- Custom content area: This allows store owners to add personalized text, images, videos, and more, ensuring a unique experience for customers post-purchase.
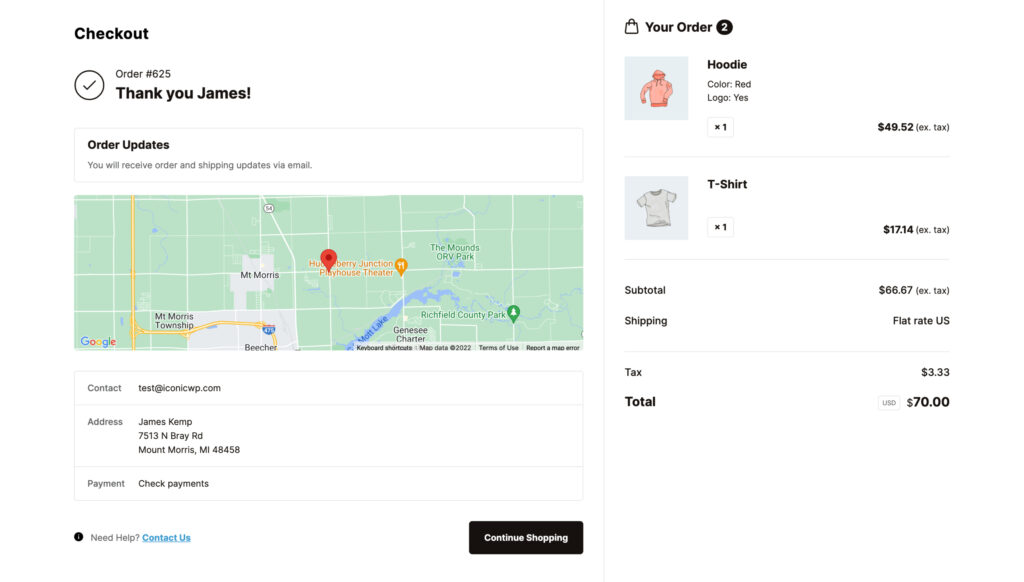
- Customer location map: A visual representation that gives customers a reassuring confirmation of their shipping address, enhancing trust and transparency.
- Mobile optimization: Ensures a seamless checkout and order confirmation experience across all devices, whether desktop or mobile.
Transform your entire checkout process with Flux Checkout
While its custom Thank You page is a significant highlight, Flux Checkout also offers a range of features that completely transform the entire checkout process:
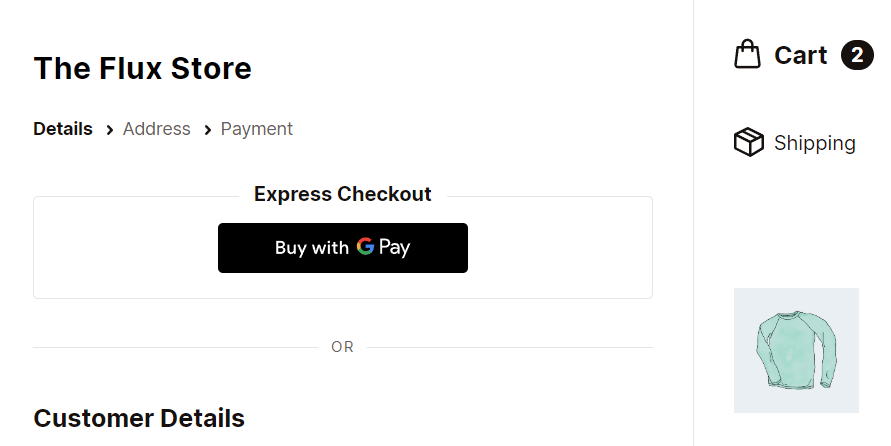
- Multi-Step checkout experience: Flux Checkout streamlines the checkout process by breaking it down into digestible steps, making it user-friendly and reducing the chances of cart abandonment.
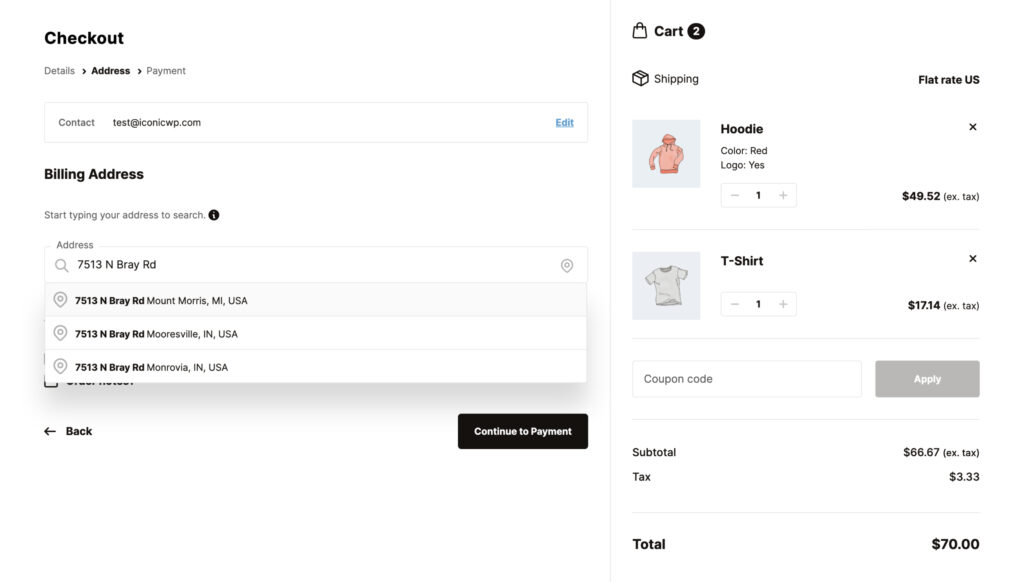
- Address autocomplete: This feature speeds up the checkout process by suggesting addresses as the customer types, ensuring accuracy and saving time.
- Checkout themes: Flux Checkout offers various visually appealing themes that can be tailored to align with your brand’s aesthetics, ensuring a consistent look and feel throughout the checkout process.
- Responsive design: Whether your customers are shopping from a desktop, tablet, or mobile device, Flux Checkout ensures a seamless and responsive checkout experience.
- Optimized for Conversions: The design and flow of the Flux Checkout are optimized to encourage conversions, guiding the customer smoothly from product selection to final purchase.
By offering these features, Flux Checkout enhances the post-purchase experience and ensures that the journey leading up to it is smooth, intuitive, and optimized for conversions.
How to customize your WooCommerce confirmation page with Flux Checkout (step-by-step)
So now we know what Flux Checkout for WooCommere can do, let’s get it set up and running. So you can not only have an improved checkout page, but a custom WooCommerce thank you page set up for your WooCommerce store.
Visual learner? Watch the video tutorial here:
Step 1: Install Flux Checkout for WooCommerce
- Purchase the Flux Checkout for WooCommerce plugin from the Iconic store.
Flux Checkout for WooCommerce
Flux Checkout transforms the default WooCommerce checkout into one that’s lightning-fast, distraction-free, and reduces checkout abandonment.
- Navigate to Plugins > Add New from your WordPress dashboard and click the Upload Plugin button.
- Locate and select the downloaded .zip file, then press Install Now.
- Once installed, click Activate.
Now we have Flux added to your WooCommerce store, let’s customize its design.
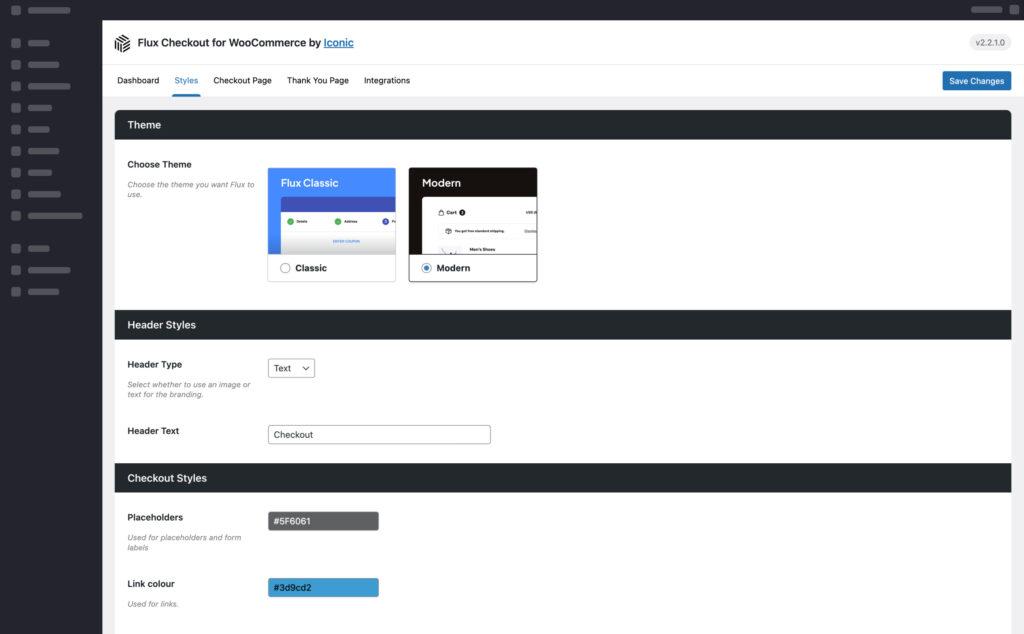
Step 2: Customize your checkout page design
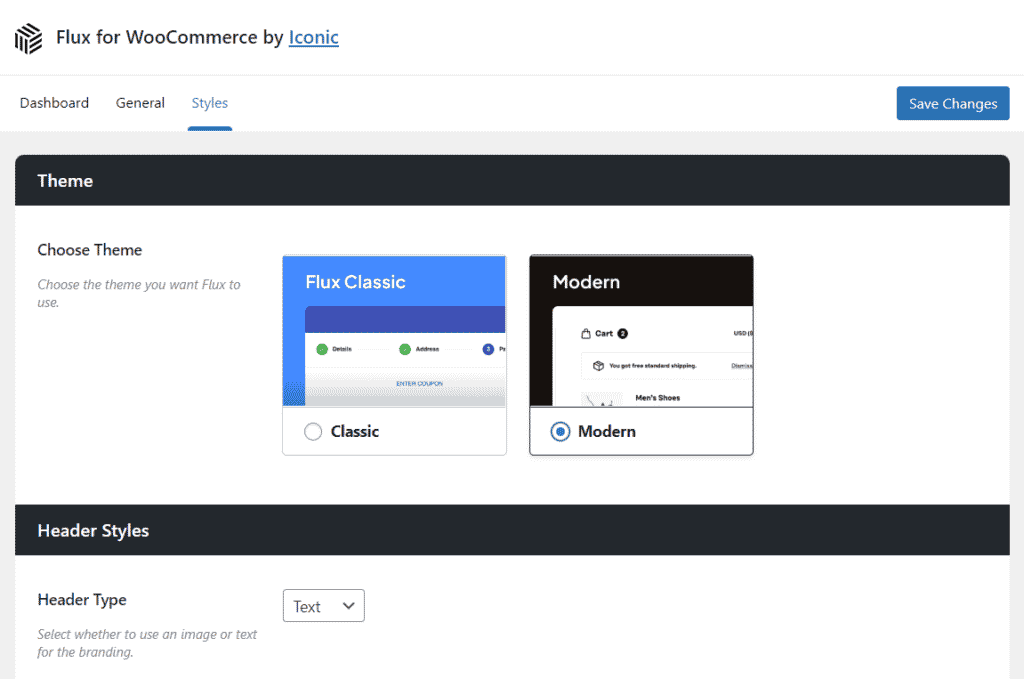
- Go to WooCommerce > Flux Checkout. You’ll see tabs like General and Style.
- The Style tab allows you to choose between different visual themes for your checkout. Select whichever appeals to you the most, and customize to suit you.
Once your overall checkout design has been customized, we’ll move on to customizing the order confirmation page.
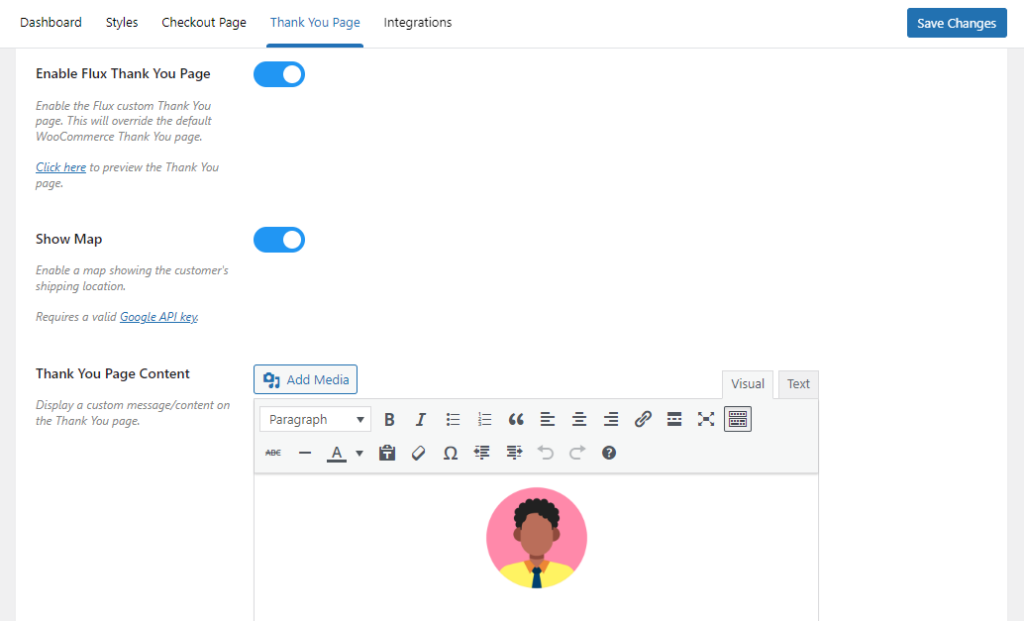
Step 3: Customize your thank you page template
- Click the Thank You Page tab/link at the top of the page.
- Activate the Enable Flux Thank You Page toggle button to use Flux’s custom WooCommerce confirmation page.
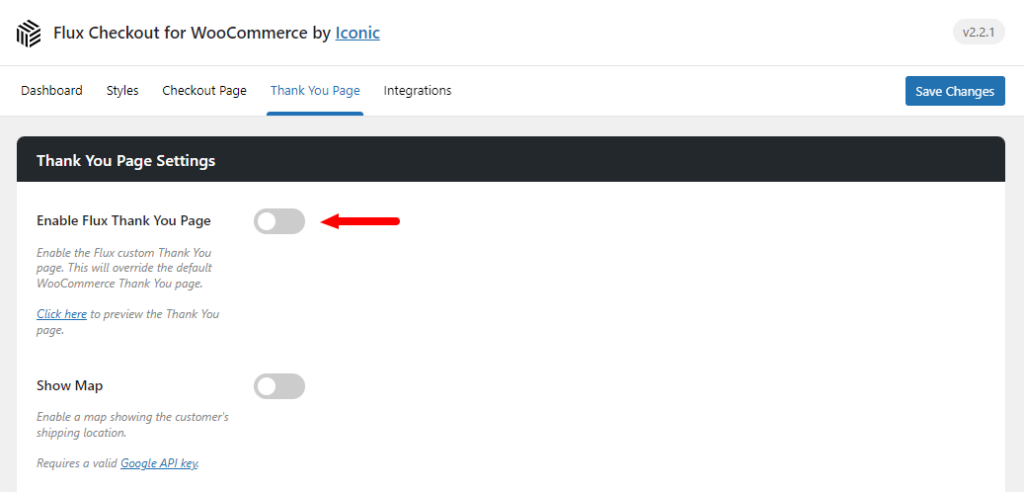
- Customize the Thank You page using various settings:
- Show Map: Toggle to display a map on the Thank You page. This map will only appear for physical and deliverable products.
- Thank You Page Content: A free space content area where you can add rich content of your choice, be it delivery instructions, promotional content, or any other information.
- This includes adding things like custom-coded social media sharing buttons, custom text, upselling or cross-selling specific products, custom HTML, links to tutorials, shortcodes, promotional coupon codes, and so much more.
- Content Placement: Decide where you’d like the content to appear on the page.
- Contact Page: Link to a Contact Us page. If you don’t want a Contact Us button, leave this setting empty.
There we have it. You’ve now transformed the default WooCommerce thank you page into one that’s easier to use and customizable for you and your WooCommerce store.
Create a custom WooCommerce thank you page today
The WooCommerce confirmation page plays a crucial role in the customer’s journey with your online store. By optimizing this page, you can reinforce your brand identity, enhance the customer experience, introduce upselling opportunities, and gather invaluable feedback.
Each of these elements contributes to building trust and fostering customer loyalty.
Flux Checkout offers a solution for those aiming to maximize the benefits of their confirmation page. Its tailored features designed to improve both the checkout and post-purchase experience provide store owners with the tools necessary to leave a memorable impression on their customers.
Flux Checkout for WooCommerce
Flux Checkout transforms the default WooCommerce checkout into one that’s lightning-fast, distraction-free, and reduces checkout abandonment.

Gina Lucia is our in-house Content Manager at Orderable. She writes articles, user guides, technical documentation, and creates videos on everything WooCommerce and Orderable.
Gina has been working in the WordPress/WooCommerce space since 2012 when she developed WordPress websites for clients large and small.
For the past 8 years, she’s been writing about everything WordPress and WooCommerce, becoming an expert in what makes a WooCommerce store succeed.
When not writing, Gina loves to tend to her vegetable garden, read, or travel to mainland Europe.