
In this guide, we’ll show you how to add a product builder to your WooCommerce store with the help of the WooCommerce plugin, WooCommerce Product Configurator.
Sadly, the default WooCommerce setup hasn’t been optimized to create and sell configurable products. Configurable products are not among the default product types offered by WooCommerce. It also has no built-in product builder.
In general, the simplest way to offer configurable products in WooCommerce is to use the variable product type and create product variations.
However, this presents a new set of problems:
- You have to create a huge number of images for the different product variations.
- Inventory management is problematic because multiple SKUs are involved when the customer configures the product, but only one SKU is used when the product is sold.
Fortunately, these problems can be solved by using a plugin that does the hard work for you. In this case, the WooCommerce product builder plugin, WooCommerce Product Configurator.
This guide will show you how to use this plugin to easily and accurately offer configurable products in your WooCommerce store. We’ll also show you how to upgrade your product builder with swatches as a bonus.
Introducing WooCommerce Product Configurator
WooCommerce Product Configurator is a plugin that enables you to add a product builder to your WooCommerce store.
WooCommerce Product Configurator
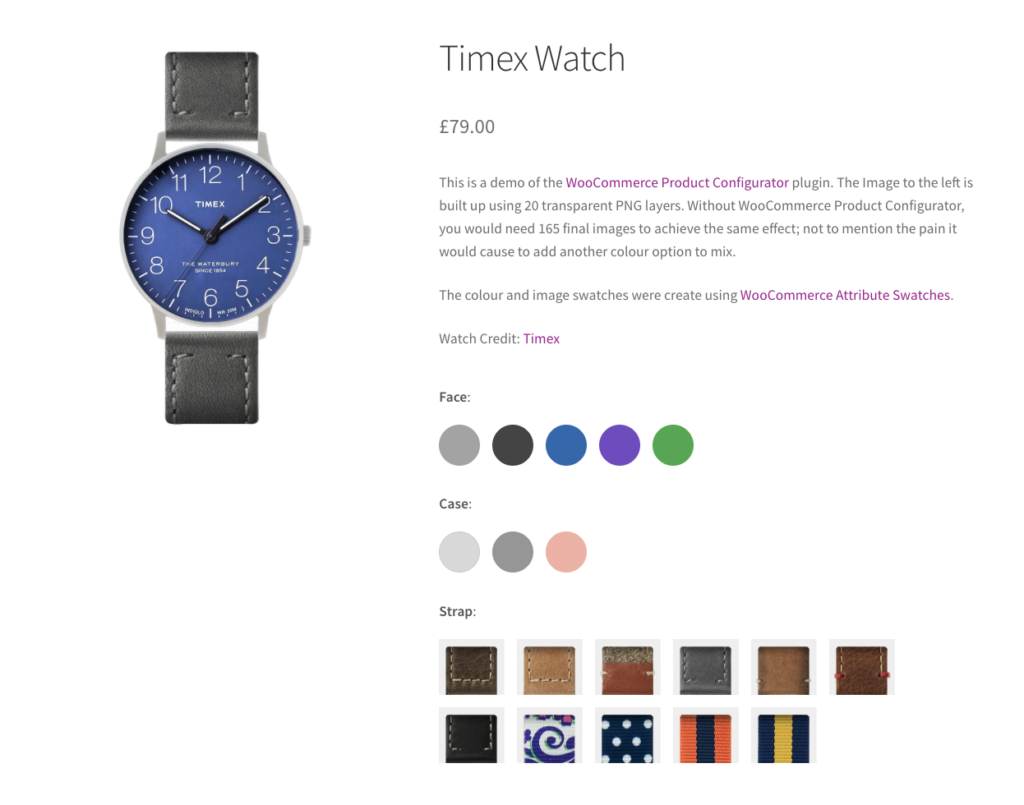
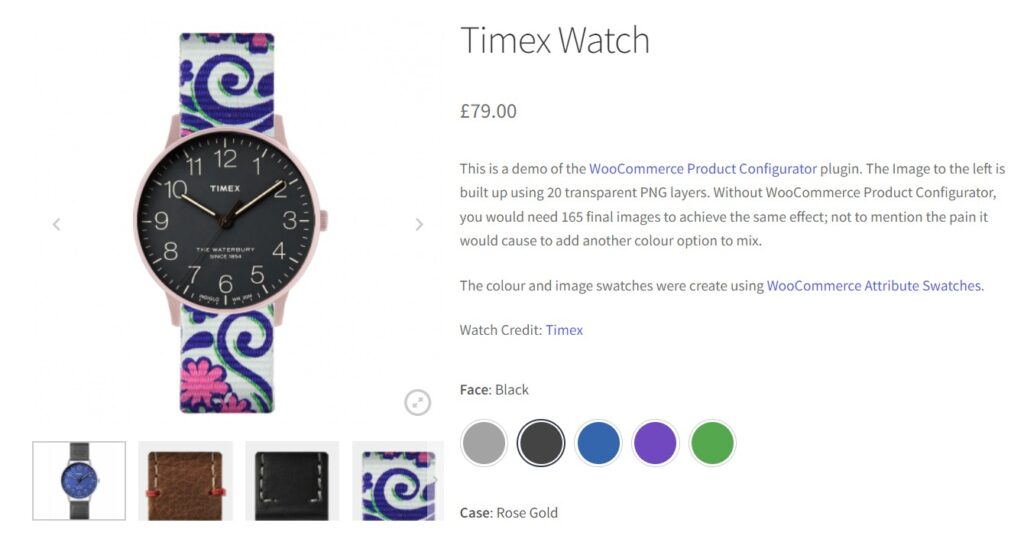
WooCommerce Product Configurator adds a visual product configurator to your WooCommerce store and allows visitors to customize your products with ease.
With this plugin, you can offer multiple customization options and product add-ons to your customer when they visit the product page. These options could be a change in color, addition or removal of a component, change of material, etc.
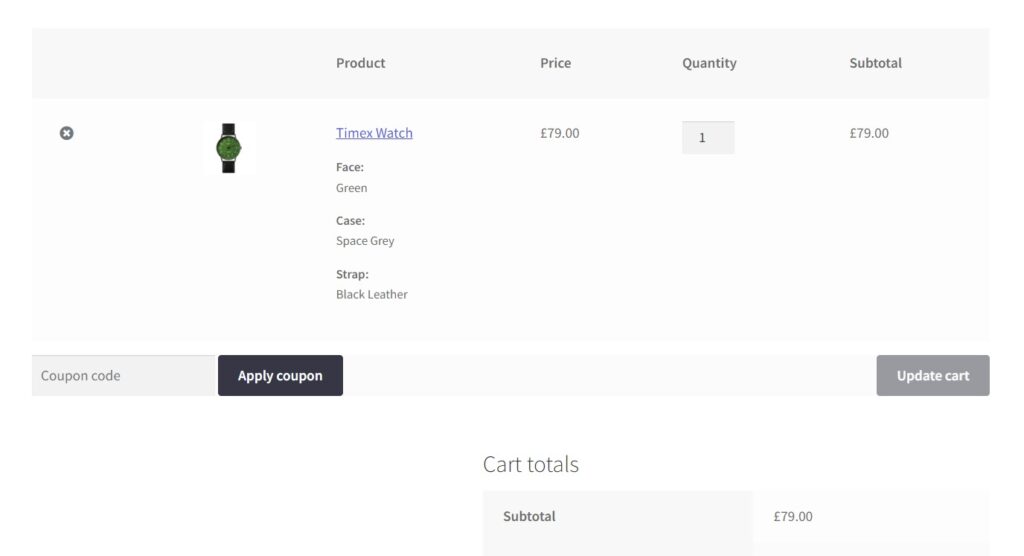
As the customer selects their customizable product options, images will be layered on top of each other to generate the final product image. Once they’re done, they will see a mini-preview of the final product with their selected options at the checkout.
This plugin works to solve the major problems online store owners face when offering configurable products. Providing the best possible experience for both customers and store owners.
It does this by allowing you to:
Save time with layered image layers
First, you get to upload only one transparent image (PNG) for each attribute. Then these images will layer on top of each other to create the end-result image for the customer.
This will save you countless hours in comparison to creating numerous images to represent each end customization. When you want to add an extra product option, you simply have to add an attribute and image layer on the backend of your site.
Make product customization user-friendly and satisfying
It helps you minimize cart abandonment resulting from customer frustration when images don’t update to match the customer’s selection.
Once the customer selects a new product option, the image will update immediately, giving them a hassle-free and satisfying experience. Helping you boost sales.
Simplify stock management for each product option
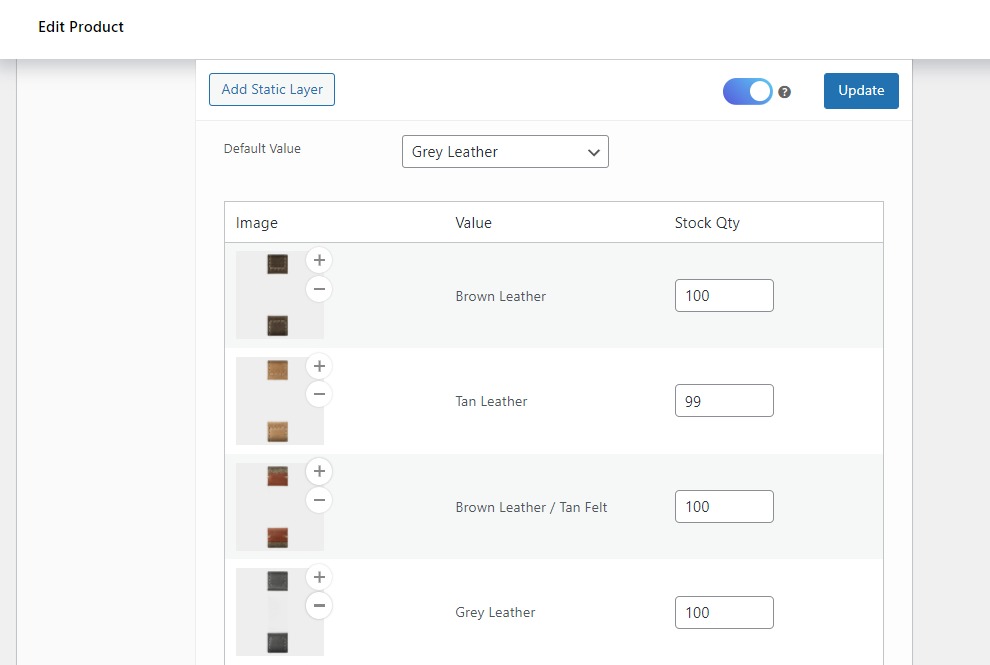
It simplifies inventory management by allowing you to manage the stock levels for each product option right from the product edit page.
You can quickly view the stock levels from this page and ensure you have enough items for each product option to avoid frustrating customers.
Offer mobile-friendly customization
Your customers will be able to customize products on any device, irrespective of screen size. This ensures that you won’t lose customers because they can’t configure products on their preferred device.
Now that you know what WooCommerce Product Configurator is, let’s see how you can use it to add a product builder to your WooCommerce store.
How to add a product builder to WooCommerce using WooCommerce Product Configurator
This section will walk you through, step by step, how to add a product builder to your WooCommerce store using the plugin, WooCommerce Product Configurator.
Step 1: Install WooCommerce Product Configurator
Start by installing WooCommerce Product Configurator. To do this, purchase WooCommerce Product Configurator from the Iconic store: iconicwp.com/woocommerce-product-configurator
Then follow these steps:
- Go to Plugins > Add New > Upload plugin from your WordPress dashboard.
- Select the zip file containing the extension you downloaded from the Iconic store.
- Click Activate and go to your email to retrieve the license key to activate your subscription.
After activating WooCommerce Product Configurator, we’ll next need to create a variable product with product options.
Step 2: Create a variable product with product options
Since WooCommerce Product Configurator only works with variable products, the next thing you need to do is create a variable product.
Follow these steps to create a variable product with product options:
Note: For the sake of this guide, we’ll use a wristwatch as an example.
- From your WordPress Go to Products > Add New.
- Give your product a name, Timex watch in this case, and a description.
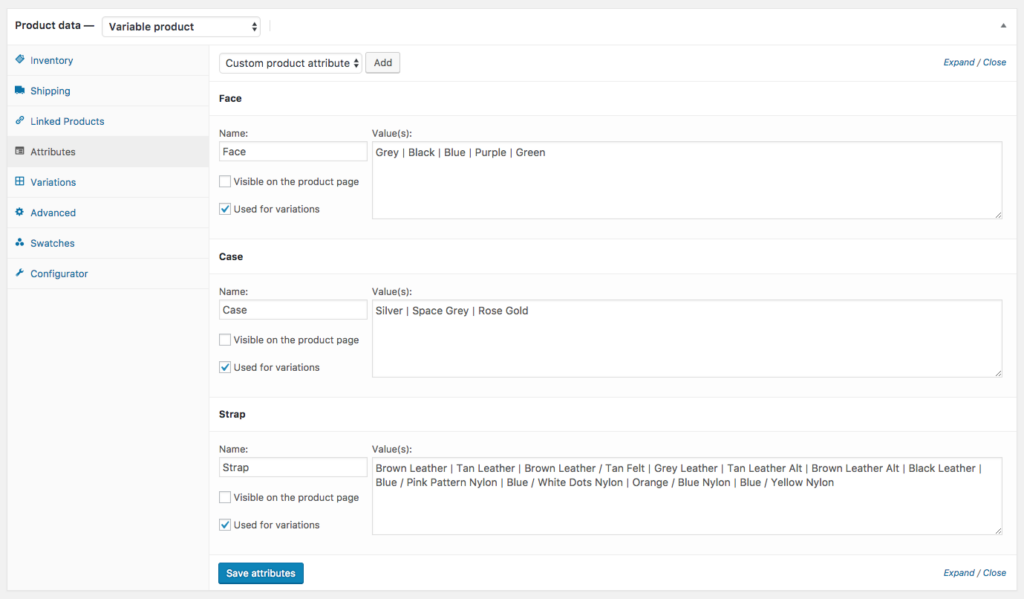
- Scroll down to the Product Data section, click on the drop-down next to it, and select Variable product.
- Click on the Attributes tab and then the drop-down at the top, select Custom product attribute, and click on the Add button. Name and value fields will appear.
- Enter a name for the attribute in the name field. In this case, it could be the face, straps, or case.
- Move to the Value(s) field, start typing the values for this attribute, and separate each value using the vertical slash (|). For this case, you can enter values such as grey, black, blue, etc.
- Next, click on the Variations tab. Click on the drop-down, select Add variation, and click on the Go button.
- You can then select a default value for each attribute on the dropdowns that appear at the top of this tab.
- To set the price for each variation, select a variation.
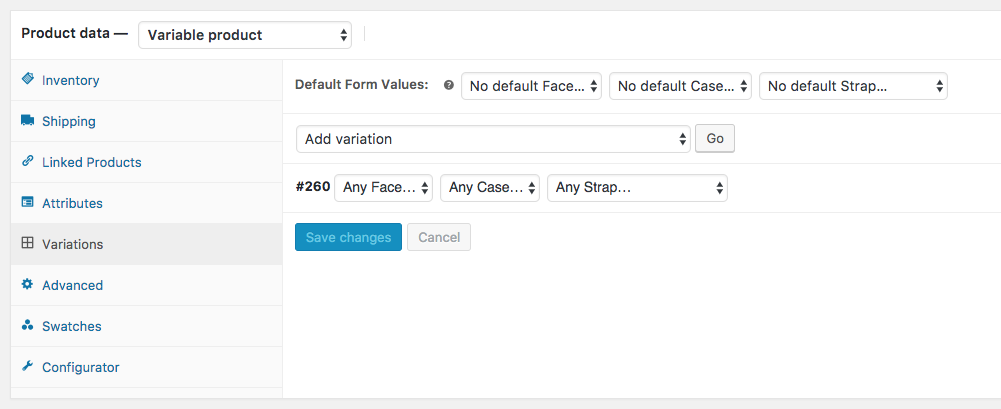
- Next, click on the main drop-down and select the type of price you want to set. Then click on the Go button. A small window will appear where you can set your price. Click on the Save changes button.
- When you’re done with all changes, click on the Save Attributes button at the bottom of the product data window.
After creating variable products with product options, we’ll next need to create our product image layers.
Step 3: Create your product images
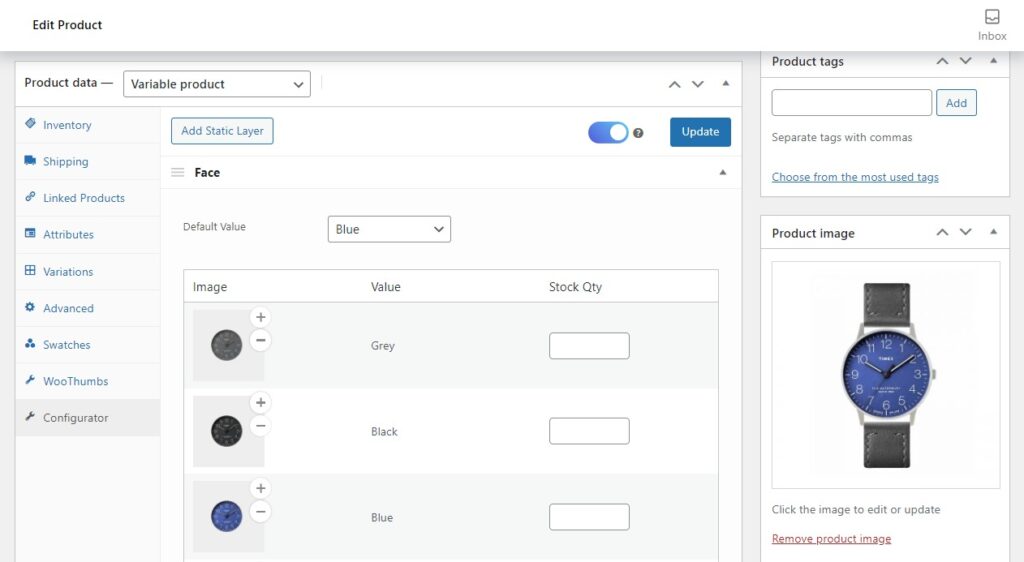
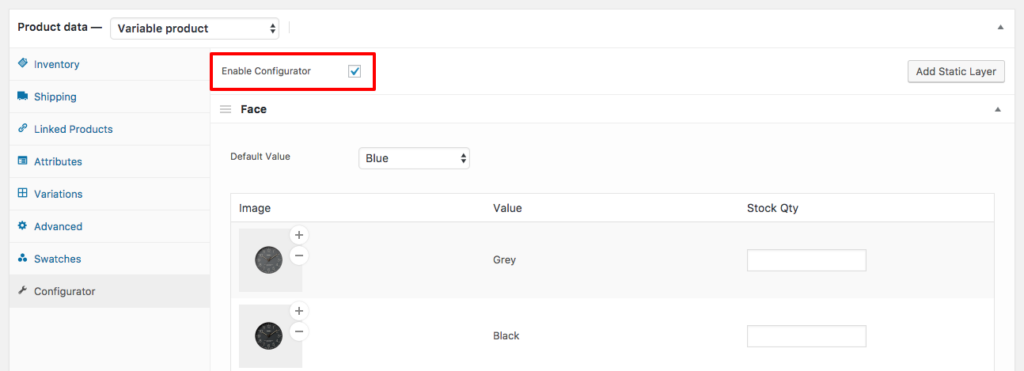
Before creating your product images, we need to enable the configurator first.
- Go to the Product data section of the edit product page and click on Configurator. Enable it by clicking on the toggle switch next to the Update button.
Now let’s create our product images.
Preparing your product images is the most important step when using WooCommerce Product Configurator. You can’t create layered images in WordPress. So you’ll need image editing software like Adobe Photoshop or Affinity Photo.
- Open the image editing software of your choice (in this tutorial, we’re using Adobe Photoshop) and create an artboard of your preferred size (1000px by 1000px).
- Create your image layers. Make sure everything lines up with the layer below.

- Save each layer at the size of the artboard (1000px x 1000px) with the background remaining transparent.

- You’ll also need to create a background layer for the configurator. If you like, this can be a solid color, but it must still be saved as a PNG image.
After creating the layers, we’ll need to add these images to your final product.
Step 4: Add the images to your final product
Follow these steps to add the images to your configurable products:
- Navigate back to the edit product page and scroll to the Product data section.
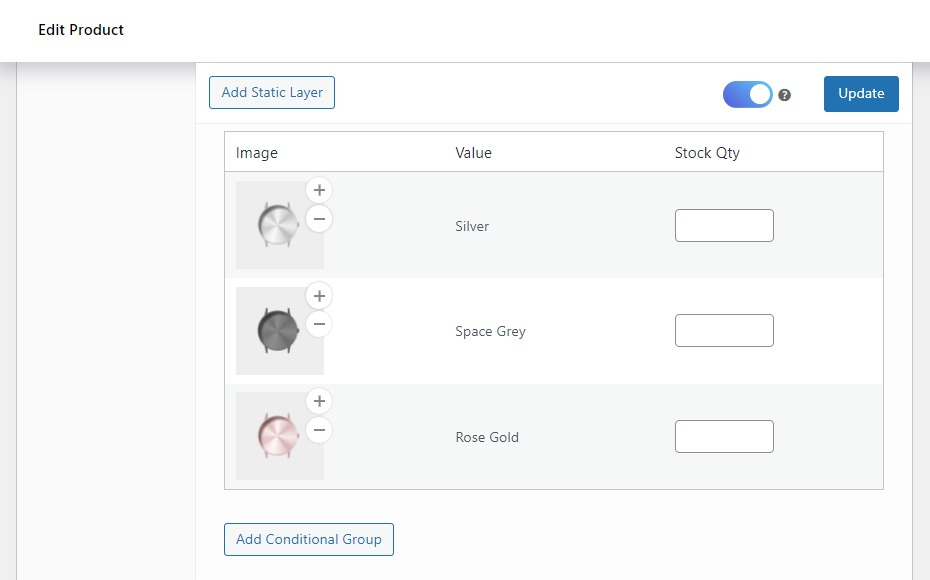
- Below the checkbox to enable the product configurator, you will see a list of product attributes. This is where you’ll add your images.
- Click the plus(+) icon on the grey squares and upload the image layer you created in Photoshop to the media library.
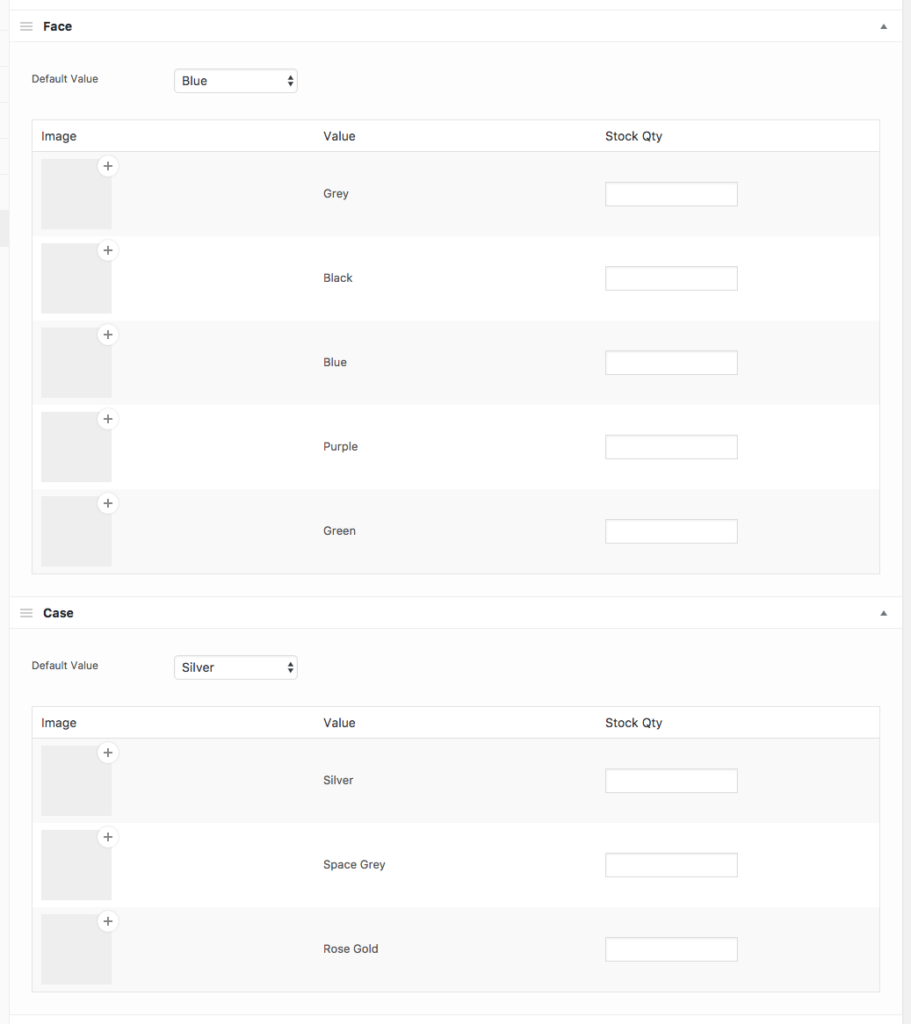
- Then click Set Image, and your image layer will be displayed on the grey box. If you accidentally add the wrong image, you can click on the minus(-) to remove it.
- Repeat these steps for the other images.
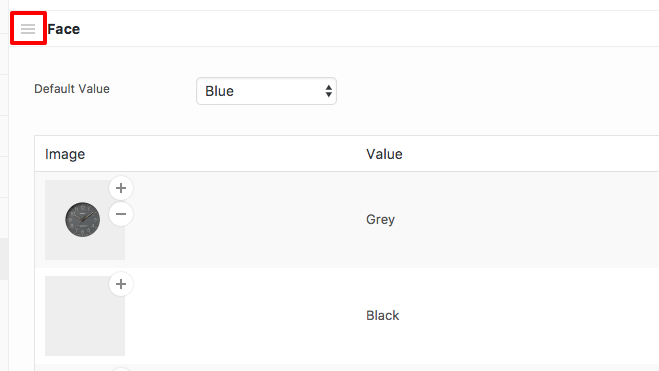
- Re-order the layers to sit properly on the final product. Click the 3 lines icon next to the product attribute to drag and drop them to re-order.
- Add the background layer to the Background image section to enable the configurator to know the size of your artboard.
- Once you’re done, click on the Update button to add this configurable product to your store.
After everything is complete, your product configuration options will be displayed as dropdowns on the product page. Customers can simply click on the product attribute dropdowns, select each attribute’s value, and build their preferred custom product.
If you want to take things up a notch, you can transform these attribute dropdowns into color, image, and text swatches. Next, we’ll walk you through how.
Bonus: Upgrade your product builder with swatches
WooCommerce on its own doesn’t allow you to add attribute swatches to your variable product options. To do this, you will need the help of the plugin, WooCommerce Attribute Swatches.
WooCommerce Attribute Swatches allows you to replace the standard WooCommerce product variation dropdowns with color and image swatches.
When used together with WooCommerce Product Configurator, this plugin grants customers a preview of the variation’s actual appearance. It could be appearance, the material used, or texture.
Allowing customers to build their configurable products visually enriches their experience, translating to more conversions for your store.
Here is a demonstration of using these plugins in combination:
Add a WooCommerce product builder to your WordPress website today
On its own, WooCommerce doesn’t have a product builder to enable you to offer configurable products in your store efficiently. To add a product builder to your ecommerce store, you will need the help of the WooCommerce Product Configurator plugin.
WooCommerce Product Configurator
WooCommerce Product Configurator adds a visual product configurator to your WooCommerce store and allows visitors to customize your products with ease.
This plugin saves you countless hours spent creating numerous images by layering images upon each other to create the end result image during product customization.
To improve user experience with configurable products, you can replace the standard product variation dropdowns with color, image, and text swatches using WooCommerce Attribute Swatches.

Gina Lucia is our in-house Content Manager at Orderable. She writes articles, user guides, technical documentation, and creates videos on everything WooCommerce and Orderable.
Gina has been working in the WordPress/WooCommerce space since 2012 when she developed WordPress websites for clients large and small.
For the past 8 years, she’s been writing about everything WordPress and WooCommerce, becoming an expert in what makes a WooCommerce store succeed.
When not writing, Gina loves to tend to her vegetable garden, read, or travel to mainland Europe.