WooCommerce product categories are what your customers use to find specific products they’re looking for when browsing your online store. They’re also incredibly useful for store owners to section, promote and streamline their products for a better customer experience.
The product categories in your WooCommerce store can be simple, or complicated. They also have endless uses which can not only help you save time but make more sales too.
So by the end of this article, you’ll know exactly how to manage your WooCommerce product categories. We’ll cover everything, including what they are, how to display them, reorder them, make the most of them and use them to boost the sales in your store.
We’ll also show you how to get this done fast with three WooCommerce plugins.
The plugins mentioned in this guide:
- WooCommerce Attribute Swatches – Add color and image swatches to your WooCommerce category filters for a more accurate visual experience.
- Image Swap for WooCommerce – Allow customers to hover over images on the category page with image swap effects to encourage shoppers to make a purchase with fewer clicks.
- WooCommerce Quickview – Allow customers to preview a product on the category page and purchase faster with fewer clicks.
What are WooCommerce product categories?
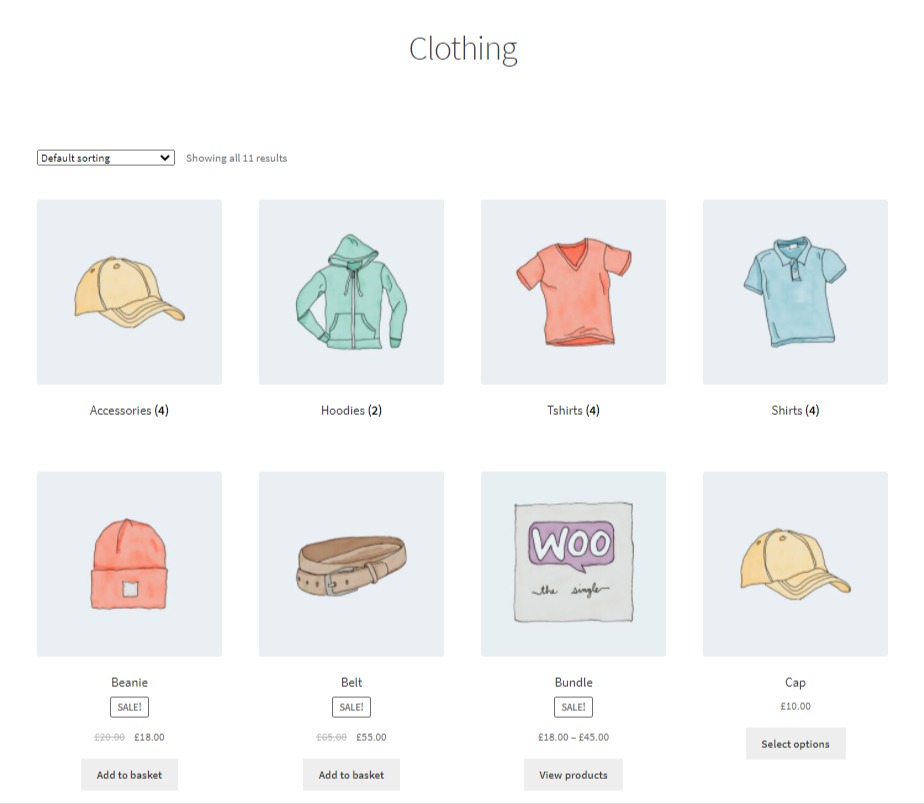
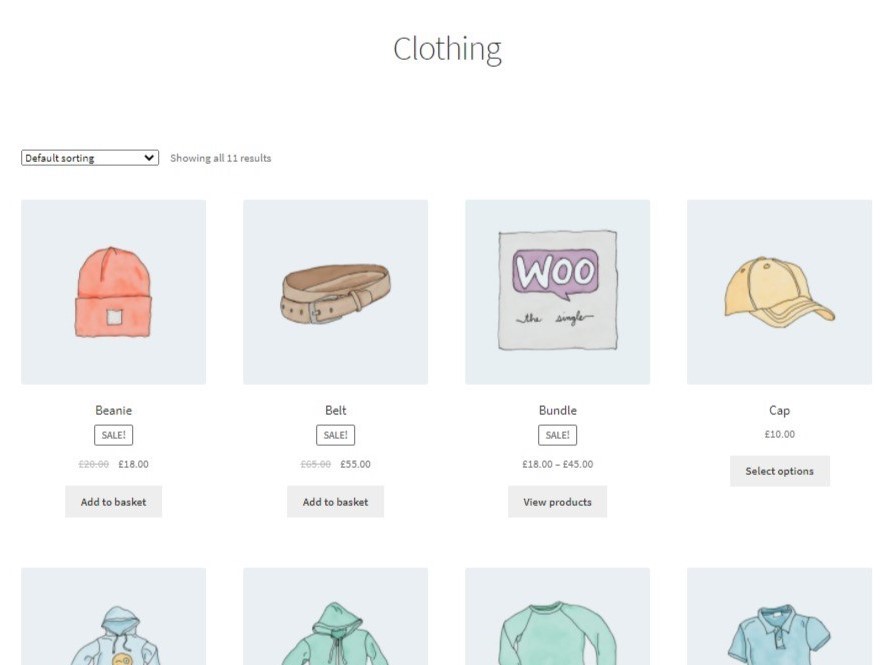
WooCommerce product categories are a useful way to group products with similar features. This could include categorizing your products by ‘shirts’, ‘shorts’ or ‘swimwear’.
Shoppers search by product categories to find specific products they are looking for. So including them in your WooCommerce store is a simple way to make the browsing experience a lot more enjoyable.
How to create a product category in WooCommerce
Creating a product category in WooCommerce is a fairly straightforward process. But if you’re new to WooCommerce, it can seem a little intimidating or confusing at first.
So we’ll walk you through the steps below:
- From your WordPress dashboard, go to the Products > Categories.
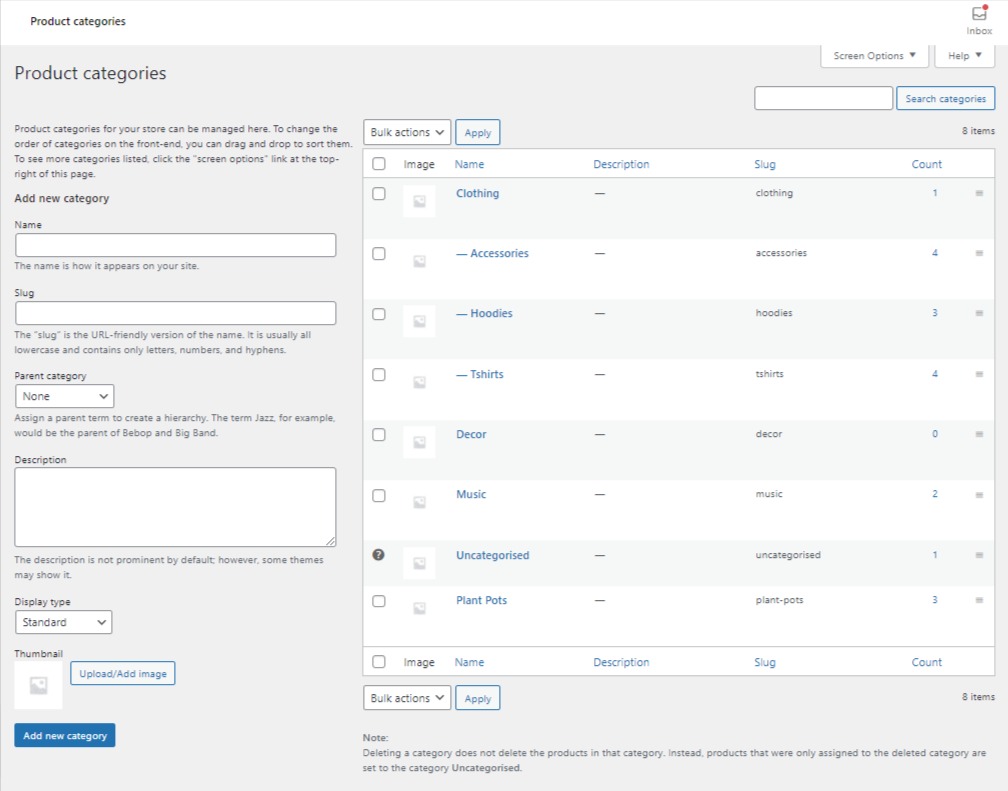
- Add a Name for your category that best describes the product group.
- Add a Slug (optional). This is the URL that will be added to the end of your main website’s URL after product-category. For instance, if a website is named www.website.com and a SLUG is added, it will look like this: www.website.com/product-category/slug.
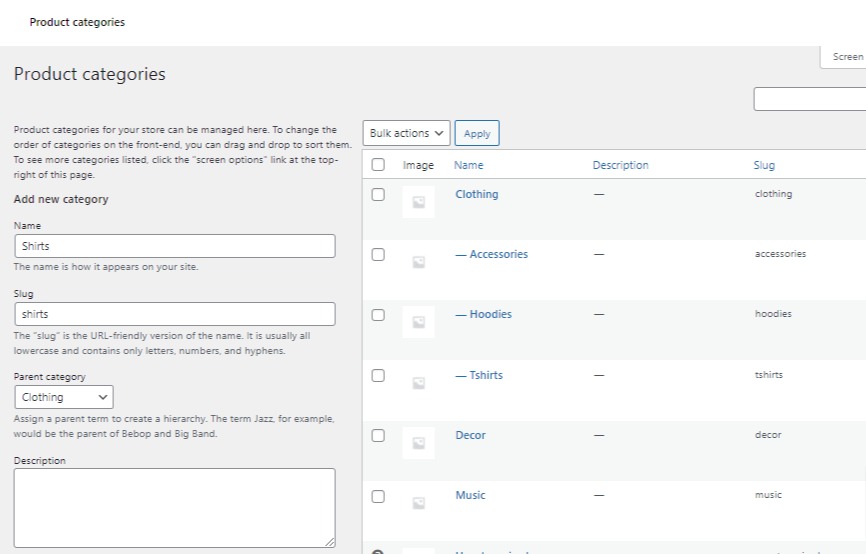
- Choose a Parent if this is a subcategory.
- Enter a Description if you want your customers to have a better understanding of the category.
- Choose the Display Type. This is where you can choose what displays on the category’s landing page.
- The Standard display is your theme’s default (this is usually just the products within that category).
- Subcategories will only display the subcategories in that category.
- Products will only display the products in that category.
- Both displays the subcategories in that category and products in that category.

- Next you can upload or add an image. While this is optional, it may be a good idea if your theme showcases an image for product categories. Adding an image is an effective way to help your customers easily identify what they’re searching for.
- Once happy, click the Add new category button and your new category has been created.
So now we know how to create a product category in WooCommerce, let’s display them in your store.
How to display products by category in WooCommerce
There are many different options for displaying products by category in WooCommerce. Let’s take a look at two effective ways you can display products by category to enhance your user experience.
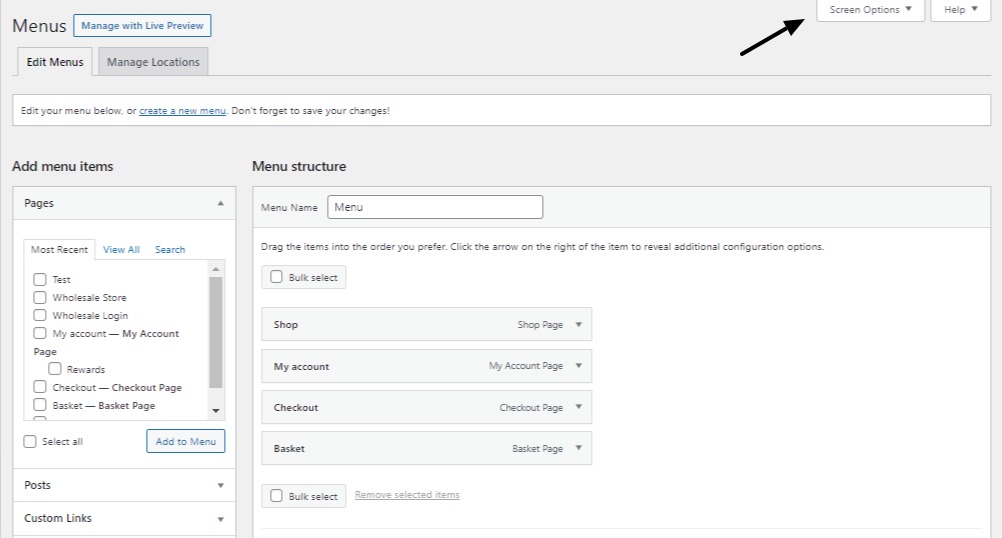
Method 1: Make a WooCommerce category menu
One efficient method to display products by category is to add the product categories to your website’s navigation. Depending on which theme you’re using, the appearance can look slightly different.
Here’s a step-by-step process on how to create a WooCommerce category menu:
- On the menus page (Appearance > Menus), go to the top of the page and click the white Screen Options button.
- The top of the page should showcase a box with different display options. Check the Product Categories box. An option to the left in the Add menu items section should appear.
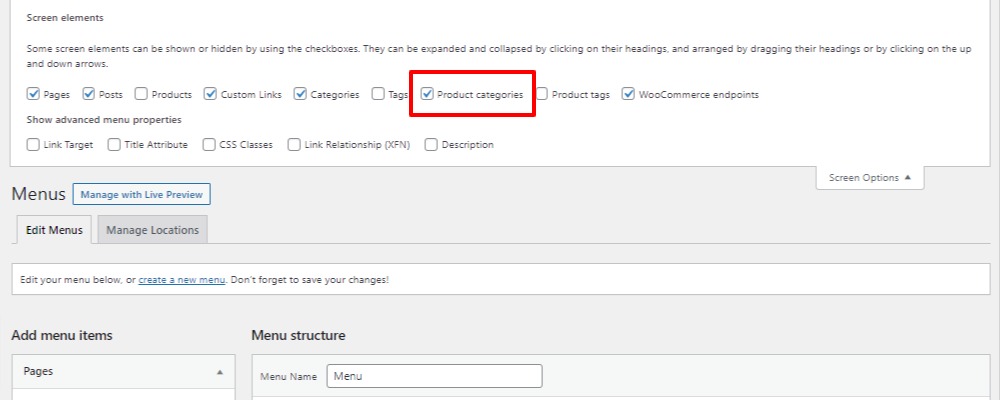
- Click on the Product categories tab in this section to open it up. Then, click the checkbox next to each category you want to add to the menu.
- Once you’ve made your selection, click the Add to Menu button and they’ll be added in the Menu structure section.
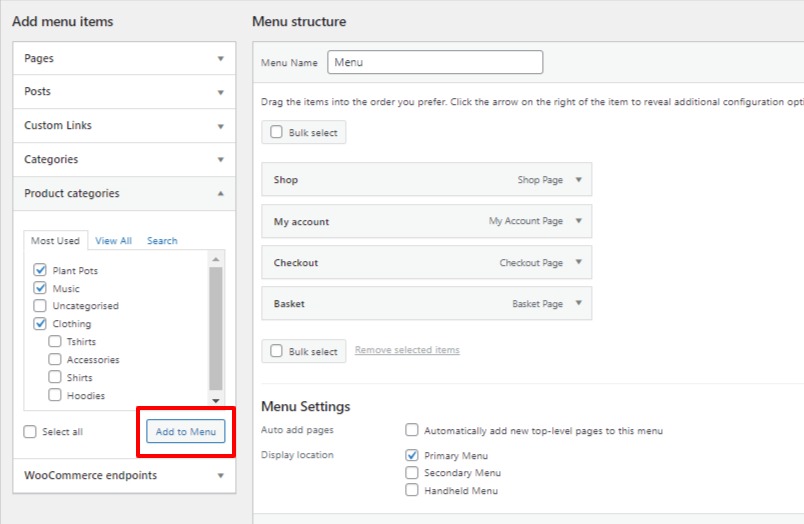
- You’ll now be able to drag and drop each menu item in the menu to re-order them. If you’d like to create a dropdown menu, you can drag a menu item beneath the parent item. This will create a sub-item and allow a dropdown menu on your navigation.
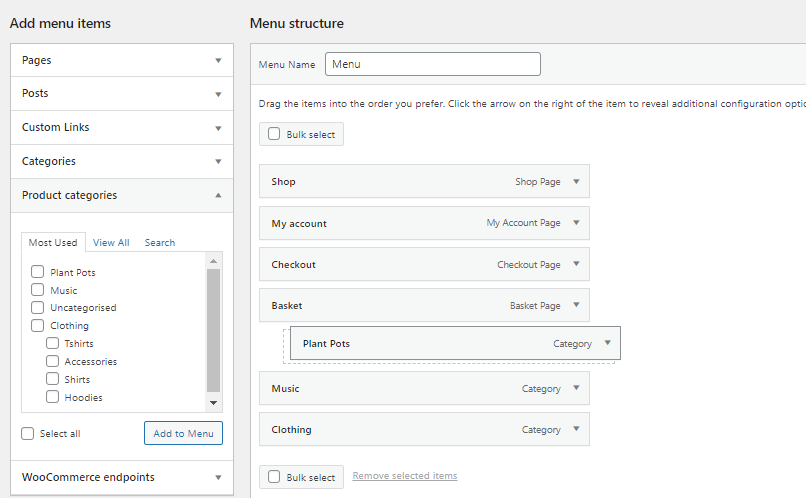
- Once you’re happy with your new menu, click the blue Save Menu. The product categories should now appear on your store.

Method 2: Display products by category using a shortcode
Displaying categories by shortcodes is a powerful method for customizing your WooCommerce store. Shortcodes are condensed pieces of large code that make dealing with code easy for anyone no matter experience level.
This section seems daunting at first, but once you try shortcodes out a few times, they’ll be much easier to manage.
If you want to display your product categories on any page, you can use the following shortcodes to do so:
[product_category]– is how you display a specified product category.[product_categories]– is how you display ALL of your product categories.
When building a shortcode, you’ll want to be aware of all of the product attributes you may want to include in your code. Below is a list of useful product category attributes that can be added to your shortcode (you don’t have to use all of these):
- ids – Specify specific category ID to be listed.
- category – Can be either the category ID, name, or slug.
- columns – The number of columns to display. The defaults is 4.
- hide_empty – The default is ‘1’ which will hide empty categories. Set to ‘0’ to show empty categories.
- orderby – The default is to order by ‘name’, which can be set to ‘ID’, ‘slug’, or ‘menu_order’.
- order – States whether the category ordering is ascending (ASC) or descending (DESC), using the method set in orderby. Defaults to ASC.
A category shortcode example
Using some of the above options, we’ve put together a shortcode so you can try it out in your store.
Note: If you’d like to learn how to add a shortcode to your store, check out our WooCommerce product shortcodes tutorial.
Let’s say you want to show a list of all the top-level categories in your store (not sub-categories), the shortcode would look like this:
[product_categories number="0" parent="0"]
We chose product_categories to showcase ALL of our product categories. Parent=”0” was chosen to show only the top-level categories.

You can copy and paste this shortcode anywhere on your website to showcase your WooCommerce product categories.
How to filter or sort by category in WooCommerce
When shopping for products, your customers may want to filter or sort through categories to find the specific category in mind. We’re going to give you two different ways to showcase filter by category options on your website to help shoppers filter through product categories.
Add filter by category to the shop sidebar
One way to help users filter through product categories is to add filter by category to your shop’s sidebar. You can do this by following the steps below:
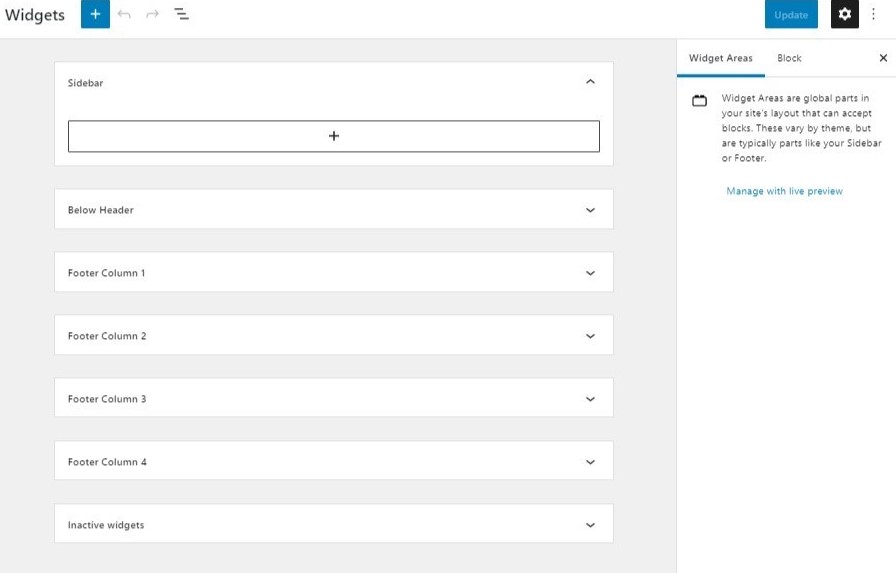
- From your WordPress dashboard, go to Appearance > Widgets.
- On this page, you should see a white box at the top with a plus symbol.
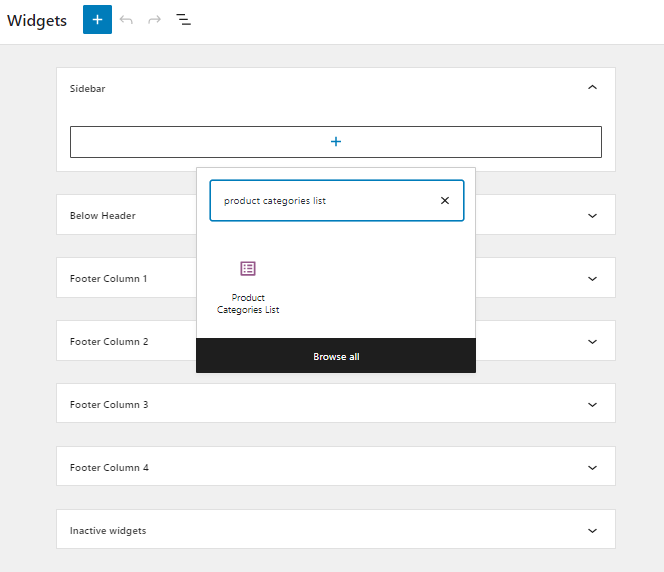
- Click the plus symbol and type ‘Product Categories List’ into the search field. Click the Product Categories List widget to add it.
- The widget will now appear on the Widgets page. Here you’ll be able to customize how the categories display if you’ll include product counts, show empty categories, and more.
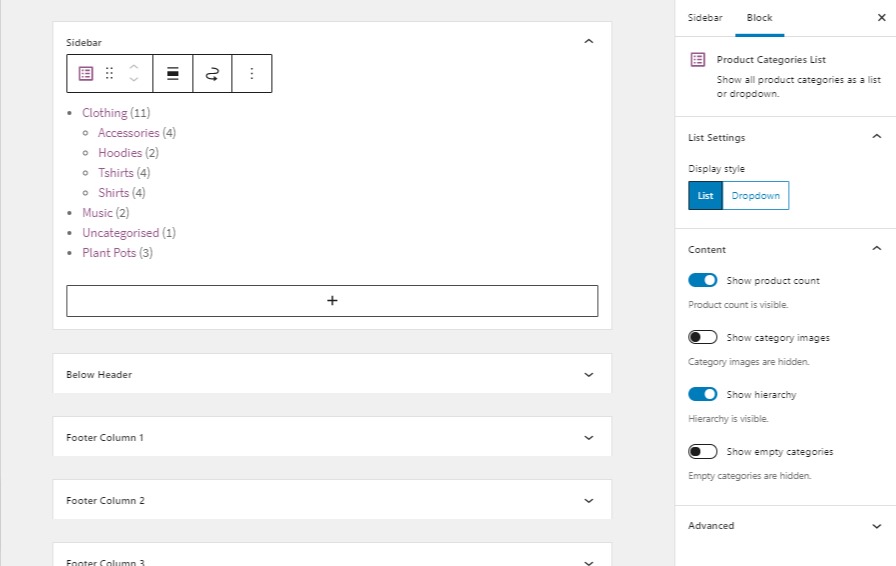
- Once you’re happy with your selection, click the blue Update button at the very top of the page.
Now your customers will be able to easily filter through product categories using your shop’s sidebar.
Sort products within a category manually
If you want to sort the order of how products display with a category, WooCommerce comes with a plethora of sorting options.
By default, the sort order for your products is ‘Custom Ordering + Name’. But if you’d like to change the order, take the following steps:
- From your WordPress dashboard, go to Products > All Products and click the blue Sorting link above the filtering options and underneath the import and export buttons.
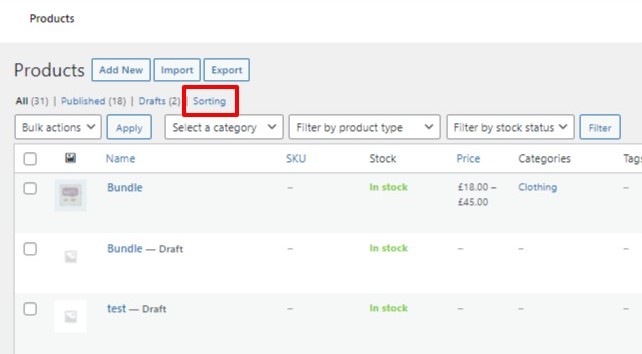
- Once clicked, you’ll be able to drag and drop the product rows to reorder them. Or you can filter by category and change the ordering per category.
- When new products are added, they will show up first on the list.
How to set the WooCommerce category image size
When it comes to your online store, images are one of the most important selling tools. You want to make sure you use the correct category image sizes that go perfectly with your theme to create an aesthetically pleasing, eye-catching experience.
Having the right-sized images can prevent image blurring and help increase your website’s speed. Sometimes images that are too large will slow down your website’s speed which can increase bounce rates.
To set WooCommerce product category image sizes, go to Appearance > Customize > WooCommerce > Product Images > Thumbnail Width.
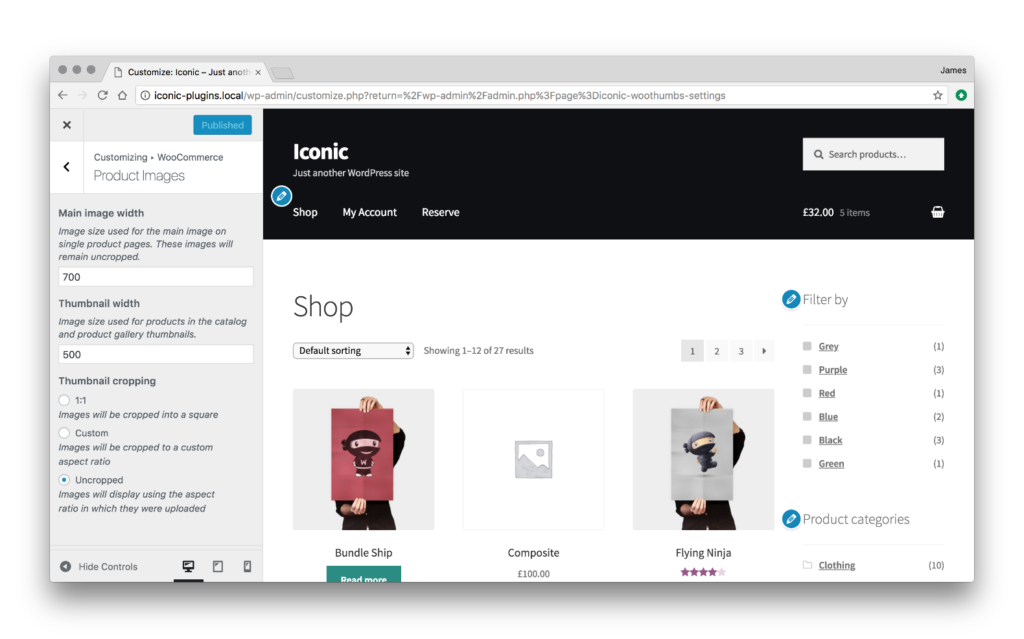
Depending on your theme, you might see image thumbnail width options, or you might only see thumbnail cropping options.
If your theme is controlling the size of your images, the default is usually as follows:
- The image thumbnail (this usually shows on the category pages and includes the category image itself) – 300px by 300px.
How to use the WooCommerce category page to increase sales
Are you wondering how to use the WooCommerce category page to increase sales? In this section, we’re going to give you a few ways to utilize the best plugins to give your WooCommerce category page a boost to make more sales.
Add color and image swatches to your category page filters
With WooCommerce Attribute Swatches, you’ll be able to make your category page filters a lot more accurate and easier to use with color and image swatches.
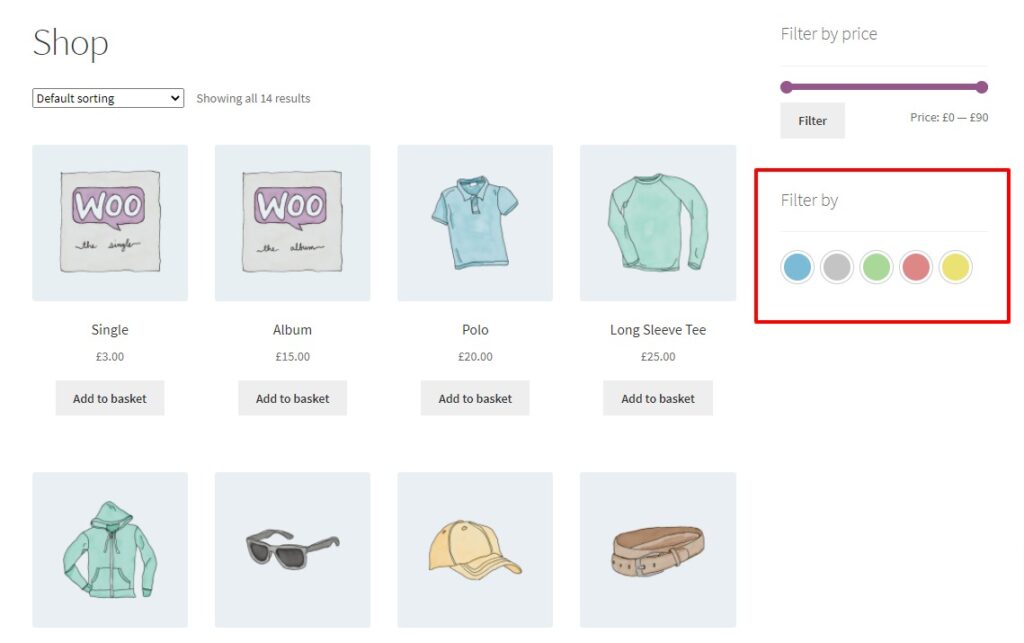
When on your category and shop pages, customers will be able to click a specific color or image swatch and be shown products with that exact color.
There’s no more guesswork when customers can filter visually. Instead, they’ll save a ton of time by only searching for the things they find visually appealing.
Attribute Swatches also allows you to add these color and image swatches to the single product page, and under each product within the category page.
WooCommerce Attribute Swatches
Replace the default WooCommerce variation dropdown menu with variation swatches for WooCommerce. Add color swatches, image swatches, and modern text buttons to your variable product pages.
Show additional product images on the category page
Do you want to add more images to your products on the category page?
Showcasing more of your product is a higher guarantee that you’ll reap more purchases.
With Image Swap for WooCommerce, you can show additional images, add a hover effect that allows customers to zoom in on images, or essentially create a product gallery on the shop/category page.
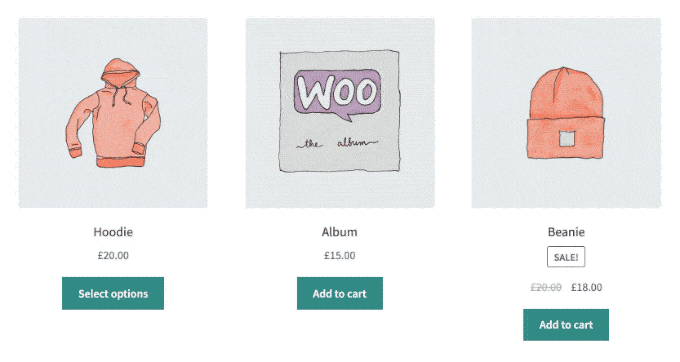
By allowing your customers to hover or flip product images, you’re allowing them to see more of each product, without having to click through to the product page. Saving them clicks and keeping them in your store for longer.
Image Swap for WooCommerce
Add gallery-like image swap effects to your product images on the shop, catalog, search, and filter results pages with Image Swap for WooCommerce.
Allow customers to preview products on the category page
Do you want to increase the chance of someone purchasing your products? With WooCommerce Quickview, you can add a product gallery lightbox to the category page.
The lightbox allows shoppers to preview an item without having to go to each product’s page, making the shopping experience easy and fast. Your customers will be able to preview products that pique their interest and still be able to stay on the category page.
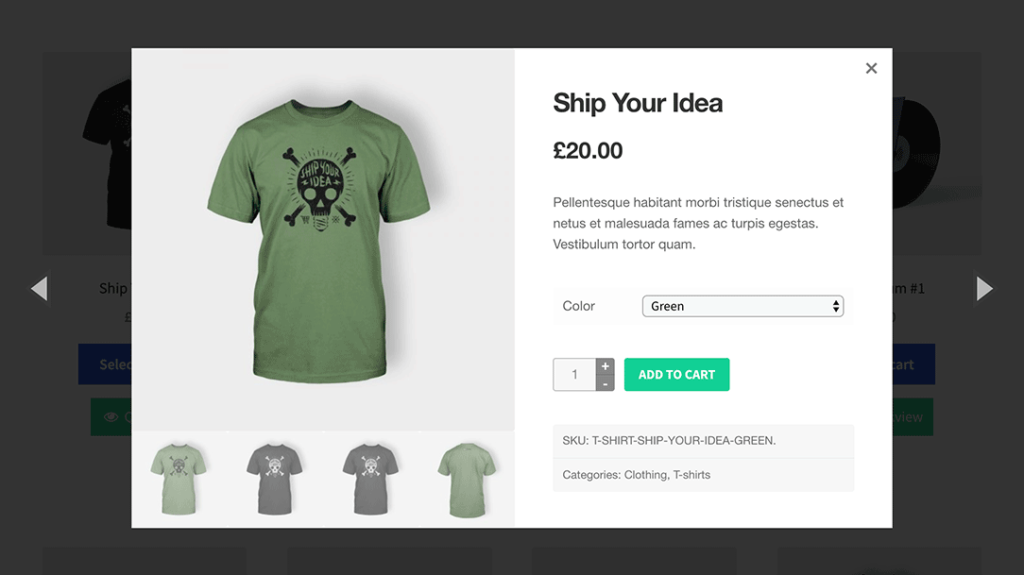
If a customer wants a product, they can add it to their cart straight from the lightbox without having to go to a separate page. This plugin reduces clicks, expedites the shopping experience, and is an effective way to boost sales.
WooCommerce Quickview
Add a WooCommerce quickview product lightbox to your category and shop pages. Allow customers to preview product information and add products to the cart without leaving the page.
Get to grips with WooCommerce product categories
Product categories might seem like a fairly basic part of your WooCommerce store. But when used strategically, they can boost sales and enhance your customers’ experience.
Give your WooCommerce category pages an additional boost with the plugins we mentioned in this guide:
- WooCommerce Attribute Swatches – Add color and image swatches to your WooCommerce category filters for a more accurate visual experience.
- Image Swap for WooCommerce – Allow customers to hover over images on the category page with image swap effects to encourage shoppers to make a purchase with fewer clicks.
- WooCommerce Quickview – Allow customers to preview a product on the category page and purchase faster with fewer clicks.

Gina Lucia is our in-house Content Manager at Orderable. She writes articles, user guides, technical documentation, and creates videos on everything WooCommerce and Orderable.
Gina has been working in the WordPress/WooCommerce space since 2012 when she developed WordPress websites for clients large and small.
For the past 8 years, she’s been writing about everything WordPress and WooCommerce, becoming an expert in what makes a WooCommerce store succeed.
When not writing, Gina loves to tend to her vegetable garden, read, or travel to mainland Europe.