If you want to understand what product attributes are and how to use them effectively in your ecommerce store, this article is here to help.
Ecommerce customers rely on product attributes to make informed purchasing decisions. They tell customers which products would be the best fit for their needs.
Understanding and effectively utilizing product attributes should be a top priority if you want to improve your customers’ shopping experience and drive sales. In this article, we’ll walk you through how to do it.
To be specific, here’s what we’ll cover:
- What are product attributes (with examples)?
- The different types of product attributes.
- Why are product attributes so important in ecommerce?
- How to use and improve how you present product attributes in your online store.
To start us off, let’s first understand what product attributes are.
What are product attributes?
Product attributes are the specific features or characteristics of a product that help describe it to a customer. These include things like the product’s color, size, material, and model.
When creating new products in your online store, you’ll assign attributes to them based on their specific features. These attributes are what your customers will use to filter out the rest of your products and remain with what will likely suit their needs.
But that’s not all they’re good for. You would use the same attributes to set up your product listings, manage inventory, and bolster your SEO efforts.
The bottom line is that product attributes are more than just a nice-to-have feature in your online store. They are necessary, and we’ll see just how important they are in this article before we set them up.
But first, let’s look at some examples to better understand what product attributes are.
Examples of product attributes
Suppose you have a clothing store selling t-shirts. These t-shirts will have different characterizing features such as:
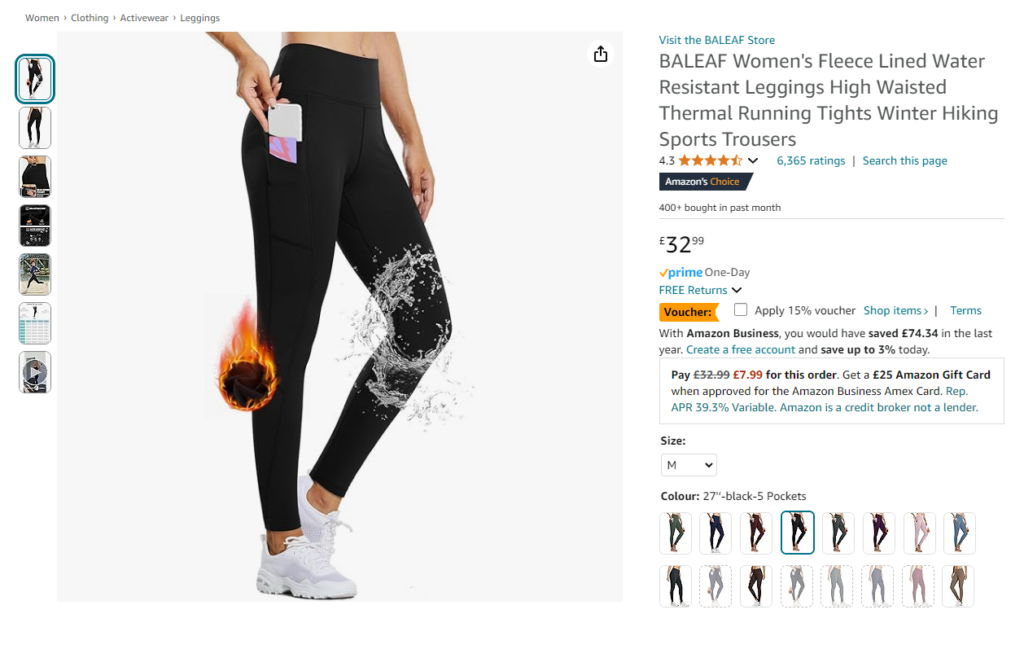
- Product name.
- Color.
- Size.
- Brand.
- Custom pattern or material.
- Necklines (v-neck, turtleneck, or crew-neck).
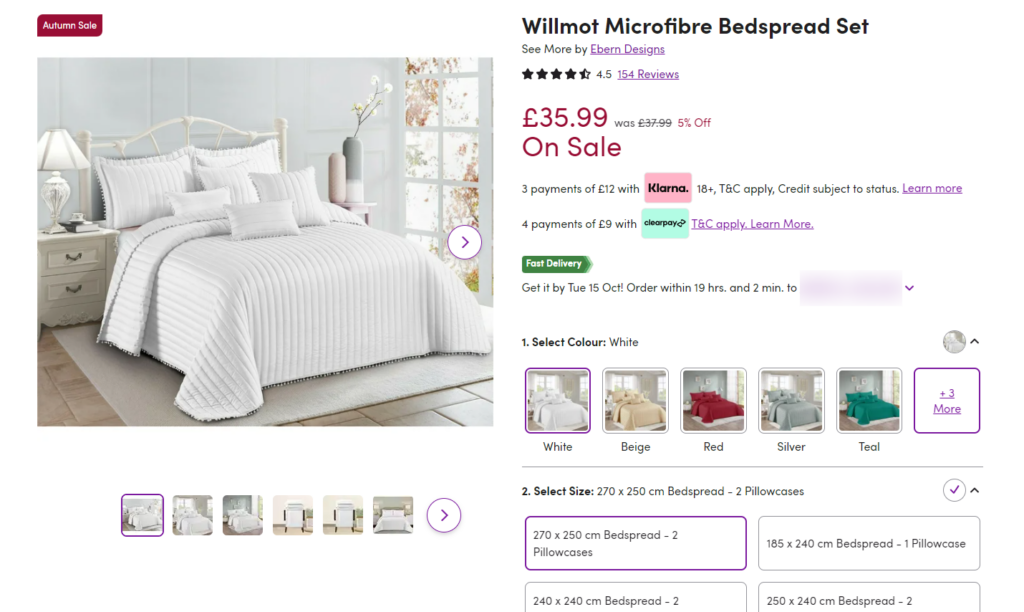
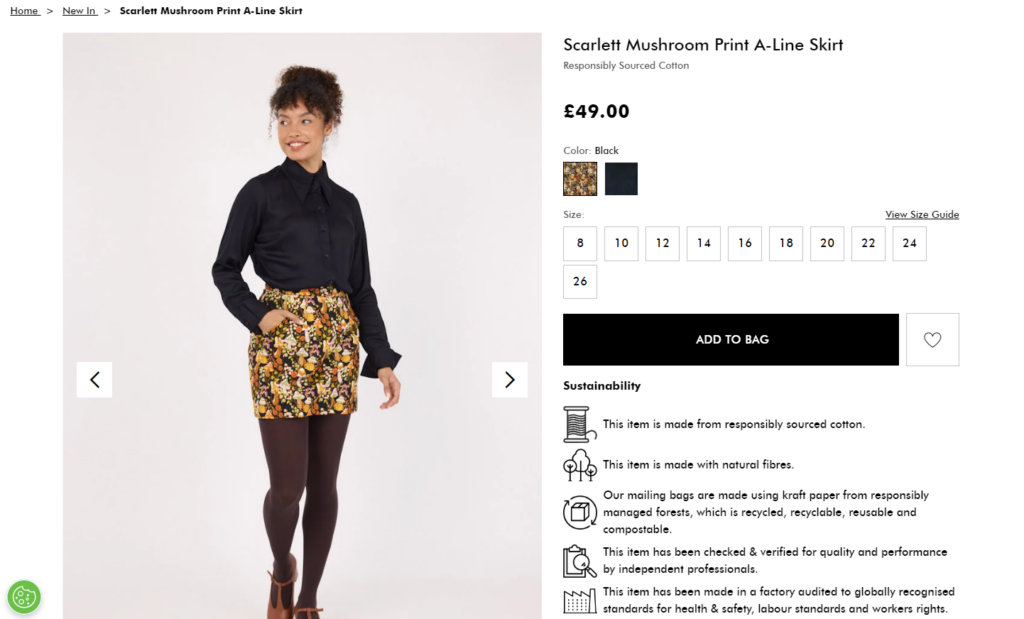
Color, size, and material are pretty much universal product attributes. They cut across products like apparel, furniture, and textiles (curtains, bedsheets, etc).
Apart from these standard product product attributes, different types of products will have different types of attributes relevant to them.
For instance, in addition to color, potential customers will also care about jeans’ cut – whether it’s:
- Slim-fit.
- Skinny.
- Or tapered.
If you’re selling cars, one of the attributes should be the car’s country of origin. On the other hand, for books, you can have the genre, year of publication, and language. The list is endless, and it all depends on the type of product you’re selling.
Remember that the goal of attributes is to provide customers with enough information for them to make an informed decision. So you want to provide enough so they’re certain about your product but not overwhelmed with the options.
What are tangible vs intangible product attributes?
Tangible attributes are those physical attributes customers can see, touch, or measure. They include the color and size options we’ve discussed, as well as durability, battery life (smartphones), and so on.
These are the most common types of product attributes, but they aren’t the only ones. We also have intangible product attributes.
These are those that customers can’t physically touch or measure, such as:
- Exceptional customer service – if you’re selling a software product.
- Marketing claims such as product quality, performance, and sustainability.
- Warranty – which is a promise.
- Security and reliability.
- Product reviews and other forms of customer feedback.
While tangible attributes provide important information about a product’s features, intangible attributes help you to seal the deal. They play an important role in convincing customers to buy from you.
For instance, if a first-time customer is skeptical about buying a product, they will be more confident if other customers describe your product as high quality.
Intangible attributes shape how potential customers perceive your product or brand. As such, they should be a part of your marketing strategy because they can be a selling point for your product.
What is the difference between product attributes and product specifications?
Product attributes and product specifications are closely related. Sometimes, they’re used interchangeably because both terms describe a product to consumers. So what makes them different?
Attributes are the general characteristics of a product, like the ones we’ve discussed above. On the other hand, product specifications are more precise. They outline the specific technical features of the product.
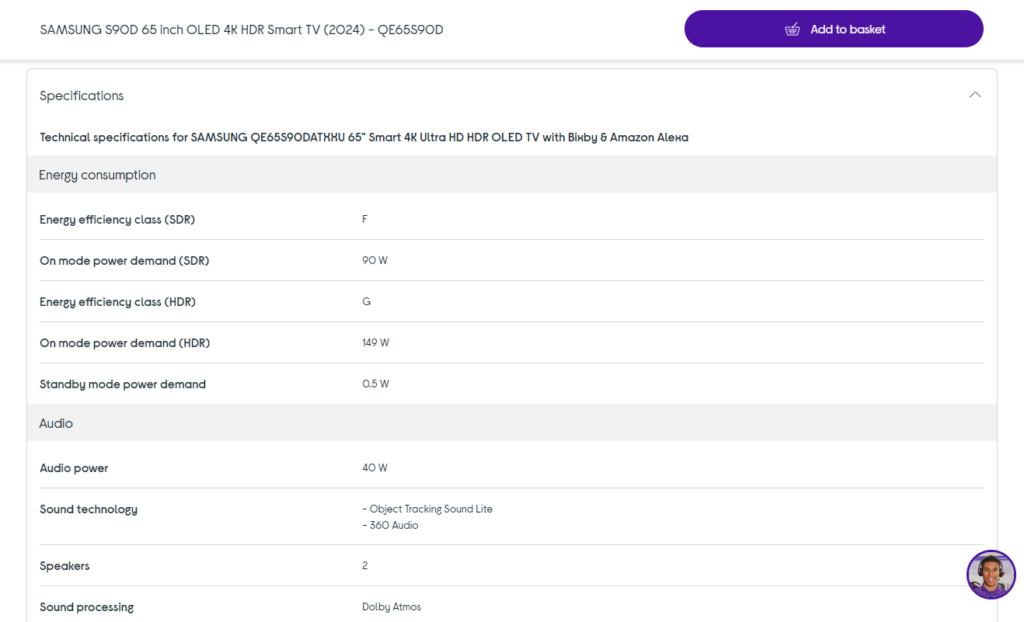
Looking back at our t-shirt example, product specifications would go as far as specifying the material composition, fabric weight, thread count, collar construction, etc.
Customers buying t-shirts might not be too interested in this information. But those shopping for tech products, pharmaceuticals, and vehicles need it to assess the quality of the product.
So that’s what product attributes are, their types and examples, and how they differ from product specifications. With that in mind, we’re ready to go over why product attributes are important for your online store.
Why are product attributes so important in ecommerce?
When introducing product attributes, we touched a little on how they’re important to you and your customers. Now, it’s time to dive deeper. Product attributes are important in your ecommerce store because of the following reasons.
Product attributes help in product information management (PIM)
📈 The most successful ecommerce stores today use PIM systems to manage their products’ information. As of now, nearly 50% of businesses do this.
If you sell products through multiple channels, say a WooCommerce store, and on Amazon, you probably use it too. Attributes are the foundation of any PIM system.
They create a structure for organizing product information within this system, which makes this process a whole lot easier for you. They enable your product’s data to be consistent across different listings.
This means you can distribute accurate product information across these channels. The best part about it is that the benefits of a well-organized PIM system trickle down to improve inventory management, SEO, and your customers’ experience.
Simplified inventory management
Product attributes provide the information you need to keep track of your stock. You can use product attributes to construct product variants and attach a SKU to these products.
This enables you to know how much of a specific product you have so that you can prevent shortages or stocking too much of it.
📈 One interesting thing about small businesses is that they don’t put enough effort into inventory management. In fact, studies show that 43% of small businesses don’t track their inventory at all.
Taking time to manage your inventory can give you the edge over some of your competitors.

Improved SEO
When it comes to consumer goods, shoppers want products that meet their specific needs. They find these products by searching for very specific product attributes on search engines like Google.
Let’s say a customer wants to buy a new couch for their living room. What do you think they will search for online? One thing is for sure: it won’t be a ‘couch’ or ‘sofa.’
They will think about the attributes they want the couch to have, for instance, ‘L-shaped’, ‘Beige’, and ‘with storage’, and include these attributes in their search terms.
Because of this, using attributes improves your SEO efforts. Attributes serve as the keywords customers use to find products on search engines. This means your store will receive more organic traffic from search engines.

How can attributes improve the online shopping experience?
Running a successful ecommerce business isn’t just about having the best products, but providing the best shopping experience as well. Product attributes can help you with that.
Product attributes help customers find their preferred products in your online store the same way they do when customers are searching online.
They enable customers to easily find what they’re looking for using:
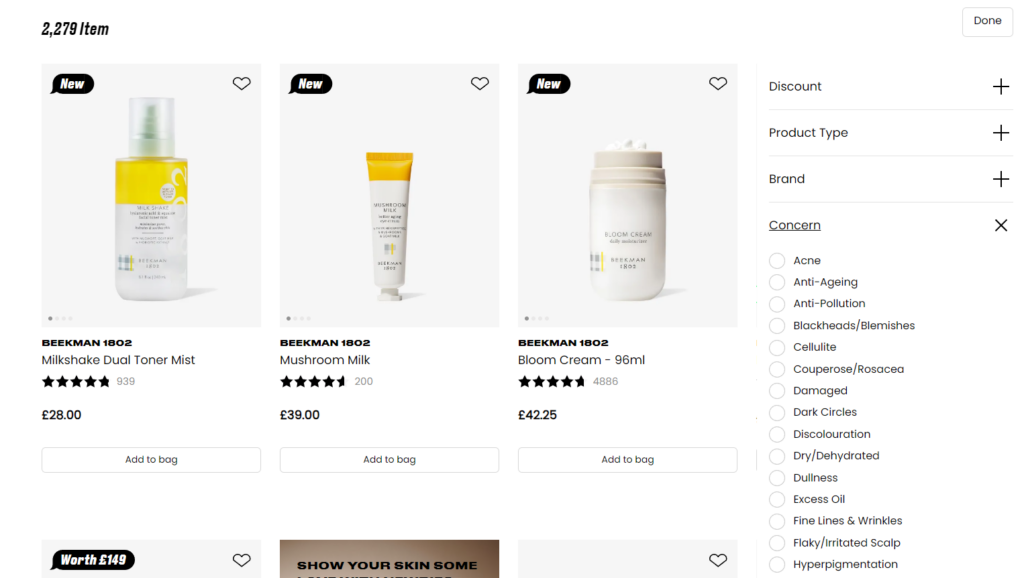
- Search. Customers can simply input the attributes they want in the search bar, and if you have well-defined attributes, it will return accurate search results. They can quickly find what they’re looking for. This takes the hassle out of shopping online.
- Product filters. Product attributes in filters enable customers to narrow down their search to products highly likely to meet their needs.
📈 According to research, 56% of online shoppers put careful consideration into each purchase. They like to compare products and see which ones best suit them. Product attributes in your search and filters allow them to compare similar products.
This is to say that attributes are an important part of customers’ purchase decision-making process.
Now that you know how important product attributes are, let’s get practical and see how to add them to your online store.

How to use product attributes in your online store
There are different ways to use product attributes in your online store depending on the ecommerce platform you use. So, let’s explore them.
In this section, we’ll walk you through the different techniques for using product attributes on WooCommerce (with WordPress) and Shopify. If you aren’t using these platforms, you’ll still find these techniques useful.
Let’s begin with WooCommerce.
How to use attributes in your WooCommerce store
In the default WooCommerce setup, there are mainly two types of product attributes:
- Global product attributes.
- Product-specific attributes.
Global attributes in WooCommerce
These are the product attributes you can apply across different products, such as the color and size options we discussed earlier. Also, you can use these in the product filter widget on your shop page.
How to create global attributes in WooCommerce
To create global attributes in WooCommerce:
- Log into your WordPress dashboard and go to Products > Attributes.
- You’ll see the Create Attribute page where you’ll:
- Add a name and slug. Let’s use color for this example.
- If you want this attribute to have product archives, check the box that says Enable Archives.
- Select the default sorting order and click the Add Attribute button.
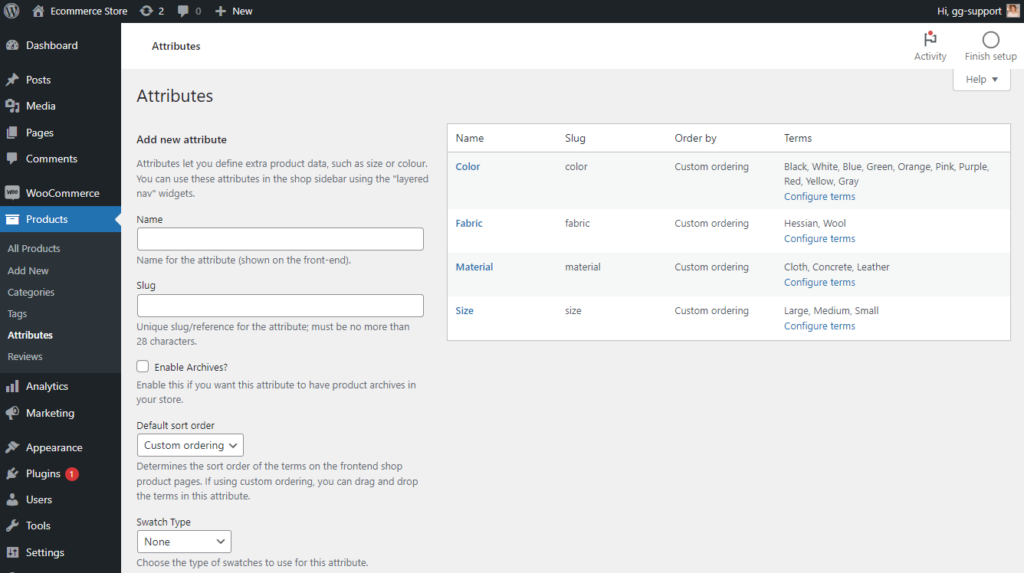
- Next, you’ll need to add the values of each attribute, in this case, the colors (red, blue, beige, etc.) for the color attribute. To do this, click on Configure Terms under the Terms column on the menu to your right.
- Name the colors and add a description. Once done, click the Add New Color button at the bottom.
- Repeat this for all the other colors.
Remember that once you’re done, you’ll need to assign these attributes to products so that they appear on the product page. We’ll see how to do it in the next section.
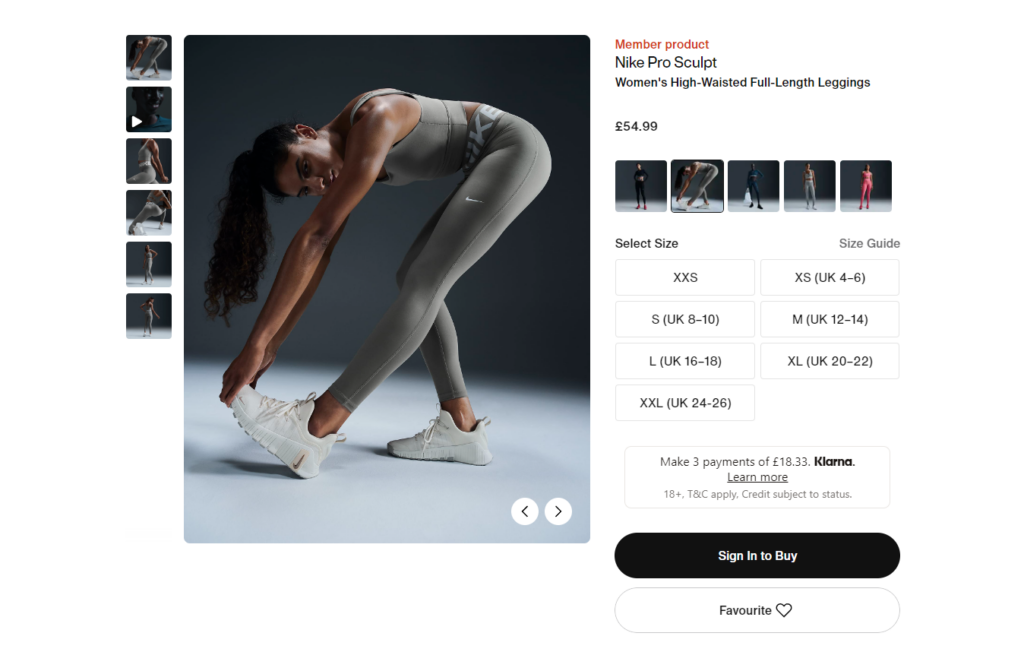
Specific product attributes
In WooCommerece, you can also create product attributes that are specific to certain products. For example, a jeans fit (slim fit, regular, oversized). To create specific product attributes:
- Go to Products on your WordPress dashboard, hover on the product you want to add attributes to, and click on Edit.
- Scroll down past the product descriptions section to the Product Data section. Click on the Attributes tab.
- If you want to assign global attributes to this product, click on the dropdown that says Add existing and select the attribute you want to add.

- But if you want to create product-specific attributes, enter a name and add values on the fields below this section. Separate each of the values using a vertical slash (|).
- Once done, click on Save attributes. For these changes to be reflected, scroll up and click on the Update button to your right.
That’s it. Now, when customers visit your product page, they will see these attributes, and can use them to browse through your variable product options.
Why the default WooCommerce attribute and variation display needs improvement
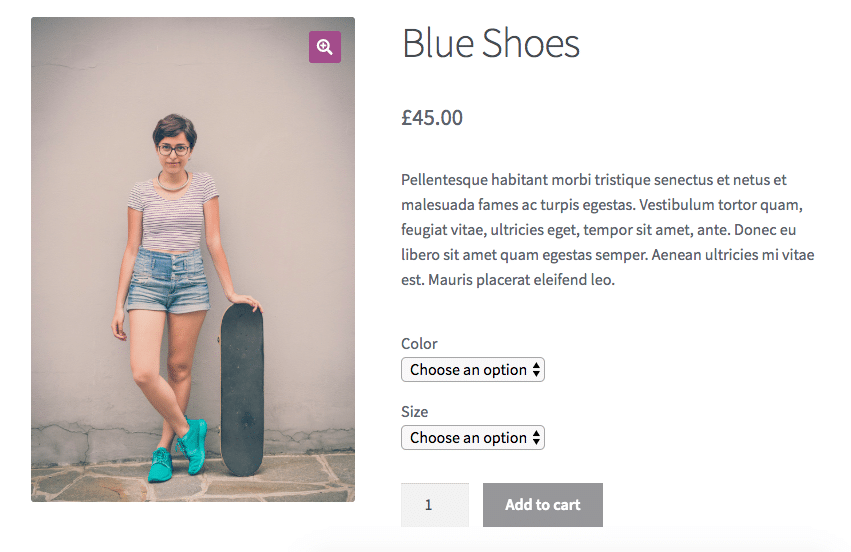
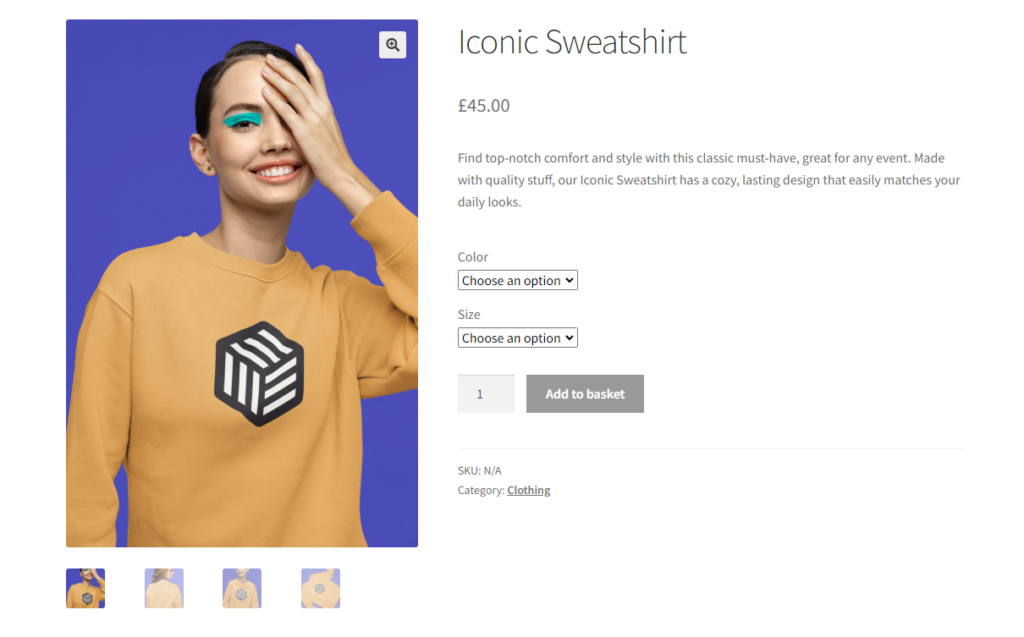
By default, WooCommerce presents these attribute options for variable products using dropdowns. So, if customers are looking for a specific variation of the product, they’ll have to click the dropdown for each attribute, go through the options, and select what they prefer.
We can all agree that this isn’t the best user experience. If you have tons of attributes and variations, customers will have a difficult time browsing products. After all, who wants to click through dropdown after dropdown looking through numerous options?
Trying to style these dropdowns just won’t cut it because we’re very limited on what we can do depending on the theme you’re using.
We can certainly do better than the default option.
How to improve attributes in WooCommerce
To create the best experience for your customers and increase their chances of buying from you, you should change these product dropdowns into swatches. By default, WooCommerce doesn’t allow you to do this.
Fortunately, we can do it with the help of the WooCommerce Attribute Swatches plugin.
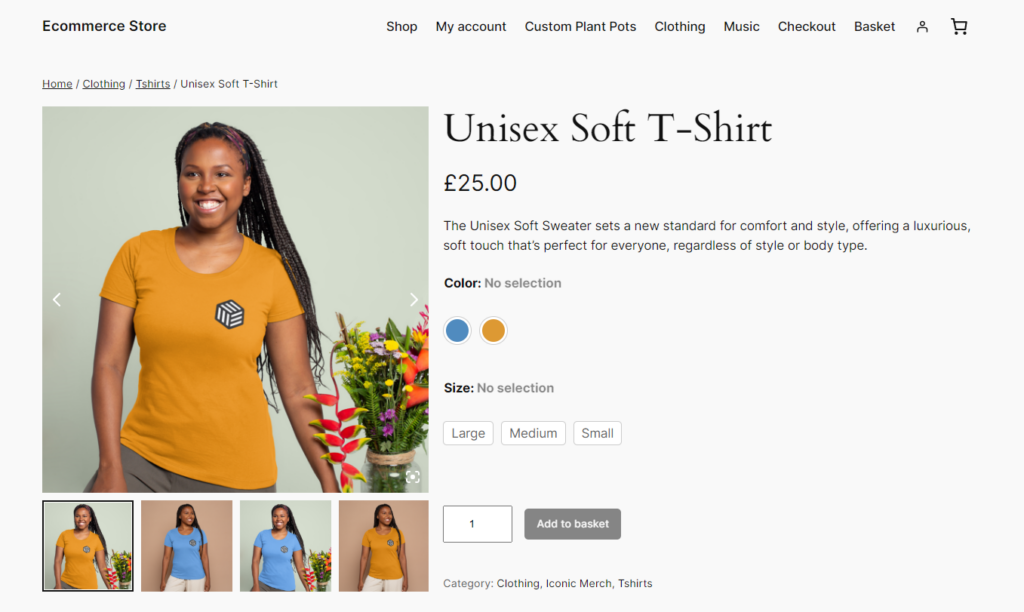
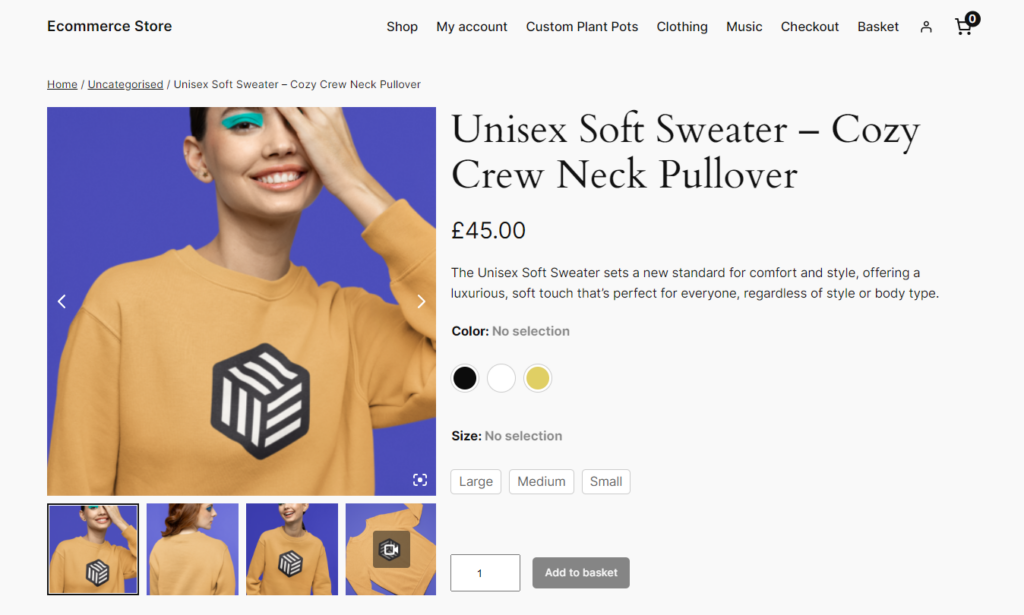
WooCommerce Attribute Swatches allows you to replace the standard WooCommerce product variation dropdowns with:
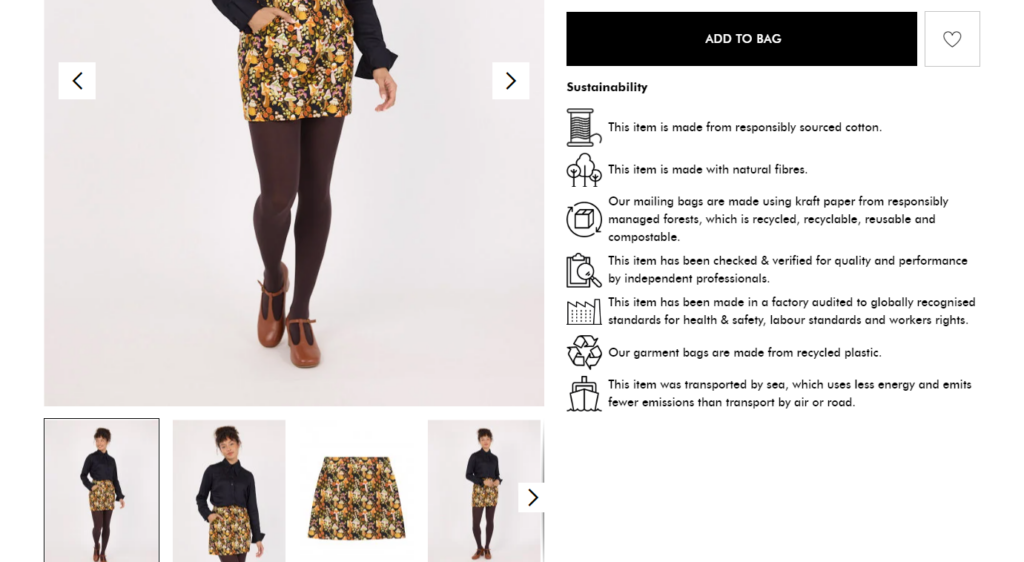
- Color swatches. A user-friendly color picker customers that allows customers to see visual representations of the different colors a product comes in.
- Image swatches. Replace dropdowns for patterns, designs, or materials with small images showing a preview of these attributes.
- Text buttons. Adding square shapes around your text-based attribute variations to make them look better.
- Radio buttons. With a clean and upgraded design.
With these swatches, customers can visually browse through variable product options, which makes for a great user experience. Speaking of user experience, this plugin improves the experience of both you and your customers.
WooCommerce Attribute Swatches
Replace the default WooCommerce variation dropdown menu with variation swatches for WooCommerce. Add color swatches, image swatches, and modern text buttons to your variable product pages.
A seamless shopping experience for your customers
The swatches you add to your WooCommerce store are interactive. What does this mean? They are clickable, and as soon as a customer clicks on them, the product image updates immediately to reflect the selected variation. This creates a seamless experience as customers select and compare variations.
WooCommerce Attribute Swatches is mobile-optimized. This means your swatches will adapt to the screen size of customers using mobile phones or tablets to shop.
📈 More than 50% of online shopping traffic comes from mobile devices.
As such, you’ll cater to a majority of your target audience.
A better attribute creation experience for you
WooCommerce Attribute Swatches seamlessly integrates with the WooCommerce global attributes feature. If you have tons of product attributes with numerous variations, you don’t have to worry about creating swatches for each one of them.
Simply create global attributes, and you can use their swatches across different products in your store. So if you have a shirt, a piece of furniture, sneakers, etc., with the color attribute, you’ll only have to create this swatch once.
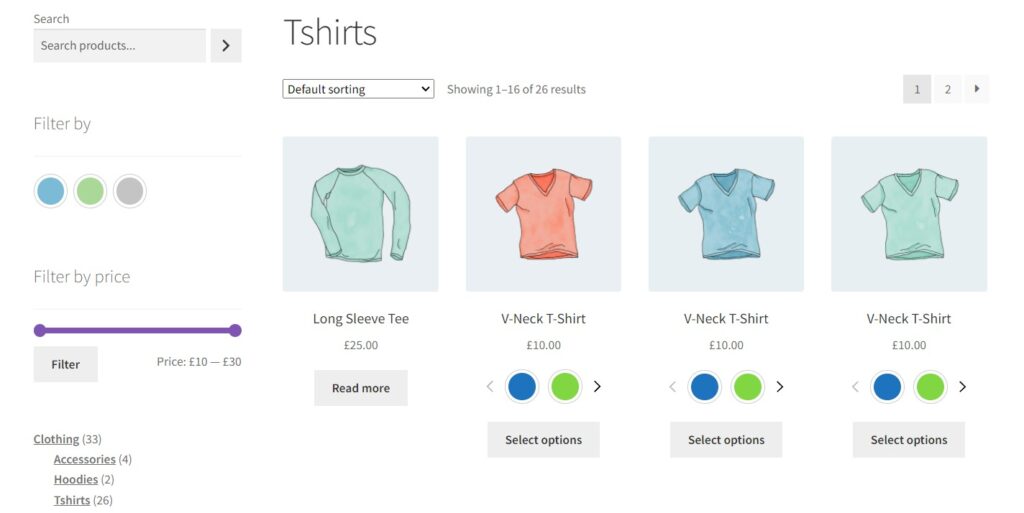
Apart from the product page, where else can you display these swatches? You can do it on:
- The shop page. Allowing customers to see what’s available without visiting the product page. Those in a hurry can simply select their preferred variation and add it to their carts without leaving the shop page.
- Product filters. You can also replace the product filter dropdowns with these swatches and allow your customers to filter products visually.
Attribute swatches are powerful customer experience tools, saving your customers’ clicks and ensuring they have a great time shopping at your online store.
We’ve seen how to use product attributes in WooCommerce. Now, let’s see how to get it done on Shopify.
How to use product attributes in your Shopify store
Product attributes in Shopify and WooCommerce are quite similar, with a few differences here and there. The first thing you should know is that in Shopify, attributes are referred to as product options.
Secondly, Shopify’s approach to creating and managing product attributes is more product-focused. It doesn’t explicitly offer the global product attributes feature that comes in the default WooCommerce.
Instead, it looks more like creating product-specific attributes like you would for WooCommerce.
How to create product options in Shopify with the default settings
You can create product attributes as Options from the variant section on the Create/Edit Product page.
To do this:
- Log into your Shopify dashboard and click on Products.
- If you want to add options to an existing product, simply click on the product. But, if you want to create a new product, click on the Add Product button at the top-right of your screen.
- Add product details such as the product description, SKU, images, etc., if you haven’t done this already.
- Scroll down to the Variants section and click on the + Add options like size or color button.
- Add the name of the option, let’s say ‘Size’, and add the values like Small, Medium, or Large in the field below this.
- Once you’re satisfied with your options, click on Done.
Depending on the theme you’re using, Shopify will present these product options as text buttons. So if you have size as the option, Small, Medium, and Large will be in separate text buttons.
The main issue with this is that when you have numerous product options, your product page will be cluttered. Just like in WooCommerce, you’ll need a better way to display this information.
How to improve product options with Shopify apps
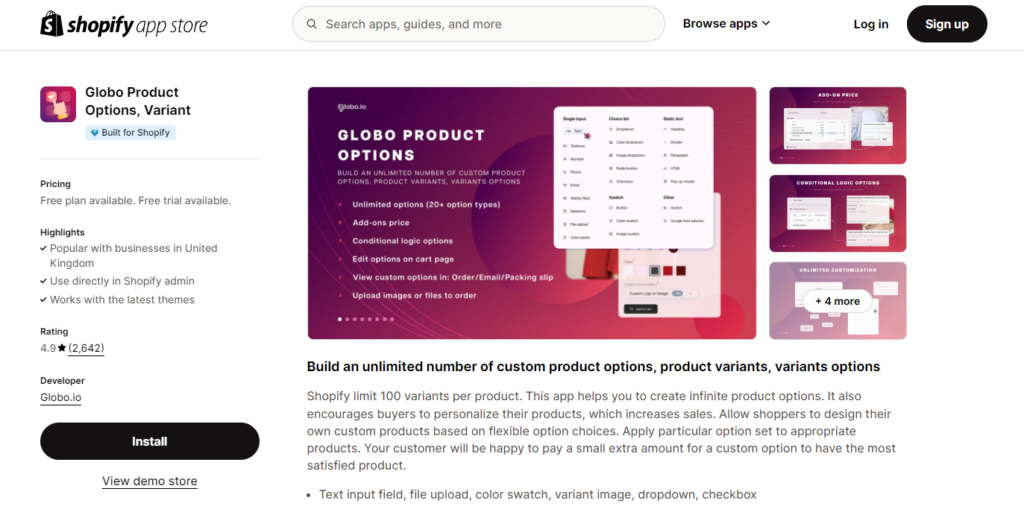
You can improve how product options are displayed on the product page with the help of Shopify apps such as:
These apps allow you to add color swatches, image swatches, and checkboxes to replace the standard Shopify text buttons. If you have over 10 product options, you can group them into one dropdown to avoid using too much space on this page.
EasyFlow Product Options provides the closest thing to global attributes with its bulk editing feature. With this feature, you can manage sets of product options (for example, all color options) at once. This helps you create product options faster.
That’s it. Whether you’re using WooCommerce or Shopify, you have enough information to get started with product options in your online store.
Get to grips with ecommerce attributes today
Product attributes are so important to your ecommerce store because consumers rely on them to find products that suit their needs. At the same time, they help you organize your inventory and ensure everything is running smoothly in your store.
While WooCommerce provides you with useful settings for creating global and product-specific attributes, it falls short when it comes to displaying them.
Thankfully, you don’t have to be stuck with the bland, word-heavy default WooCommerce attribute dropdowns. You can upgrade them with color, image, and text swatches with the WooCommerce Attribute Swatches.
Improve your customer’s product attribute browsing and selection today in a few clicks with WooCommerce Attribute Swatches.
WooCommerce Attribute Swatches
Replace the default WooCommerce variation dropdown menu with variation swatches for WooCommerce. Add color swatches, image swatches, and modern text buttons to your variable product pages.

Gina Lucia is our in-house Content Manager at Orderable. She writes articles, user guides, technical documentation, and creates videos on everything WooCommerce and Orderable.
Gina has been working in the WordPress/WooCommerce space since 2012 when she developed WordPress websites for clients large and small.
For the past 8 years, she’s been writing about everything WordPress and WooCommerce, becoming an expert in what makes a WooCommerce store succeed.
When not writing, Gina loves to tend to her vegetable garden, read, or travel to mainland Europe.