As an online store owner, chances are you’re always on the lookout for different ways to optimize your ecommerce store’s conversion rate. One of the best ways to do this is to create a WooCommerce one-page checkout.
The easiest way to do this is with a WooCommerce one-page checkout plugin, like Flux Checkout. With Flux, you can improve your user experience, speed up the customer journey, and effectively reduce cart abandonment rates.
In this article, we’ll highlight the key benefits of implementing a WooCommerce one-page checkout and explain how you can set it up using the Flux Checkout plugin.
The plugin mentioned in this guide:
- Flux Checkout – Create a fast and reliable one-page checkout for your WooCommerce store.
Flux Checkout for WooCommerce
Prevent abandoned carts with a slick multi-step checkout experience, designed for your customer’s device.
Why one-page checkouts work
Shopping cart abandonment is a real problem for online stores. In fact, it’s been shown that over 69.23% of shopping carts are abandoned worldwide. That percentage is extremely high and it’s no wonder if the majority of online stores have a checkout process that’s hard to navigate.
The problem with the standard WooCommerce checkout page is that it makes the checkout process unnecessarily long. This checkout will typically involve multiple steps and page refreshes, making it extremely easy for your potential customer to give up before they hand over their cash.
A one-page checkout, on the other hand, is a faster and simpler process, requiring the minimum amount of time and details you need from your customer. The result is a massive reduction in abandoned carts and a better experience for your customers.
So now we know the benefits of switching your store’s checkout from the standard WooCommerce setup, to one-page checkout, let’s make that process even easier with a plugin.
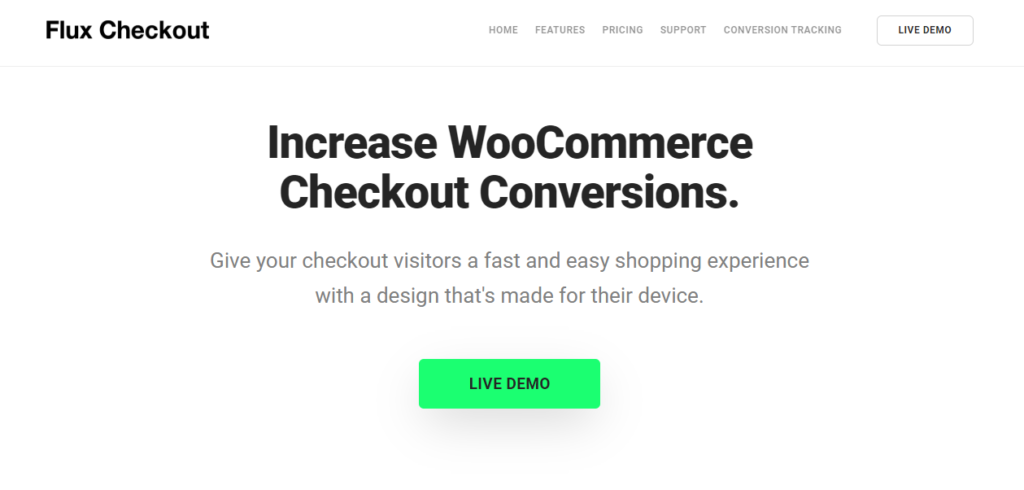
Flux Checkout: A WooCommerce one-page checkout plugin
Flux Checkout is an easy-to-use WooCommerce plugin that can help you optimize the checkout experience your store delivers and increase your site’s conversions while you’re at it.
Here are some of the key benefits you can expect to get with Flux Checkout:
Multi-step checkout
The Flux Checkout plugin lets you set up a multi-step checkout process on your WooCommerce store. The key benefit of adding this to your online store is that it helps you reduce the number of fields a customer is initially presented with on a single page. This way, they’re not overwhelmed with a large form right off the bat.
By creating a multi-step checkout form, you can make sure that each step contains the minimum number of fields and actions. This will help you deliver a user-friendly checkout experience, convert more customers, and boost sales.
Address autocomplete
If you’ve ever bought anything online, you probably already know that the address section of the WooCommerce checkout takes up the most time. This is partly because it contains the largest number of input fields – street, city, zip code, state, and country.
The benefit of using a WooCommerce one-page checkout is that you can use a single input field for the address lookup. In other words, it lets you turn six fields into one, saving your customers a ton of time.
Frictionless experience
While it’s nice to have a responsive checkout page that works seamlessly across different sized devices, it still comes off as overwhelming. One way to make it easier for users to fill out the checkout form fields is to incorporate animation into the design.
Flux Checkout offers an app-like experience with animations that go beyond a responsive checkout. By using the plugin, you can deliver a full-screen checkout experience complete with off-screen transitions, modals, field and error highlighting, and switches.
Easy integration
One of the best parts about using Flux Checkout on your WooCommerce store is that it’s incredibly easy to integrate. All you have to do is install the WordPress plugin on your website and customize it. The plugin features a ton of customization options which makes it easy to match your brand aesthetic.
Once that’s done, customers will only have to add products to their shopping cart, click the Add to Cart button, and proceed to a speedy checkout.
How to set up your WooCommerce one-page checkout using Flux Checkout
Here, we’ll explain how you can set up your WooCommerce one-page checkout using Flux Checkout.
Step #1: Install and activate Flux Checkout
To get started, purchase Flux Checkout: iconicwp.com/flux-checkout
Then follow these steps:
- Go to Plugins > Add New > Upload Plugin
- Choose the zip file you downloaded, upload, and then click ‘Activate’
- Once activated, you’ll need to enter your licence key
Now that we have Flux Checkout installed, we can move onto adjusting the settings.
Step #2: Configure the plugin settings
Once you’ve activated the plugin, you’ll automatically be redirected to the plugin settings page. From here you can configure the General Settings, Header Settings, and Checkout Style.
General settings
Click on the General Settings tab to get started.
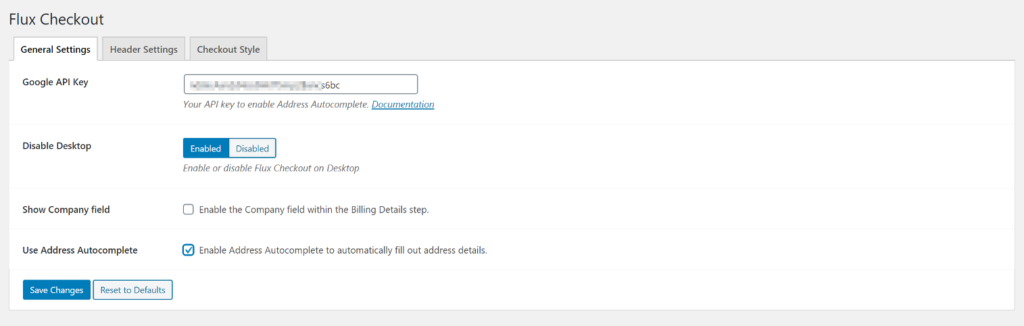
- Enter your Google API Key to enable Flux Checkout’s Address Autocomplete feature.
- Choose to enable or disable Flux Checkout on desktop machines.
- Tick the checkbox next to Show Company field if you’d like to enable the Company field within the billing details step.
- Tick the checkbox next to Use Address Autocomplete to enable the Address Autocomplete feature. We recommend enabling this option.
Header settings
Next, click on the Header Settings tab.
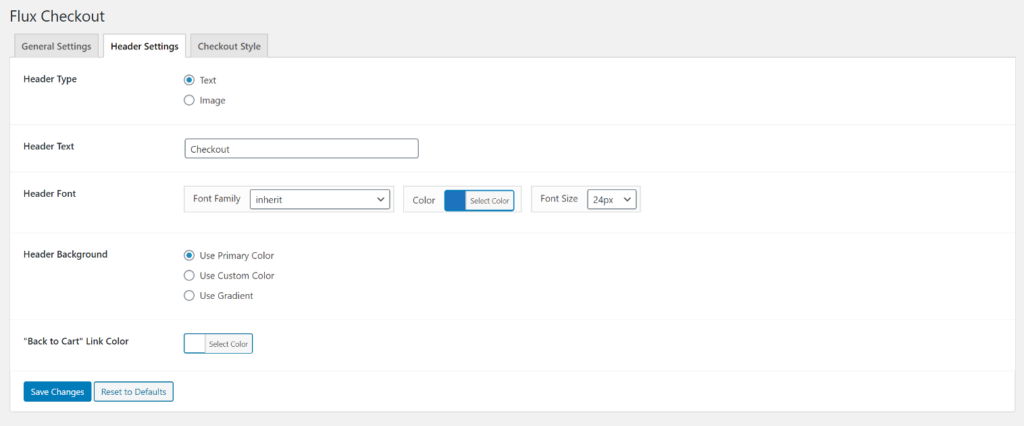
From here, you can customize how the WooCommerce one-page checkout form appears on the front-end. You can choose the header type (either image or text), set the header text, and select fonts, background, and link colors.
Checkout style
Finally, click on the Checkout Style tab.
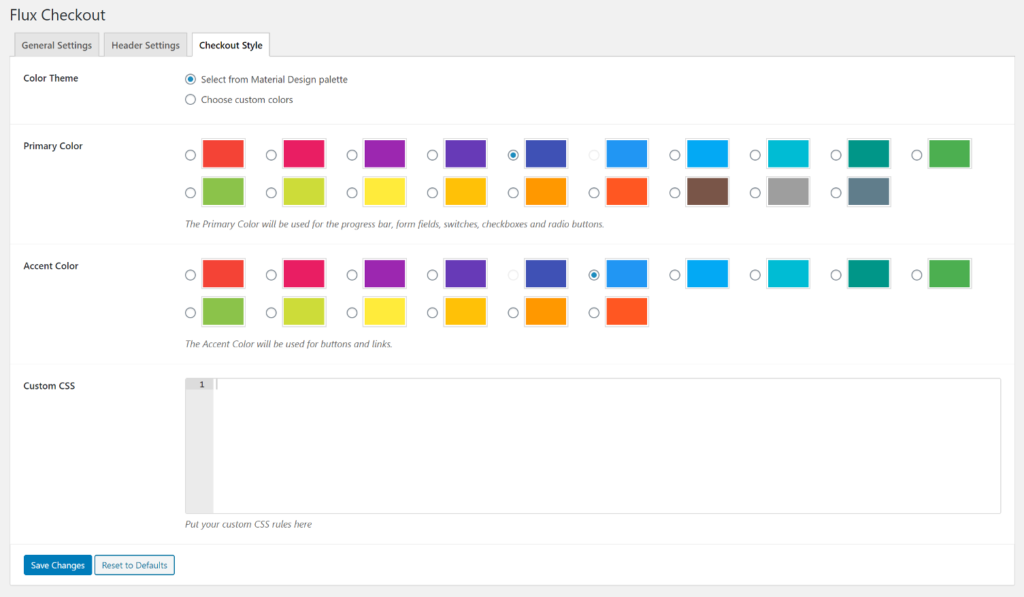
You can use these settings to select a color theme for your checkout form. In addition to this, you’ll also see a color palette that you can use to set the primary color and accent color for your multi-step checkout form.
To take things to the next level, you can also use the Custom CSS option to add CSS rules and customize your checkout form’s look and feel however you’d like.
Once you’re done configuring the checkout form’s settings, click the Save Changes button to proceed.
Step #3: Preview your one-page checkout
The easiest way to test out the Flux Checkout form after you’ve configured the plugin’s settings is by executing a test purchase. To do this, head over to your online store’s product page, add a WooCommerce product to your shopping cart and proceed to checkout.
You’ll notice that the WooCommerce checkout has automatically been split up into three steps – Details, Address, and Payment – instead of everything crammed into a single page.
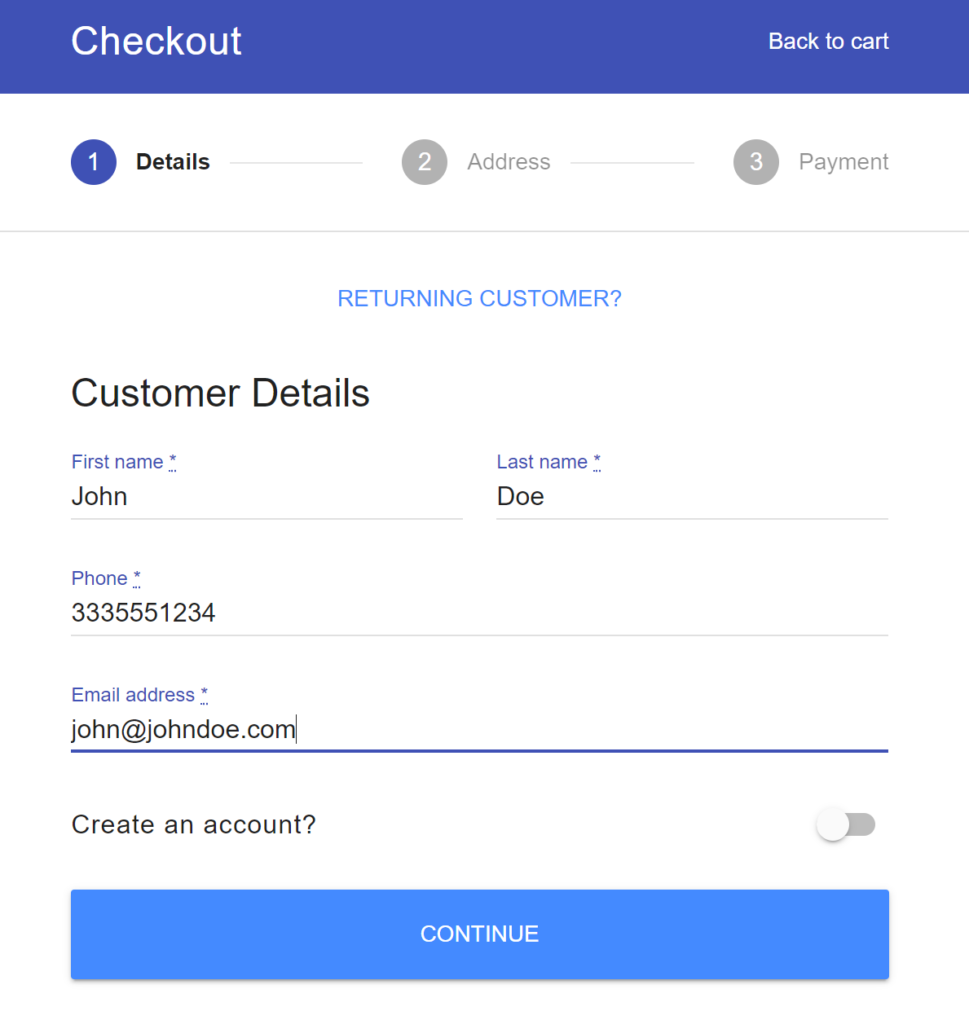
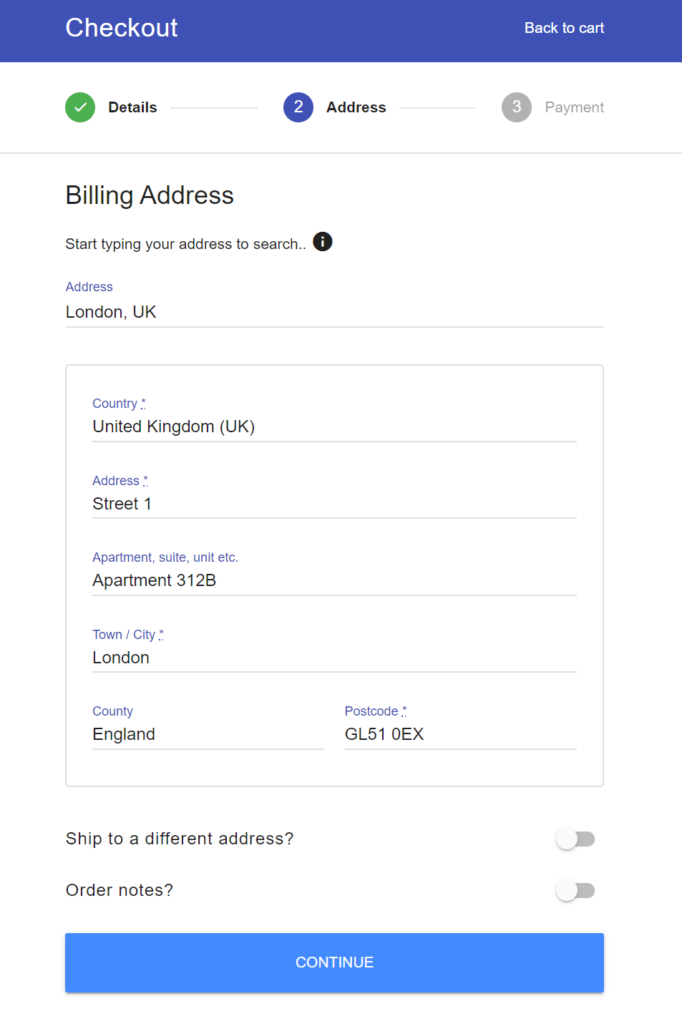
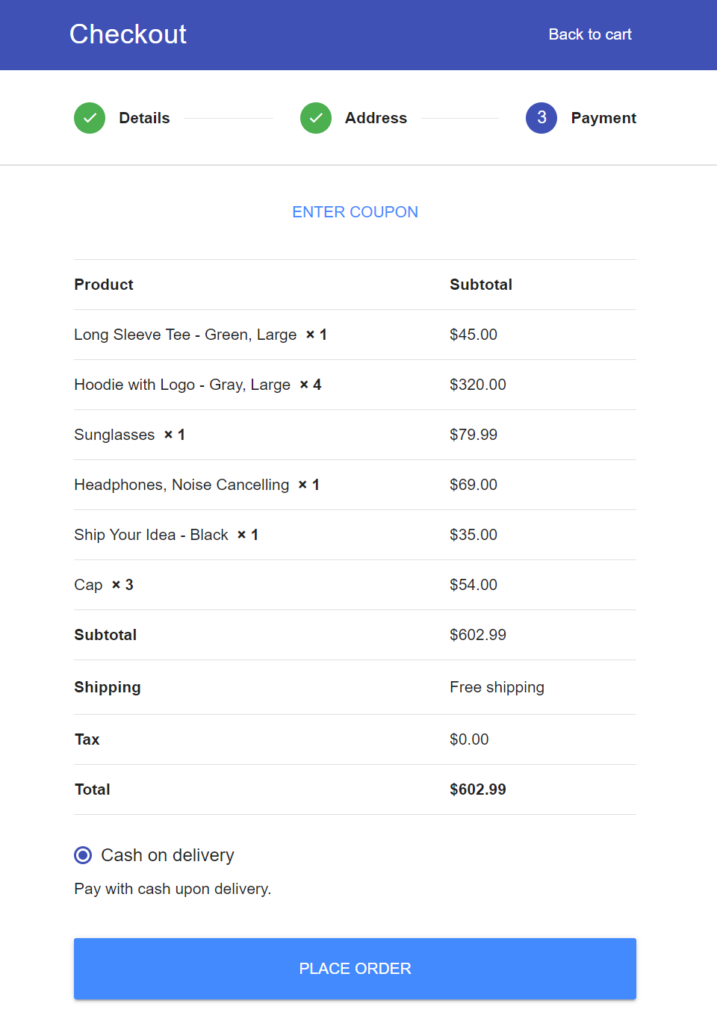
The form allows guest checkout automatically while giving customers the option to create a user account simply by toggling the Create an account? option. Once that’s done, it uses the Address Autocomplete feature to enable customers to quickly enter their billing address. And, finally, customers can proceed to the payment stage to review their cart and select a payment method before placing their order.
Deliver a one-page checkout experience
Instead of making the WooCommerce checkout experience unnecessarily complicated and overwhelming, you should look for ways to optimize it in order to boost conversion rates and reduce cart abandonment rates.
And the easiest way to do this is by using the WooCommerce plugin Flux Checkout to simplify the purchase process. Once you have the plugin installed and activated, you simply have to configure the look and feel of your checkout form and it takes care of the rest.
Reduce cart abandonment on your eCommerce store. Get Flux Checkout today!