
In this post, we’ll show you how to display custom fields on the WooCommerce product page with a few different techniques. We’ll do this for both simple and variable products and with the help of an easy-to-use plugin.
The plugin mentioned in this guide:
- WooCommerce Custom Fields for Variations – Add custom fields to your product variations.
Contrary to a physical store, customers in your WooCommerce store don’t have an opportunity to interact with your products physically. So, providing as much information as possible on the product page without congesting it is in your best interest.
An effective way to do this is by using custom fields to add and display additional information on the product page. In this post, we’ll show you how to do this.
Let’s first understand what custom fields are.
What are custom fields in WooCommerce?
In a WordPress site, fields represent sections on which you can add content to be displayed on your web pages. In a WooCommerce website, the product page has the product title, description, data, and reviews fields by default. You can add text, images, radio buttons, and other content to these fields, and they will be displayed on the product page.
On the other hand, custom fields are fields you create apart from those already there by default.
You can then use custom fields to display unique additional information on your products or collect input from customers directly from the product page.
Why add custom fields to your WooCommerce products?
With custom fields, you‘ll be able to have additional sections for adding information on the product page without cluttering it. Your customers will then be able to find this information effortlessly and make informed decisions quicker.
As the store owner, you can accelerate the process of editing specific product variations by using these custom fields for multiple products with some changes. You can use custom fields for a variety of purposes on your product page, including:
To add technical information
If you deal in technical equipment such as PCs, video cards, etc., you can use custom fields to display the specs of a piece of equipment. This could be memory, processing speed, edition, and more.
This is especially important for technical products because customers tend to look at specs before deciding to make a purchase.
To add additional identification information
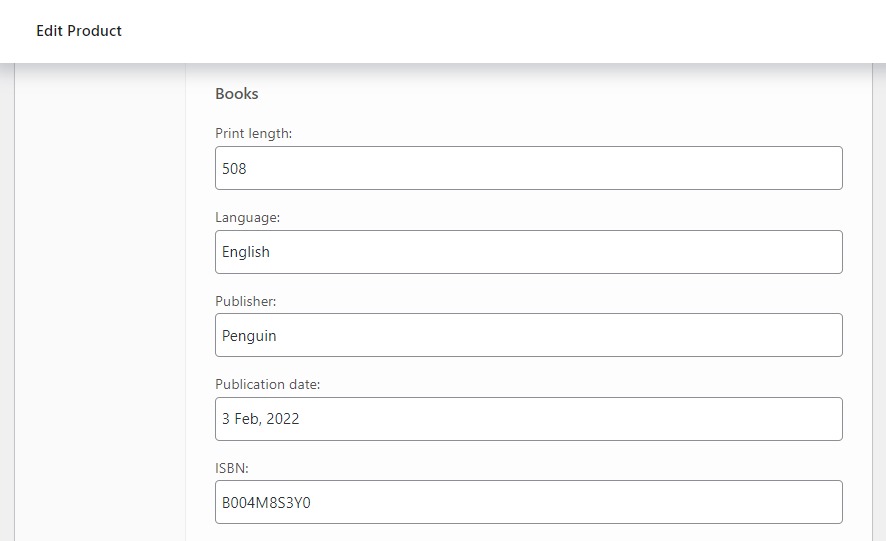
You can also create custom fields for additional identification information such as ISBNs, barcodes, version numbers, and so on.
This information is especially useful if you sell books to enable your customers to order the exact book they want to purchase. The additional identification information can also help you to monitor your stock.
To add unique product information
If your products have been made with a unique material or if they are custom made, custom fields can help you to provide this information to the customer on the product page. For example, Neoprene or Princess Lace Satin fabrics are quite rare. Unique materials are selling points for products and justify the quoted price. So if your products are unique, this is how you inform your customers.
You can add custom fields to display additional information for product variations and simple products on the product page. In the next sections, we’ll walk you through how to create custom fields for product variations and individual products.
How to create custom fields for product variations
In the default WooCommerce install, you can’t create and display custom fields for product variations. Fortunately, you can do it with the help of the plugin WooCommerce Custom Fields for Variations.
Introducing the plugin WooCommerce Custom Fields for Variations
WooCommerce Custom Fields for Variations is a WooCommerce plugin that enables you to create and display custom fields for product variation information on your WooCommerce store’s product page.
This plugin allows you to save time while editing product variations while making this process a breeze. The best part? You get to effortlessly provide customers with product variations in a clear and concise format. Allowing them to make informed purchasing decisions.
WooCommerce Custom Fields for Variations
Add custom fields to your product variations and save time editing products with WooCommerce Custom Fields for Variations.
With WooCommerce Custom Fields for Variations, you get to:
Enrich your experience when customizing product variations
As a store owner or admin, creating and editing product variations is tiresome and lengthy, especially when your catalog is large.
With WooCommerce Custom Fields for Variations, you can massively cut down the time taken by creating custom fields for variations and using them store-wide.
Broaden your field-type options for easy editing
You can use different field types on your custom fields, including checkboxes, dropdowns, and radio buttons, to make the presentation of basic product information straightforward.
Only display custom field types when you need to
Despite having the option to use the custom fields you’ve created store wide, this plugin allows you to display product variation information whenever needed using shortcode.
Retain your theme’s styling on your custom fields
The custom fields you create using this plugin blend in with your theme’s styling. Customers in your store will feel right at home as a result.
Now we know what WooCommerce Custom Fields for Variations can do for your product page, let’s see how to set it up on your WooCommerce store with the following tutorial.
Step 1: Install WooCommerce Custom Fields for Variations
To install WooCommerce Custom Fields for Variations:
- Purchase Custom Fields for Variations from the Iconic site: iconicwp.com/products/woocommerce-custom-fields-variations
- You‘ll then be sent the license key and the download link via email. Open the email and download the extension.
- Log in to your WordPress dashboard and go to Plugins > Add new.
- Click the Upload plugin button at the top, then choose the extension that you had previously downloaded from Iconic and upload it. Click on Install Now.
- Once it is installed, you need to activate it. So click on the Activate Plugin button, and you’ll be taken to the license activation screen.
- Copy your license key from the email sent to you by Iconic and paste it in the input field and click on Agree & Activate license.
That’s it, you’re now ready to use the WooCommerce Custom Fields for Variations plugin.
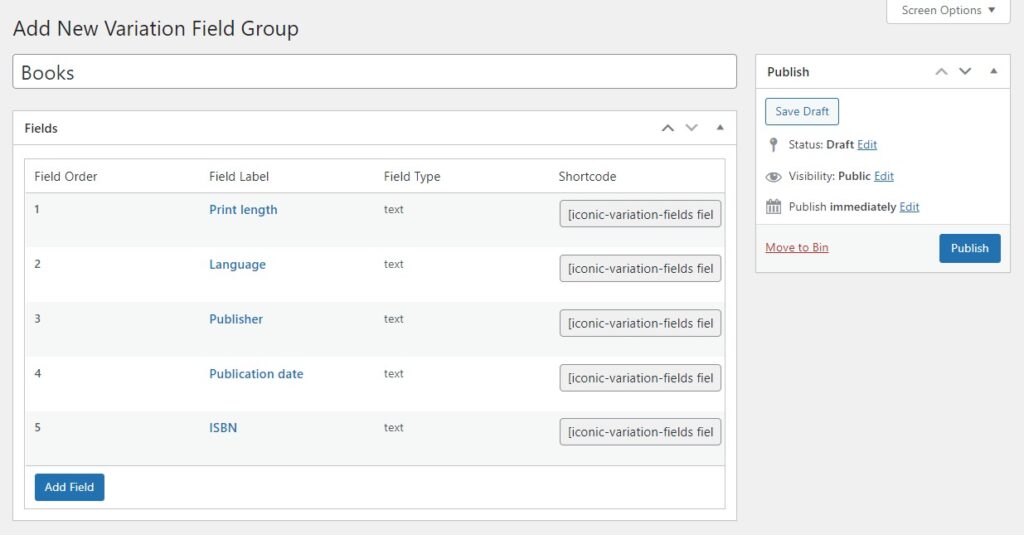
Step 2: Create a custom field group
To improve your experience editing product variation information, you can add custom fields to the variation edit tab in groups. To do this, you have to create the custom field group first.
- Go to Products > Variation Field Groups on your WordPress dashboard.
- Next, click on the Add New button to create a new group.
- Assign a title to this group that will be used to define the group section in the variation edit tab. Let’s say you want to create a custom field for variations of the backpacks you sell, you can assign the backpack title to this custom field group.
Once your custom fields group has been created, you can proceed to add your custom fields.
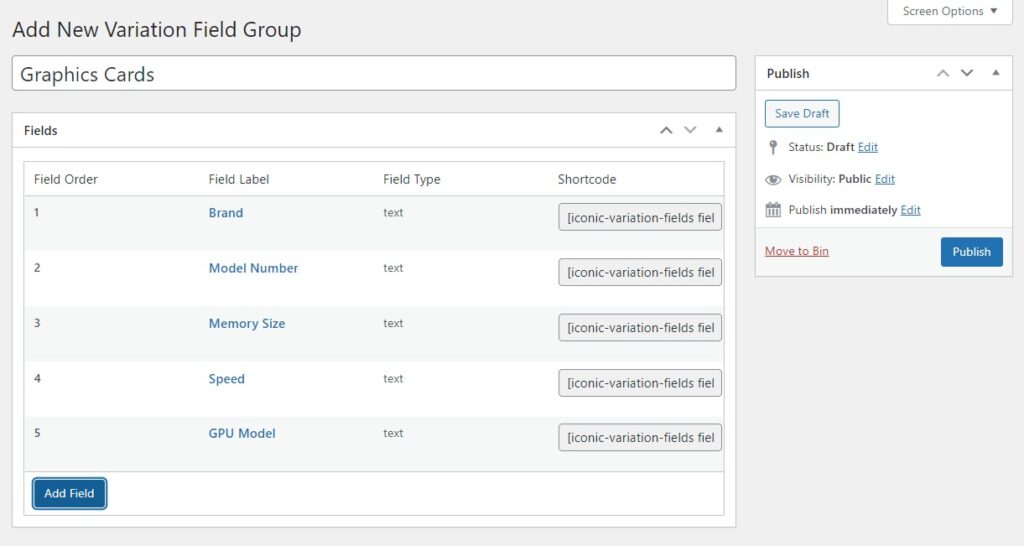
Step 3: Add your custom fields
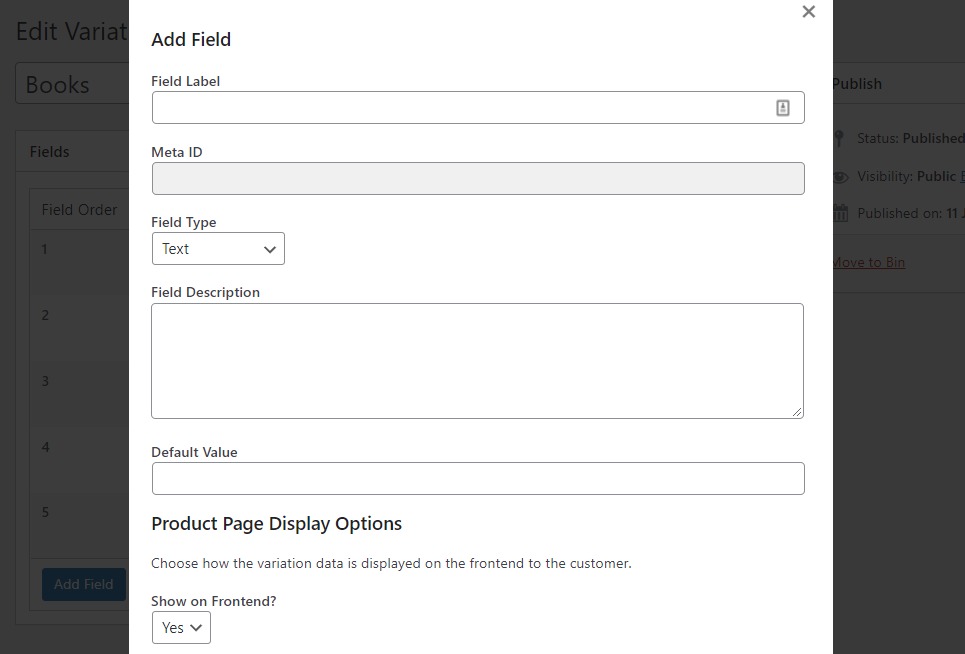
- Click on the Add Field button under Fields.
- In this section, you will be required to enter the following information for your extra fields:
- The custom field’s name under the Field Label section could be a feature of the product, for instance, weight.
- An ID to help in importing custom fields in the Field ID section.
- Select the Field Type you would like to use from these options: text, text area, checkboxes, select, and radio.
- Add a Field Description.
After providing this information, you can proceed to save and view your custom fields.
- Once you’re done with everything, click Add Field to save your changes.
- Repeat the steps in the previous section if you need to add more custom fields. After you’re done adding your fields, click on publish.
Step 4: Edit your custom fields
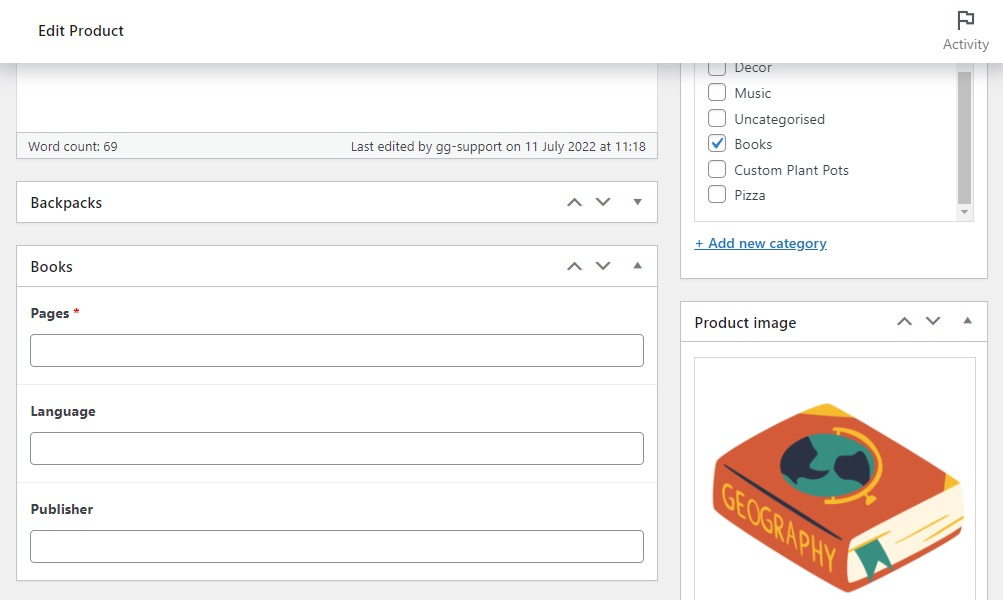
- If you want to edit your custom fields for each product, go to the edit page of the product you want to add custom fields to.
- Scroll down to the Product Data section and click on the Variations tab.
- Select a variation, and you‘ll see the custom fields under the Variation Description section.
- Here you‘ll be able to fill in the information (custom field data) displayed in the custom field text input area.

- Once you‘re happy, scroll to the top of the page and click Update.
After creating and editing your custom fields for variation products, you will need to display them.
We’ll show you exactly how to do this, but first, let’s see how to create custom fields for simple products.
How to create custom fields for simple products
You’ll need the Advanced Custom Fields plugin to create custom fields for simple products. It’s a simple and intuitive plugin that lets you add up to 30 custom fields to your website.
This tool is developer-friendly. So if you have coding knowledge, you can benefit from its API that lets you use functions to quickly build templates.
Here’s what you need to do to use this plugin to create custom fields for simple products.
Step 1: Create your fields
- Install and activate the Advanced Custom Fields plugin.
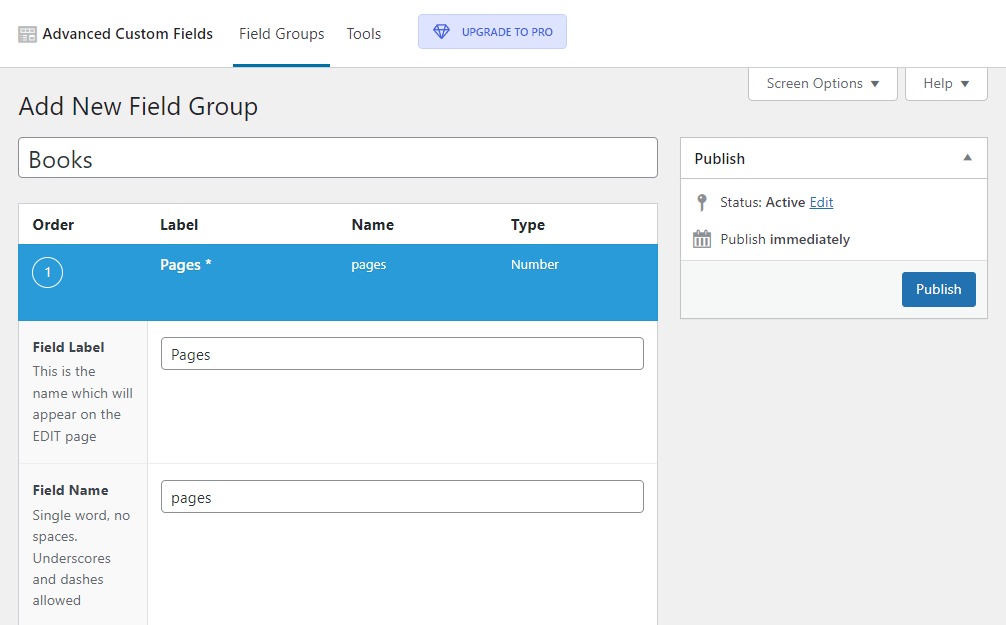
- From your WordPress dashboard, go to Custom Fields and under Field Groups, click on Add New.
- Add a title for this field group (the product you wish to add custom fields for).
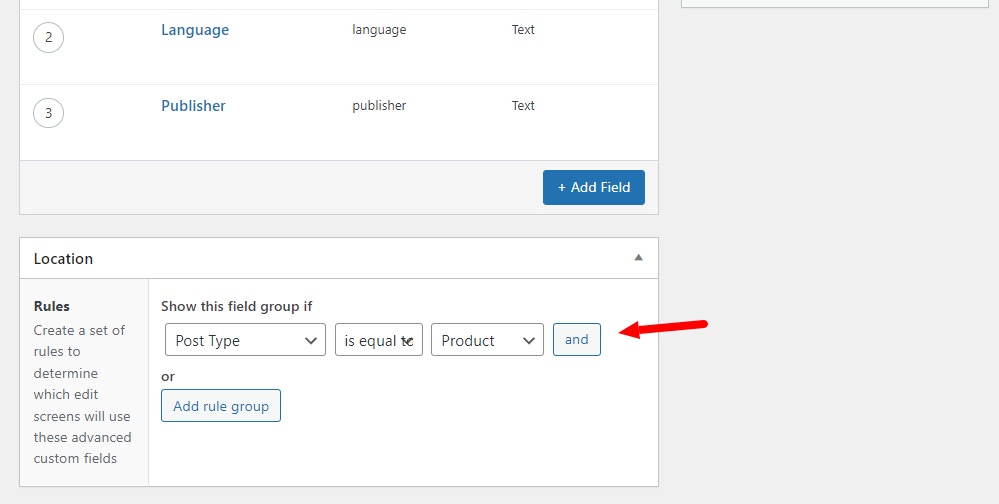
- In the Location section, ensure that the dropdowns under Show this field group if, say ‘Post type is equal to product’. This is to limit this field group to products only.
- Next, click the Add Field button and add the Label. Then select the Field Type (checkbox, text, etc.)
The Field Name will be generated automatically based on the label. Therefore the label should be a feature of the product, like weight.
- Scroll to the bottom, click Add Field, and repeat steps 4 and 5 to add another custom field to this field group.
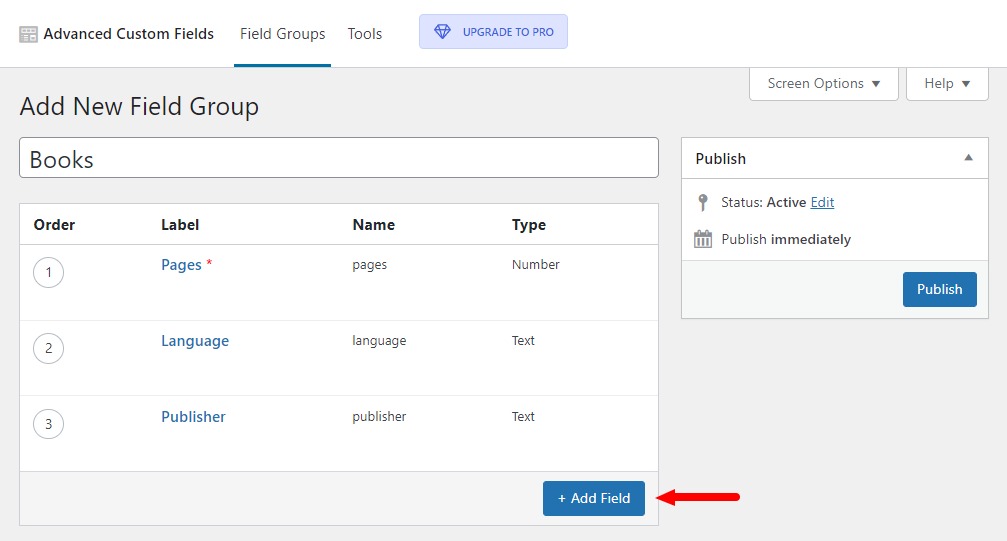
- When everything is done, click Publish.
Step 2: Fill your fields
You have created your fields, but they’re blank. You need to fill them with the information displayed to your customers. To do this:
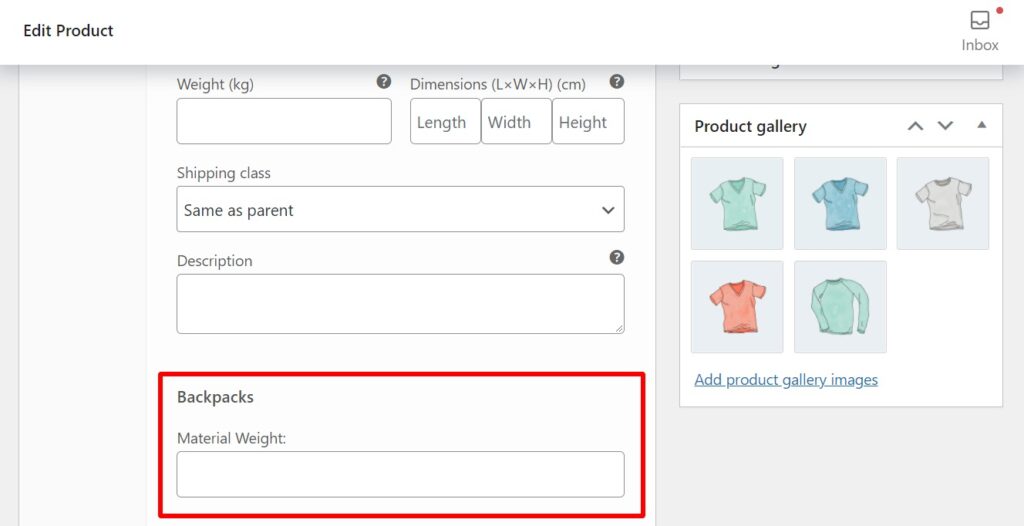
- Go to Products and click Edit on the product you want to add information to.
- Just below the main product description, you will see your custom fields. Enter the information you want to display on the product page in these text fields.
- When done, click Update. Repeat for every WooCommerce custom field.
If you head over to your product page on the front end of your website, you’ll notice the information in the custom fields is not displayed. So next, let’s see how you can display custom fields on your WooCommerce product page.
How to display custom fields on the WooCommerce single product page
Whether a seasoned WordPress user or a beginner, you can use a shortcode to display custom fields on this page. Shortcodes are single lines of human-friendly code that condense blocks of long and complicated code.
Shortcodes can be used to add features to your WooCommerce store that would otherwise require a lot of technical experience.
You can use shortcodes to display custom fields on the WooCommerce product page for both the WooCommerce Custom Fields for Variation and Advanced Custom Fields plugins.
Using WooCommerce Custom Fields for Variations
WooCommerce Custom Fields for Variations has a single shortcode for displaying custom fields: [iconic-variation-fields]
If you want to display the custom fields for one particular custom field group you’ve created, take the following steps:
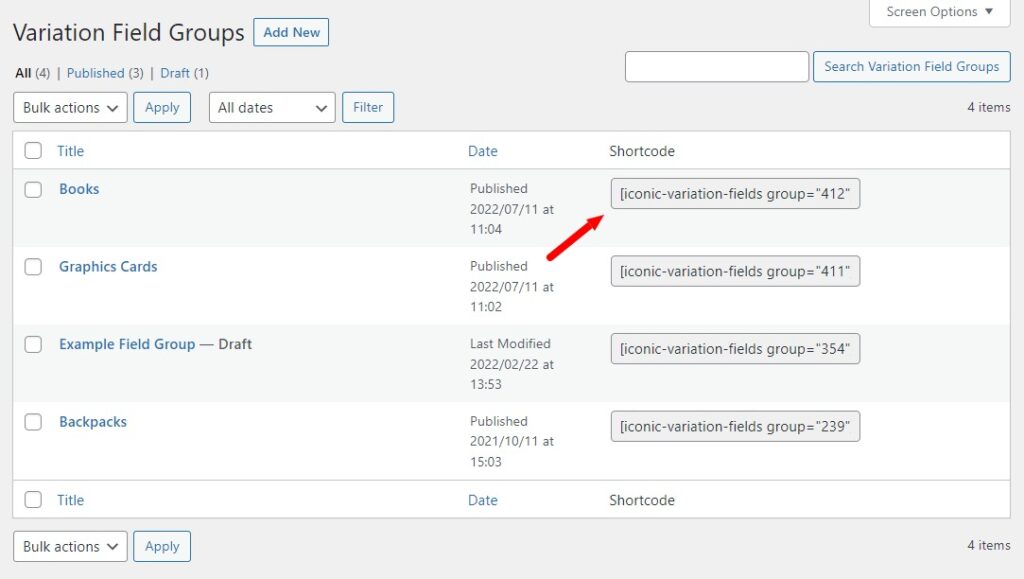
- From your WordPress dashboard, go to Products > Variation Field Groups.
- Here you’ll see all the custom field groups you’ve already created.
- In this Shortcode column, copy the shortcode of the group you want to display on a specific product page.
Once copied, we’ll add this shortcode to the edit product page.
To display custom fields for product variations:
- From your WordPress dashboard (the backend of your store), go to Products > All Products.
- Then hover on the product you wish to display custom fields for and click Edit.
- Enter the shortcode above in the product’s main description or short description section.
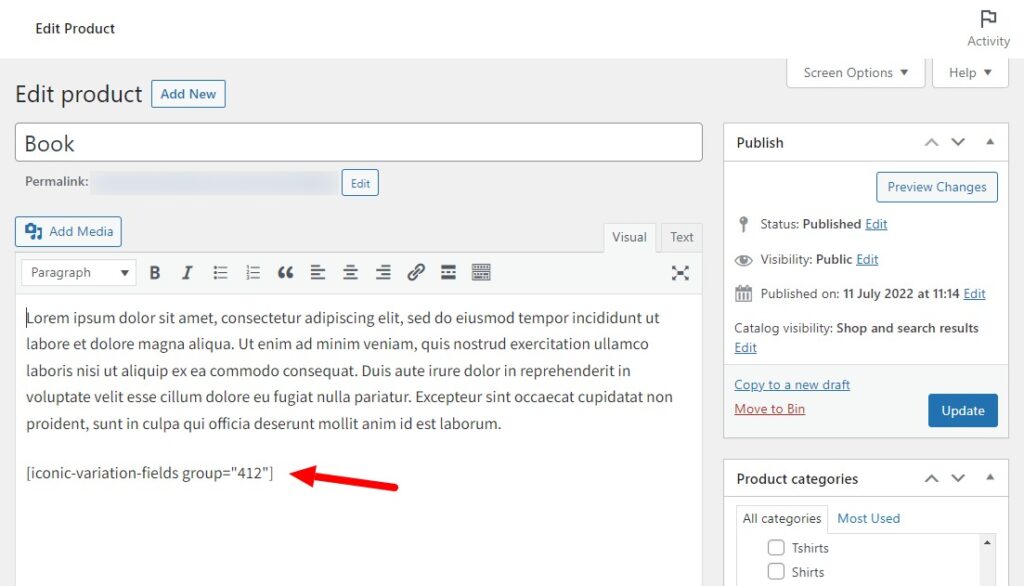
- Click Update to save your changes.
Using Advanced Custom Fields
Displaying custom fields using this plugin follows a similar procedure as the previous one, but the shortcode is different. So you’ll have to navigate to the product’s Edit page for which you want to display custom fields.
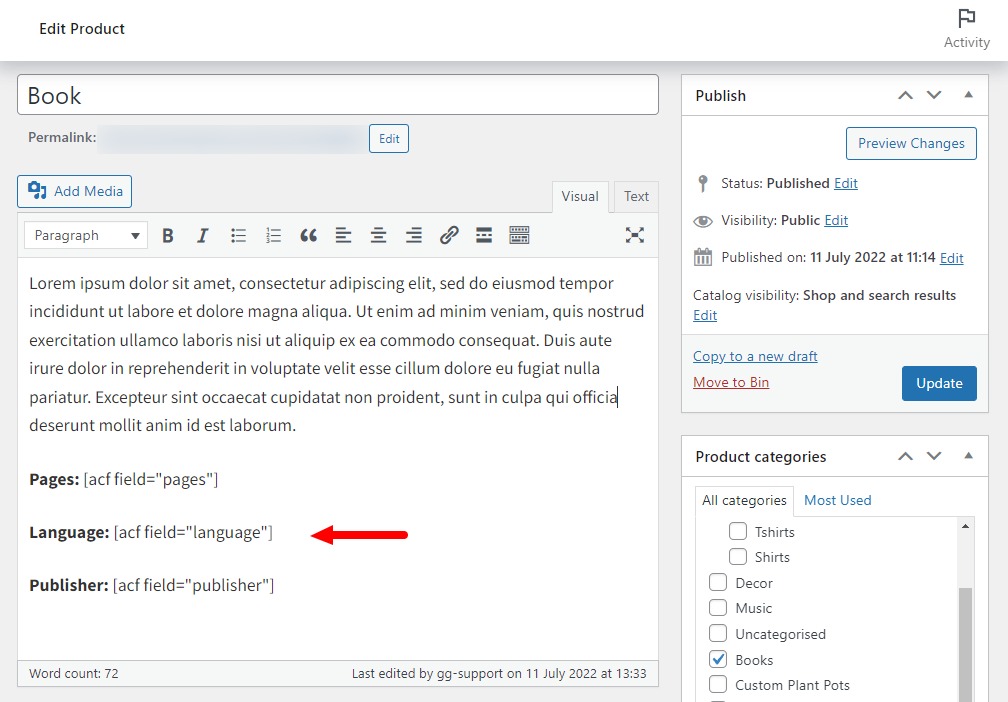
Then add the following shortcode: .
Make sure you replace {$field_name} with the Field Name of your custom field (you can find this by editing the custom field you created earlier).
This shortcode will only display the custom field data you input when editing the product. So you might need to add a little text before the shortcode for context. See our screenshot below.
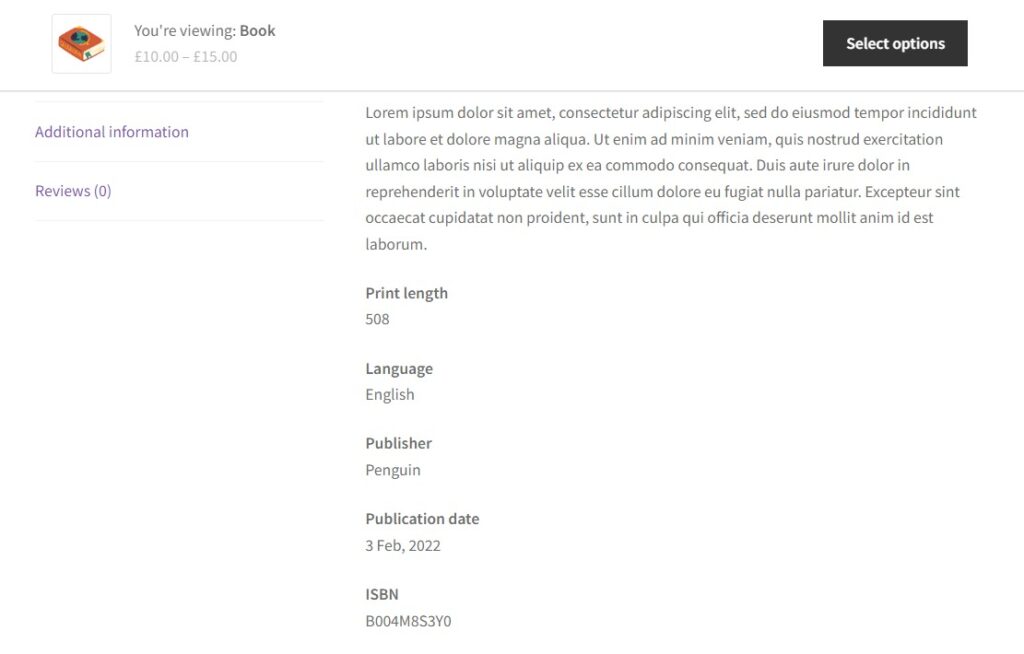
When you’re done, click Update to save your changes.
That’s it, your customers will now be able to see the information you put in the custom fields.
Add custom fields to the product page today
Adding new custom fields to your ecommerce store enables you to create new sections where you can display useful information on your product pages.
Custom fields for variations allow you to save time and have a smooth experience editing product variations.
You can’t create custom fields for variations in the default WooCommerce install. To do this, you will need:
- The WooCommerce Custom Fields for Variations plugin – Add custom fields to your product variations.
WooCommerce Custom Fields for Variations
Add custom fields to your product variations and save time editing products with WooCommerce Custom Fields for Variations.

Gina Lucia is our in-house Content Manager at Orderable. She writes articles, user guides, technical documentation, and creates videos on everything WooCommerce and Orderable.
Gina has been working in the WordPress/WooCommerce space since 2012 when she developed WordPress websites for clients large and small.
For the past 8 years, she’s been writing about everything WordPress and WooCommerce, becoming an expert in what makes a WooCommerce store succeed.
When not writing, Gina loves to tend to her vegetable garden, read, or travel to mainland Europe.