Looking to start an online thrift store but are unsure where to begin? This guide will walk you through the steps and recommend the best platform to set up shop this year.
Many people are buying secondhand items online to save money and shop sustainably. This trend has made online thrift stores a billion-dollar industry from which you can profit and compete with the big players.
But where do you start? What selling platforms and tools should you use? If similar questions have crossed your mind, we’ll answer them in this guide so you can have a piece of that billion-dollar pie.
Here’s what we’ll be covering:
- What an online thrift store is and how it differs from an in-person store.
- Key steps to launch a successful thrift store online.
- How to choose the right platform (and why WooCommerce is the best option).
- How to set up and optimize a WooCommerce thrift store.
Let’s begin with the first item on the list.
What is an online thrift store?
An online thrift store is a retail business that resells used items at a discounted price. Some call it a secondhand or thrift shop because everything you sell has been owned before but is still in good condition.
You can sell vintage items like clothing, shoes, furniture, electronics, or unique antiques.
Here’s how it differs from your regular thrift store
An online thrift store uses a website or resale platform like eBay as a digital storefront. Let’s say you have some valuable or unique pieces that can sell. You don’t have to arrange items on shelves or racks. Instead, you can take photos, write descriptions, set prices, and list those items for sale on your website.
When buyers discover your store, they can browse your items for unique finds and make a purchase. Once the order is placed, you can ship it directly to the customer.
Key benefits of an online thrift store
Since all the transactions happen online, an online thrift store has some key advantages over a physical thrift shop:
- Customers can shop anytime, from anywhere. They don’t have to visit your location, which makes it convenient.
- You can sell to people outside your local area. Selling online usually gives you access to a much larger audience, increasing your potential for more sales.
- Lower startup costs. You don’t have to rent a shop, hire several staff, or invest in expensive displays. All you need is a phone or camera to take pictures, a platform to list your items, and a way to ship orders to start.
Selling secondhand items helps people shop sustainably because 1 in 4 customers buy secondhand items to reduce waste.
You can leverage this increasing demand to run a successful online thrift store and help the environment. With all these in mind, what are the initial steps for starting an online thrift store?
What steps are involved in launching an online thrift store?
Like any other business, there are key steps you have to take to start an online thrift store business.
1. Research the target market and competition
The whole point of conducting market research is to learn three major things:
What items sell best? For example, you can look for best-selling products or trending categories on marketplaces like eBay. Pay close attention to competitor pricing as well. If an item keeps selling at a good price, it’s worth stocking in your store.
Who your potential customers are. Here, you research your target audience’s age, location, income range, the items they like, etc.
Who your competitors are. Are they selling similar items you’ve picked? Where are they doing well, and what gaps can you fill?
The results you’ll get from your research can help you write your business plan.

2. Create a business plan
Writing a business plan allows you to take the information you learn from market research and turn it into a clear strategy.
For example, you can easily define your niche by choosing a specific category of secondhand items to sell. Items like vintage fashion, high-end resale, streetwear, retro electronics, kids’ clothing.
Other details you can include in your plan include:
- Your budget and pricing strategy.
- Marketing plan.
- Where you’ll sell (e.g., your own website, eBay, Poshmark).
- How you’ll source inventory.
Tip: Get a business plan template to help you write one.
Free Download: Ecommerce Website Checklist
Build your online store with confidence using this free ecommerce website checklist.
This checklist is designed to guide you through every stage of building a successful ecommerce site, from foundational setup to understanding conversion rates.

3. Source inventory
There are several places where you can source products. For instance, you can attend garage sales in your community to find used or vintage items at low prices. Local thrift shops, flea markets, and online marketplaces like Craigslist and eBay can also be great sources.
Other sources include:
- Donations from friends, family, or community groups.
- Attending estate sales to find antiques, collectibles, etc.
- Consignment deals where you sell items for others and take a cut of the profit.
- Wholesale secondhand suppliers who sell in bulk at discounted rates.
Tip: Carefully select curated items that can fetch higher prices in the market.
4. Choose a selling platform
Popular platforms where you can sell include Shopify, eBay, Poshmark, Amazon, Depop, Etsy, and WooCommerce.
Many people know eBay, for example. It has a large customer base actively looking to buy secondhand items. However, it charges fees on each sale, which WooCommerce doesn’t.
WooCommerce is one of the top free ecommerce platforms now. It powers approximately 38.74% of all online stores.
In the next section, we’ll cover why the WordPress platform, coupled with the ecommerce plugin WooCommerce, is the best choice.

5. Set up an ecommerce website
If you choose to sell using WordPress and WooCommerce, you’ll need to create your ecommerce website. As a store owner, you’ll have full control over your business and won’t pay monthly fees, unlike Shopify.
If you need help setting up your ecommerce store with WordPress and WooCommerce, see our in-depth clothing store guide.
We’ll also go into each step in detail later in this article.

6. Photograph and list items
With WordPress and WooCommerce, products are added to a store as images. Because you will be selling secondhand or used items, capture high-quality product photos that can convince customers to buy.
Do you want to know why high-quality ecommerce product photography is effective? A study found that high-quality product photos have 94% higher conversion rates than low-quality photos.
Write detailed product descriptions for each product as well. Descriptions are just as important because they give customers key details that a product photo can’t show (e.g., size, condition).
7. Set up shipping and return policies
If customers are going to buy secondhand items, be sure they’ll want to know your return and refund policies as well.
They’ll be interested to know:
- Whether returns are accepted.
- The return window.
- Who pays for return shipping.
- The condition the item must be in for a return, and so on.
Clear return and refund policies reduce misunderstandings and build trust. So, keep it simple, fair, and transparent to encourage more sales.

8. Market your store
Think about how you’ll get people to notice your store as well. For example, you can post your best finds on social media platforms like Instagram, TikTok, and Pinterest to attract buyers. If you don’t have many followers, consider partnering with local influencers or running targeted ads to reach more people.
SEO also plays a big role. For example, you can link to Google Search Console, see what search terms you’re ranking for, and then add them to your product pages. You can also list your business on Google My Business to target local customers nearby.
Read our guide on how to get started with WooCommerce SEO for solid search engine optimization strategies.
All these steps we’ve discussed help lay the foundation for a successful online thrift store, but is it actually profitable? Let’s find out.
Is an online thrift store profitable?
An online thrift store is a highly profitable business because:
It has high resale margins
You can source inventory for free or at a lower cost. Then, resell items at a higher price to make a profit, as long as the price is reasonable and not above the original retail price.
Just look at revenue estimates by Statista for various secondhand goods. Apparels are estimated to hit the 99.49 billion dollar mark next year. So, business is doing well. And this brings us to reason number two.
Some product categories have a high demand (and a high resale value)
31% of customers in the US mostly buy secondhand clothing, followed by shoes. Then, books, movies, games, and so on. ThredUp even did a study of their own and found that 60% of customers mostly buy secondhand clothes.
Selling items in high demand, like vintage clothing, to customers can also increase your profitability. That’s because they often fetch high resale margins.
There is a growing customer base.
The number of customers you sell to increases significantly if you flip items online. The numbers tell the story: 93% of Americans shop for secondhand items online.
However, your profit depends on creating a strong brand. How well you market yourself to attract these buyers and win their trust.
Not to forget, more customers want the government to help make fashion more sustainable. A trend that can increase your profitability.
For example, about 65% think the sales tax on secondhand clothes should be removed. Some 59% of Gen Z and millennials would buy more secondhand without sales tax.
So, if you’re doubting the profitability of an online thrift shop, this should give you the clarity you need. Now, let’s look at the best platforms you can start an online thrift store.
What platforms are best for starting an online thrift store?
You can look at different ecommerce platforms to help you decide your business model.
Popular selling platforms:
Some of the popular platforms where you can sell include:
- Shopify. It is a user-friendly platform that lets you build online stores. Shopify charges monthly subscription fees and transaction fees ranging from 0.6% to 2% per sale based on your chosen plan.
- eBay, Poshmark, and Depop. These online marketplaces are good for selling individual items or a small inventory. Plus, you’ll pay a flat rate or commission fee for each sale based on product categories, seller levels, and other factors. Store branding is also limited.
- WooCommerce. WooCommerce is a highly customizable and free platform that is built on WordPress.
Because of its extensive customization, it is the strongest choice if you want to run a profitable ecommerce business for a long time. Here’s why.

Why WooCommerce is the best choice
WooCommerce is free to use and does not charge transaction fees. Instead, you only cover costs for hosting and additional plugins, which can be more cost-effective in the long run.
It allows you to build a fully customizable online thrift shop that also reflects your brand. You have complete control over design, branding, and the customer experience, free from the limitations of marketplace rules.
You own your customer data. This enables you to offer excellent customer service, build loyalty, and start targeted marketing strategies.
Scalable inventory management
You can easily manage a large inventory with WooCommerce. You can scale your store with unlimited product listings. Organize inventory with categories and tags. and filters to enhance the customers’ browsing experience.
If these reasons are convincing enough about WooCommerce, let’s set up your store using this platform.
How to start an online thrift store
In this section, we’ll walk you through a step-by-step guide on how to set up a WooCommerce thrift store. We’ll also include essential Iconic plugins you can purchase to optimize your store’s functionality.
1. Set up WordPress and WooCommerce
To set up WordPress and WooCommerce, you’ll need two critical things.
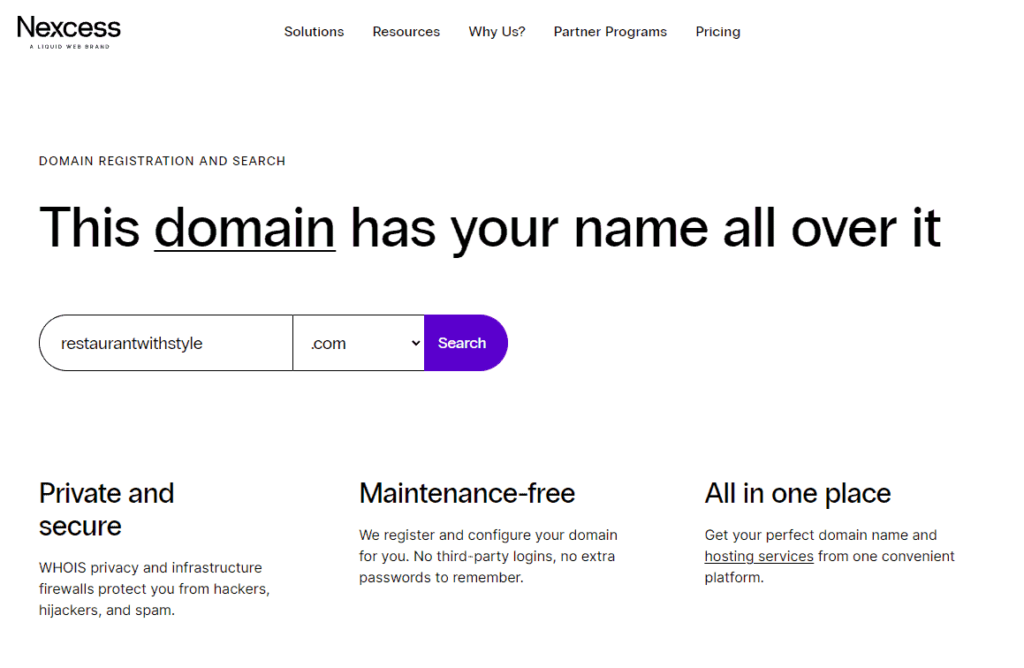
- Get a domain name. Your domain name is your store’s unique address on the web. For instance, our website’s domain name is iconicwp.com.
- Purchase a managed WooCommerce host like Nexcess. It makes it easy to install WordPress and provides several convenient features to manage, secure, and speed up your WooCommerce store.
You can head over to Nexcess and purchase fully managed WooCommerce hosting. We can install WordPress once you’ve purchased it.
How to install WordPress on Nexcess
You’ll have to log into your Nexcess client portal and follow these steps:
- From your Nexcess client portal, go to Plans > Menu > Environment.
- Next, click on the Application tab. In this tab, you’ll see your admin username and password for the WordPress site.
- To access the WordPress login page, type this in your browser mythriftshop.com/wp-admin – where mythriftshop.com represents your domain name.
- Enter the login details you retrieved from Nexcess to log into your WordPress site.
With a blank WordPress website ready, now is the time to convert it into a fully functional ecommerce store.

Install and customize WooCommerce
Installing WooCommerce allows you to sell products directly from the WordPress site.
Here’s how you install the WooCommerce plugin:
- Log into your WordPress dashboard and go to Plugins > Add New.
- Type in ‘WooCommerce’ in the search field located at the top right-hand corner of your screen.
- Click on the Install Now button right next to the plugin. After a few seconds, this button will turn blue and will read Activate. Click on it.
You’ll now see WooCommerce’s setup wizard that will walk you through the rest of the remaining setup process. The whole process is super simple and hardly takes a few minutes.
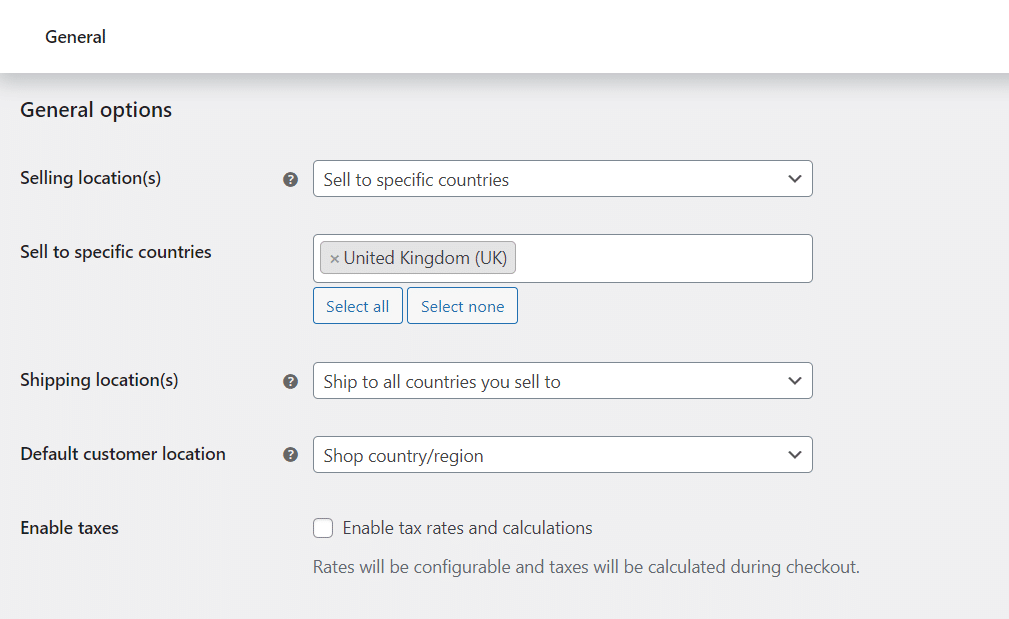
Other settings you can configure include:
- Location, tax rates, and email notifications.
- Create important store pages like the shop, cart, checkout, and my account pages.
We’ll add products in step 4, but let’s choose a theme for your WordPress online store first.
2. Choose a theme and design your store
A theme is a pre-designed layout with images, text, buttons, and other elements. It allows you to modify the appearance of your website quickly instead of creating web pages from scratch. You can install a theme and edit it to suit your brand.
WooCommerce has a theme called Storefront. We recommend it because it works well with the plugin. Plus, it has a simple design that suits any ecommerce store, including an online thrift shop. You can stick to this if you don’t want any extra hassle.
Check out other themes (if needed)
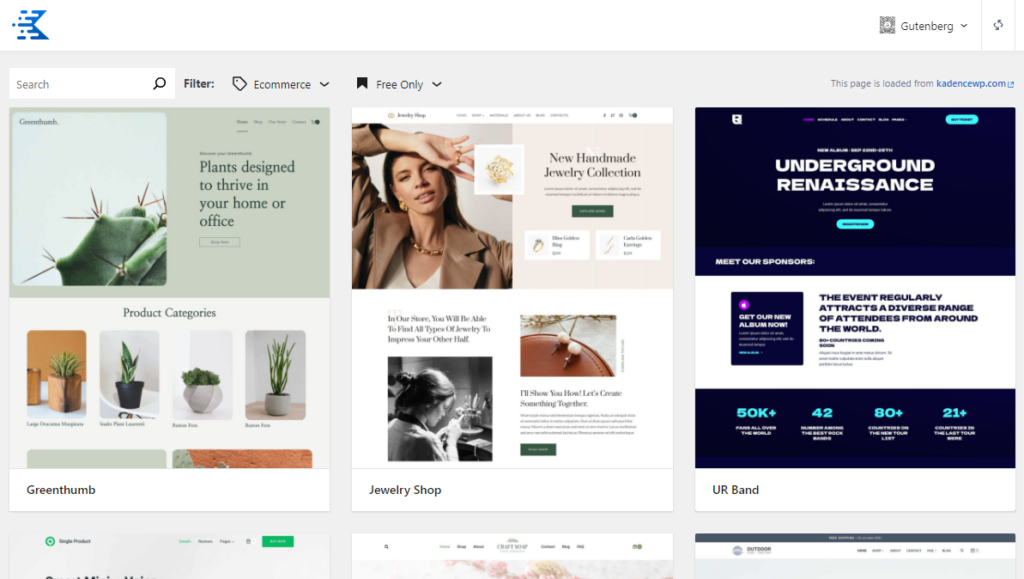
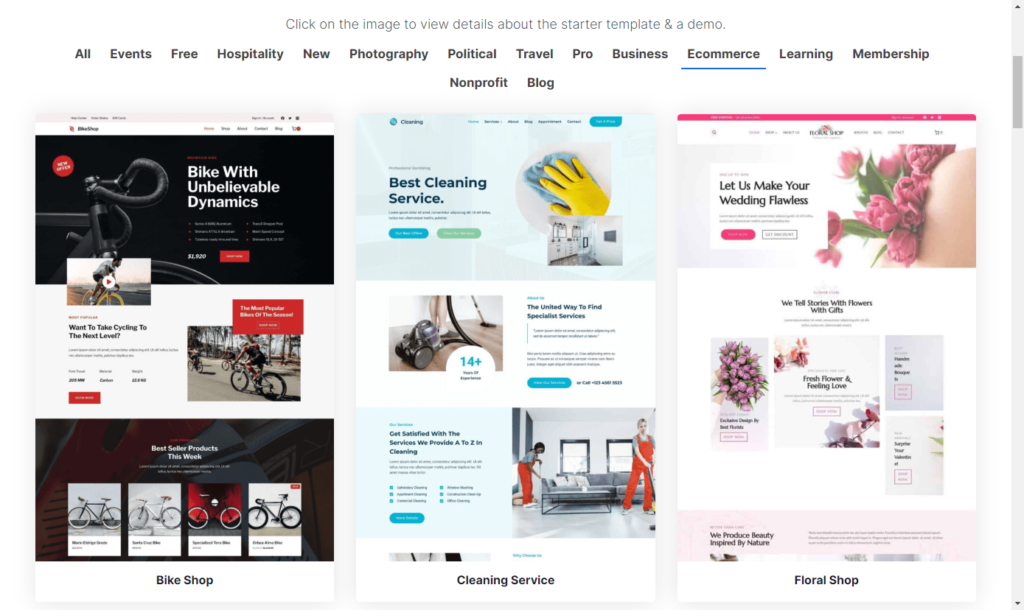
If you’re looking for a different look besides Storefront, try Kadence starter templates or Astra. These themes are usually mobile-friendly and lightweight because they avoid busy elements like fancy sliders that slow a website down.
Here’s how you can install one from the WordPress.org directory:
- Go to your WordPress dashboard and click on Appearance and then Themes.
- Click on the Add New button to browse through the theme selection. You can also demo a few to test your store’s appearance.
- Click on the Install button for the theme you like. After a few seconds, the button will read Activate. Select it, and the theme is yours.
You can also install a premium theme by uploading the .zip file you downloaded after purchase and activating it on WordPress. You’ll see a link to activate your theme after a success message.
We’ll also need additional plugins to help improve conversions and sales in your WooCommerce store.
3. Install essential plugins for a thrift store
After setting up your store, you can enhance it with the following Iconic plugins. These plugins make your store more straightforward and attractive. They also help customers browse, select products, and check out faster, which can increase sales.

Replace WooCommerce attributes with WooCommerce Attribute Swatches
Attributes are product details like color, size, material, or style that help customers filter and choose variations. In the default WooCommerce, customers can only use dropdowns to browse product variations, often leading to a poor experience.
How WooCommerce Attribute Swatches improves your shopper’s experience
If you sell secondhand items with different attributes, you can install the WooCommerce plugin, WooCommerce Attribute Swatches, and improve your customer’s shopping experience. This plugin lets you replace the dropdown menus with color, image, and text swatches.
You can:
- Show color options as clickable swatches.
- Use images to display textures, materials, or product finishes.
- Replace dropdowns with text buttons or radio buttons for easy selection.
So, instead of choosing from a dropdown menu, customers can select colors, sizes, or styles by clicking user-friendly color blocks, images, or labeled buttons. This doesn’t just improve the browsing experience for customers but also makes selection more straightforward and engaging.
WooCommerce Attribute Swatches
Replace the default WooCommerce variation dropdown menu with variation swatches for WooCommerce. Add color swatches, image swatches, and modern text buttons to your variable product pages.
What more can you do with WooCommerce Attribute Swatches?
The following are other things you can do with the WooCommerce Attribute Swatches plugin:

- You can customize variation swatches. For example, modify the variation swatch shape (round or square), size (in pixels), and the order they appear in.
- Enable a larger preview of image swatches when a customer hovers over one.
- Decide how you’d like your variation swatches displayed when you have many attributes.
- etc
- Attribute swatches are not limited to the product pages only. You can also add them to the shop page and product filters to help customers easily find what they’re looking for.
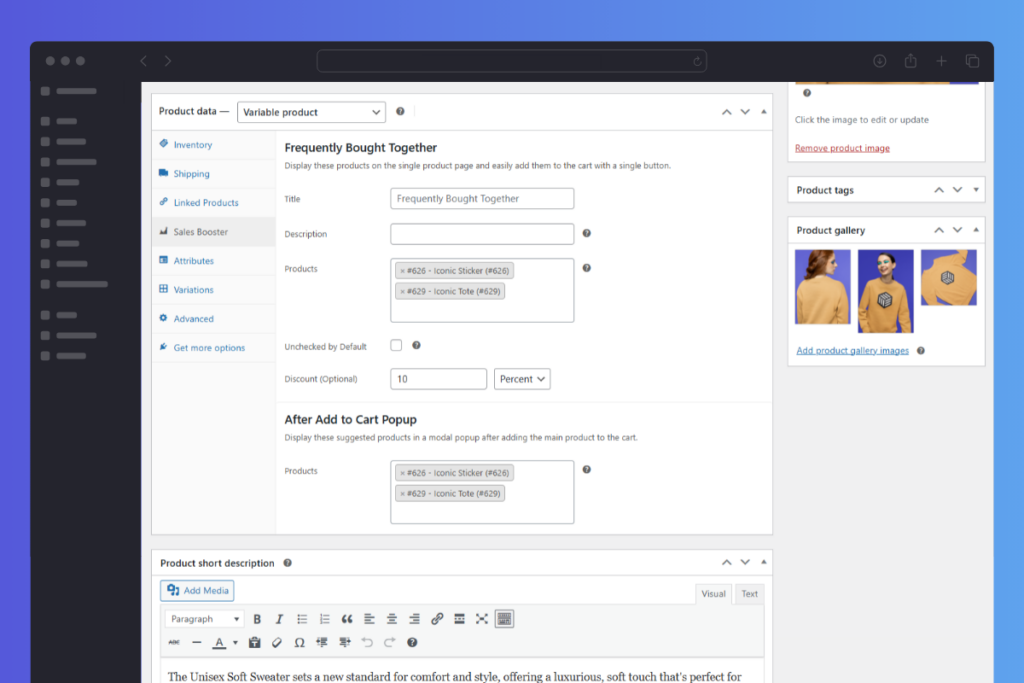
- This plugin lets you add fees to your product attributes, too. Let’s say you have a vintage sweater as a variable product with a material attribute. You can add $20 when the material is cashmere and $10 if a customer picks cotton.
Also, you can display multiple product variations as separate products and save customers time when finding and buying specific variations with the help of the WooCommerce plugin, WooCommerce Show Single Variations.

Show product variations as single products using WooCommerce Show Single Variations
The WooCommerce Show Single Variations plugin allows you to display product variations as separate products on the following pages:
- Shop page.
- Category pages.
- Archive pages.
- Search or filtered results.
This solves the problem of hidden or hard-to-find product variations. Instead of having customers navigate to individual product pages to see available options, each variation appears as a “simple” product on your shop page, for example.
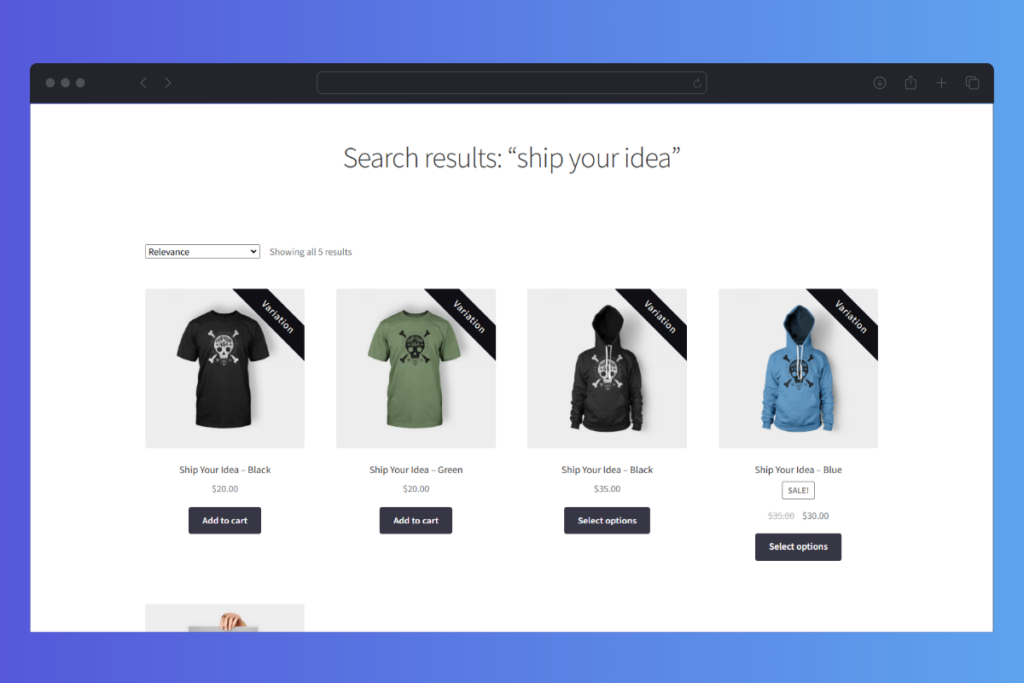
In this way, customers can quickly find the exact size, color, or style they are interested in and add it to their cart. When customers find what they’re looking for quickly, they efficiently convert.
Displaying each variation as an individual product also extends your product catalog. It makes your store appear more extensive and diverse, which customers appreciate.
WooCommerce Show Single Variations
Show WooCommerce variations as single products on the shop page, category pages, search results, and filtered results with WooCommerce Show Single Variations.
What else can you do with WooCommerce Show Single Variations?
Here’s what WooCommerce Show Single Variations can do for your online store. You can:
- Customize your single variation products. For example, you can decide if you want the individual variation title format to inherit the main product’s name or to add the variation’s attributes to it. Hide the parent variable product for a cleaner look.
- Add direct add-to-cart buttons to variations. This lets customers add a particular variation to their cart directly from the shop page. This saves them numerous clicks, streamlines the shopping process, enhances their experience, and boosts conversion rates.
Your default WooCommerce checkout page will also need an upgrade. It usually feels long, with too many form fields to fill out, and you can lose conversions if you don’t change it.
By the way, Baymard Institute found that 22% of customers abandon checkout if it’s too long or complicated.
We’ve got the WooCommerce plugin, Flux Checkout to help.
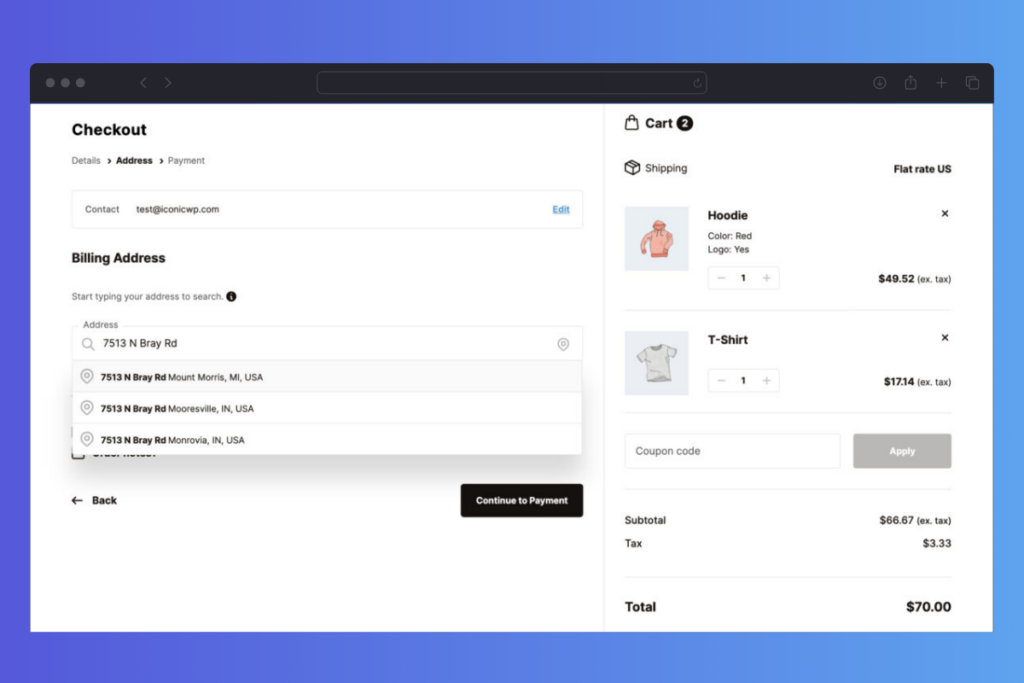
Upgrade the default WooCommerce checkout page with Flux Checkout
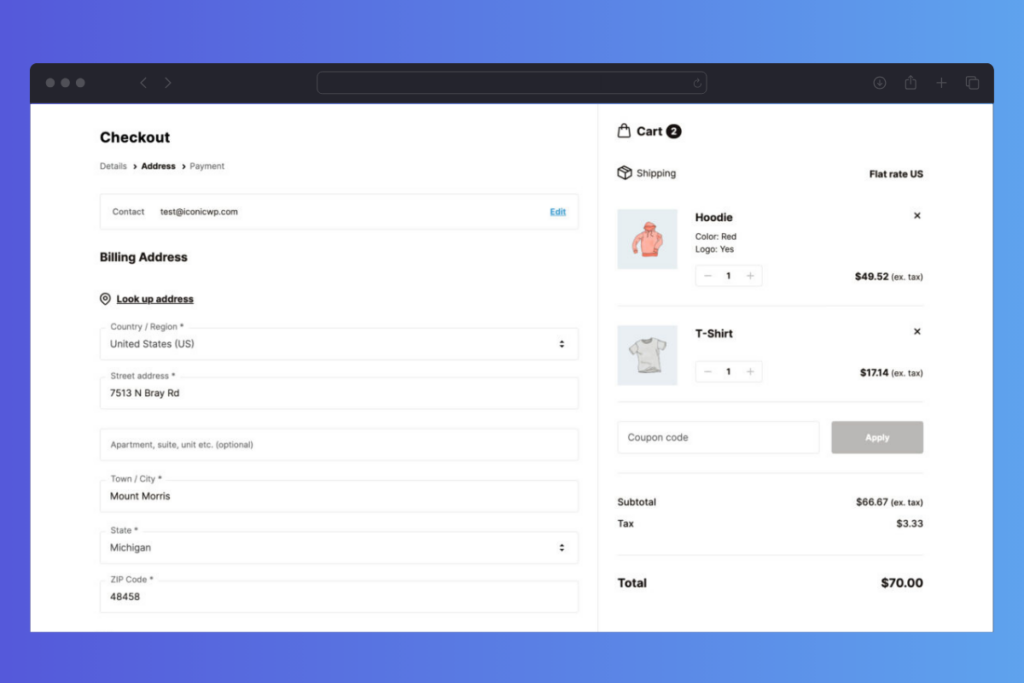
Flux Checkout transforms the default WooCommerce one-page checkout into a simple, multi-step process for a better checkout experience.
Here’s what this WooCommerce plugin does:
It breaks down all the key checkout stages into a series of simple steps your customers can follow to complete their purchase.
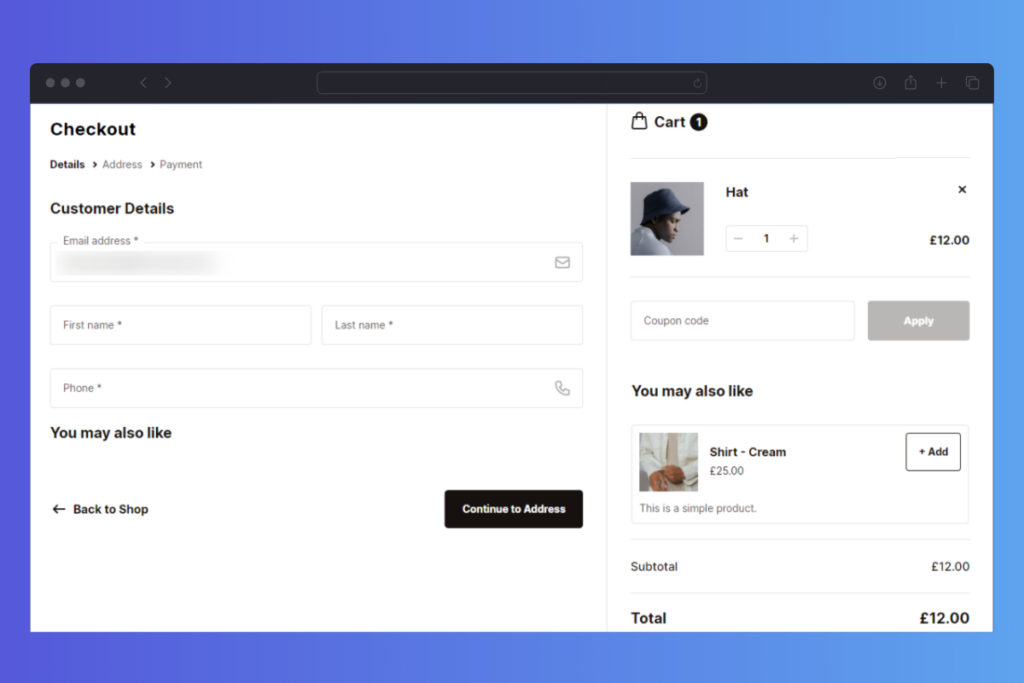
These steps include:
- A cart review so customers can confirm the items before checkout.
- There is an option to log in, sign in, or check out as a guest.
- Entering billing/shipping information.
- Select a shipping method and a payment method.
- Reviewing an order summary after which a customer places an order.
Simplifying the checkout flow this way increases the likelihood that a customer will follow through with their purchase.
Flux Checkout eliminates distractions during checkout too
This plugin removes unnecessary fields like separate street numbers, headers, footers, and sidebars, which will be hidden to allow customers to focus on completing the checkout.
It improves the overall checkout design (so it’s trustworthy)
Flux Checkout has two templates that make your checkout page look clean and more user-friendly. Every element and layout has been carefully designed to reduce clutter and smoothly guide customers through the checkout process.
Features like:
- Address autocompletion saves customers time when filling in billing or shipping details.
- Visual progress indicators show the customer the stage of the multi-step checkout they’re in.
- Use Flux Checkout Elements to create custom banners, trust seals, and more to build trust.
The templates are also mobile-friendly. Most importantly, business owners can customize their chosen theme’s style with color presets, checkout button options, header text, and more.
Flux Checkout for WooCommerce
Flux Checkout transforms the default WooCommerce checkout into one that’s lightning-fast, distraction-free, and reduces checkout abandonment.
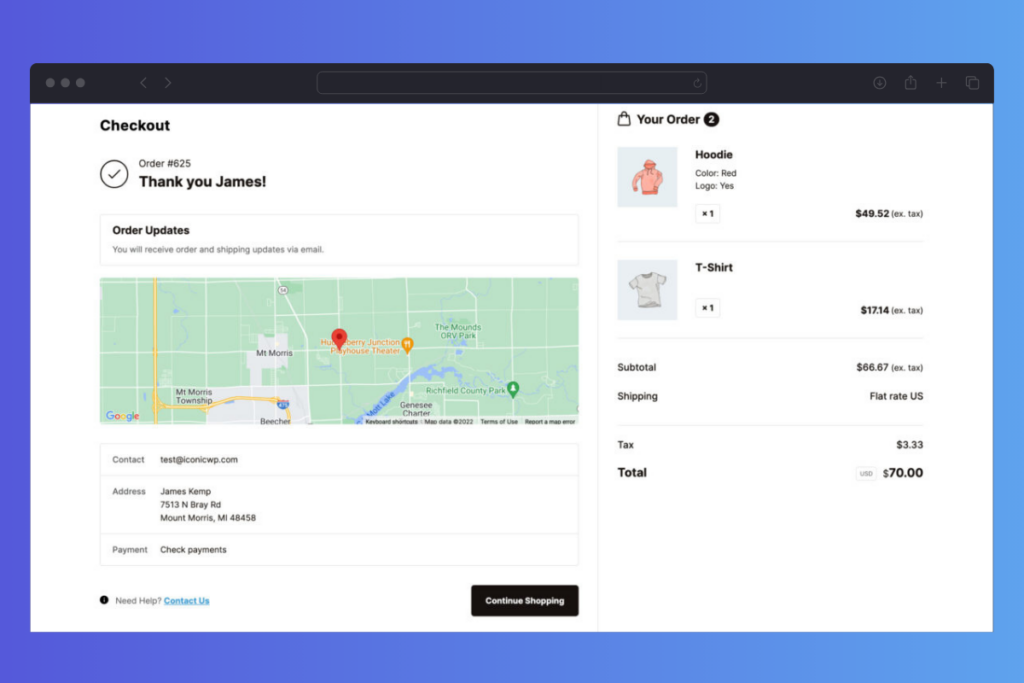
The order confirmation page is customizable
With Flux Checkout, you can replace the default WooCommerce Thank You page with a modern and user-friendly one. Then, add custom content that encourages customers to buy from you next time.
Some of this content could:
- Coupons on a customer’s next order.
- Links to your community forums.
The list is endless with Flux Checkout for WooCommerce. Next, we’ll show you how to add products to your online thrift store.
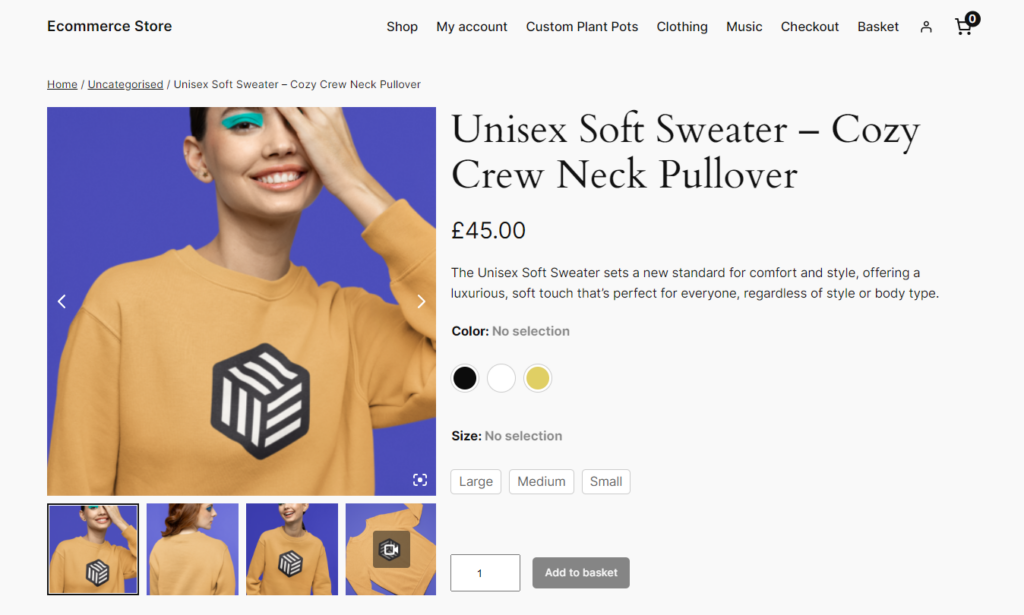
4. List your thrift store items
Now that your store is set up, it’s time to add the products we took high-quality photographs of earlier.
Go to your WordPress dashboard and click on WooCommerce > Products > Add New to add your sourced products.
The classic WordPress content editing screen includes fields for product name, product description, product data section, short description, product categories and tags, product image, and product gallery.
Note: WooCommerce typically shows handy tooltips to explain the purpose of every field, so you know exactly what everything is for.
When you’re finished, click the Publish button to add your products.
5. Set up shipping and payment options
Finally, we cannot forget to set up shipping and payment methods so customers can complete their purchases smoothly.
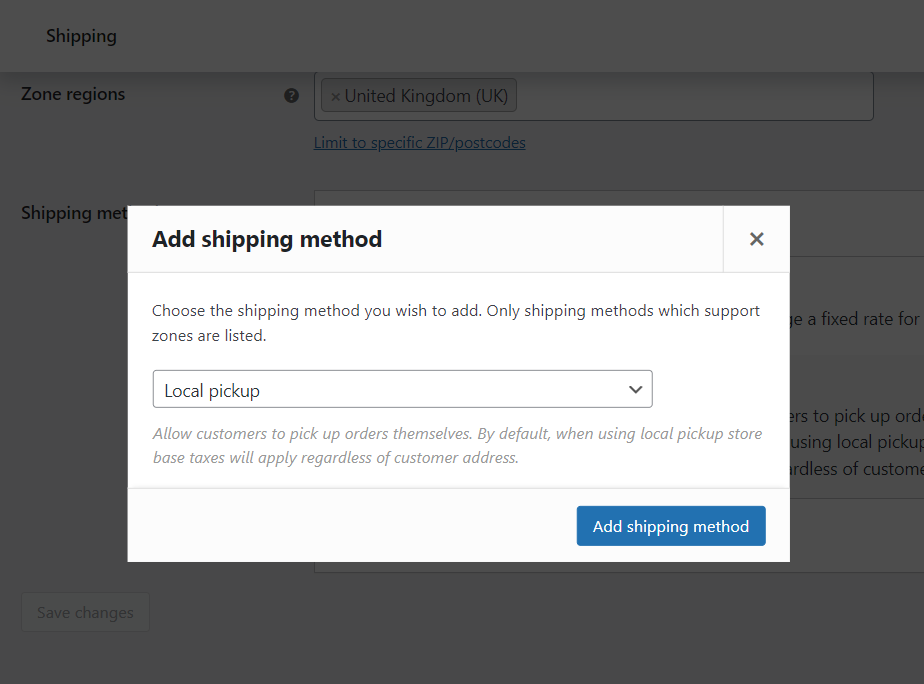
To add shipping, go to WooCommerce > Settings > Shipping and create shipping zones based on where you’ll deliver. Set up flat-rate shipping, free shipping, or real-time carrier rates, depending on your business model. If selling locally, you can also offer local pickup as an option.
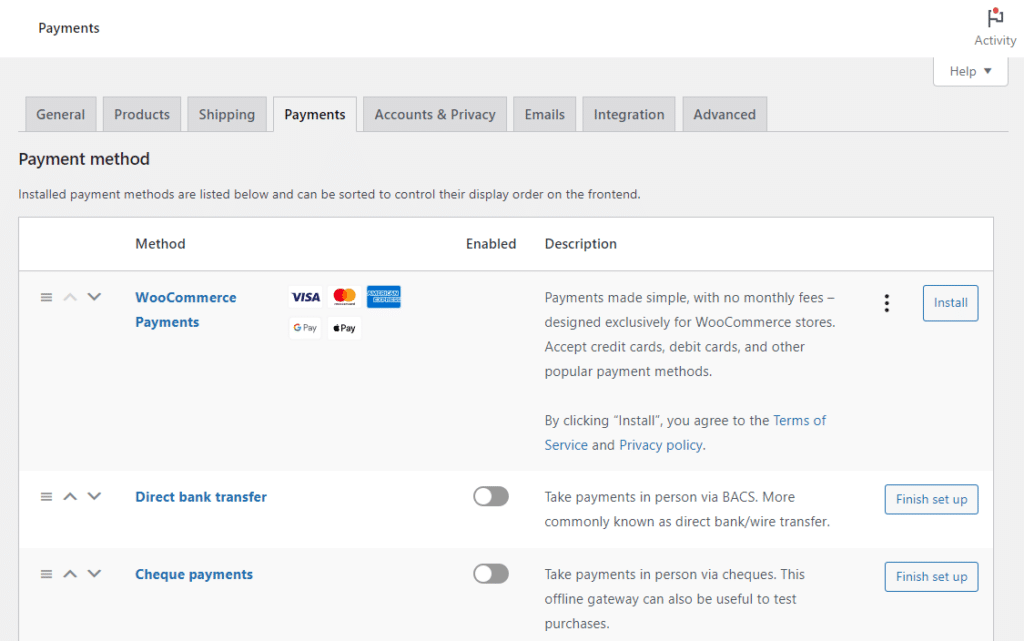
Offer multiple payment options too
Don’t forget to add multiple payment gateways so customers won’t abandon their carts because they can’t find their preferred payment method.
Go to WooCommerce > Settings > Payments and enable secure payment options like PayPal, Stripe, or direct bank transfer. If you’re selling internationally, choose gateways that support multiple currencies.
Tip: Install payment gateway extensions to allow you to accept more payment methods than the default one.
Don’t forget to test everything before you launch your store and fix any issues. That way, you can be sure customers won’t encounter problems that could stop them from buying.
Learn how to start an online thrift store today
How to start an online thrift store is easier than you think.
You can set up a store using online marketplaces like eBay, but be ready to pay hefty commission fees. Additionally, these platforms only handle a small inventory and withhold customer data. The latter can cripple you if you’re looking to grow your small business in the future.
With WooCommerce, you fully control your business, store branding, and customer experience. You can customize your store, list unlimited products, and optimize checkout using the following Iconic plugins:
- WooCommerce Attribute Swatches. It replaces the default WooCommerce dropdown menu with color swatches, image swatches, and modern text buttons.
- WooCommerce Show Single Variations. It displays all WooCommerce product variations as single products on the shop or category pages.
- Flux Checkout for WooCommerce. It transforms the default WooCommerce checkout into a multi-step checkout page.
Now it’s your turn. Launch your online thrift store today with WooCommerce and Iconic plugins for the best experience.

Gina Lucia is our in-house Content Manager at Orderable. She writes articles, user guides, technical documentation, and creates videos on everything WooCommerce and Orderable.
Gina has been working in the WordPress/WooCommerce space since 2012 when she developed WordPress websites for clients large and small.
For the past 8 years, she’s been writing about everything WordPress and WooCommerce, becoming an expert in what makes a WooCommerce store succeed.
When not writing, Gina loves to tend to her vegetable garden, read, or travel to mainland Europe.