
Selling tickets using WooCommerce is a great way to manage upcoming events on your WordPress website. If you’re planning on selling tickets for events via WooCommerce, this article has all of the information you need to get started.
The default WooCommerce setup doesn’t allow you to create events, sell tickets, or optimize the ticket order process.
Fortunately, there are plugins crafted specifically for this purpose. These include:
- The Events Calendar – Create events for free on your WordPress site with the top WordPress Calendar Plugin.
- Event Tickets and Event Tickets Plus – Sell event tickets in your WooCommerce store with this compatible plugin (and upgrade) from The Events Calendar.
- Flux Checkout for WooCommerce – Optimize the standard WooCommerce order process and reduce abandoned carts with this high-converting, mobile-friendly, multi-step checkout process.
In this article, we’ll explain exactly how to create events on your WordPress website. Plus, how to sell event tickets via your WooCommerce checkout, and optimize the ticket order process using the plugins mentioned above.

But first, let’s look at why you would want to create your own events and sell event tickets through your WooCommerce store. Rather than outsourcing to an external provider.
Why sell event tickets in WooCommerce?
Creating events and selling event tickets through your WooCommerce store enables you to:
Own your events
You can run your events your way. You’ll have total control over the design, layout, content, promotion, and so much more.
You’ll also be able to set your own limits for the event, and you won’t be restricted by someone else’s rules.
Have total control over your tickets
Create and add tickets when you want them
By selling tickets through the WordPress ticket sales plugin, Event Tickets and via WooCommerce, you can add tickets to your events from your WordPress dashboard. No third-party website intervention is required.
You also get to own all the revenue generated from ticket sales. Because you don’t have to pay a portion to third-party services.
Robust ticket management
Event Tickets and Event Tickets Plus empowers you to manage each ticket individually. The same way you would manage a tangible product on WooCommerce.
You get to allocate prices and SKUs, and you even manage the stock. You’ll be able to personalize your tickets and events for your needs.
Boost ticket sales by integrating multiple payment gateways
Events Tickets Plus works with WooCommerce to support multiple payment methods. Such as Paypal, Stripe, credit cards, etc. Whatever payment methods your WooCommerce store uses, you can use with your event tickets.
According to Baymard Institute, 19% of customers dislike the “credit card information” page and prefer an ecommerce system that offers multiple payment gateways.
Converting this percentage of people into customers significantly increases your revenue. By including these payment methods, you’ll reduce abandoned carts because your customers preferences will be accounted for.
Now that we’ve discussed the importance of selling event tickets through your WooCommerce store, let’s look at how to actually do it.
How to sell event tickets in WooCommerce
In this guide, we’re assuming you already have WooCommerce (with your preferred settings) installed on your website. If so, selling event tickets via WooCommerce involves three steps:
- Installing The Events Calendar and Event Tickets (Upgraded to Event Tickets Plus) plugins.
- Creating your event.
- Creating your event tickets.
In the next sections, we’ll show you how to sell event tickets via WooCommerce.
Install The Events Calendar and Event Tickets
To get started, install the free Events Calendar and Event Tickets plugins. These allow you to create events on your website and sell tickets.
You can either download them from the official website and then upload them on the Plugins page of your WordPress admin dashboard.
Or you can install them directly from the plugins page:
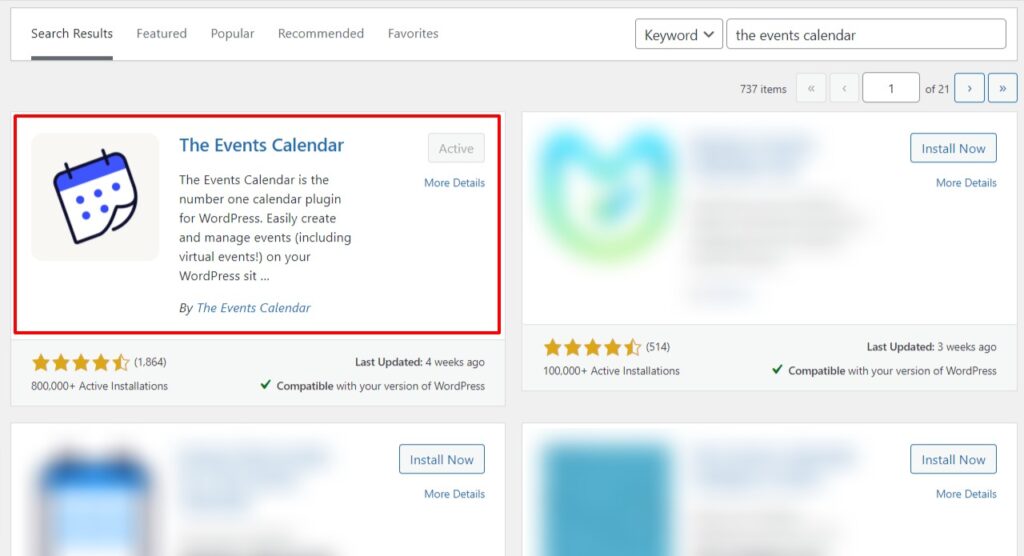
- Log into your website’s admin dashboard. On the left side menu, click on Plugins > Add new.
- Search for “The Events Calendar”.
- Click on The Events Calendar plugin to install and then activate it.
- Then, search for “Event Tickets”.
- Click on the Event Tickets plugin to install and then activate it. That’s it!

To sell tickets for events via WooCommerce (so you can use the WooCommerce checkout), you’ll need to purchase Event Tickets Plus from The Events Calendar website.
The Event Tickets Plus version works with WooCommerce so you can sell tickets using the WooCommerce cart and checkout.
Purchasing this version gives you the following features:
- Premium support.
- Confirmation emails after ticket purchases.
- QR code check-in app for both Android and iOS.
- Custom registration and shared stock.
- Collect attendee information.
- New features and updates that ensure you have the most up-to-date WooCommerce events plugin.
Upgrade Event Tickets Plus
You can purchase the Event Tickets Plus plugin license from The Events Calendar Website. Or follow these steps to upgrade:
- Go to Events > Settings on the left side menu and click on the Tickets tab.
- Scroll all the way down to Tribe Commerce and click on Event Tickets Plus. This will take you to the official website, where you can purchase the license for the Plus version. The license key will be automatically added, and you’re done.
If your license key is not added, however, follow this guide to manually input your license key.
Now that both The Events Calendar and Events Ticket Plus plugins are active, let’s look at how to create your event.
Create your event
Creating events with The Events Calendar is easy. In fact, the events editor page is almost identical to the standard post/page editor on WordPress.
- Click on the Events menu item, and select Add new.
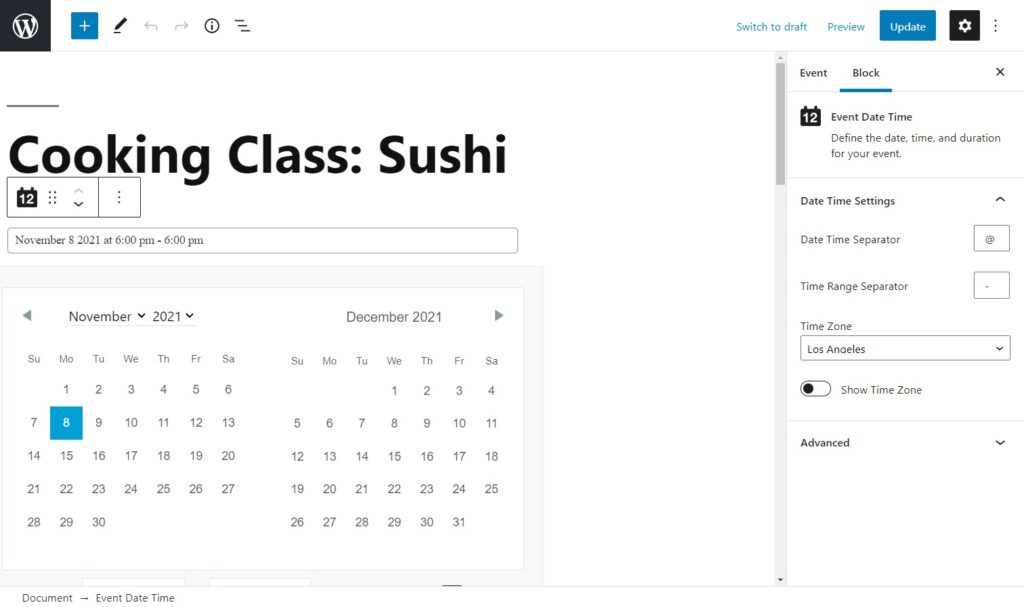
- On this page, add the title and description for your event.
- Scroll down to Locations, and add the time and date followed by the venue. You can adjust time zones under event settings.
- Add details for event organizers, event website (optional), and the cost (also optional).
- Add a category and tags for this event. Tags will allow you to promote related content or events on your website.
- Next, select the event’s featured image. Then click Publish, and you’re done!
Now, you can visit the event page to preview how it will look to your potential audience.
You can go into a lot of detail with The Events Calendar. But for the sake of this guide, we’ve summarized the process. If you’re looking for additional help, check out The Events Calendar’s guides: theeventscalendar.com/knowledgebase
After creating an event, you’ll need to sell tickets for it. But first, you have to create the tickets.
Create your event tickets
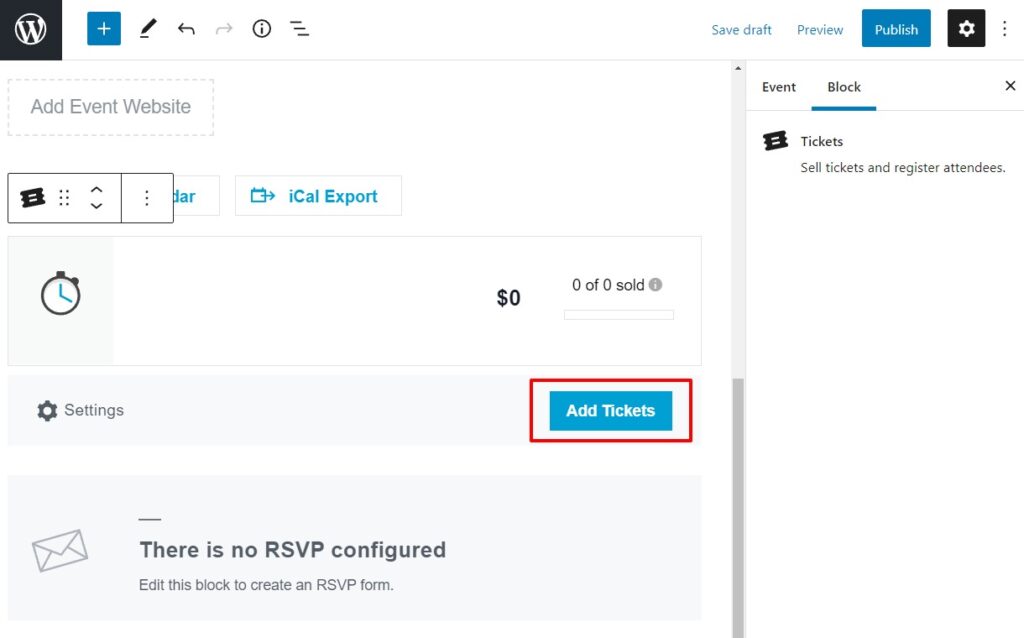
You can add tickets to events, pages, or posts. When editing your event, you’ll find the Ticket Meta box just below the main content on the event editor page.
- Click on the Add Tickets button in the block that says ‘There are no tickets yet’.
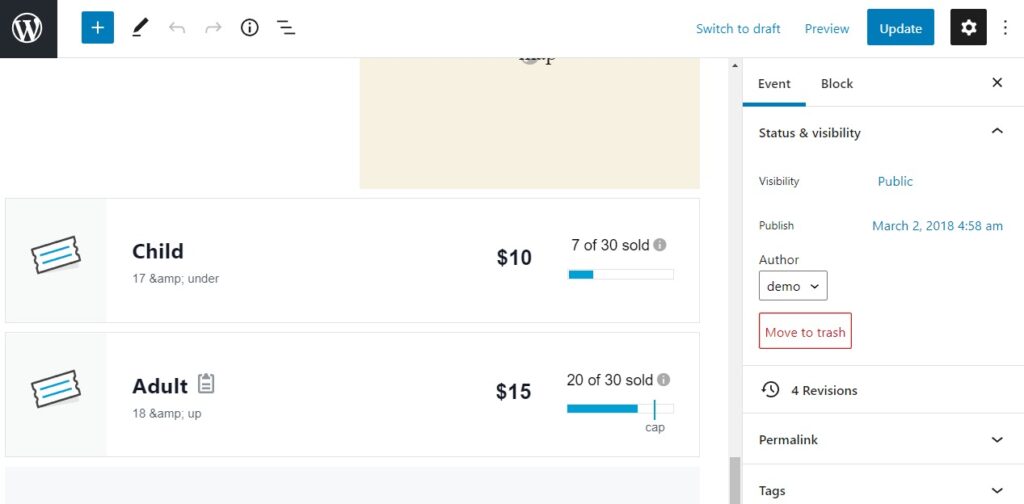
- Input details for the ticket type (VIP, standard, etc.) and price (zero if the ticket is free). Then set the capacity.
- Click on the Advanced option and add a description for your ticket. On the same page, you can add the ticket sale duration and SKU to easily track the tickets.
- Click Save/Update ticket.
Now, customers can purchase tickets for your events via WooCommerce.
For more insights, explore the Attendee Information feature, available on Event Tickets Plus.
Now we have your events and tickets set up, let’s take a look at the checkout process. The last thing we want when selling tickets via WooCommerce, is to lose customers at the checkout stage.
So in the next section, we’ll guide you through simplifying your checkout to maximize sales.
How to improve your event tickets checkout
The standard WooCommerce checkout process is often more complicated than it needs to be. This can result in a significant loss of revenue.
According to Baymard Institute, up to 26% of customers abandon carts when they feel the checkout process is complicated.
To avoid this pitfall, you can improve your checkout process by making it more streamlined and multi-step.
Tickets are simple products, and a simplified order process has the potential to maximize your ticket sales, thereby maximizing your revenue. With optimum conversions, the bounce rate will be limited. This can be accomplished with the use of a plugin.
Flux Checkout for WooCommerce is a plugin that allows you to simplify the standard WooCommerce checkout process. This plugin works perfectly with Event Tickets Plus to maximize your ticket sales.
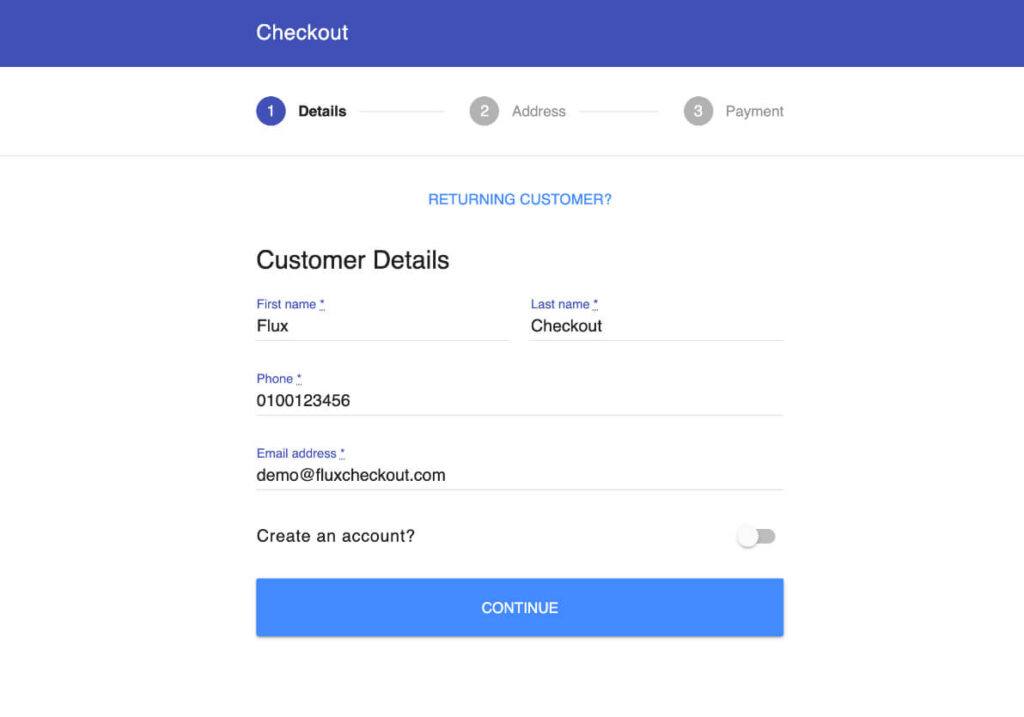
Some of its advantages include:
- It reduces the number of visible fields to create a concise checkout process. Distractions have also been removed so customers enjoy a fuss-free experience.
- It automatically populates input fields to save the customer time.
- It adjusts the layout on mobile devices to improve the customer’s experience.
You can purchase Flux Checkout for WooCommerce from Iconic and upload it manually to your website. It integrates with WooCommerce to give your customers a simple and stress-free experience when purchasing tickets with Event Tickets Plus.
Flux Checkout for WooCommerce
Prevent abandoned carts with a slick multi-step checkout experience, designed for your customer’s device.
Sell tickets with WooCommerce
Selling event tickets on your WooCommerce store is a great way to promote upcoming events and related content on your website. If you plan to do this, look no further than:
- The Events Calendar – Create events for free on your WordPress site.
- Event Tickets and Event Tickets Plus – Sell event tickets in your WooCommerce store with this compatible plugin from The Events Calendar.
- Flux Checkout for WooCommerce – Optimize the standard WooCommerce order process and reduce abandoned carts with this high-converting, mobile-friendly, multi-step checkout process.