
If you’re looking to add a WooCommerce order bump to your store, this guide will walk you through exactly how to do it, step by step.
Order bumps are a simple way to increase your average order value by offering customers a relevant add-on right at checkout. But if you’re unsure how they work, what to offer, or how to get them set up in WooCommerce, you’re not alone.
In this guide, we’ll cover:
- What a WooCommerce order bump actually is (and how it differs from other upsells).
- Why order bumps are so effective at boosting revenue.
- How to create and add your own order bump offers in WooCommerce.
Let’s start by breaking down what a WooCommerce order bump is and why it works.
Article summary: WooCommerce doesn’t support order bumps by default, but with a plugin like Iconic Sales Booster for WooCommerce, you can add one-click product offers at checkout. This guide covers what order bumps are, why they boost sales, and how to set them up step-by-step.
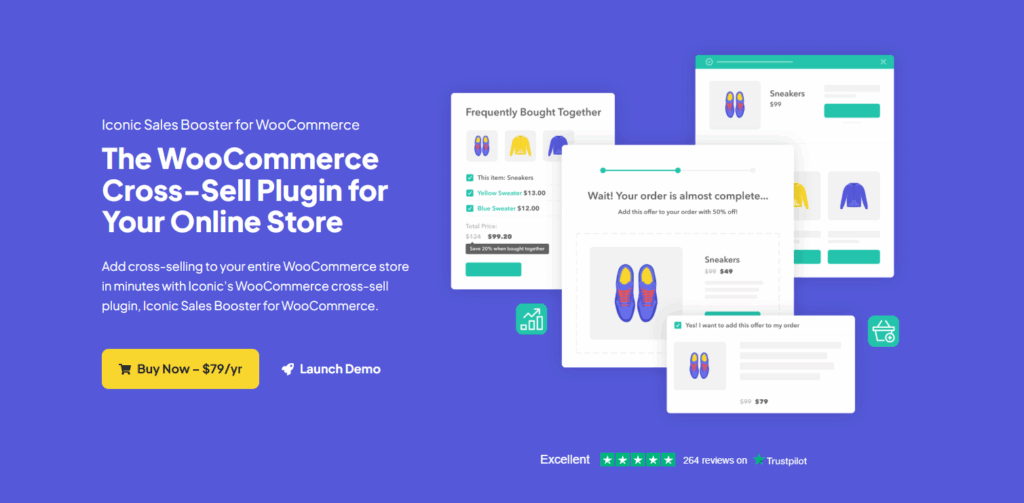
Iconic Sales Booster for WooCommerce
Add cross-selling to your entire WooCommerce store in minutes with Iconic’s WooCommerce cross-sell plugin, Iconic Sales Booster for WooCommerce.
What is a WooCommerce order bump?
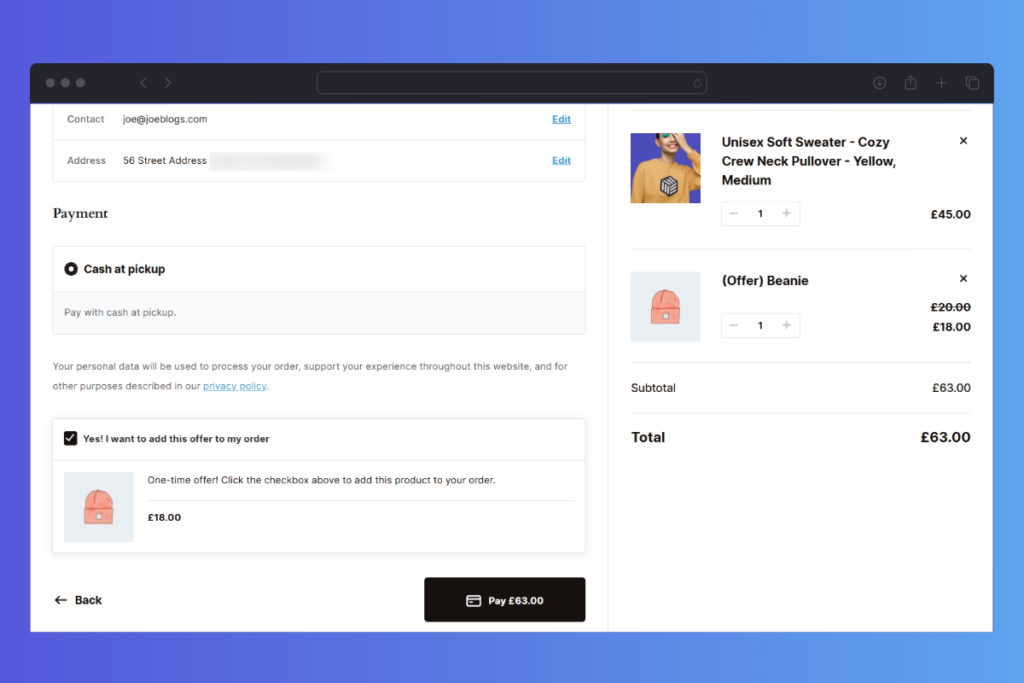
A WooCommerce order bump is a small, optional offer that appears during the checkout process, usually just before the customer places their order. It’s typically a lower-cost item related to what the customer is already buying, and it can be added with a single click (often by ticking a checkbox).
Think of it like a friendly nudge: “Want to add this too?” No pressure, no pop-ups, just a relevant extra that feels easy to say yes to.
Examples of order bumps
You’ve seen this tactic in physical stores, like candy bars or chewing gum, at the checkout. You’re already buying something, you see a quick add-on, and without much thought, you grab it.
Order bumps work the same way in ecommerce. Say you sell graphic hoodies for $39. At checkout, you might offer a matching tote bag for $9 with a message like:
“Add a matching tote bag for just $9 – today only!”
✅ Yes, add this to my order
With one click, the customer can upgrade their order, and you’ve just increased your average order value.
Order bumps are often confused with cross-sells and upsells, but they’re not quite the same. Let’s take a closer look at how they compare.
How order bumps differ from cross-sells and upsells
Order bumps, cross-sells, and upsells all aim to increase your store’s revenue, but they show up at different times and offer different types of products.
Let’s break it down.
How order bumps differ from cross-sells
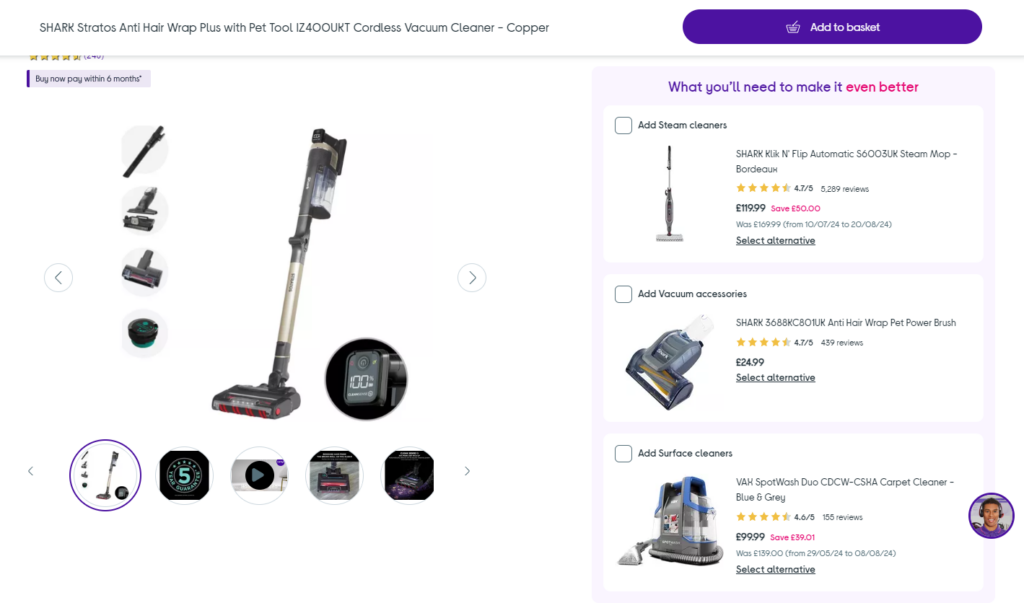
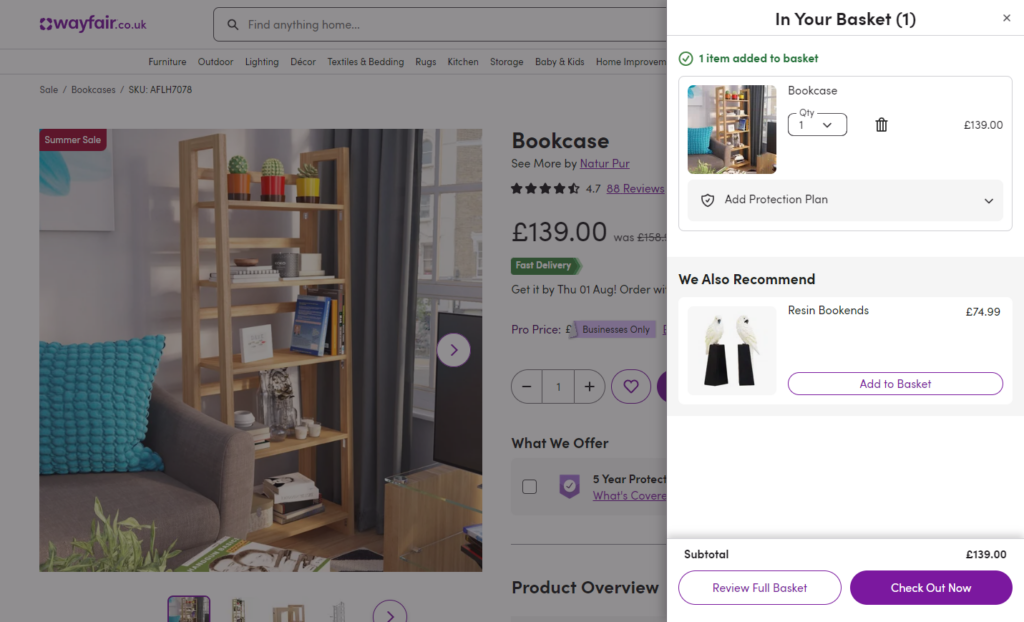
Cross-sells usually appear earlier in the shopping experience, on the product page or in the cart.
They’re often shown under headings like:
- You may also like.
- Frequently bought together.
- Customers also bought.
These are related items that complement what the customer is buying. For example, if someone adds a camera to their cart, you might cross-sell a memory card or tripod.
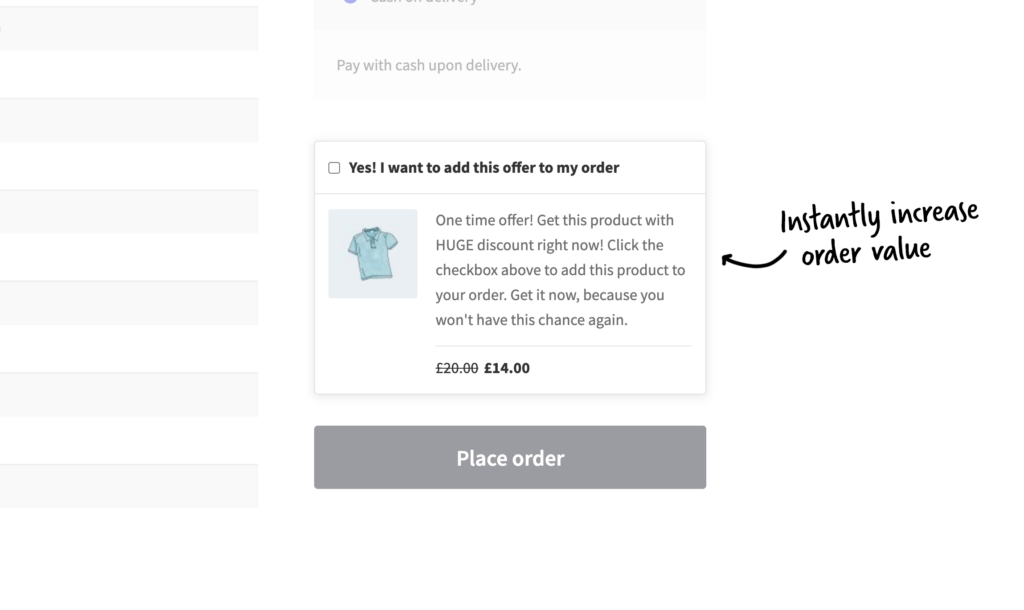
Order bumps, in contrast, appear during checkout, usually just before the “Place Order” button. They’re designed to be quick, low-friction add-ons (think: bonus item or small upgrade) and are typically lower in price than cross-sells.
You can think of an order bump as a type of cross-sell, but with better timing and less decision-making required.
How order bumps differ from upsells
Upsells encourage customers to buy a more expensive or premium version of the product they’re considering. These offers might appear on the product page (before the cart) or after checkout as a one-click upsell.
Unlike order bumps, upsells usually replace the original product with a higher-value alternative rather than adding something extra.
Quick summary:
- Cross-sell = a related product shown before checkout.
- Upsell = a better or pricier version shown before or after checkout.
- Order bump = a small, relevant add-on shown during checkout.
| Tactic | Placement | Goal | Common Use |
|---|---|---|---|
| Cross-sell | Product/Cart page | Suggest related items | Camera + memory card |
| Upsell | Product/After checkout | Offer a premium version | Basic → Pro plan |
| Order bump | Checkout page | Quick add-on to original item | Hoodie + tote bag |
Now that we’ve covered what order bumps are and how they differ from other sales tactics, let’s look at why they’re worth using on your WooCommerce store.
Why add order bumps to your checkout page?
Order bumps are one of the simplest ways to increase revenue without driving more traffic or creating new products. Here’s why they’re so effective:
1. They boost sales – fast
Customers often arrive at your store with one product in mind. But with the right offer at checkout, you can turn a single sale into two, three, or more.
In fact, Amazon reports that related product offers (like order bumps) account for up to 35% of their sales. It’s a proven tactic, and it works just as well on smaller stores.
2. They increase your average order value (AOV)
Let’s say your main product sells for $37, and your order bump adds another $15. That’s a 41% increase in a single transaction, without needing to acquire another customer.
According to SamCart, order bumps can increase AOV by 30–40%, just by giving shoppers an easy way to say “yes” to something extra.
3. They improve the shopping experience
Order bumps help your customers too.
Instead of digging through your catalog for add-ons or related items, they get a relevant recommendation right when it matters. One click, no fuss. It’s faster, easier, and more convenient.
Retailers who focus on creating this kind of smooth experience often see conversion rates jump by 10–15%.
4. They can support SEO (indirectly)
While not the main goal, order bumps that use internal product links (e.g., via product tags in WooCommerce) can help search engines better understand your site structure. That can improve indexing and boost discoverability.
Bottom line: order bumps give you a simple, no-fuss way to increase revenue, improve customer experience, and make every checkout count.
Next up, let’s look at how to set one up in your WooCommerce store.
How to add a WooCommerce order bump to your online store
By default, WooCommerce doesn’t let you add true order bumps at checkout, only basic cross-sells on the product or cart pages.
To display a one-click add-on during checkout (where it really counts), you’ll need a plugin built for the job.
That’s where Iconic Sales Booster for WooCommerce comes in. It makes it easy to create targeted order bumps and show them right on your checkout page, no custom code needed.
Here’s how to set it up.
What is Iconic Sales Booster? (WooCommerce order bump plugin overview)
Iconic Sales Booster for WooCommerce is a powerful plugin designed to help you increase your average order value, without relying on guesswork or gimmicks.
It gives you everything you need to add strategic product offers throughout your customer journey, using proven tactics that work for real ecommerce stores.
With Sales Booster, you can easily create:
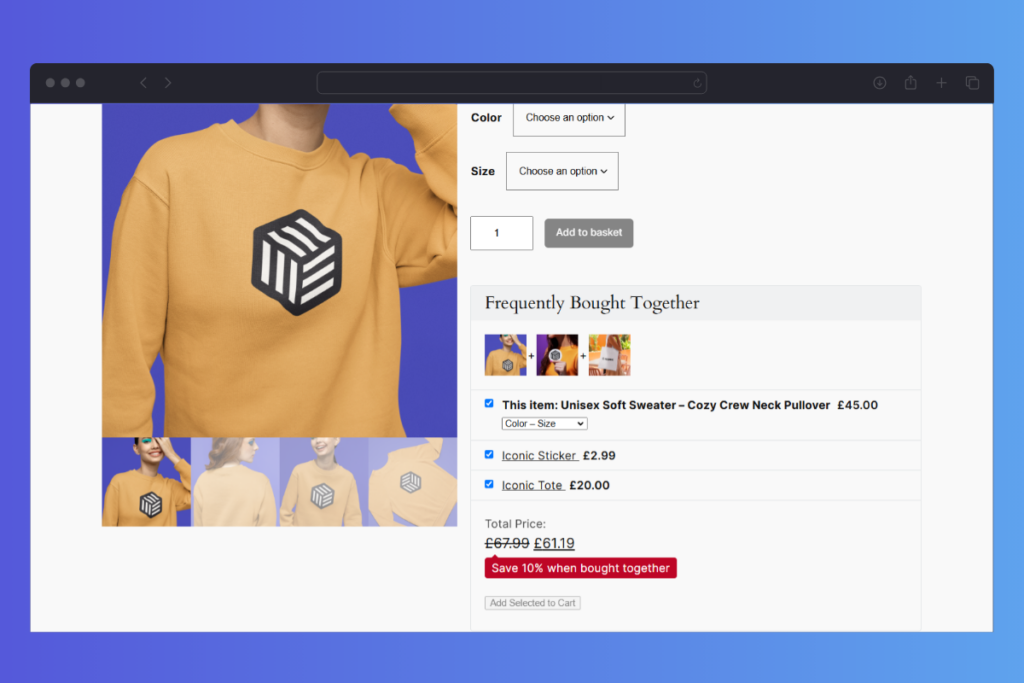
- “Frequently bought together” offers – Show complementary products directly on the product page.
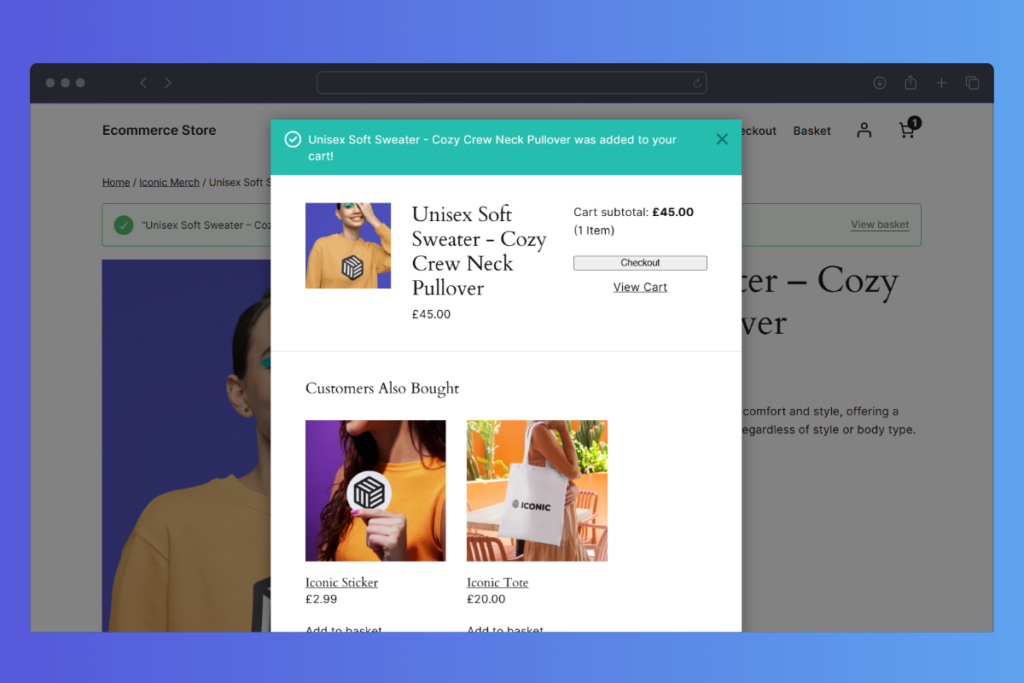
- “Customers also bought” popups – Triggered right after someone clicks Add to Cart to nudge them toward a second purchase.
- One-click post-purchase offers – Show upsells right after checkout, without interrupting the buying flow.
But the real standout? Checkout-stage order bumps, the kind that actually boost conversions.
Add WooCommerce order bumps with Iconic Sales Booster
Sales Booster makes it effortless to add order bumps directly to your checkout page. The exact moment when customers are ready to buy.

And these aren’t generic product suggestions. You can:
- Target order bumps based on cart contents, product categories, or specific items. So your offers feel relevant, not random.
- Control the design and wording of your offer to match your store’s tone and layout.
- Offer incentives, like fixed or percentage discounts, to make the bump feel like a no-brainer.
Customers don’t need to leave the page or rethink their purchase. It’s just a simple checkbox that says: “Yes, I want to add this too.”
That small prompt can turn a $40 sale into a $60 sale in seconds.
Iconic Sales Booster for WooCommerce
Add cross-selling to your entire WooCommerce store in minutes with Iconic’s WooCommerce cross-sell plugin, Iconic Sales Booster for WooCommerce.
Built for compatibility and performance
Sales Booster works with well-coded WordPress themes and plays nicely with popular page builders like Elementor and Divi. It supports variable products, all major payment gateways, and integrates seamlessly into your existing checkout flow. No clunky workarounds required.
Whether you’re looking to increase revenue, streamline your sales funnel, or simply give your customers smarter product recommendations, Iconic Sales Booster gives you the tools to do it all, without needing to touch a line of code.
Next, let’s walk through how to set it up.
How to create a WooCommerce checkout offer (order bump tutorial)
Ready to set up your first WooCommerce order bump? Here’s exactly how to do it using Iconic Sales Booster for WooCommerce, no technical skills required. Just follow these steps:
Step 1: Install the Iconic Sales Booster for WooCommerce plugin
Start by first installing the Iconic Sales Booster plugin.
- Go to the Iconic website and purchase the Iconic Sales Booster plugin: iconicwp.com/iconic-sales-booster. You’ll receive two emails after your purchase. One of the emails will have your license key, which you’ll use to verify your purchase, so keep it safe.
The other email will have the link to download the Sales Booster plugin.
- Click on the link to download the plugin.
- Log in to your WordPress dashboard and go to Plugins > Add New. Click on the Upload Plugin button at the top.
- Next, click Choose File and select the Sales Booster zip file you downloaded, and click Install Now.
- Once installed, click Activate. After activation, you’ll be redirected to the license activation screen.
- Copy the license key we mentioned earlier and paste it here.
- To finish up, click Agree & Activate License.
Now that you’ve installed Iconic Sales Booster, you can proceed to create your order bump offer.
Step 2: Create a checkout order bump
You can create order bump offers that either display for all products or based on the contents of a customer’s cart.
To create an order bump offer, follow these steps:
- Go to Sales Booster > Order Bumps from your WordPress dashboard.
- Click the Add New button at the top. You’ll see the settings you can configure to customize your order bump.
- Just below the title field, you’ll see three sections: Product(s), Offer, and Customize in separate tabs.
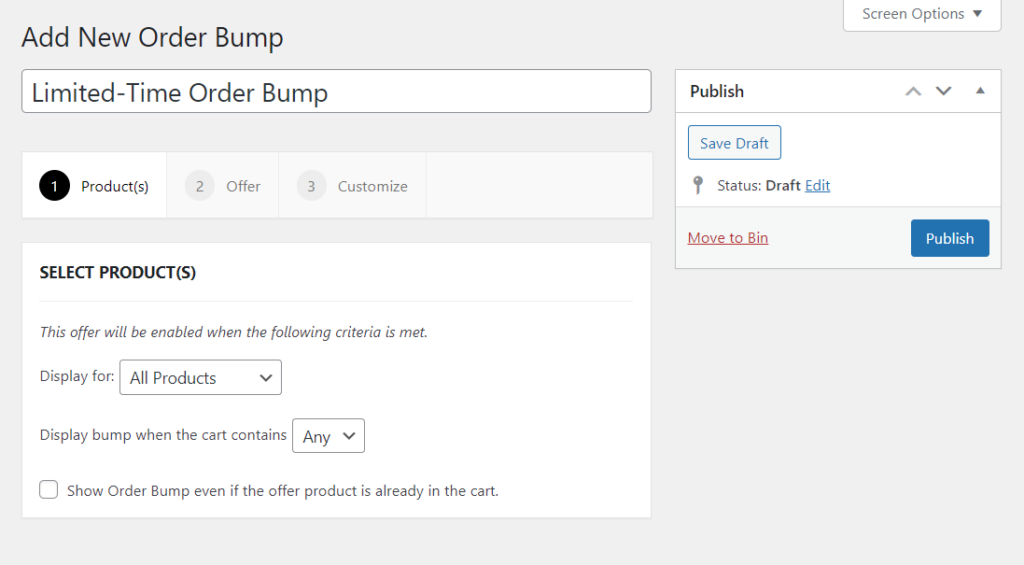
Choose the products you want to offer
You’ll be able to select the products to display the order bump you want to create for.
- By default, this is set to All Products, but you can click the dropdown and change it to Specific Products.
- If you do, you’ll see a search field which you can use to choose the products to display the order bump for.
- You can also choose to show the order bump when Any or All of these products are in the cart, in the order bump below.
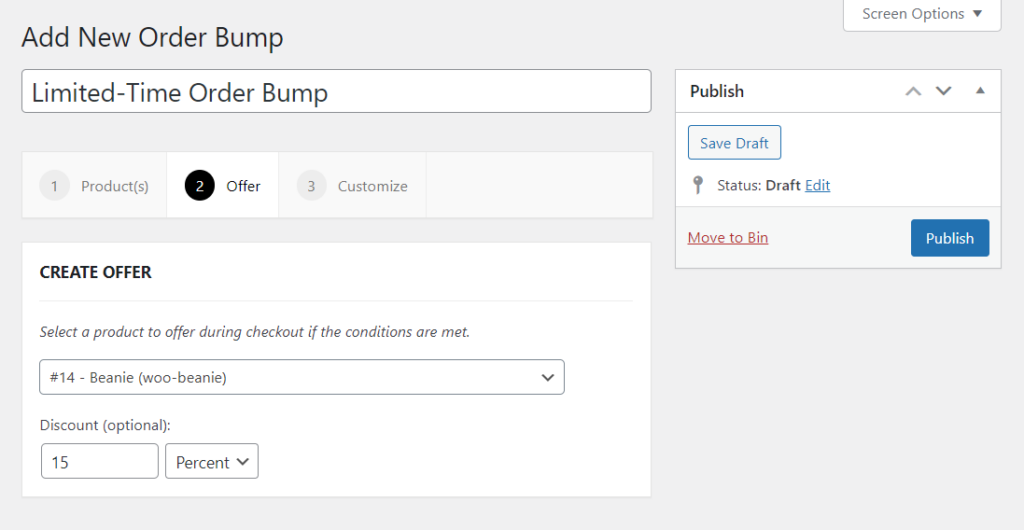
Select your order bump offer
After you’re done selecting the products for which you want to show order bumps, click on the Offer tab. This is where you’ll select the products that will be offered as an order bump.
- Here you’ll see a field that allows you to search for the products you want to offer as order bumps. You can search them by name, ID, or SKU.
- Next, enter the discount you want to offer and choose whether it is a fixed amount or a percentage.
Customize your offer’s appearance
Once done, click on the Customize tab. You’ll see a visual preview of the order bump with options to customize it.
- You can customize everything here, starting with the sales text and the description. You can also choose to display the price, product image, or shadow.
- Once you’re happy with your settings, click on Publish or Update. This will make your offer active.
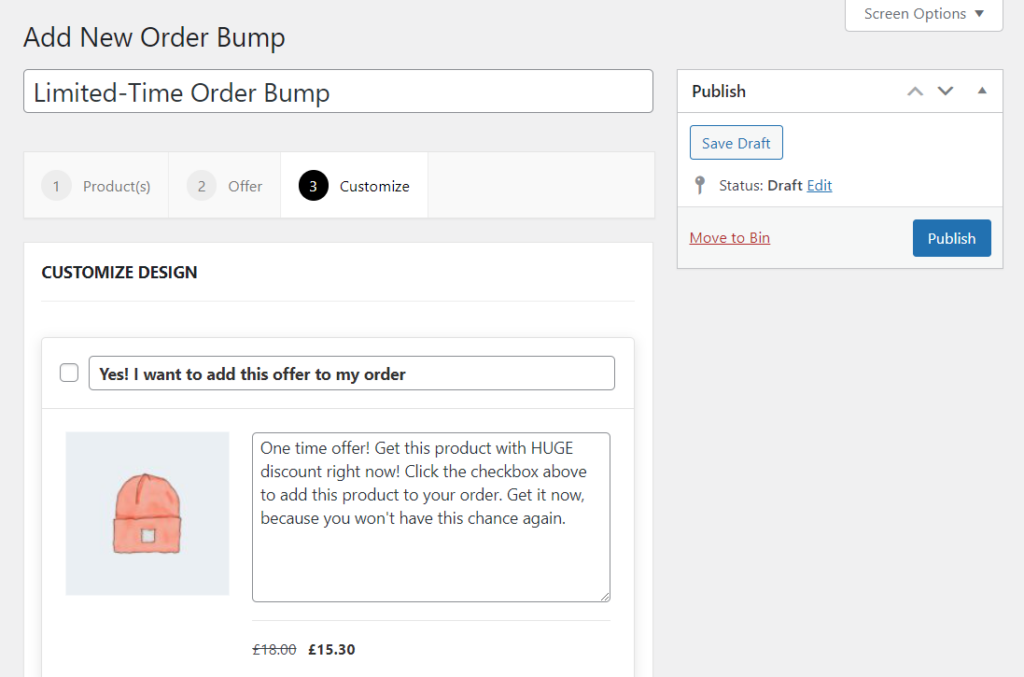
When customers add the products you specified to their cart, they’ll see this offer right before they confirm their order.
You might be wondering, what if the customer already has the order bump product in their cart? Well, if this is the case, the order bump will not be displayed. But, if you want to display it anyway, go back to the Product(s) tab and check the box that says ‘Show Order Bump even if the offer product is already in the cart’.
Step 4: Position the order bump in the checkout
By default, Iconic Sales Booster places your order bump above the Place Order button on the checkout page. However, you can change where this offer is displayed.
To do this:
- Go to Sales Booster > Order Bumps from your WordPress dashboard.
- Choose the order bump you want to edit and then click on the Customize tab.
- At the bottom, you’ll see the Position option.
- Click on this dropdown and select the position in which you want the order bump to be placed. There are several options here, including before or after the order total, before cart contents, before order review, etc.
- Click on the Publish/Update button to finish.

If you’re creating the checkout page using a page builder such as Divi or Elementor, there is another way for you to position the order bump. You can do it using this shortcode: [iconic_wsb_order_bump].
Keep in mind that you can only use this shortcode on the checkout page and that the shortcode will appear where you add it.
FAQs about WooCommerce order bumps
An order bump is a small, optional offer shown during checkout. An upsell usually replaces the original item with a higher-value product and may be shown before or after checkout.
Yes, using a plugin like Iconic Sales Booster, you can display one-click offers, called order bumps, directly on the checkout page.
No, WooCommerce doesn’t support checkout-stage order bumps out of the box. You’ll need a plugin like Iconic Sales Booster to enable this feature.
Yes, if you’re using a plugin like Iconic Sales Booster, you can include variable products in your order bumps and even allow customers to select variations directly from the checkout.
Choose a product that’s directly related to the main item in the cart, low in cost, and easy to understand at a glance. Think accessories, upgrades, or limited-time add-ons.
Ready to boost sales? Add order bumps to WooCommerce today
Order bumps are one of the easiest ways to increase your average order value and boost sales, without spending more on ads or driving more traffic.
And while WooCommerce doesn’t support this feature out of the box, Iconic Sales Booster makes it simple to add high-converting order bumps directly to your checkout page.
With full control over what’s offered, when, and how it looks, you can tailor each bump to your products and your customers, leading to a smoother experience and more revenue per order. If you’re serious about growing your WooCommerce store, this is a smart place to start.
Get Iconic Sales Booster for WooCommerce and start adding order bumps today.
Iconic Sales Booster for WooCommerce
Add cross-selling to your entire WooCommerce store in minutes with Iconic’s WooCommerce cross-sell plugin, Iconic Sales Booster for WooCommerce.

Gina Lucia is our in-house Content Manager at Orderable. She writes articles, user guides, technical documentation, and creates videos on everything WooCommerce and Orderable.
Gina has been working in the WordPress/WooCommerce space since 2012 when she developed WordPress websites for clients large and small.
For the past 8 years, she’s been writing about everything WordPress and WooCommerce, becoming an expert in what makes a WooCommerce store succeed.
When not writing, Gina loves to tend to her vegetable garden, read, or travel to mainland Europe.