
In this guide, we’ll teach you how to change the WooCommerce shop page image size in a few simple steps. Plus, we’ll give you a few additional techniques to make the most of your WooCommerce product images using a few different plugins.
The plugins mentioned in this guide:
- WooThumbs for WooCommerce – Change your WooCommerce product image sizes easily and improve your WooCommerce product gallery.
- Image Swap for WooCommerce – Add flip and hover product image effects to your WooCommerce shop page.
How to change the WooCommerce shop page image size
In WooCommerce, the shop page image size (category/catalog image sizes) has been removed.
This means you can’t set a specific image size for your WooCommerce shop page, but you can still achieve the look you want. In the following steps, we’ll show you how.
To set the shop page image size in WooCommerce, take the following steps:
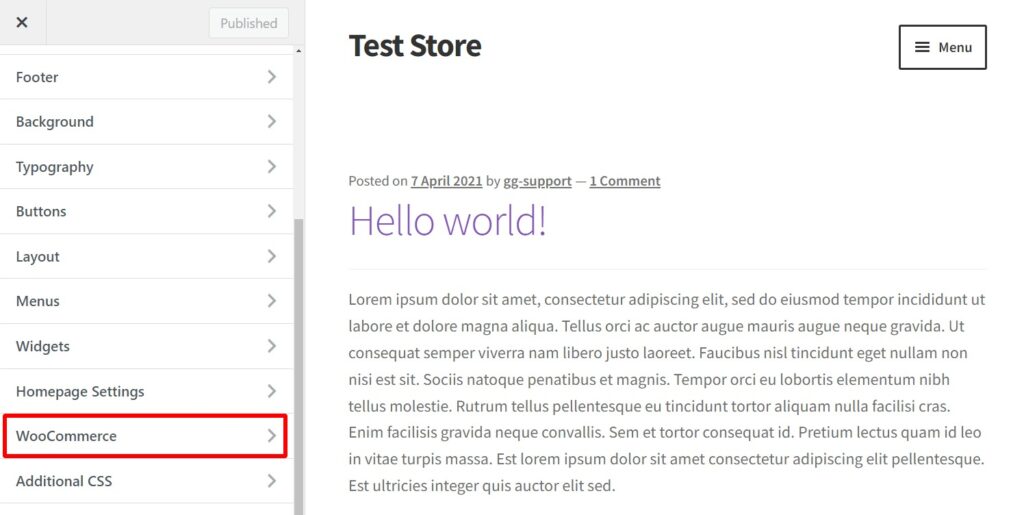
- From your WordPress dashboard, go to Appearance > Customize. This will pull up the Customize menu on the left and a preview of your site on the right.
- Scroll down the left-hand side menu and click WooCommerce, then Product Images.
- Here you’ll see some Thumbnail cropping settings. If you select 1:1, your images will be cropped into a square. You can customize the shape further if you click Custom and pick a different aspect ratio, i.e. 4:3 for a rectangle.
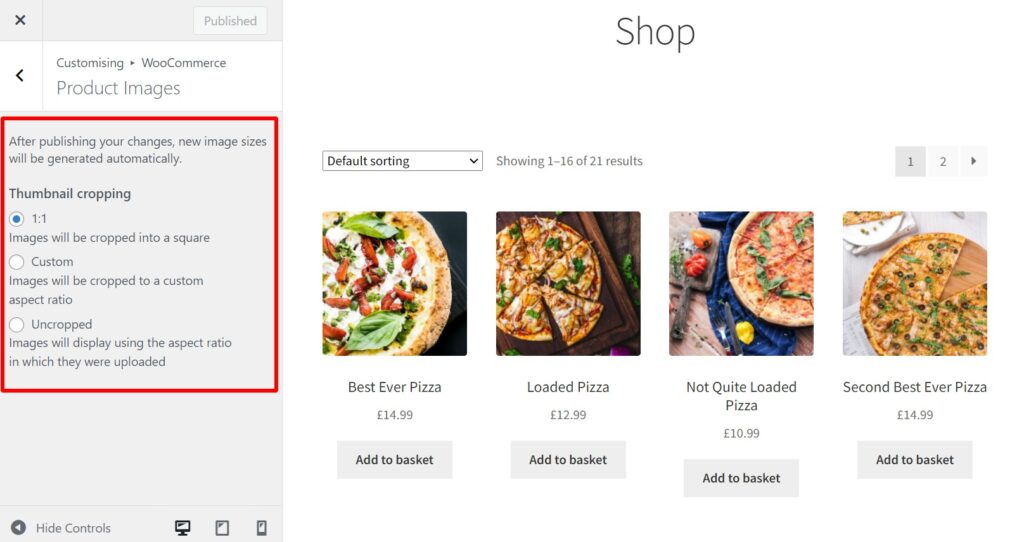
- Once you’re happy, click the blue Publish button at the top of the page.
All your product images should now be the same size and shape, but what if you want them to be larger or smaller? The best way to achieve this is to specify how many products you want to appear in each row of your shop page.
To do this, take the following steps:
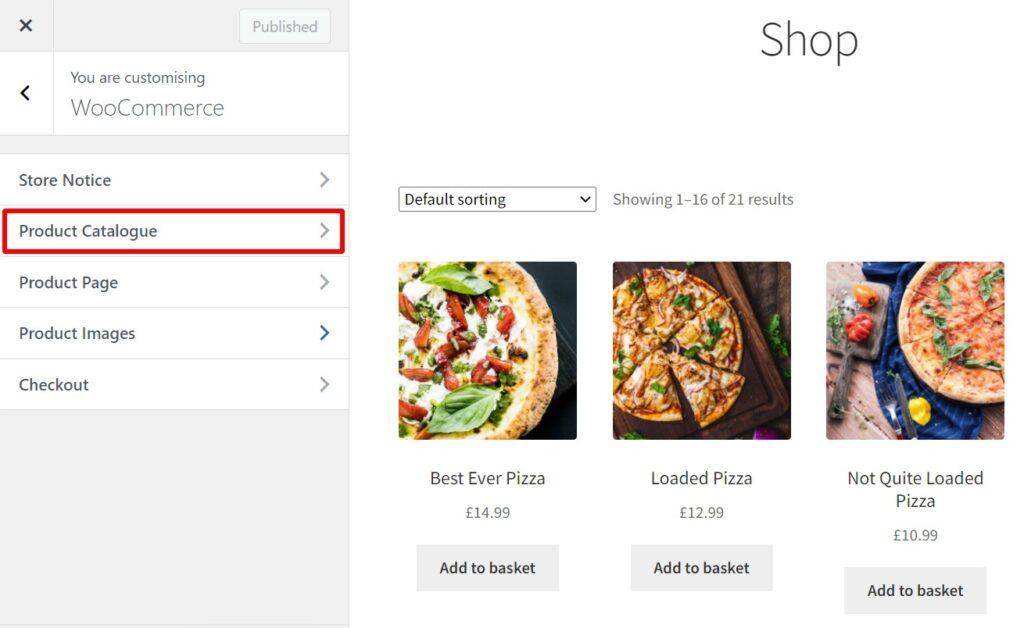
- While you’re still on the customization screen, click the back arrow at the top, then click Product Catalogue.
- Scroll down until you see Products per row. Underneath this you should see a field with a number in it – this will likely be 4. If you raise this to 5, your product images will get smaller. If you lower it to 3, they will get bigger.
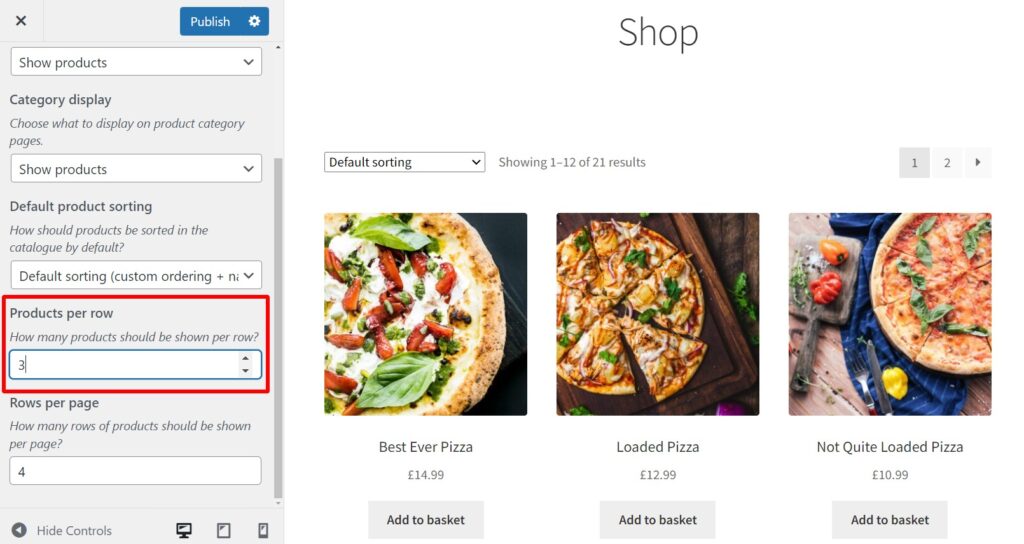
- Once you’re happy with the changes, click the blue Publish button at the top.
Updating the shop page image size this way may seem like you have less control, but WooCommerce does the heavy lifting for you.
As soon as you make these changes, the product images on your site will be automatically updated and working perfectly. Changing size and adapting without you having to do a thing.
So now we’ve changed the WooCommerce shop page image size, let’s improve them further.
Improve your WooCommerce shop page images
With your product images sized correctly on your shop page, it’s time to maximize their ability to make you sales.
To do this, you can add image swap and hover effects to your product images on the shop page. These will allow customers to hover over or click on your product images to see more.
The effects can range from flipping the image to reveal another to zooming in, adding clickable thumbnails below the main image, and more.
This technique can be added with the plugin Image swap for WooCommerce. This easy-to-use plugin will allow you to show customers more product information without them having to click through to the product page. Saving them time and keeping them on your site for longer.
With Image Swap installed, you’ll save customers time, unnecessary clicks, and frustration.
Curious? You can get a 14-day free trial of Image Swap for WooCommerce here:
Image Swap for WooCommerce
Add gallery-like image swap effects to your product images on the shop, catalog, search, and filter results pages with Image Swap for WooCommerce.
Now we have your shop page images sized correctly and working hard to make you sales, let’s improve your product page images.
How to improve your product page images in WooCommerce
If you’d like more control over the image sizes in your WooCommerce store and you’d like to improve your product images in general, then you’ll need the help of a plugin.
WooThumbs for WooCommerce allows you to change the size of your product images on the single product pages with a few simple settings.
It will also allow you to:
- Upgrade your product page gallery with control over the design and placement of thumbnails.
- Add better image zoom.
- Include video.
- Include multiple images for each of your product variations.
- And more.
WooThumbs for WooCommerce
Customize your WooCommerce product image gallery in minutes with a new layout, embedded video, multiple images per variation, and more.
Once you’ve installed WooThumbs for WooCommerce, you’ll be able to change your image sizes with ease by taking the following steps:
- From your WordPress dashboard, go to WooCommerce > WooThumbs > Display.
- Scroll down to the Image Sizes section and enter your image size in the Single Image Width (px) field.
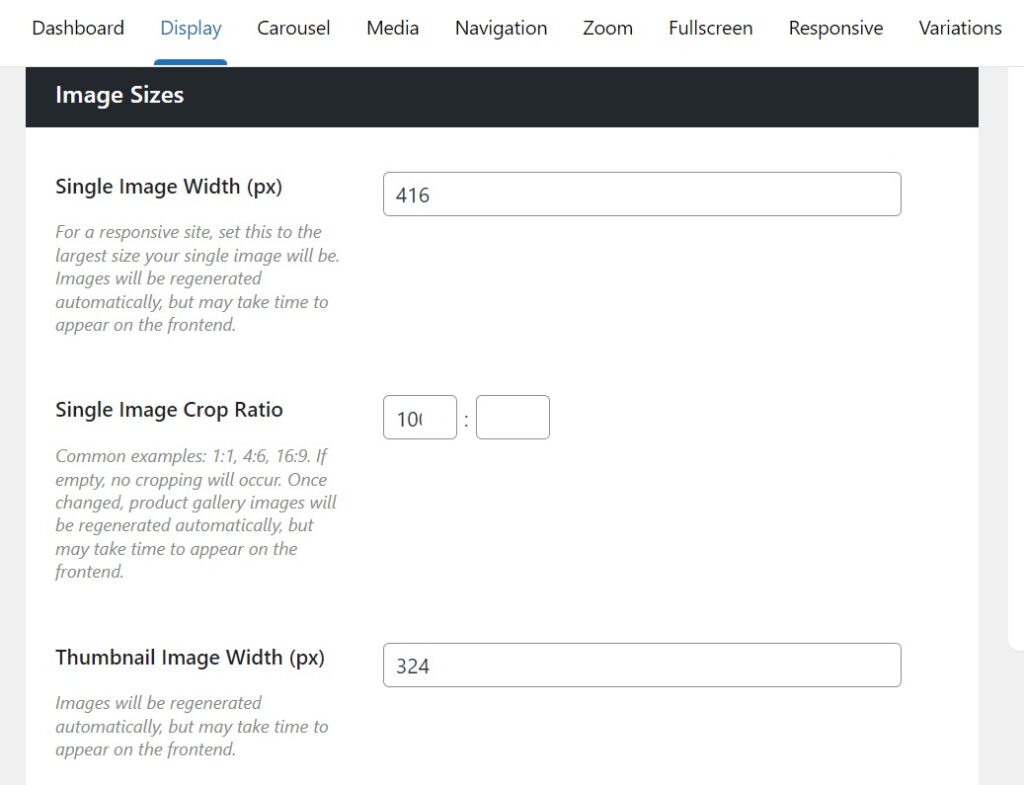
- Click Save and it will trigger the background image regeneration process for your single image thumbnails.
It’s as simple as that. With WooThumbs you’ll have greater control over your WooCommerce store’s image sizes. So you can get back to what really matters – making your store more sales.
Get to grips with WooCommerce image sizes today
In this guide, we’ve explored how to change your WooCommerce shop page image size, improve your WooCommerce images and upgrade them to make you sales.
The plugins mentioned in this guide:
- WooThumbs for WooCommerce – Change your WooCommerce product image sizes easily and improve your WooCommerce product gallery.
- Image Swap for WooCommerce – Add flip and hover product image effects to your WooCommerce shop page.

Gina Lucia is our in-house Content Manager at Orderable. She writes articles, user guides, technical documentation, and creates videos on everything WooCommerce and Orderable.
Gina has been working in the WordPress/WooCommerce space since 2012 when she developed WordPress websites for clients large and small.
For the past 8 years, she’s been writing about everything WordPress and WooCommerce, becoming an expert in what makes a WooCommerce store succeed.
When not writing, Gina loves to tend to her vegetable garden, read, or travel to mainland Europe.