
Are you a restaurant business owner wanting to learn how to create a restaurant menu in WordPress? If it’s a yes, then you are definitely in the right place!
Attracting more clients and increasing sales is way easier when you have a restaurant menu that not only looks good but is also easy for your customers to navigate.
If you don’t have this set up yet, don’t worry! WordPress has a plugin for pretty much anything, with no coding required! (Is that an audible sigh of relief I hear, or is it just me?)
Take Orderable, for example, it’s a lightweight plugin that can make creating restaurant menus a cinch.
Here, we will take you through everything that you need to know. From why a restaurant menu is an absolute necessity. To how you can create a WooCommerce restaurant menu in just four steps with the WooCommerce restaurant menu plugin, Orderable.
First, let’s start with understanding why creating your very own restaurant menu is so important.
Why create a restaurant menu in WordPress?
You might be wondering why you need to create your own restaurant menu. Well, 3rd party food delivery businesses actually take a huge chunk of your earnings, usually around 20-40%. Not only that – you also have less control over your listing on those apps, and are more likely to get lost in the crowd.
Food delivery apps in the United States alone are predicted to bring in $220 billion in revenue by 2025. But this money doesn’t come out of thin air. These companies can charge customers delivery and service fees that significantly raise the price of their orders.
Not only that, but delivery apps can charge the restaurant a commission and fee as well, which can cut into profit margins. Avoiding these extra charges is one of the primary reasons why restaurants are creating their own menu.
Let’s explore these benefits of creating your own menu a little further:
You’ll get to keep your hard-earned money
A massive advantage of using WordPress to build a restaurant menu is that you won’t have to pay huge third-party costs. This is because restaurant owners do not have to pay a large commission on each transaction.
This means that when you create your own website menu and people start ordering, you get to keep 100% of the profits for yourself! Just think of what you could do with that extra 20-40%…
Your website, your way
You get to influence every aspect of your own website menu. From its appearance to additional product items, payment options, user-friendliness, and more. You won’t have to wait for a third party’s approval, either.
With different menu layouts to choose from and a variety of add-ons that you can include, you decide what works best for your business, in line with YOUR brand.
You’ll have full control of the ordering and delivery experience
By taking care of orders in-house, you’ll be able to control the whole process. Everything from the design of the website to offers and promotions, and even checkout procedures. Not to mention, you’ll have more control over what the client experiences and how the delivery drivers are trained.
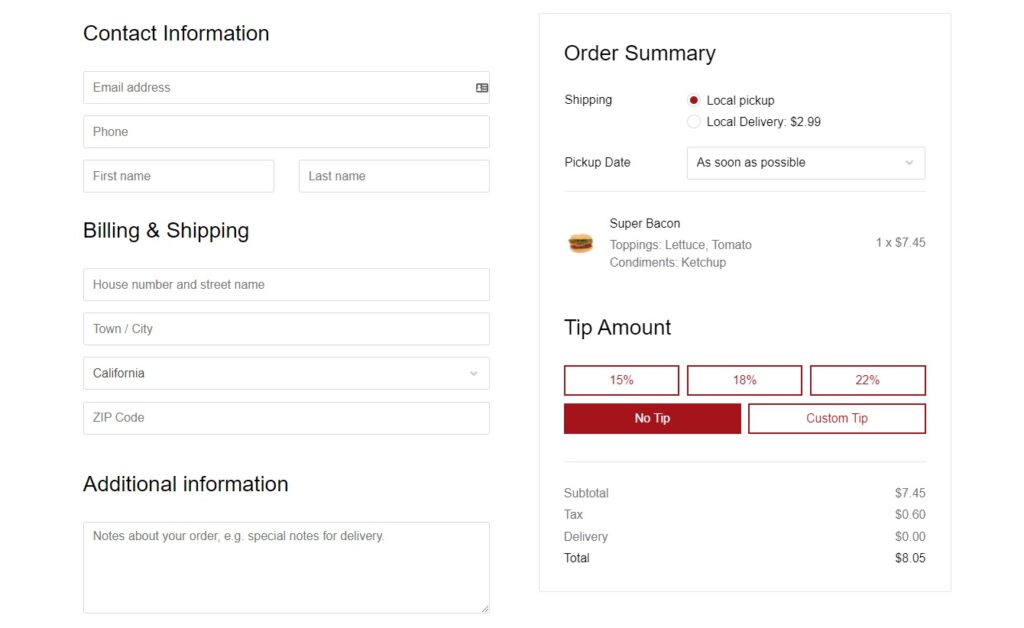
You can even add time slots and holiday schedules, control of delivery fees and tip options, order notifications, and even timed products that are perfect for your lunchtime offers!
You’ll be able to communicate better with customers
Having your own restaurant menu allows you to add that personal touch. You will easily be able to communicate with customers directly, make changes, take feedback, and include relevant business information, opening hours, location, events, and other information.
As a result, incorporating online menus may assist you to attract more consumers to your restaurant business.
Basically, you get to be the creator and owner, with full control of the entire process. From setting up your menu to check out and delivery, you get to decide how it all happens from start to finish.
Now that you know creating your very own restaurant menu in WordPress is essential, let’s look at how you can set it up.
How to create your restaurant menu in WordPress
Creating a restaurant menu can be difficult, especially if you’re not familiar with WordPress. Whether you’re a novice or an expert, you’ll be able to create a stunning restaurant menu with ease using these four steps.
But first, introducing the tool that will make it all incredibly simple: Orderable.
The best WordPress restaurant menu plugin
To help you create an amazing restaurant menu in WordPress, you’ll need a plugin. Introducing the best WordPress restaurant menu plugin available – Orderable. This all-in-one WooCommerce restaurant plugin takes care of pretty much everything.
All you have to do is build your menu, take orders, and deliver them. It even installs WooCommerce for you! That means that you can focus on what matters most – your customers and growing your business.
Now, assuming you have your WordPress website already up and running, let’s get you started creating your very own restaurant menu.
Step 1: Install Orderable
The first step is to download and install the Oderable plugin. You have two options: free and pro, which you can compare and download here.
Note: For Oderable Pro, there are two downloads to add (Oderable AND Orderable Pro). Remember to add BOTH to your website.
When adding Oderable to your website, use the following steps:
- Go to the WordPress dashboard, click Plugins > Add New.
- Click the Upload Plugin button at the top left of your page.
- Upload the Orderable .zip file downloaded, click Install Now, and on the next page click Activate Plugin.
- Repeat the steps above if you purchased Orderable Pro.
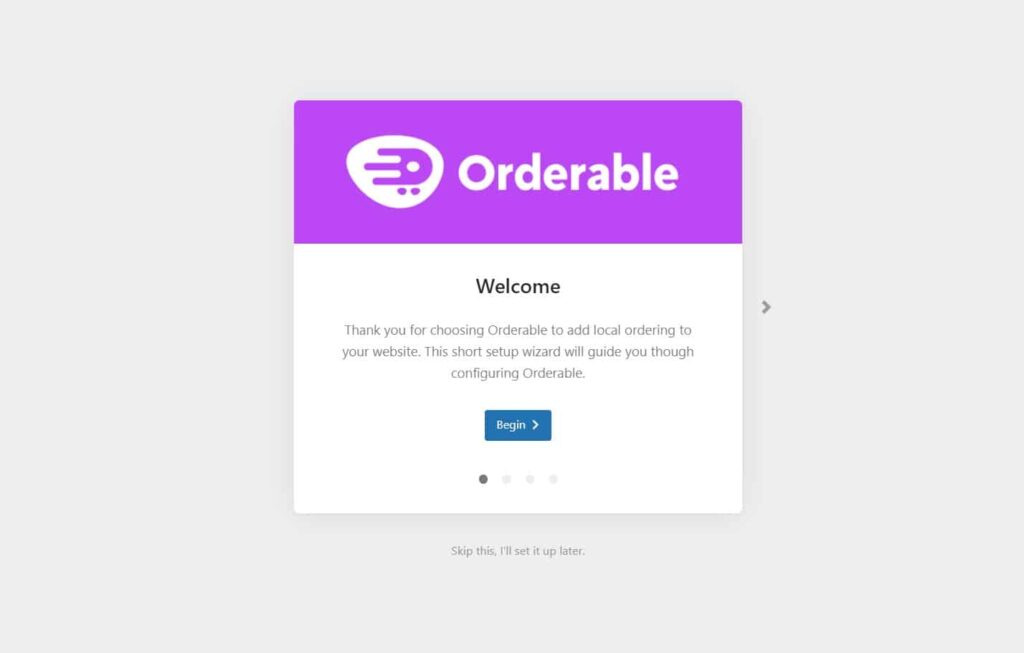
- Navigate to Orderable from your WordPress menu where you will be directed to a setup page to help you get started.
- Click Begin and WooCommerce will automatically be installed for you if you don’t have it yet.
Next, you will need to set up your business and restaurant information.
Step 2: Enter your restaurant information
The second step is filling out your business information.
Note: This information can be updated anytime, so you don’t have to worry if you miss something or add it incorrectly.
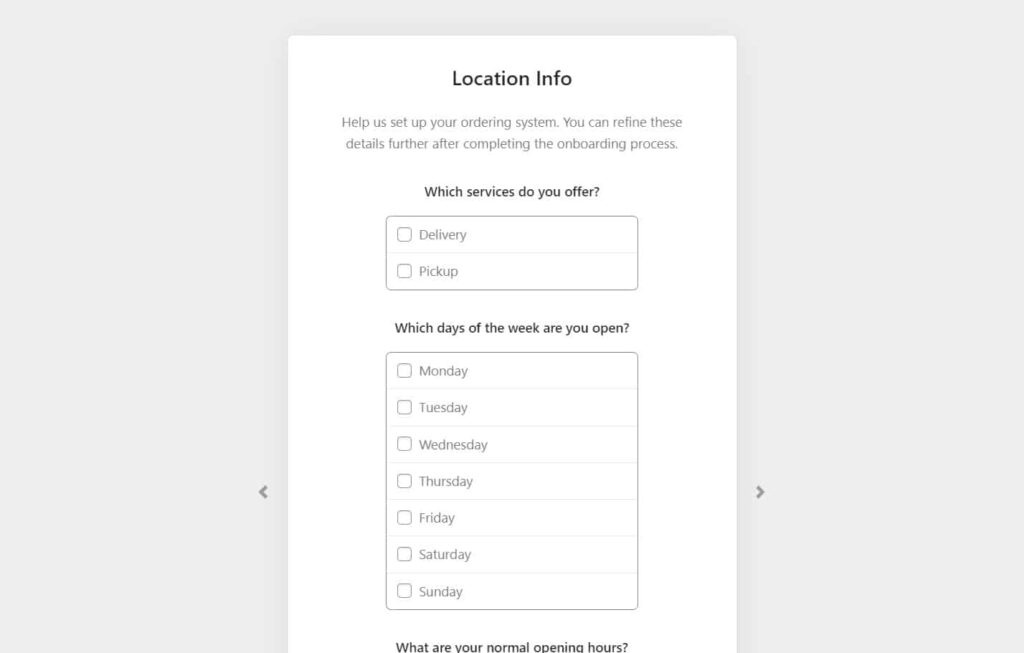
You will need to fill out:
- Your business information: name, location with postcode or ZIP, and communication details – email.
- Choose whether you want to do deliveries, pickups, or both.
- Include your days and times of availability.
And voila! Next, you will need to add your food options.
Step 3: Add your food items
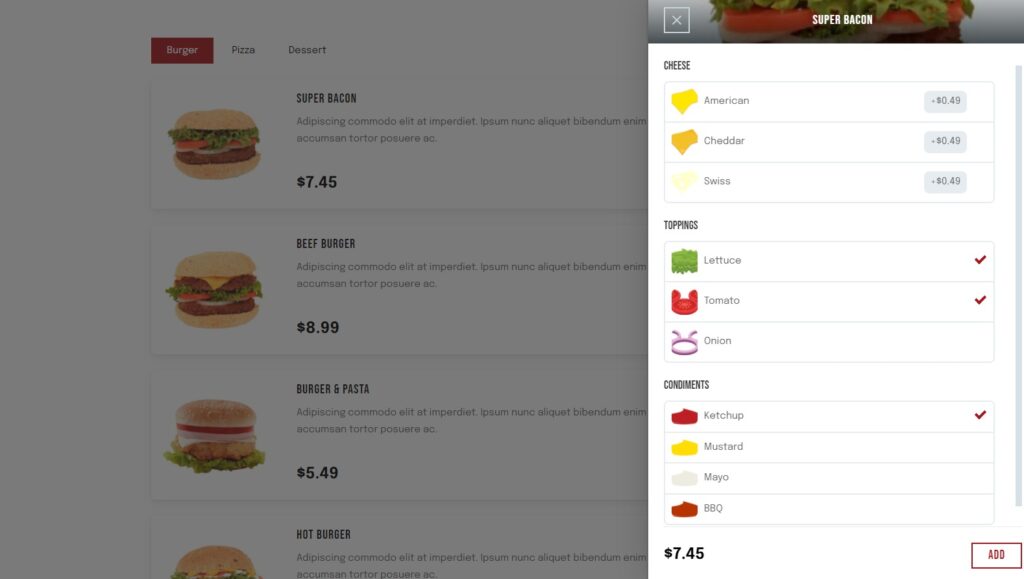
With the basics now set up, you are now ready to add your food items. If you purchased Oderable Pro, we’ll take you through how to set up add-ons here, too.
Here are the steps to adding your food items:
- On your WordPress dashboard, click Products > Add New.
Next, you’ll then be sent to a page where you can add all of the information you need for your food item. You’ll need to:
- In the title area, give it a name.
- Go to the Product Data Section where you will need to give the item a price.
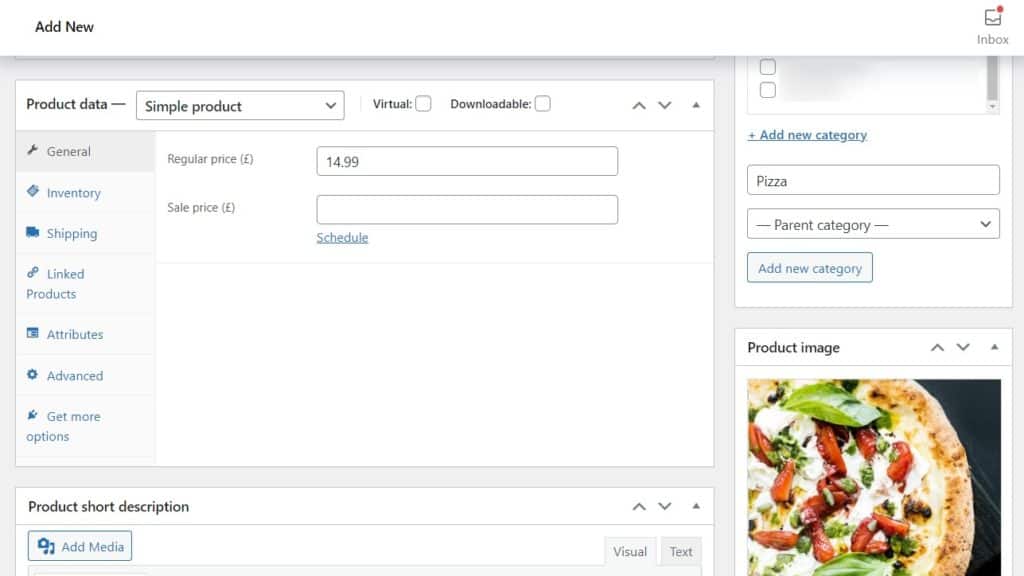
- To add a picture of your food, go to the Product Image Section on the right and click Set Product Image.
- Here, you may also create product categories (Starters, Mains, Desserts, and so on).
- If you are happy with your food item information, click Publish.
And there you have it! Your products are ready, now it’s time to create your restaurant menu.
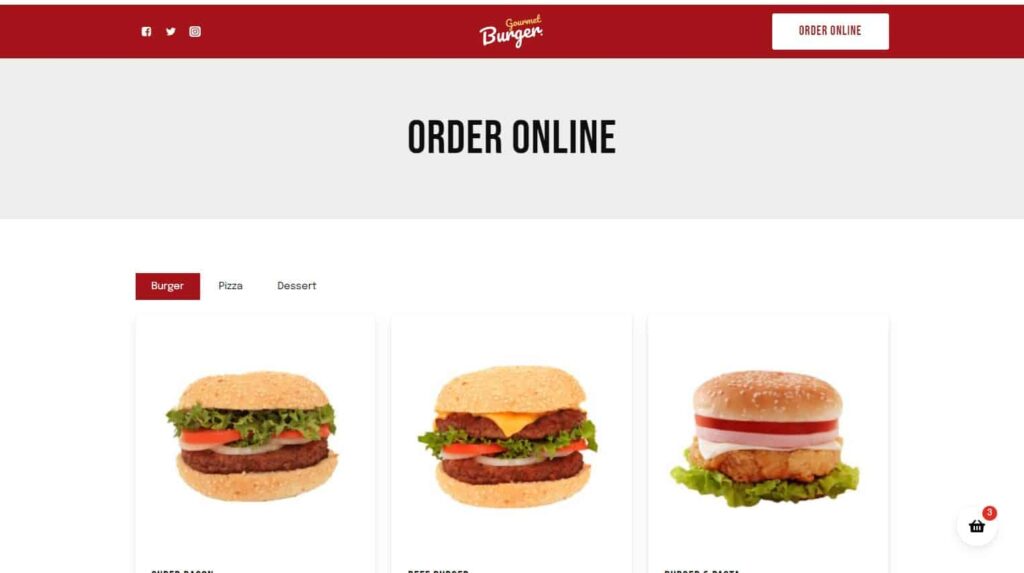
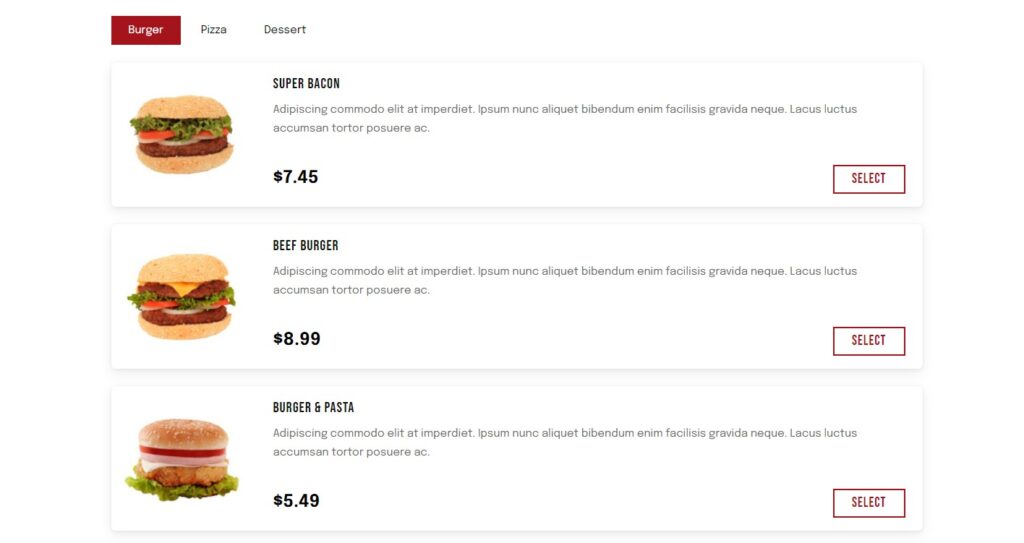
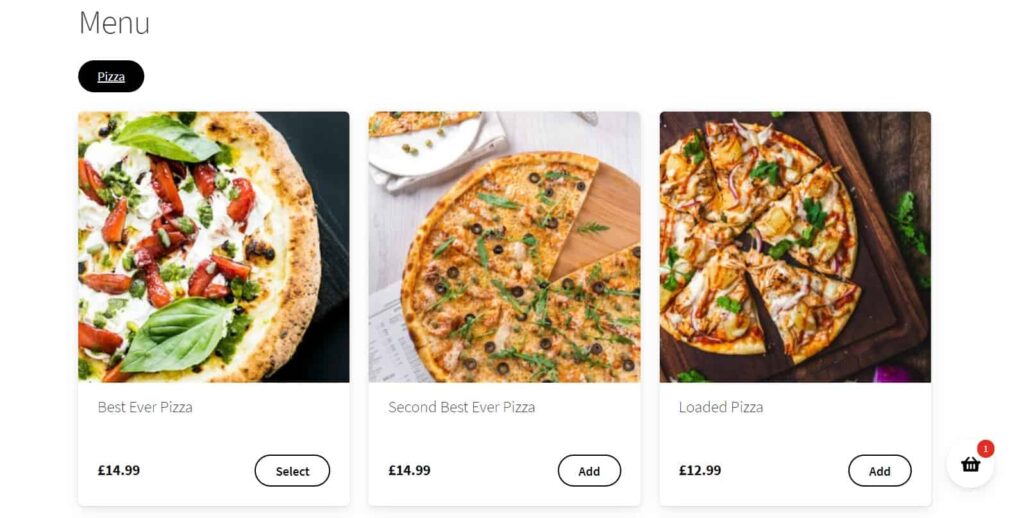
Step 4: Create your WooCommerce restaurant menu
This step is about creating the front-end, basically, what your customers will see when they visit your restaurant menu. Additionally, this is where they go to order the food items that you have advertised.
Here we will guide you through the steps:
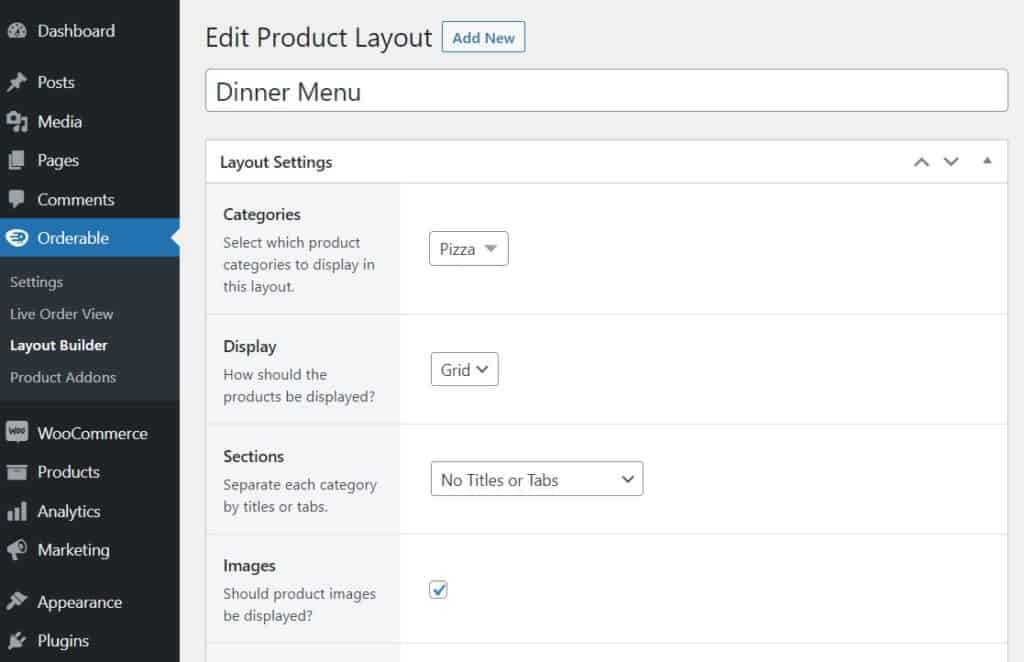
- Go to the WordPress dashboard, click Oderable > Layout Builder > Add New (at the top of the page).
- Select the categories you’d like this layout to include, and then give it a title. You’ll be able to view a preview of what it looks like at the bottom of the page.
- Next, you can choose whether you want your layout in grid or list form.
- If you’ve set categories for your meals, the Sections drop-down menu will display what they look like.
- Here you can choose if you want images to be included and if the whole menu item should be clickable or just the button.
- When you are happy with the way it looks, hit Publish!
Now you’ve designed your layout, it’s time to publish them on your website.
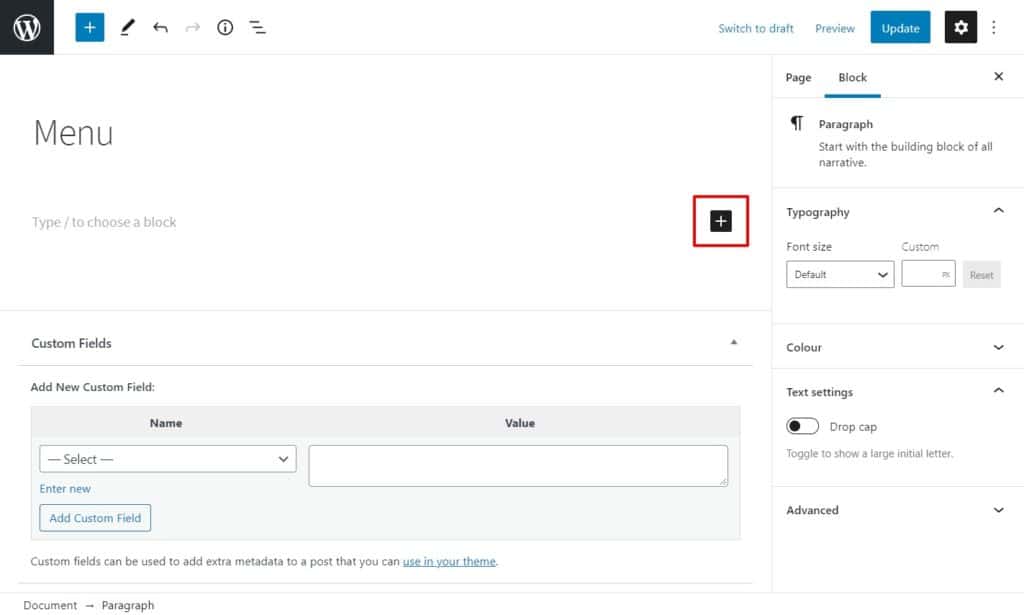
- When in your WordPress dashboard, click Pages > Add New.
- This is your restaurant’s online menu. After that, type a name for it (usually Menu) and then press the black plus sign to add a block.
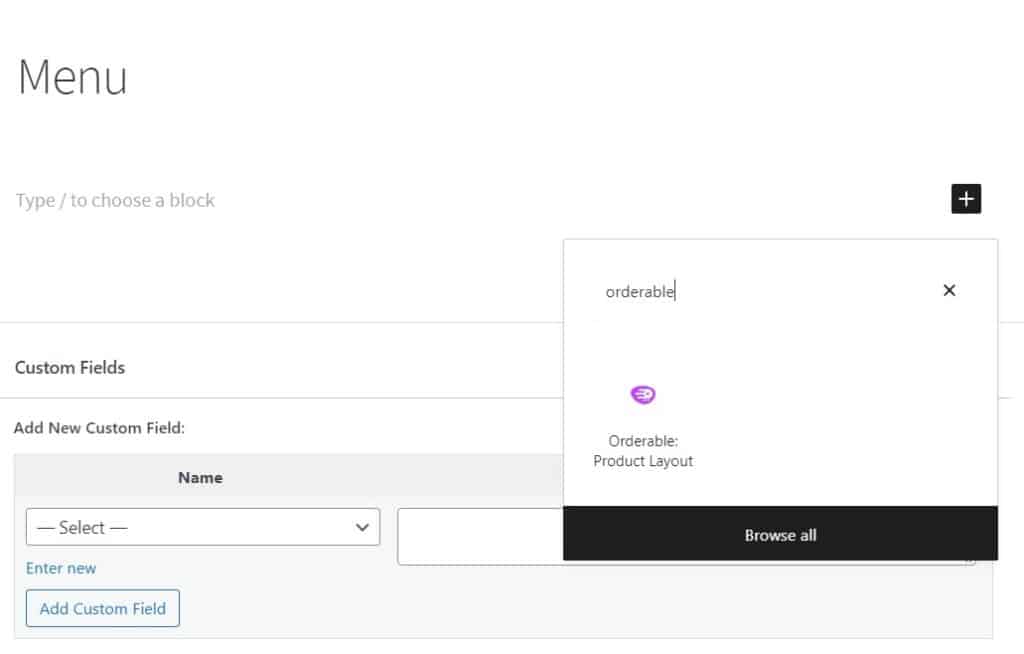
- Search ‘Orderable’ and click on the Orderable: Product Layout block.
- A generic product grid will be added. Select the layout you actually want from the right-hand Layout dropdown.
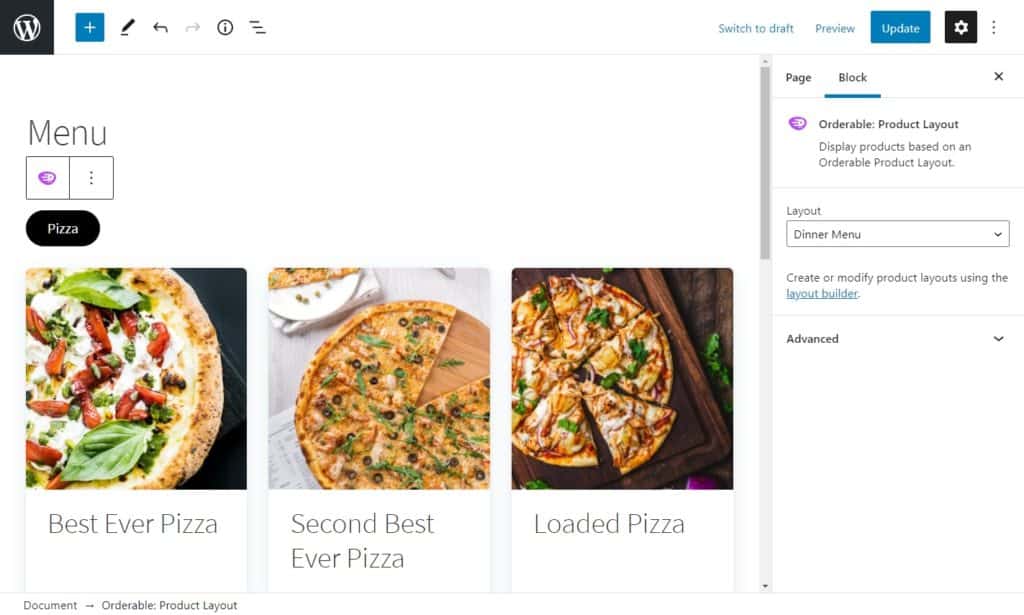
- When satisfied, click Publish.
Now you can view your restaurant menu with all your menu items that are available for order.
Note: To get the most of your Orderable Pro account, you can add your product addons and sales-boosting order bumps by following the steps outlined here.
And that’s it! You now have a fully functioning WooCommerce restaurant menu. So, now that you have everything that you need, what are you waiting for?
Create your WooCommerce restaurant menu today
With Orderable, there are no hidden costs or surprises when it comes time to pay the bill at the end of the month because there are no transaction fees, or per-transaction charges either!
What could be better than that? Give it a try and see why restaurateurs are already benefiting from using Orderable in their businesses!

Gina Lucia is our in-house Content Manager at Orderable. She writes articles, user guides, technical documentation, and creates videos on everything WooCommerce and Orderable.
Gina has been working in the WordPress/WooCommerce space since 2012 when she developed WordPress websites for clients large and small.
For the past 8 years, she’s been writing about everything WordPress and WooCommerce, becoming an expert in what makes a WooCommerce store succeed.
When not writing, Gina loves to tend to her vegetable garden, read, or travel to mainland Europe.