
If you’re looking to set multiple prices per product in your WooCommerce store, then look no further. This article will outline how to add multiple different prices to your products using the plugin, WooCommerce Attribute Swatches.
- WooCommerce Attribute Swatches – Add prices to product attributes such as color and material. Turn these attributes into color and image swatches for a better customer experience.
WooCommerce Attribute Swatches
Replace the default WooCommerce variation dropdown menu with variation swatches for WooCommerce. Add color swatches, image swatches, and modern text buttons to your variable product pages.
So before we outline how to set multiple prices per product in WooCommerce, let’s discuss why it’s important.
If you’d like to jump ahead to the tutorial, click here.
Why you might use multiple prices per product in WooCommerce
There are many scenarios where you might need to display multiple prices per product in WooCommerce.
For example, let’s say you sell a hoodie that’s available in two different colors (blue and black). Instead of adding the hoodie as two separate products to your WooCommerce store, you would add it as a variable product with the color attribute. Each color could have a different price.
The key benefit of selling variations at different prices is that it’s easier to manage on the back-end. For example, you might want to sell the XL size of a t-shirt at a higher price point than the S size. This way, you can set up WooCommerce multiple prices per product easily and make it easy for customers to browse variable products.
So now we know the reasons why you might want to add multiple prices per product, lets get them set up in your WooCommerce store.
How to set up multiple prices per product in WooCommerce
In this section, we’ll explain how you can set up multiple prices per product using the WooCommerce Attribute Swatches plugin.
Step 1: Install WooCommerce Attribute Swatches
To get started, purchase WooCommerce Attribute Swatches from the Iconic store: iconicwp.com/woocommerce-attribute-swatches
Or start a free trial below:
WooCommerce Attribute Swatches
Replace the default WooCommerce variation dropdown menu with variation swatches for WooCommerce. Add color swatches, image swatches, and modern text buttons to your variable product pages.
Then follow these steps:
- Go to Plugins > Add New > Upload Plugin.
- Choose the zip file you downloaded, upload, and then click ‘Activate’.
- Once activated, you’ll need to enter your licence key.
Now that we have WooCommerce Attribute Swatches installed, we can move onto adding multiple prices to your products using variable pricing.
Step 2: Create a variable product
The first thing you need to do is create a variable product in WooCommerce. Here’s how:
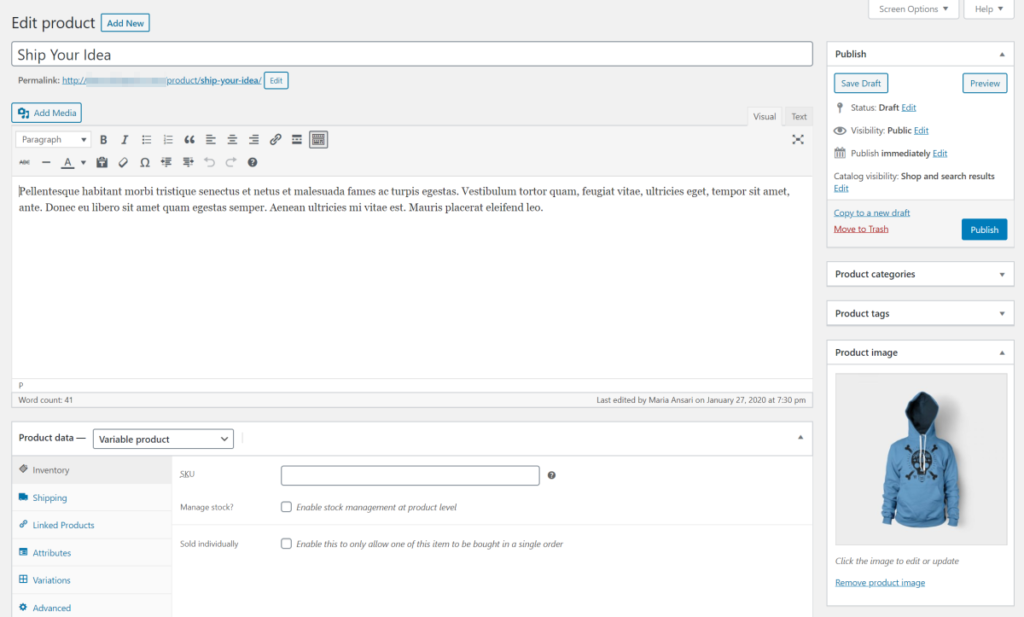
- Go to Products > Add New from the WordPress admin panel.
- Give your product a name and description.
- Scroll down to the ‘Product data’ section and select ‘Variable product’ using the drop-down that says ‘Simple product’.
Click the ‘Save Draft’ button to proceed.
Step 3: Create product attributes
Once you’ve created a WooCommerce variable product, you’ll be prompted to create product attributes for it. Here’s what you need to do:
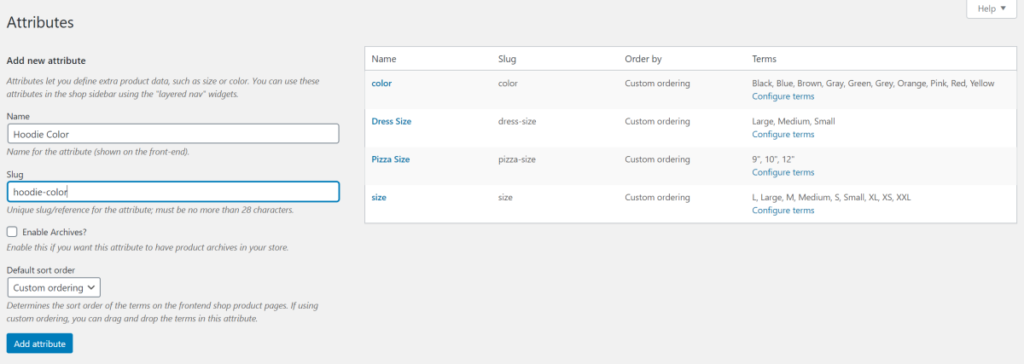
- Head over to Products > Attributes.
- Enter a name for a new product attribute e.g. size or color.
- Click the ‘Add attribute’ button.
- Click the ‘Configure terms’ link to populate the attribute. For example, if you’re adding an attribute for color, the terms might be blue and black.
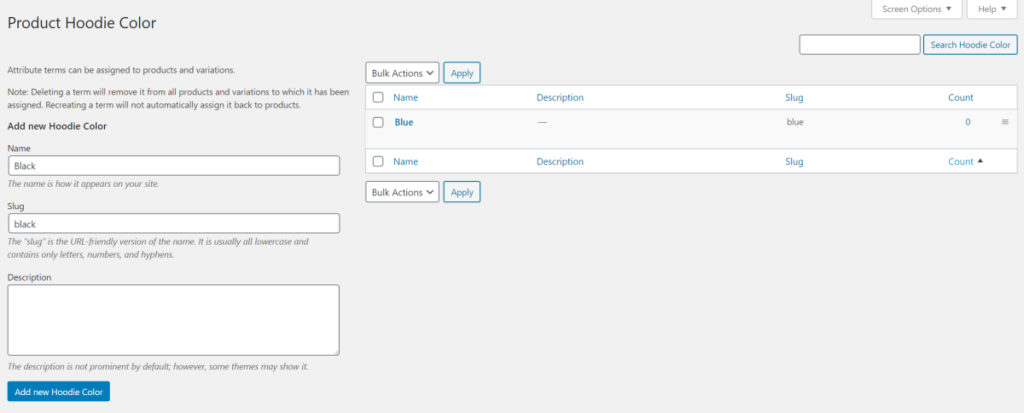
Click the ‘Save Changes’ button to proceed.
Step 4: Add attributes to the product
Go back to the variable product you created in Step #1 and scroll down to the ‘Product data’ section once again.
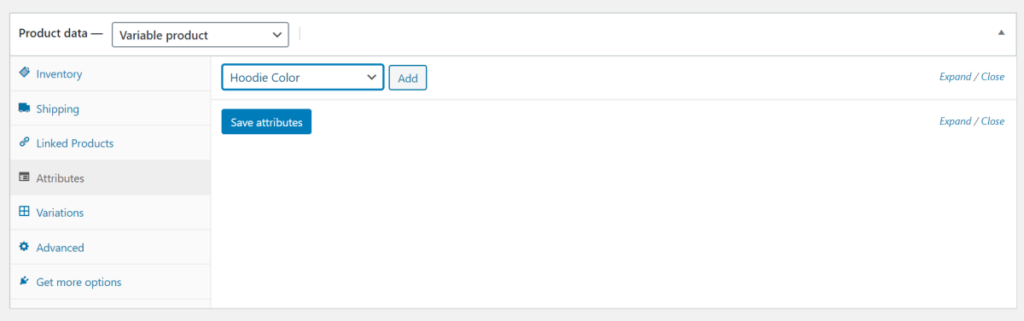
- Navigate to Attributes, use the dropdown menu to select the attribute you created in Step #2, and click ‘Add’.
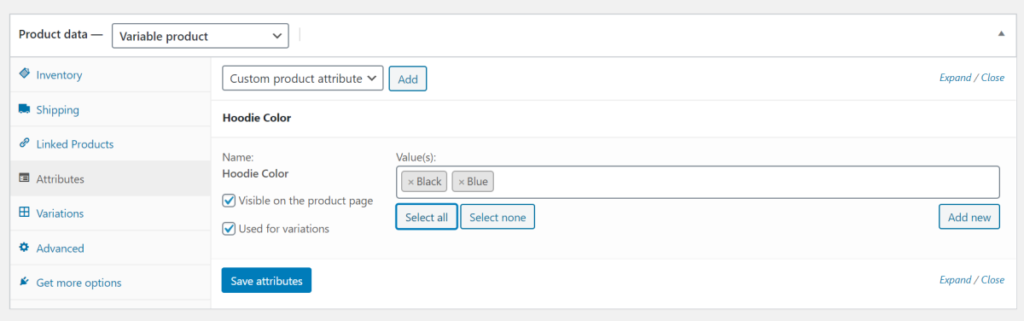
- Make sure the ‘Used for variations’ checkbox is ticked.
- Click on ‘Value’ and add all of the terms you’d like to include in your product variations.
- Click the ‘Save attributes’ button to proceed.
Step 5: Add fees to your product attributes
When it comes to adding fees to your product attributes in WooCommerce, you can get as complicated as you like. In this example, we’re going to be adding an extra fee to a picture frame glass type.
To set specific prices for product attributes, do the following:
- Scroll down to the Attributes tab in the Product Data section.

- Expand the attribute you’d like to add fees to.

- Scroll to the Fees section and enter the additional fee you want to charge.
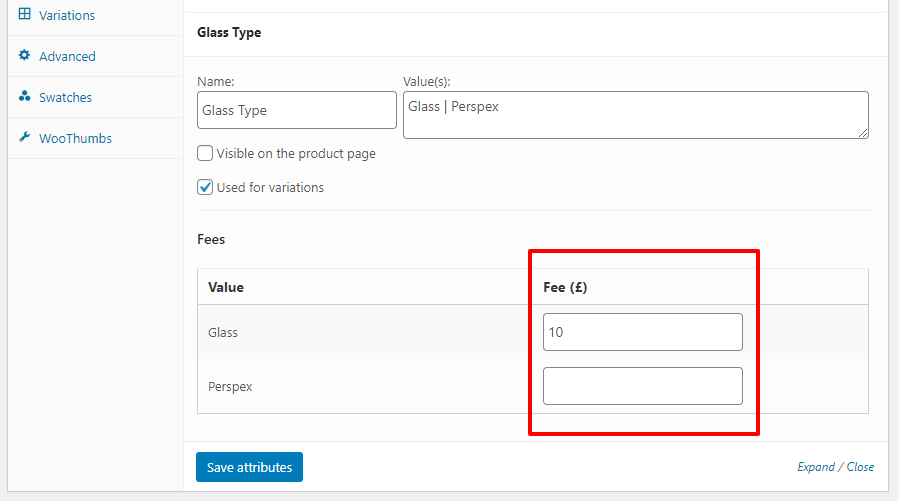
- Click Save attributes.
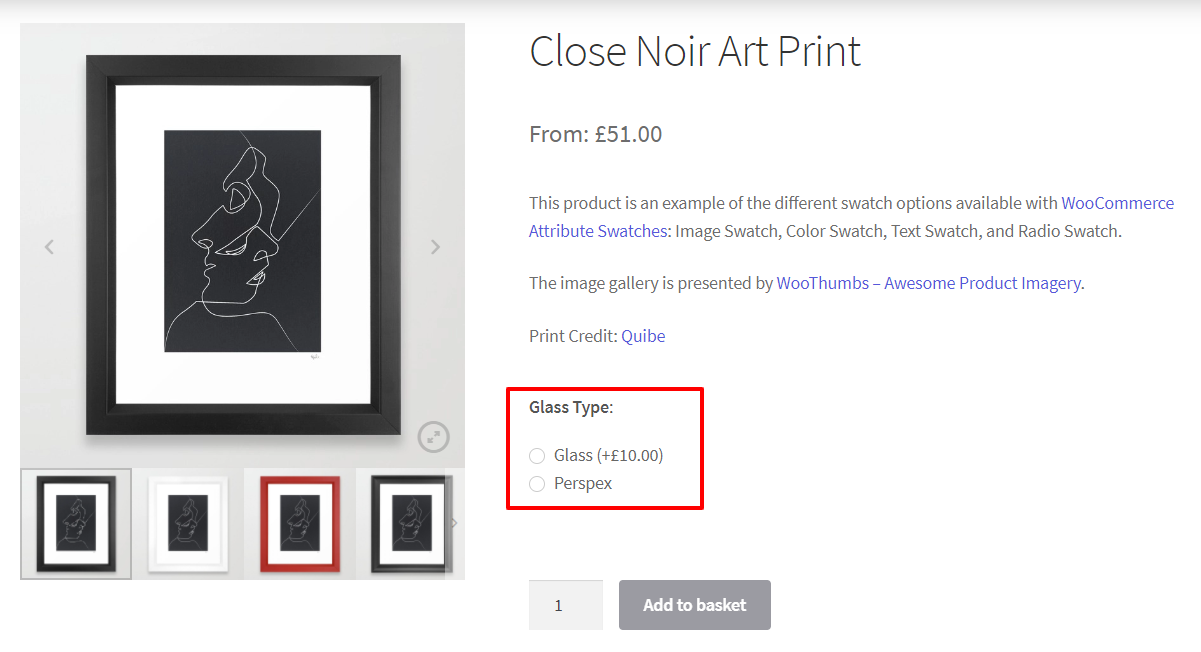
- Then click Update (at the top right-hand side of the page) to update your product.
Now when viewing the product on your store, these attribute values will have additional fees.
Add multiple prices per product to your WooCommerce store today
That’s it, your WooCommerce store now displays multiple prices per product using variable pricing. With this up and running, you’ll be able to provide a much clearer shopping experience for customers, resulting in more sales for your online store.
Make these change quickly and easily with WooCommerce Attribute Swatches.
WooCommerce Attribute Swatches
Replace the default WooCommerce variation dropdown menu with variation swatches for WooCommerce. Add color swatches, image swatches, and modern text buttons to your variable product pages.
