If you’re looking to customize your WooCommerce account page, this guide is for you.
👋 In this guide, we’ll walk you through the ins and outs of your WooCommerce My Account page, where it is, why you might want to edit it, and of course, how to customize it.
First, let’s take a little look at where the WooCommerce My Account page is and what it contains.
WooCommerce Account Pages
Add custom endpoints/tabs to the My Account area in your WooCommerce store with the plugin WooCommerce Account Pages.
Where is My Account page in WooCommerce?
The WooCommerce My Account page is a page within your WooCommerce store that’s designed to store your customers’ account details.
To access this page, they will need to create an account and then log in to that account via your login page. This is usually a page with the URL yourstore.com/my-account.
When logged out, customers can create their account via the registration form on this page (if you’ve allowed them to do so). If not, they’ll be able to create an account on the WooCommerce checkout page (again, if you’ve allowed them to do so).

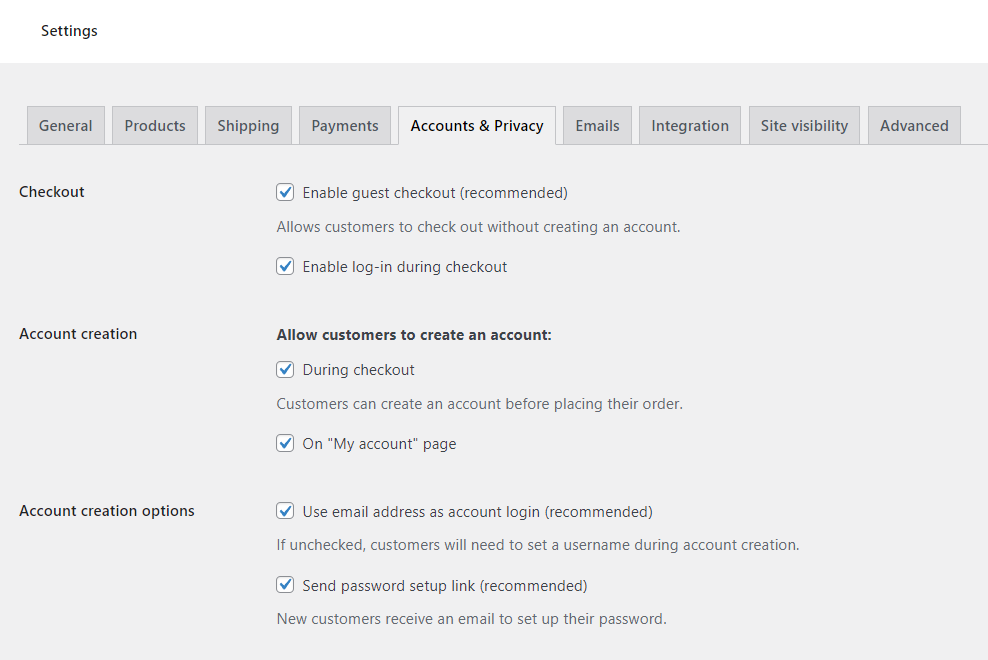
All settings for account creation can be found by going to WooCommerce > Settings and clicking on the Accounts & Privacy tab at the top.
You can change what page and, therefore, what URL this page is on by going to WooCommerce > Settings and clicking the Advanced tab. On this page, you’ll see the My Account page in the Page Setup section. To have the My Account page content show on this page, you need to make sure you’re using the My Account page shortcode: [woocommerce_my_account]

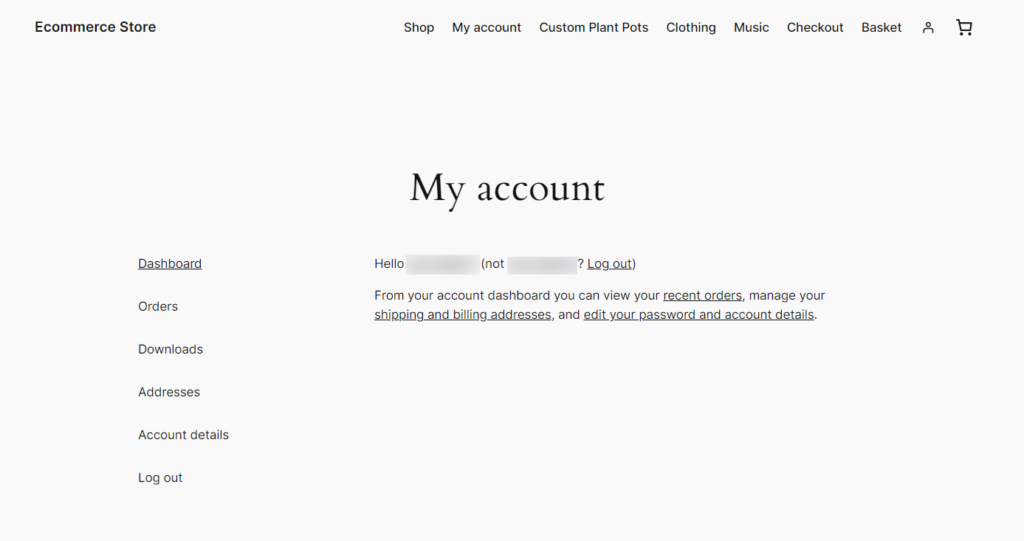
What’s on the WooCommerce My Account page?
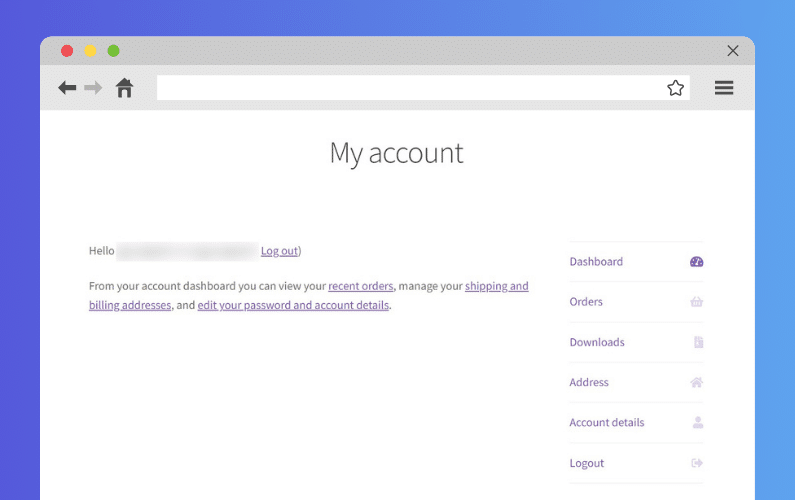
Depending on the WordPress theme, template, or page builder (like Elementor) you’re using, your My Account page’s design might look slightly different. However, pretty much every My Account page, by default, comes with an account menu/sidebar on the left and the page content on the right/in the middle.
On a default WooCommerce store, customers can view their order history, manage their billing and shipping addresses, and edit their password and account details.

Each of the menu items on the left is called an endpoint. We’ll show you how to create/add custom endpoints later in this article.
Okay, so now we know where this page is and what it contains, let’s see why you might want to customize it.
Why customize the My Account page?
Your store’s WooCommerce account page might be a functional spot to help customers get the technical information they need and update their details. But, if you want to improve your ecommerce store’s user experience, you might want it to be a little more than that.
To give the customer vital information or extra resources
If you’re selling something that requires you to give a little more information to the customer after their purchase, the WooCommerce account page could be a great place to add this kind of custom content.
For example, a store that sells specialist plants might need to provide their customers with planting guides and instructions.
They can and should send this information to WooCommerce customers via email. But if that email gets lost, customers would be able to login to their account and find the information they need quickly and easily with a custom My Account page.

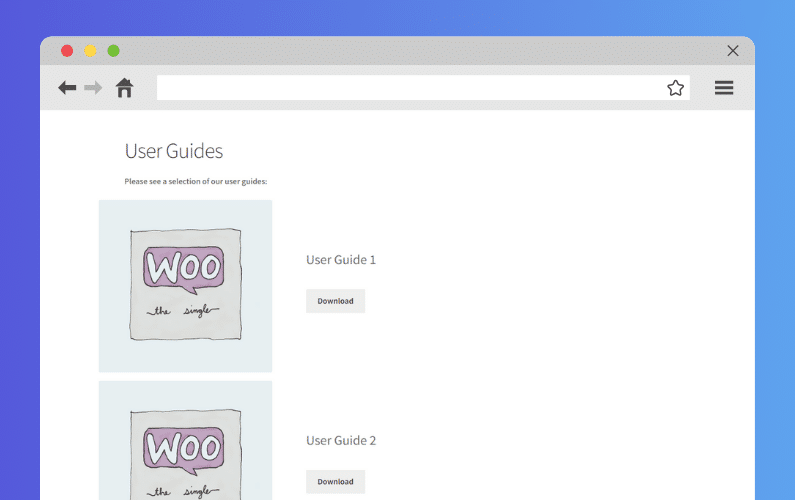
Similarly, a store that sells hardware likely needs to provide customers with user guides and extra information. So they can use their new purchase without friction.
📈 After all, 88% of customers say good customer service makes them more likely to purchase again.
By adding an extra page to the account area, you’re making sure your customers don’t have to jump through hoops to get the information they need.
To display different content depending on the user role
If you run a membership site, you might require something a little more custom than the standard WooCommerce account area can provide.
You might be sharing too much information with the wrong customers if you add new custom account pages for all members. So, the ability to create account pages that only show up for certain users is crucial. All so you can share the right content, with the right people.
The above situations can all be solved with little fuss by using an account pages plugin. Below, we’ll outline how to set this up and get it running in no time.
How to customize the WooCommerce My Account page?
If you’re unhappy with the default endpoints on your account page and want to be able to customize WooCommerce my account page fully, you’ll need the help of a WooCommerce plugin.
By default, WooCommerce doesn’t allow you to customize or add new pages/endpoints to the My Account page. To do this, we’ll use the plugin WooCommerce Account Pages.
Customize your account page with WooCommerce Account Pages
WooCommerce Account Pages is a straightforward plugin that allows you to add custom pages and tabs to the My Account page in WooCommerce.
With this plugin, adding new pages is as simple as adding a new page in WordPress. By creating your new endpoints in this way, you’ll be able to add any content to the page that you would add to a WordPress page.
This includes anything from FAQs, to custom blocks, forms, downloads, videos, and more. If you’re using a block editor, you’ll have the ability to drag and drop content onto your new tab/page to customize it to your online store.
How do I add a new tab to the WooCommerce My Account page?
In this tutorial section, we’ll walk you through the simple steps to add new custom endpoints to your My Account page. No custom CSS, coding, or PHP required.
To get started, purchase WooCommerce Account Pages from the Iconic store: iconicwp.com/woocommerce-account-pages
WooCommerce Account Pages
Add custom endpoints/tabs to the My Account area in your WooCommerce store with the plugin WooCommerce Account Pages.
Then follow these steps:
- From your WordPress dashboard, go to Plugins > Add New > Upload Plugin.
- Choose the zip file you downloaded, upload it, and then click Activate.
- Once activated, you’ll need to enter your license key.
Now that we have WooCommerce Account Pages installed, we can move on to adding your new pages.
Add your new account pages
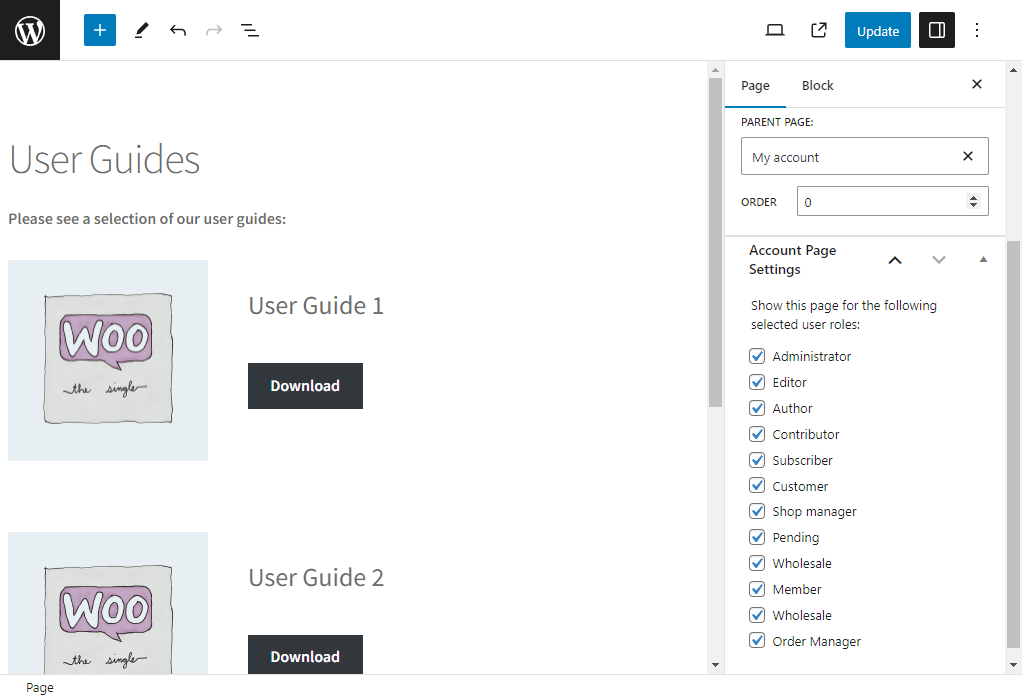
- From your WordPress dashboard, go to Pages > Add New.
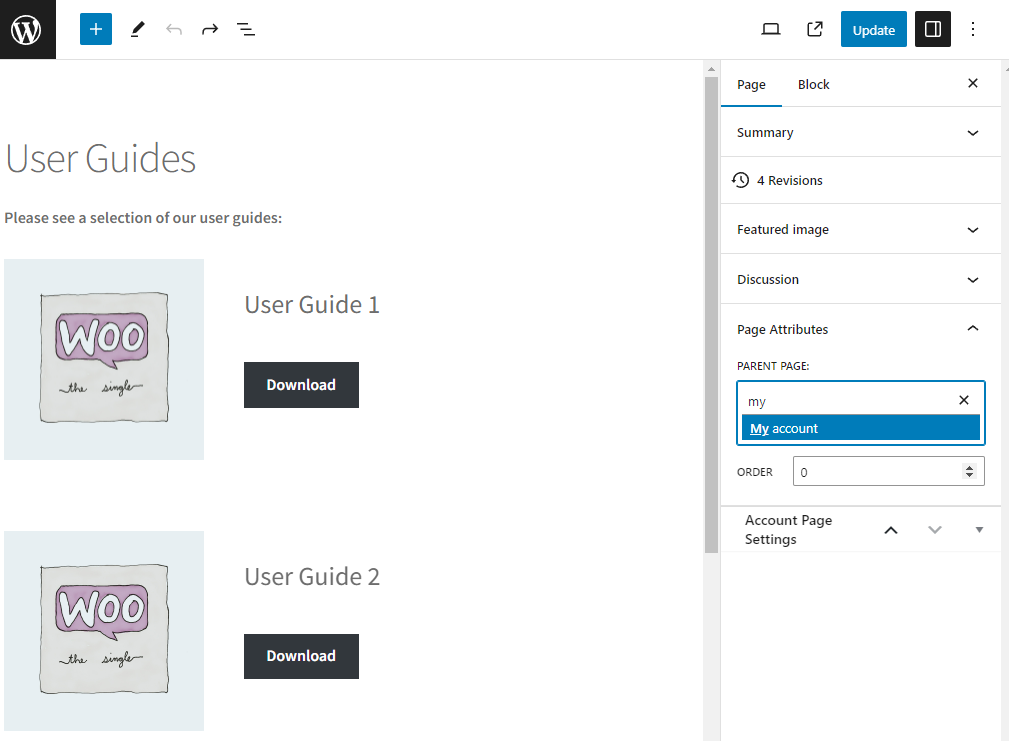
- Enter a title and content for your new account page. The content of this page can include anything you’d add to a regular WordPress page. Including links, images, videos, shortcodes, and more.
- Next, you’ll need to select your main account page as the parent page from the right-hand Page Attributes section. This allows your new page to show up in the ‘My Account’ area.
- Once done, click Publish, and your new page will be visible in your My Account area on the front end of your site.
Get to grips with the WooCommerce Account page today
This guide taught you why you might need to add custom pages to the ‘My Account’ area. You’ve also had step-by-step instructions for how to add new pages without fuss using an account pages plugin.
When used well, adding custom pages to the account area can dramatically improve your existing customer experience and encourage customers to keep coming back.
WooCommerce Account Pages makes that process a lot simpler.
WooCommerce Account Pages
Add custom endpoints/tabs to the My Account area in your WooCommerce store with the plugin WooCommerce Account Pages.

Dave is an experienced WordPress and WooCommerce developer with over a decade of building solutions in the agency world, who is now focused on commercial plugins and SaaS products.
He joined Iconic in November 2021, leading development on several plugins including our flagship WooThumbs product, before taking over as Product Manager in November 2023.