How to Show Swatches in a Single Line or Slider
If you have a lot of swatches for each attribute, your product page could look a little cluttered. The good news is, as well as our accordion feature, you can change the display of your swatches to take up less room.
In this guide, we’ll walk you through how to use the overflow feature in WooCommerce Attribute Swatches.
First, let’s explore each of the settings you can choose from in the overflow feature.
Display style: Stacked
The Stacked display will show all of your variation swatches stacked on top of one another. In other words, once your swatches have filled the available space, they’ll flow onto a new row.
This is the default style you likely already have set.
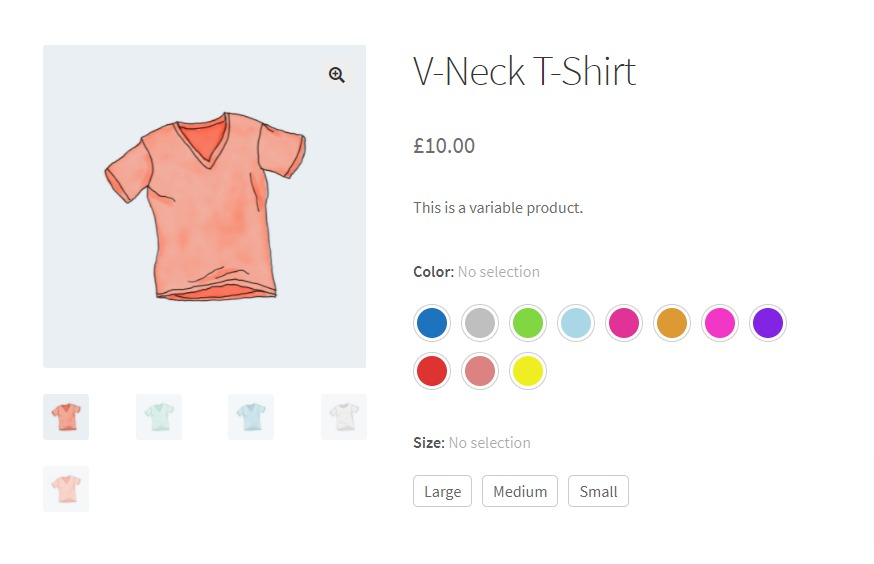
This style is great if you don’t have too many swatches or have plenty of space to use up.
Display style: Single Line
The Single Line display will show all of your variation swatches on a single line. Once the available space is filled up, an icon will appear indicating the number of swatches left in the line. Once this is clicked, the rest of the swatches will appear and stack underneath.
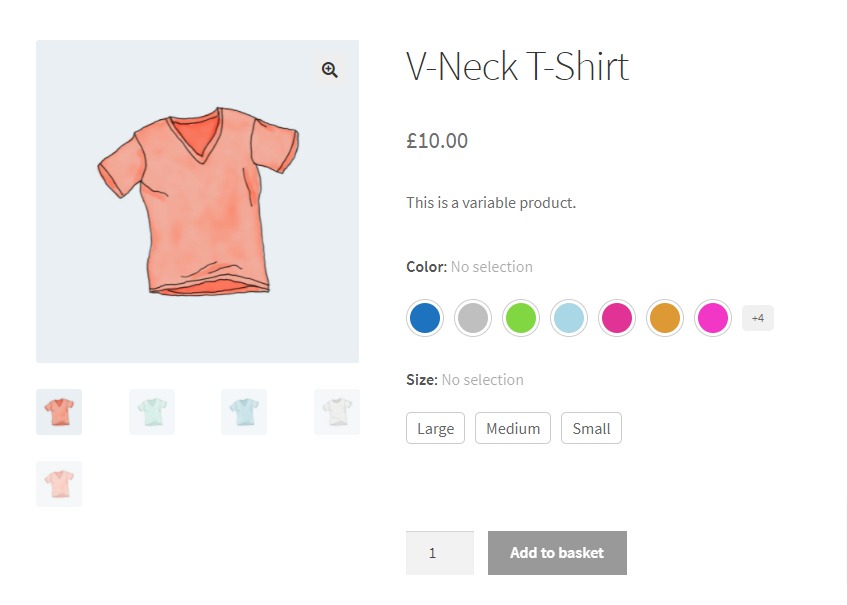
This style is particularly useful if you have a few more swatches and want to neaten up the page.
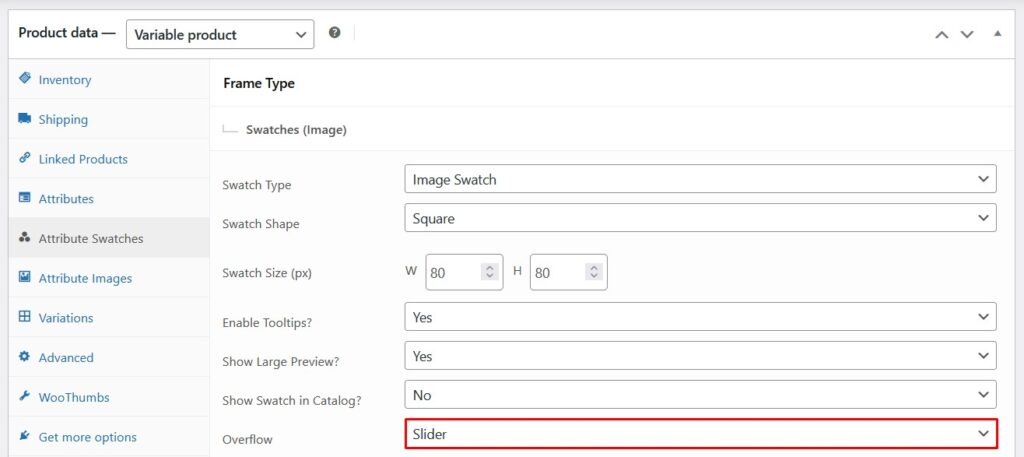
Display style: Slider
The Slider display will show all of your variation swatches in a slider. Once the available space is filled up, any additional swatches can be seen when a customer clicks the previous and next arrows next to the swatches.
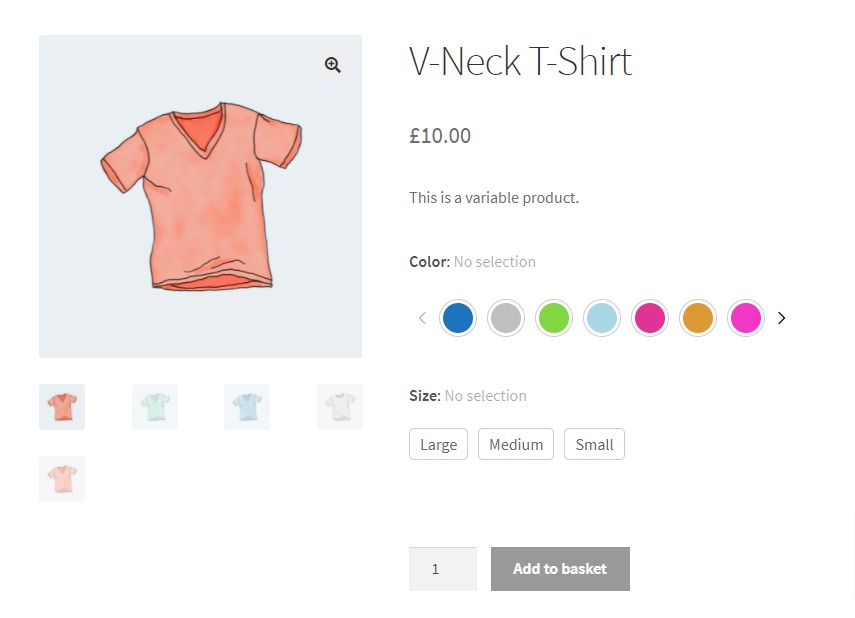
This is a great style to use if you have plenty of swatches and want an easy way for customers to browse through them.
How to apply your overflow style
You can either set your overflow style globally (accross your whole store), or on a per-product basis.
How to set the overflow style for your whole store
- From your WordPress dashboard, go to Products > Attributes and click to edit the attribute you want to add your overflow style to.
- Once clicked, scroll down the page until you reach the dropdown next to Overflow.
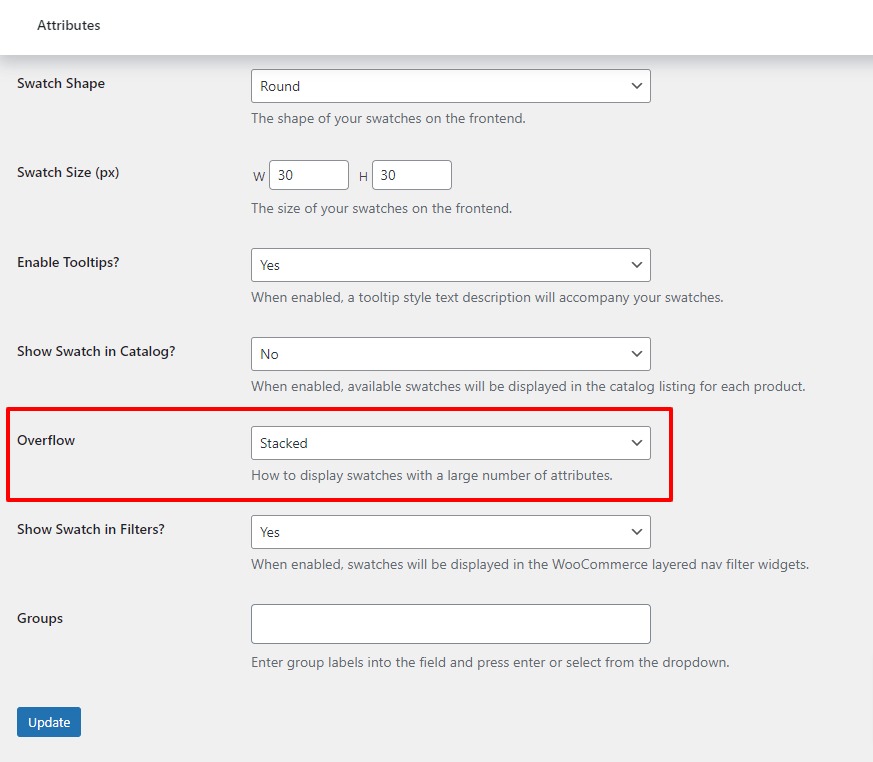
- Change the dropdown to whichever style you prefer. Then, scroll down to the bottom of the page and click the blue Update button.
How to set the overflow style for individual products
- From your WordPress dashboard, go to Products > All Products and click to edit the product you want to add your overflow style to.
- Once clicked, scroll down to the Product data section of the page and click the Swatches tab.
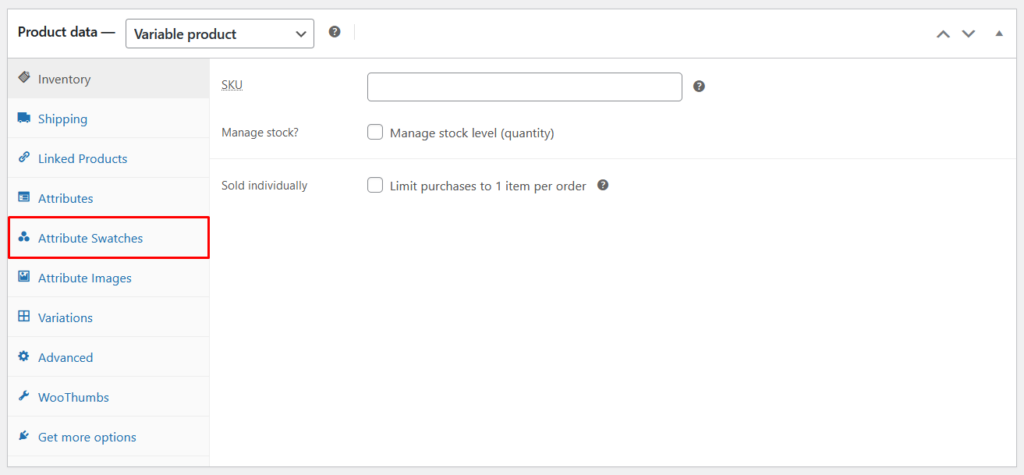
- Click the attribute you want to edit and scroll down until you see the dropdown next to Overflow.
Note: This requires you to have set up product-specific swatches. To learn how to do this, see our per-product swatch guide.
- Change this dropdown to whichever style you prefer.
- Then scroll up to the Publish section of the edit product screen and click the blue Update button.
WooCommerce Attribute Swatches
Replace the default WooCommerce variation dropdown menu with variation swatches for WooCommerce. Add color swatches, image swatches, and modern text buttons to your variable product pages.
Was this helpful?
Please let us know if this article was useful. It is the best way to ensure our documentation is as helpful as possible.