
If you’re looking for a guide on how to add a wishlist button in WooCommerce, this is the guide for you.
In this article, we’ll break down the following:
- The benefits of adding wishlists to your WooCommerce store.
- How to add a wishlist button in WooCommerce (in 5 steps).
- Methods to make the most of wishlists in your ecommerce store.
Let’s start with the benefits, because ecommerce wishlists have many.
Wishlists for WooCommerce
Allow customers to create wishlists on your online store with the WooCommerce wishlists plugin, Wishlists for WooCommerce.
Why you should add wishlists to your WooCommerce store
Wishlists are a convenient feature for shoppers. They’re a powerful tool for increasing sales, improving customer experience, and building long-term brand loyalty. Here’s why every WooCommerce store should have them:
1. Boost sales by reducing abandoned purchases
Sometimes, customers aren’t ready to buy right away. Maybe they’re waiting for payday, comparing options, or just browsing. A wishlist allows them to save products for later, increasing the chances of returning and completing their purchase instead of forgetting about your store.
2. Encourage repeat visits
When customers have a wishlist, they have a reason to return to your store. Whether they’re checking for price drops, reviewing saved items, or making a final decision, a wishlist keeps your store at the top of their minds and drives repeat traffic.
3. Increase average order value
Wishlists make it easy for customers to add multiple products they love in one place. When they’re ready to buy, they’re more likely to purchase various items at once rather than make a single-item purchase.
4. Create personalized marketing opportunities
A wishlist is practical for customers and valuable data for you. By tracking what customers save, you can send customized emails with reminders, special offers, or restock alerts, nudging them toward checkout with tailored incentives.
5. Make gift shopping easier
Wishlists simplify gifting by allowing customers to share their saved items with friends and family. This is especially effective during holidays, birthdays, and special occasions, driving additional traffic and sales from new customers who might not have visited your store otherwise.
6. Improve customer experience and satisfaction
A seamless, user-friendly wishlist feature enhances the shopping experience. Customers appreciate having a way to organize their favorite products, making shopping more enjoyable and stress-free. A good experience leads to happier customers, better reviews, and stronger brand loyalty.
So now we know the benefits of wishlists for your online store. Let’s add them. In the next section, we’ll walk you through how to add a wishlist button in WooCommerce.
How to add a wishlist button in WooCommerce (in 5 steps)
To keep things simple, we’ve broken down the following instructions into five simple steps. To add your wishlist functionality, just follow along, and you should be set up in no time.
The following uses our plugin, Wishlists for WooCommerce.
Wishlists for WooCommerce
Allow customers to create wishlists on your online store with the WooCommerce wishlists plugin, Wishlists for WooCommerce.
How does Wishlists for WooCommercw work?
Wishlists for WooCommerce is a WooCommerce plugin that allows you to let customers add products to wishlists they create.
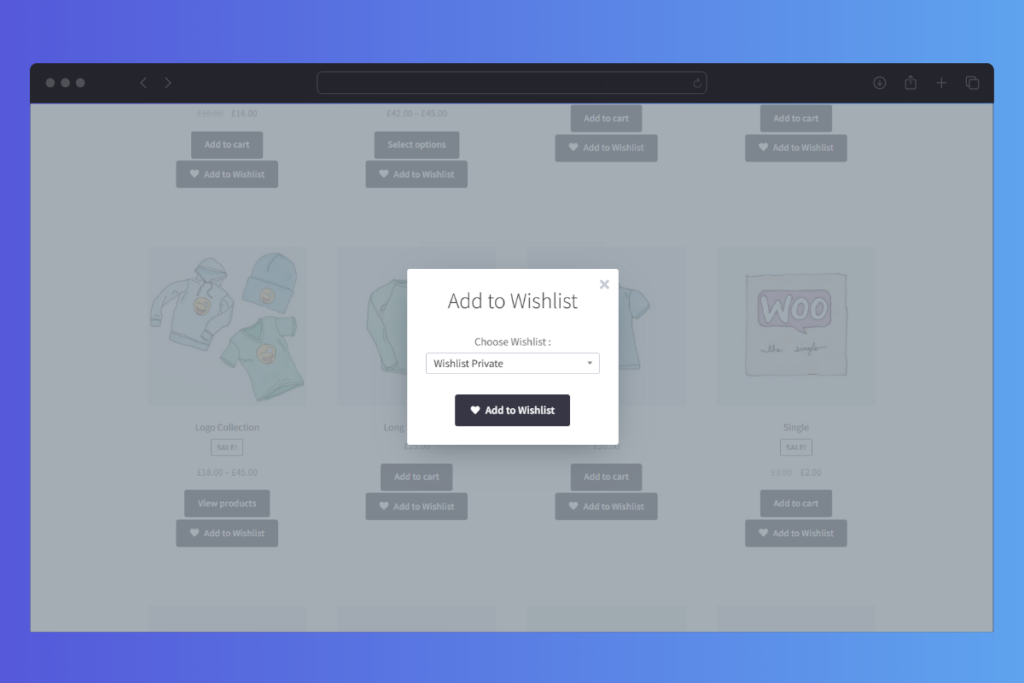
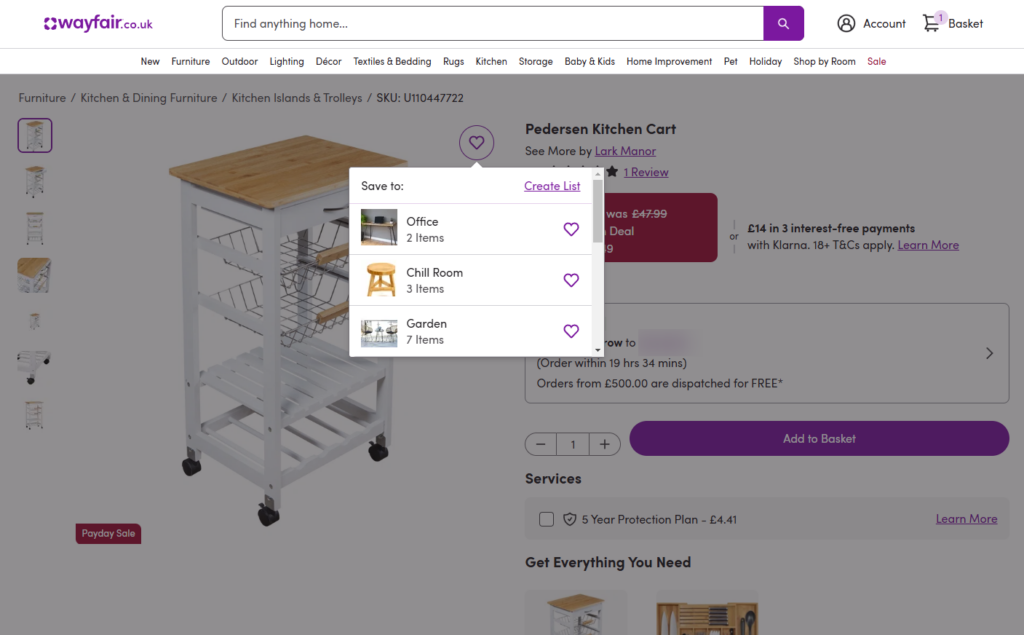
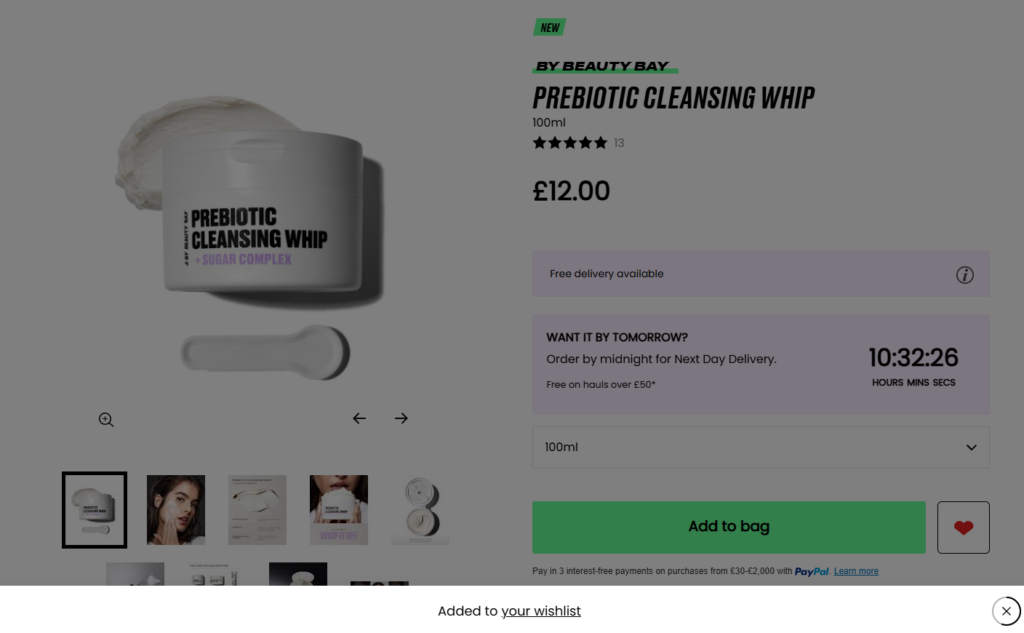
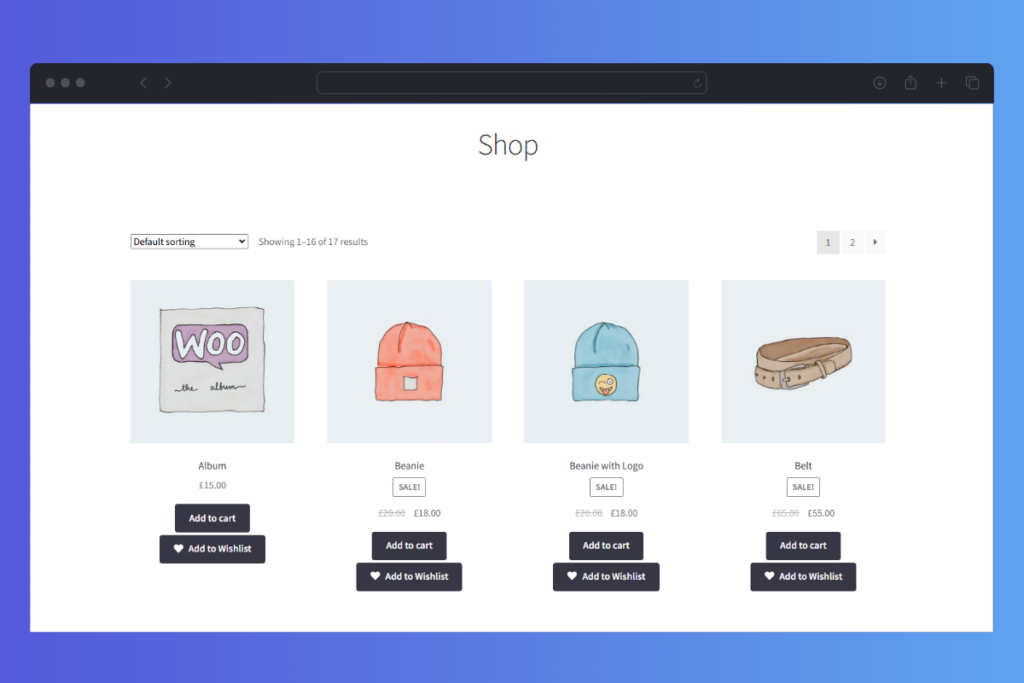
When visiting your store, customers will see wishlist buttons on your product listings/shop page and single product pages. When they click this button, they’ll be able to add the product to an existing wishlist or create a new one on your WordPress website.
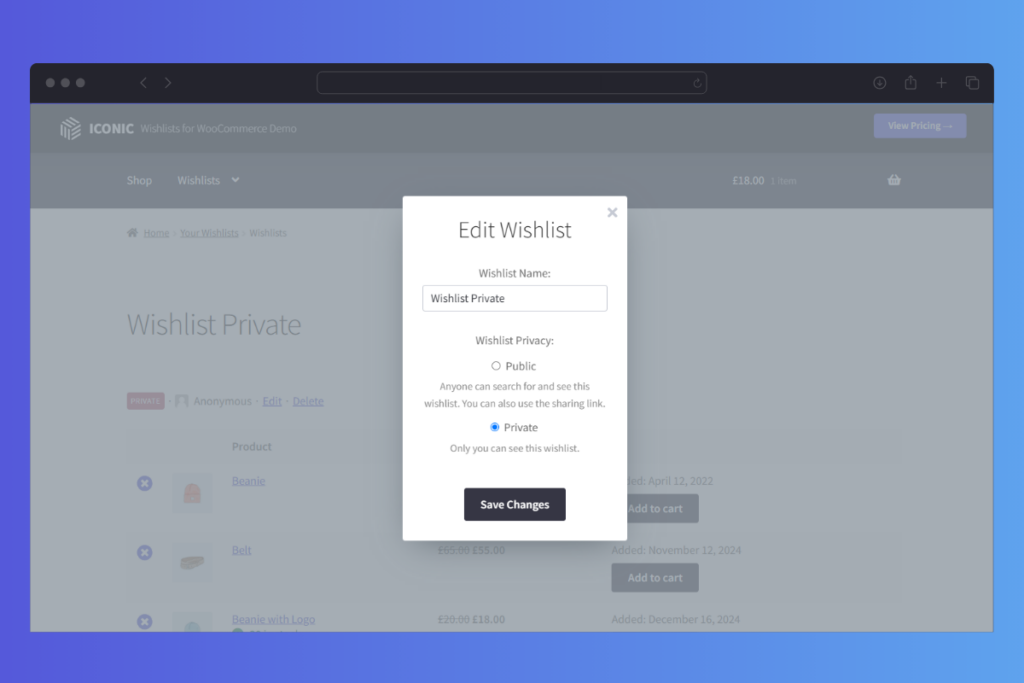
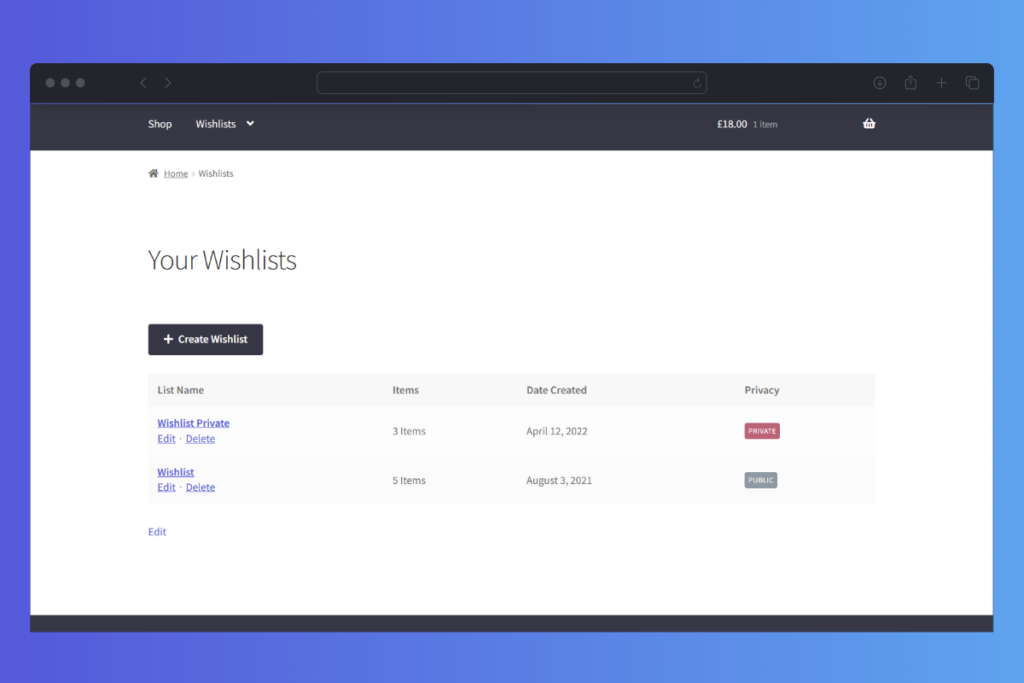
Customers can create multiple wishlists for different occasions and needs. These can be public or private, and they can share them with the click of a button. Customers are also able to view wishlists and edit them in a handy wishlist table.
As the store owner, you can customize where wishlists buttons appear, what the buttons look like, say and the button position. You’ll also see which products are added to customer wishlists. All so you can make more informed decisions based on popular products added to customer wishlists.
In the next section, we’ll walk you through, step-by-step how to set these up.
Step 1: Install and activate Wishlists for WooCommerce
To start, purchase and download the WooCommerce wishlist plugin, Wishlists for WooCommerce.
- Once you have the ZIP file (a downloadable file you get when you purchase the plugin through our site), go to Plugins > Add New within your WordPress dashboard.
- Next, click the Upload Plugin button at the top of the screen and choose the Wishlists for WooCommerce ZIP file from your computer.
- Once Wishlists for WooCommerce has been uploaded and installed (by clicking Install Now), click the Activate Plugin button.
Now the plugin is installed, it’s time to begin creating your wishlists.
Step 2: Set up your main Wishlists page
Next, you can set up a Wishlist page on your site. This page will display each customer’s personal wishlist/s, as well as a button for them to create a new list.

- To add this page, from the WordPress admin dashboard, go to Pages and select Add New.
- Give your page a title (usually ‘Wishlists’), then add the [iconic_ww_wishlists] shortcode into the text editor section. This will automatically display everything you need for your Wishlists page.
- Save and Publish your page.
- Your next step is to tell Wishlists for WooCommerce you want this page to be the main wishlists page. To do this, select Wishlists from your WordPress dashboard, then go to Settings. In the General tab, select your new Wishlists page from the drop-down menu.
Your site now has a single, easy-to-use list of all your customers’ wishlists!
Anyone visiting your site can access their own lists – or lists belonging to others – provided the owner has made the list public.
Step 3: Add the Wishlist page to your site’s navigation
To make your Wishlist page easy to find, add it to your site’s navigation. To do this, take the following steps:
- First, go to Appearance > Menus within WordPress.
- Ensure you’ve selected the correct menu from the drop-down at the top of the screen, then select your Wishlists page in the list on the left.
- Click the Add to Menu button to include your Wishlists page in the main navigation menu, then select Save Menu.
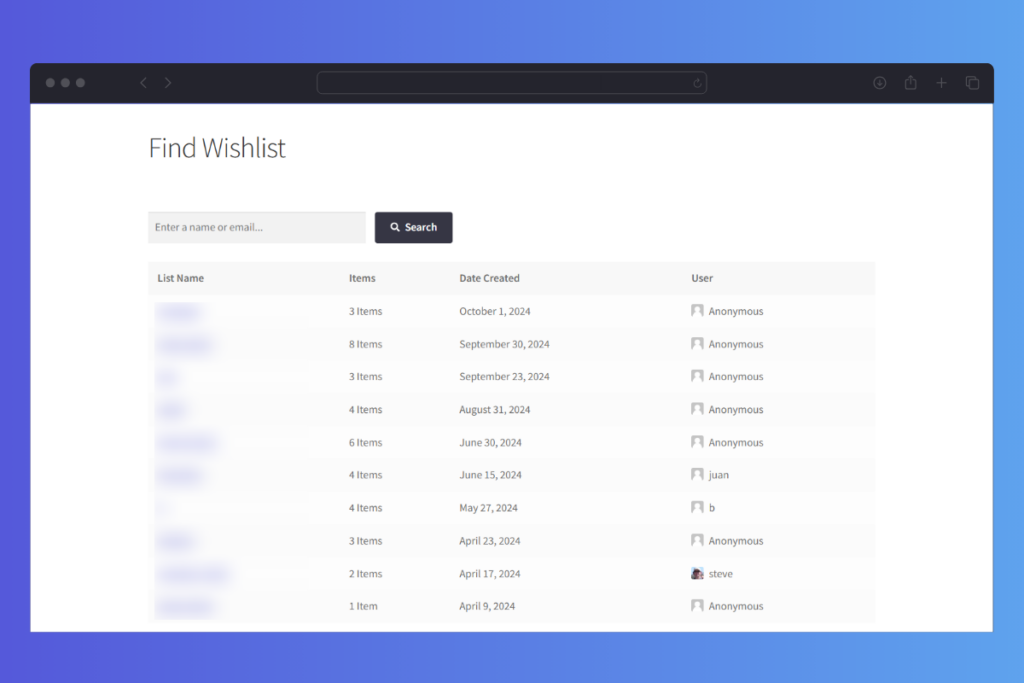
- You can also add a Find Wishlists link to your menu to help customers search for specific lists. Under Custom Links on the left side of the Menus area, type in your Wishlists page’s URL and add /find to the end. Then add some suitable link text – something straightforward, such as Find Wishlists is good.
- Click Add to Menu, then drag and drop the link to make it a sub-item of your Wishlists page, before finally selecting Save Menu.
Step 4: Customize your wishlist buttons
Wishlists for WooCommerce makes it easy for your customers to add items to their wishlists directly from your product pages. In the Buttons tab of your wishlist settings screen, you can add and choose the placement for Add to Wishlist buttons.
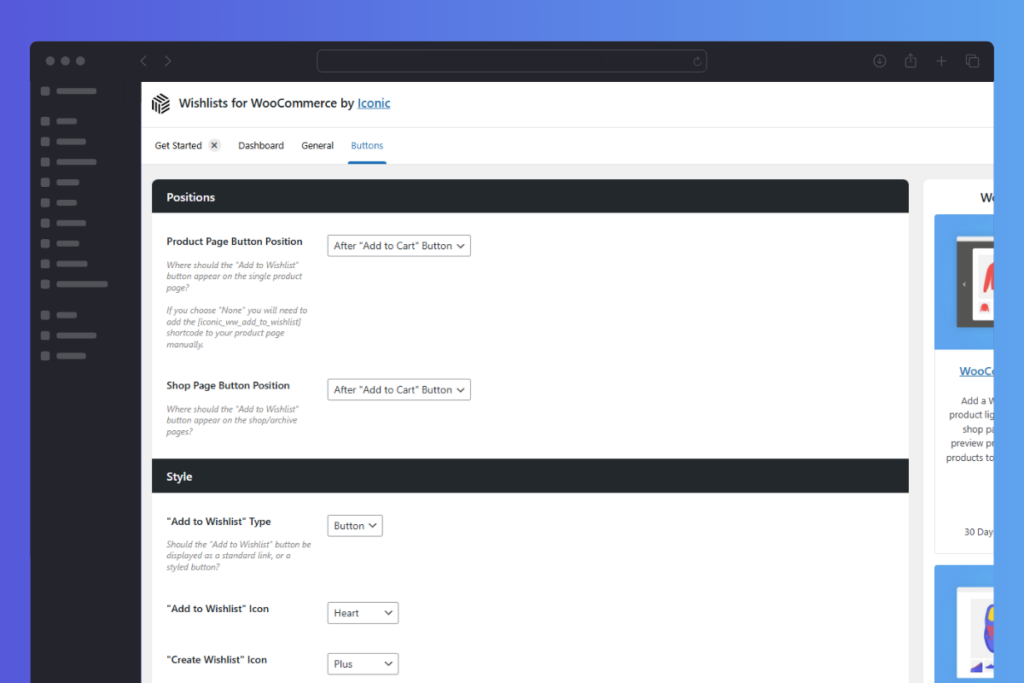
Here, you can also determine how the buttons look by adjusting the button style settings. These enable you to specify if you want to provide a button or a link, and what wishlist icons you want to use.
This ensures your buttons blend seamlessly with the rest of your site, and are clearly recognizable to your customers.
Step 5: Manage your customers’ wishlists
Your customers can now create wishlists on your WooCommerce site! All that’s left is for you to manage their wishlists and collect data for your marketing campaigns.
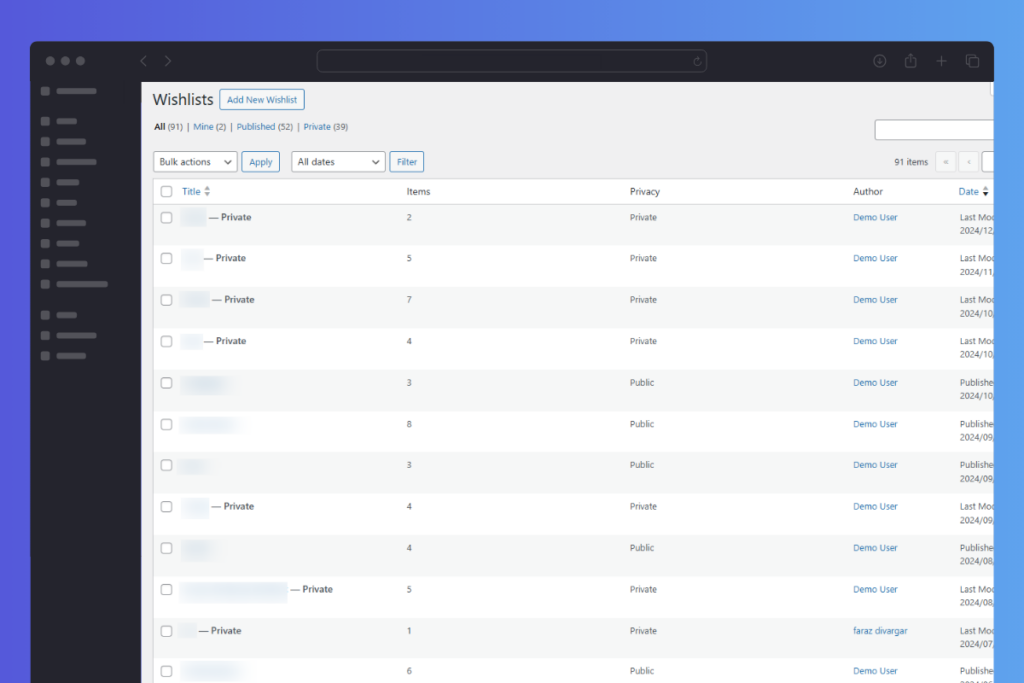
- You can see all your customers’ lists by navigating to Wishlists > All Wishlists within WordPress.
- Here, you’ll see your customers’ wishlist titles, the number of items in each list, and privacy settings. You can search through the lists to gather information on how your customers are using them, then put the information to good use in your next campaign.
Note: You will need to make sure that what you do with your customer’s wishlist data is outlined in your privacy policy.
Methods to Make the Most of Wishlists in Your Ecommerce Store
Adding wishlists to your WooCommerce store is a great way to improve the shopping experience and boost sales, but simply enabling them isn’t enough.
To make the most of wishlists, you’ll want to help customers use them easily, make them a natural part of your store’s navigation, and find ways to turn wishlist data into smarter marketing. Here’s how:
1. Make wishlists easy to find and use
Customers can’t use wishlists if they don’t know they’re there. Make sure the Add to Wishlist button stands out on product pages and blends seamlessly with your store’s design, so it feels like a natural part of the shopping experience.
You should also:
- Add a wishlist link to your main header navigation so customers can access their lists easily.
- Include a wishlist page where customers can view and manage their saved wishlist products.
- Make sure the wishlist feature is mobile-friendly so customers can add and view items on any device.
2. Encourage customers to use their wishlist
Actively promote your WooCommerce wishlist feature throughout your store to remind customers they can save products for later.
Some ways to do this include:
- Highlighting wishlists on WooCommerce product pages with a short message like “Not ready to buy? Save this to your wishlist!” This can be right below the add to cart button.
- Adding a wishlist section to customer accounts, making it easy for them to revisit their saved items.
- Using banners or pop-ups to inform new visitors that they can save products to a wishlist.
3. Use wishlists to drive conversions
Customers often need a nudge to complete a purchase. While you can’t send automated wishlist reminders directly through Wishlists for WooCommerce, you can encourage conversions by:
- Reminding customers about their wishlists in email campaigns, letting them know they can revisit their saved items.
- Promote popular wishlist items on your store’s homepage or in blog content, encouraging others to check them out.
- Running sales on frequently wishlisted items, as products that are saved often are likely to convert when offered at a discount or with a coupon.
4. Use wishlist insights for your marketing strategy
Wishlists provide valuable insight into what your customers are interested in, even if they haven’t purchased yet.
While the plugin allows you to see what customers are saving, you can use this data strategically by:
- Checking which products are most frequently added to wishlists to identify bestsellers.
- Using wishlist trends to decide which products to promote in upcoming campaigns.
- Running limited-time promotions on wishlist-heavy items to create urgency.
5. Ensure wishlists align with your privacy policy
Because wishlists involve customer data, it’s essential to be transparent about handling this information. Make sure your privacy policy clearly states how wishlist data is used, especially if you plan to analyze wishlist trends for marketing purposes.
By integrating wishlists seamlessly into your store and using them strategically, you can encourage customers to save and revisit their favorite products, increasing engagement and driving more sales.
Learn how to add a wishlist button in WooCommerce today
That’s it! You’ve now added a simple yet powerful wishlist feature to your store – one that helps customers save their favorite products while boosting conversions and encouraging repeat visits.
Wishlists for WooCommerce makes it easy to get started. With a quick setup and seamless integration, you can give your customers a better shopping experience while increasing sales.
Ready to add wishlists to your store? Get the WordPress plugin Wishlists for WooCommerce today and start turning saved items into sales!
Wishlists for WooCommerce
Allow customers to create wishlists on your online store with the WooCommerce wishlists plugin, Wishlists for WooCommerce.

Dave is an experienced WordPress and WooCommerce developer with over a decade of building solutions in the agency world, who is now focused on commercial plugins and SaaS products.
He joined Iconic in November 2021, leading development on several plugins including our flagship WooThumbs product, before taking over as Product Manager in November 2023.