
If you’re in the food business, you probably already know that offering delivery services can help you increase sales. The only problem is putting everything into action – from listing products effectively on your site and accepting orders; to setting up delivery schedules.
Fortunately, WordPress takes most of the heavy-lifting out of it if you’re using the right plugins.
In this article, we’ll show you how you can create your very own WooCommerce food delivery website using the WooCommerce Product Table and WooCommerce Delivery Slots plugins. But before we begin, let’s take a look at how a food delivery website can benefit your restaurant or takeaway business.
Let’s get started!
Why You Should Have a WooCommerce Food Delivery Website
People love online food delivery services because of the convenience they offer. They allow customers to browse through food menus, customize and place orders, and have just about anything delivered to their doorstep whenever they’re hungry.
Studies indicate that 20% of consumers use food delivery services at least once a week. And in 2015, consumer spending on food delivery was estimated at around $30 billion, of which $4 billion was spent on online delivery sales. This figure is growing all the time as more and more restaurants start taking online orders for food delivery.
As a restaurant owner, you can take your business to the next level and increase sales by offering food delivery services. You could sign up with a third-party website that takes care of creating menus, directing customers your way, and even delivering food. However, it’s usually a better idea to build your own food delivery website.
Why?
Because the problem with third-party websites is that most of them will charge you a percentage on every sale. They’ll require you to sign up for a monthly subscription. They might offer a generic solution that simply doesn’t fit your business needs. This isn’t ideal if you’re looking to grow your food business and increase profits.
A WooCommerce food delivery website allows you to keep your profits, while giving you the flexibility to customize your site to your restaurant’s needs. All you need are two additional plugins that allow you to create an online menu (WooCommerce Product Table) and offer food delivery services to your customers (WooCommerce Delivery Slots).
Creating a Food Delivery Website Using WooCommerce Product Table and WooCommerce Delivery Slots
The good news is that creating a WooCommerce food delivery website is pretty simple. All you need is a WordPress WooCommerce website with the WooCommerce Product Table and WooCommerce Delivery Slots plugins.
We’ll start out by creating a user-friendly, one-page food ordering form. Your customers will use this to browse through your menu, select what they’d like to buy, and customize their orders. Next, we’ll add a date and time selector to the WooCommerce checkout page so your customers can choose their preferred delivery schedule. Offering a choice of delivery slots is essential for any food delivery website.
Once you have WooCommerce installed and configured on your WordPress website, simply follow the step by step instructions below:
Step 1: Add Food Items as WooCommerce Products
To get started, you’ll need to add each individual food item as a WooCommerce product on your WordPress restaurant website. Here’s how:
- Log in to your WordPress admin and head over to Products > Add New.
- Add a food item to your online store by entering its name, description, categories, tags, and adding a product image.
- Configure the Product data settings from the General tab:
- Make sure Simple product is selected from the drop-down menu, or create a variable product if you want to offer a choice of options for the dish.
- Set the Regular price, or a price for each variation if you’re using variable products.
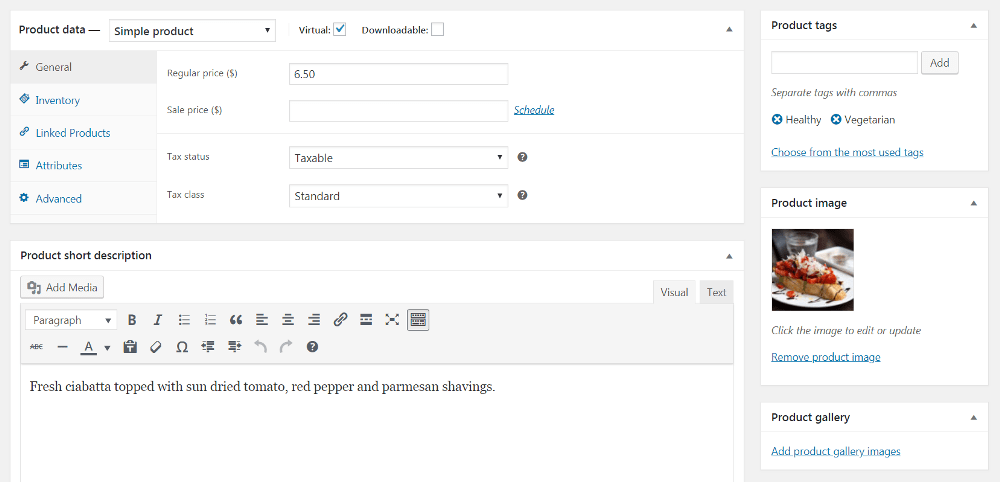
- Click the Publish button to proceed.
Repeat these steps until you’ve added all of your food items as WooCommerce products.
Step 2: List Your Food Menu in a Table
WooCommerce makes it incredibly easy to set up an online store. That said, there’s certainly some room for improvement when it comes to building an online food delivery website.
Instead of asking customers to visit separate pages for each item they want to add to their cart, you can use the WooCommerce Product Table plugin to create a searchable, filterable online menu. This is a better way to sell foods because listing your menu as a table mimics the experience of ordering from a traditional printed restaurant menu.
For example, you can list all the foods on a single page with the exact information you want to display. You can add a separate table to list foods from each section of your menu, such as Starters, Main Courses, Sides, etc. Customers simply read through the list from top to bottom, tick the ones they want, select the quantity and any extra options, and add to the cart in a single click.
Here’s how to set it up:
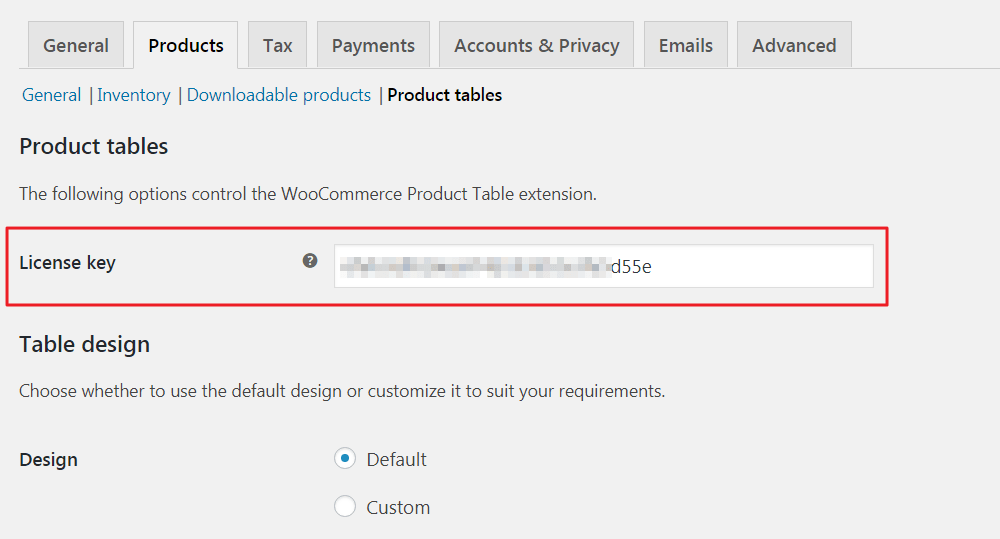
- Once you’ve purchased the WooCommerce Product Table plugin, install and activate it on your WordPress website.
- Head over to WooCommerce > Settings > Products > Product tables and enter the license key.
- Navigate to Pages > Add New to create a new page for displaying your online food menu.
- Give your page a name and click the Insert product table button from the text editor’s toolbar. This should add the
product_tableshortcode to your page.[create-page-770×219.png]
- Click the Publish button to continue.
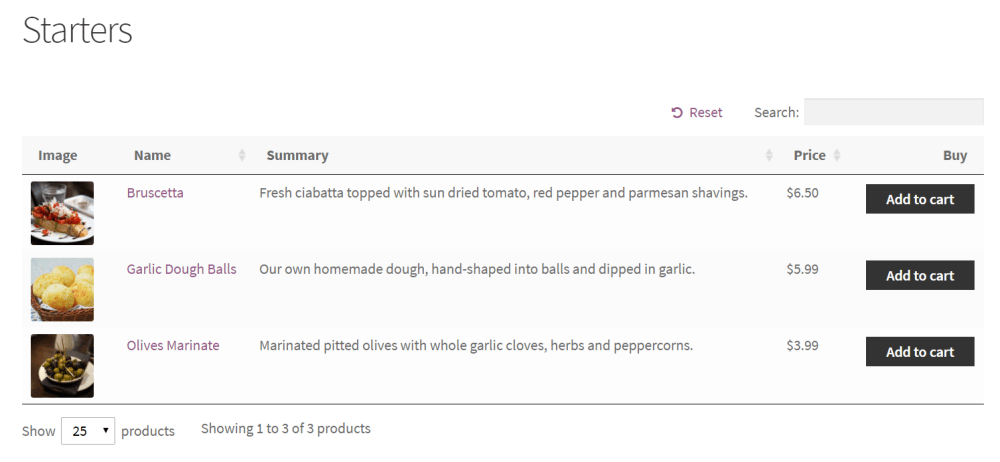
All of your food items should be added to the table automatically. It should look something like this:
Step 3: Configure the Food Order Placement System
By now, we have the food items loaded into our table. All that’s left to do now is customize the table’s layout and turn it into a fully-functional online order placement system for your restaurant.
There are a lot of options that you can configure depending on the food items you’re selling and how you’d like to market them. For the purpose of this tutorial, let’s step through the main options:
- Navigate to WooCommerce > Settings > Products > Product tables.
- The Columns option under the Table content section lets you decide which columns appear in your menu table. For a food delivery website, we’d recommend displaying the image, name, description, tags, price, and an add to cart button for each food item.

- Scroll down to the Add to cart column section and use the Add to cart button option’s dropdown menu to select Button and checkbox. This allows customers to select everything they’d like to add to their order instead of adding one food item at a time.
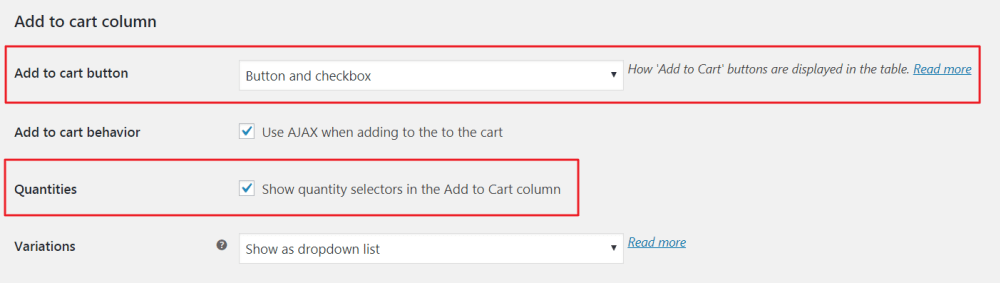
- From the same section, tick the checkbox next to the Quantities option. Doing this allows customers to order more than one food item at a time.
- From the Table controls section, use the dropdown menu next to the Product filters option to select Show based on columns in table. This allows customers to filter the food items in your menu based on the categories (or tags) you’ve set.

- Click the Save changes button to proceed.
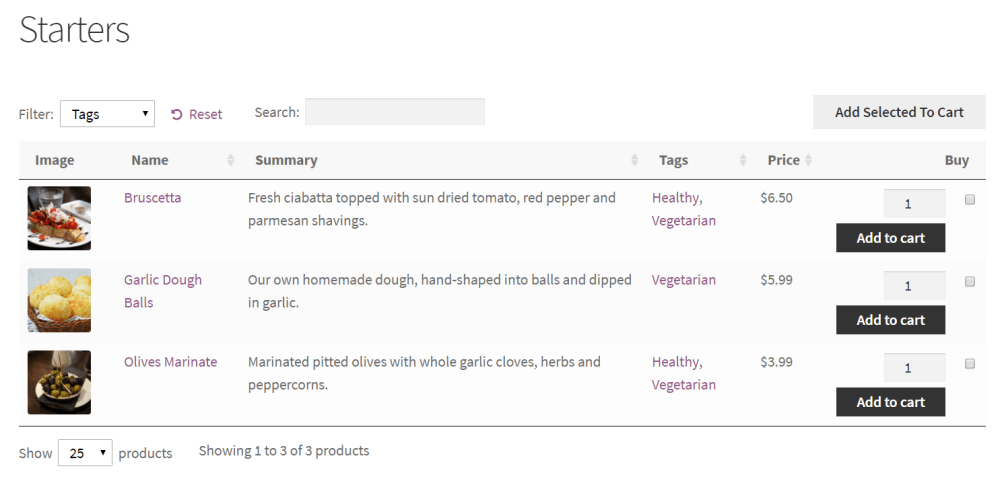
Your food ordering page should look something like this now:
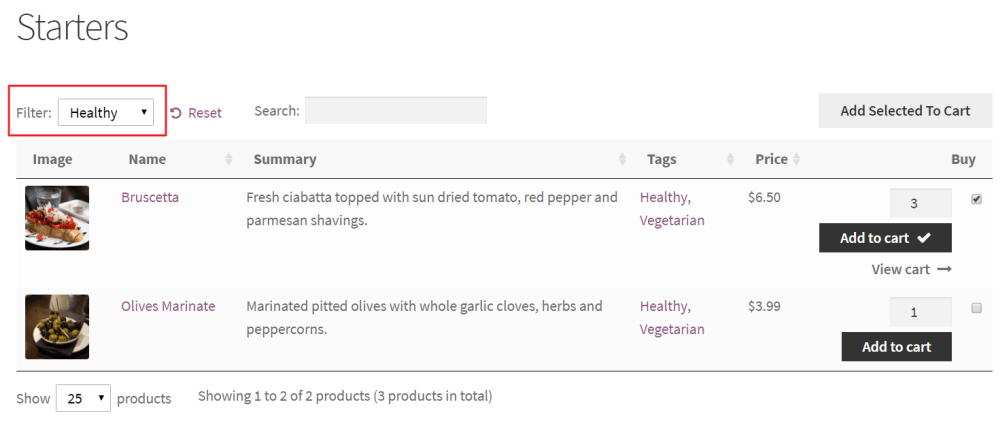
As an example, if a customer interacted with the table of foods and wanted to (1) see all the healthy starters and (2) add three bruscettas to their order, the table would look something like this:
Step 4: Set Up the Food Delivery Module
Finally, we’ll use the WooCommerce Delivery Slots plugin to set up a food delivery system on our website. This plugin makes it easy for you to set up your delivery schedule and streamline your food delivery process.
Ordering food online is different from other types of e-commerce product because restaurant customers expect to know the exact time slot when they will receive their delivery. You can’t just tell them that delivery will be in 2 days! That’s why all WooCommerce food ordering systems need a plugin that lets customers choose a delivery slot.
WooCommerce Delivery Slots
Let customers choose their preferred WooCommerce delivery date and time right from your WooCommerce checkout page. With WooCommerce Delivery Slots, you can set a flexible delivery schedule to suit you and your customers.
Here’s how:
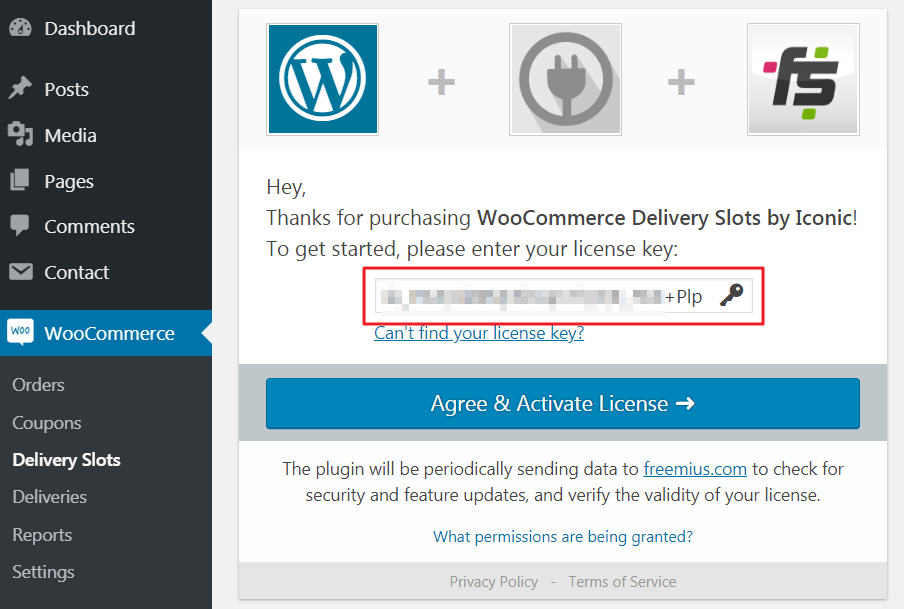
- Once you’ve purchased the WooCommerce Delivery Slots plugin, install and activate it on your WordPress website.
- You’ll be redirected to WooCommerce > Delivery Slots and asked to enter your license key.
If you’d rather watch a video tutorial for this section, you can do so here:
- If not, head over to WooCommerce > Delivery Slots > General Settings and configure the following settings:
General Settings
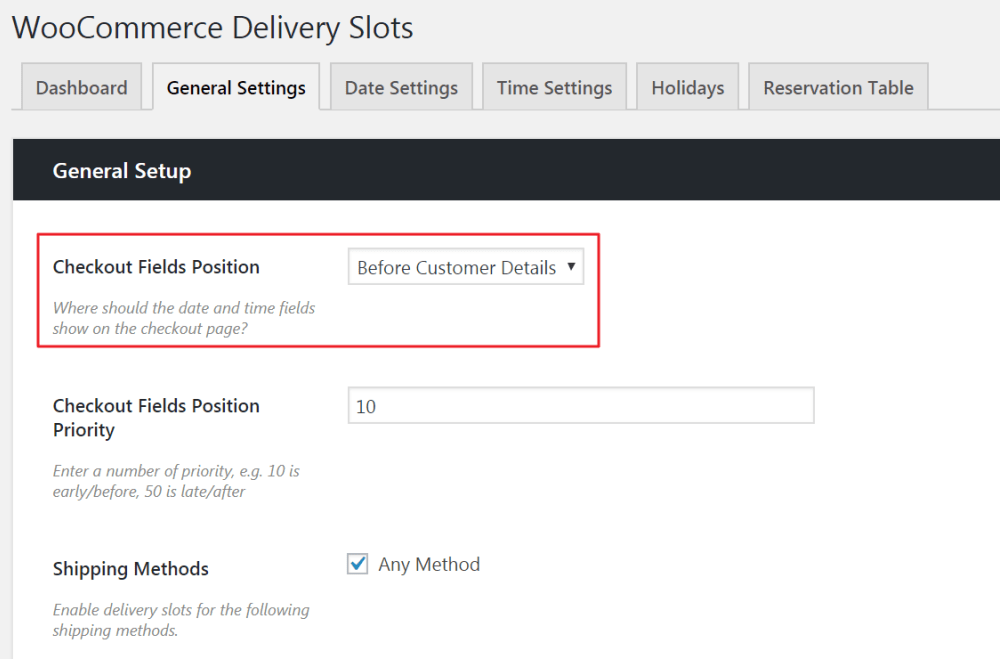
Select where on the checkout page you’d like to display the delivery date and time selectors using the Checkout Fields Position option.
Date Settings
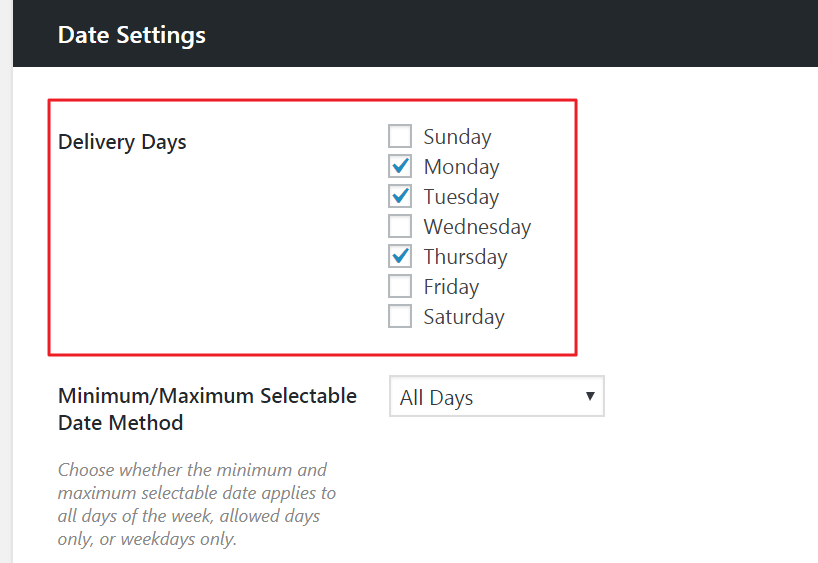
From the Date Settings tab, scroll down to the Date Settings section and select the checkboxes next to the Delivery Days option that you’d like to deliver the food on. Configure the rest of the settings in this section based on your personal preferences and requirements.
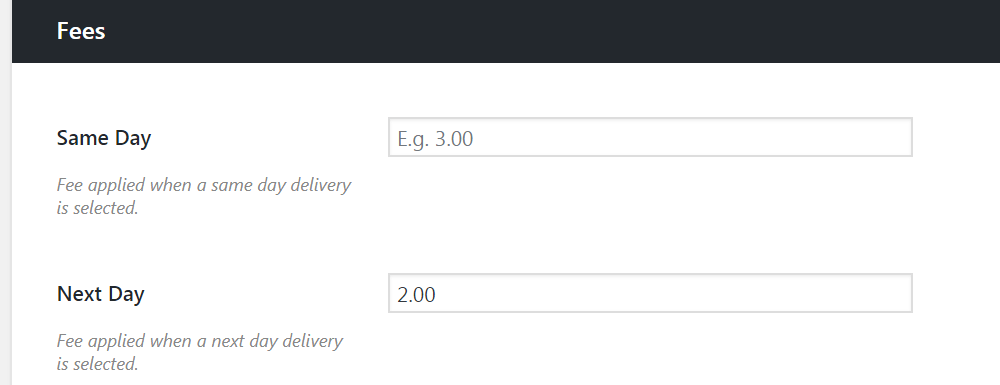
Once that’s done, scroll down to the Fees section if you’d like to charge a delivery fees on same day deliveries or next day deliveries.
Time Settings
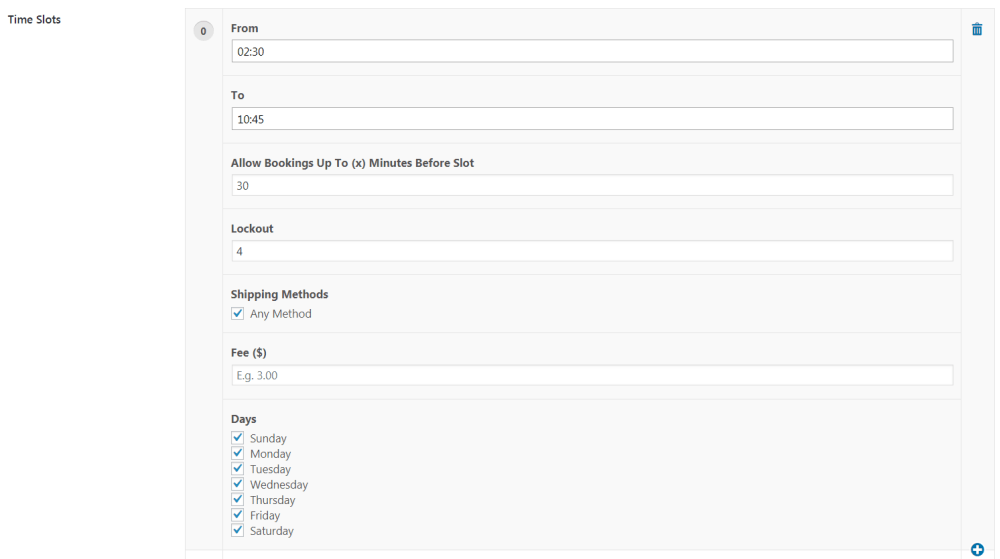
From the Time Settings tab, you can scroll down to the Time Slots section. You can configure which times during the delivery days you’re available to make deliveries using these options. You can also set when you’d like to close deliveries for a particular time slot.
- Click the Save Changes button to proceed.
Your WooCommerce food delivery website’s checkout should look something like this now:
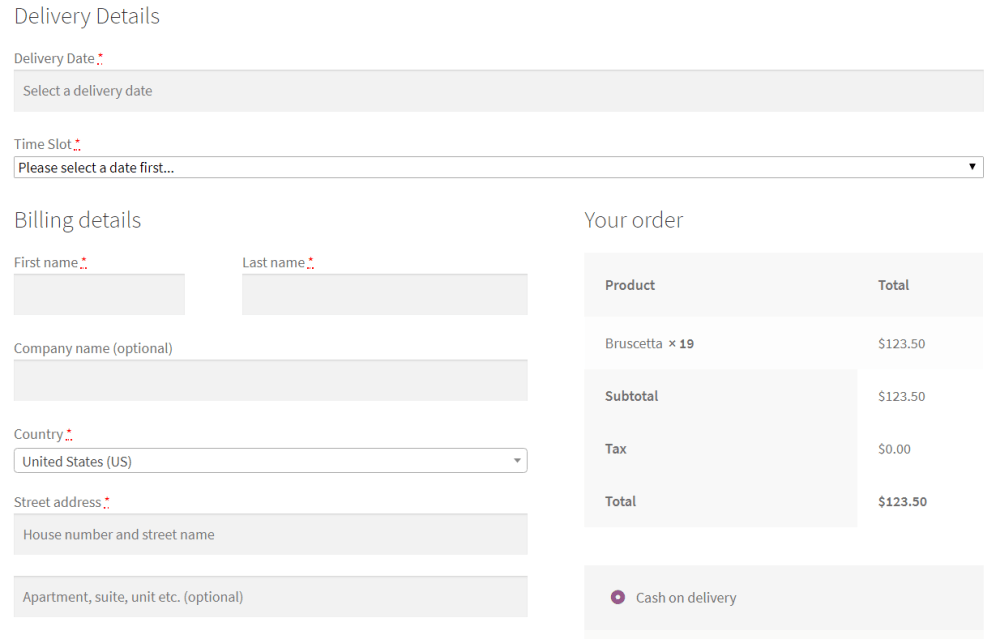
Now, if a customer placed an order and wanted to have the food delivered to their place on Monday, the Delivery Details section on the checkout page would look something like this:
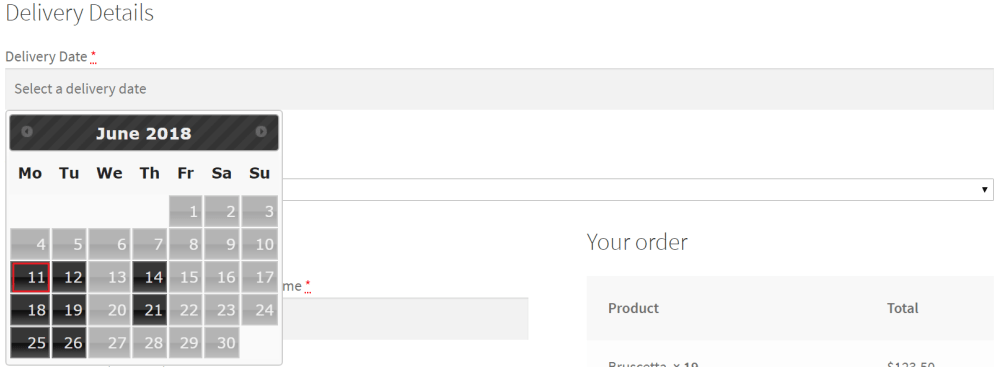
First, the customer will have to select a delivery date from the calendar:
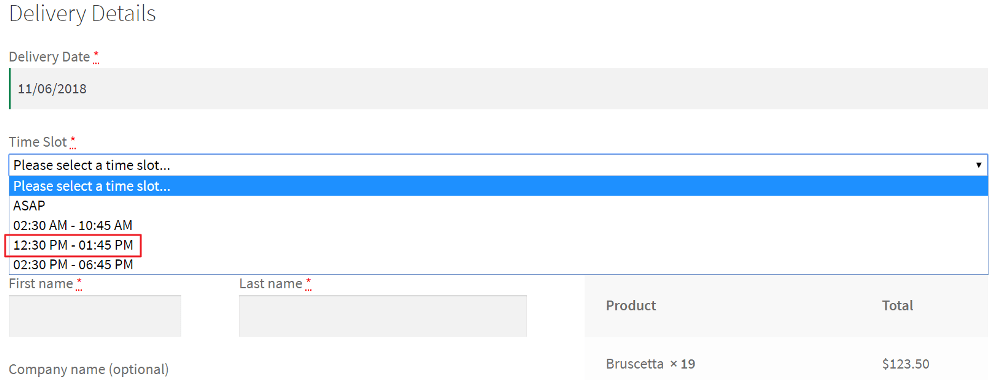
And once they’ve selected a delivery date, they can select a time slot:
If you’d like to get specific on your delivery slots, zones and shipping methods, we outline all this and more in this video tutorial:
That’s it! You should have a fully-functional WooCommerce food delivery website that allows customers to:
- Browse your menu.
- Place an order.
- Choose a delivery slot.
- Have the food delivered directly to their home.
And the best part is that WooCommerce helps you keep track of orders and streamline your delivery process!
Conclusion
Building your own food delivery website will not only save you a ton of money. It will also give you the flexibility of customizing the experience you offer to customers, and help you manage day to day operational tasks better.
Let’s quickly recap the steps you need to follow to build a WooCommerce food delivery website:
- Add food items as individual WooCommerce products to your online store.
- Install the WooCommerce Product Table plugin to create an online menu.
- Configure the plugin to set up a customized order placement system.
- Offer food delivery services by installing the WooCommerce Delivery Slots plugin.
Now you know how to build your own food delivery website. Hopefully, you’re in a good position now to take things further yourself.
Do you have any questions about how to build a WooCommerce food delivery website for your restaurant? Let us know by commenting below!

Dave is an experienced WordPress and WooCommerce developer with over a decade of building solutions in the agency world, who is now focused on commercial plugins and SaaS products.
He joined Iconic in November 2021, leading development on several plugins including our flagship WooThumbs product, before taking over as Product Manager in November 2023.