How to Display Cross-Sell Products on the Checkout Page
This guide will walk you through how to display cross-sell products on the checkout page using Flux Checkout for WooCommerce.
Cross-selling is a powerful strategy for boosting sales by encouraging customers to purchase additional products related to their original purchase. By displaying cross-sell products on the checkout page, you can enhance the shopping experience, increase the average order value, and improve customer satisfaction.

Flux Checkout offers two ways to add cross-sell products to your checkout page. This guide will explore both methods and walk you through the setup process.
The methods include:
- Cross-sell settings within Flux Checkout and WooCommerce’s cross-sell feature.
- Creating checkout Elements within Flux Checkout.
1. Enable cross-sells with Flux’s settings and WooCommerce
Flux Checkout for WooCommerce has an in-built setting that allows you to display cross-sell products on the checkout page.
Note: These cross-sell products are ones you can add via default WooCommerce settings and are usually displayed on the cart page. We’ll walk you through how to add these later.
To enable this setting, follow these steps:
- From your WordPress dashboard sidebar, go to WooCommerce > Flux Checkout and click the Checkout Page tab.
- Scroll down the page until you see the Show Cross-sell products on the Checkout page setting. Click the toggle button next to this to turn it on.
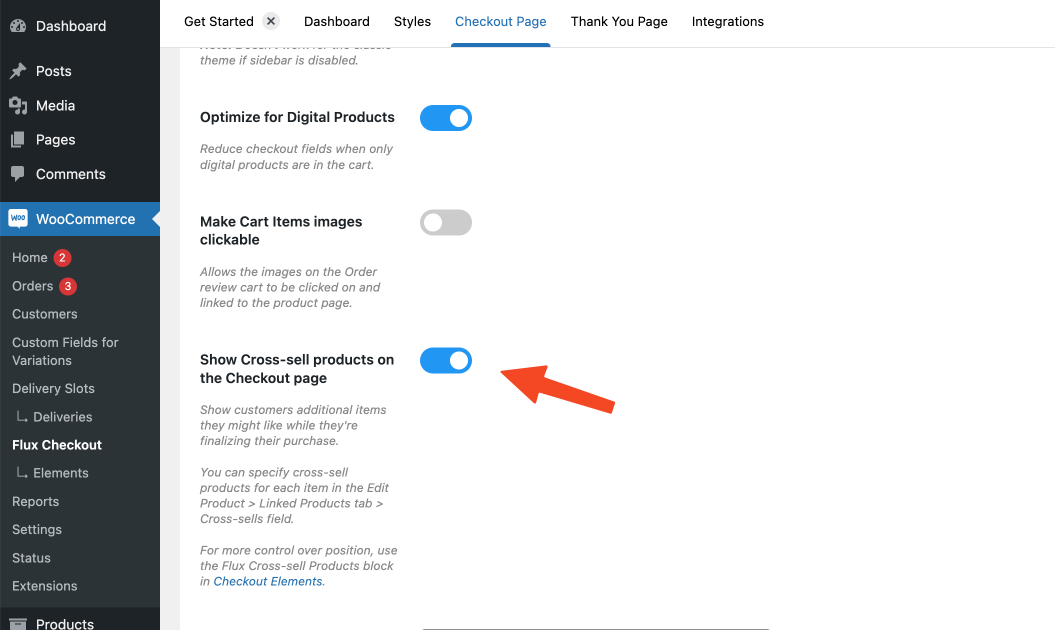
- Once happy, scroll down the page and click the Save Changes button.
How to assign cross-sell products via WooCommerce
If you’re using the first method in this guide, or you’re using the second and not setting specific products, here’s how you add your cross-sells.
To select cross-sell products follow these steps:
- Edit a product for which you want to add cross-sell products.
- Scroll down to the Product Data setting.
- Then, click on the Linked Products tab.
- In the Cross-sells field, start typing the product name. Once your product appears, click on it to add. You can add up to three here.
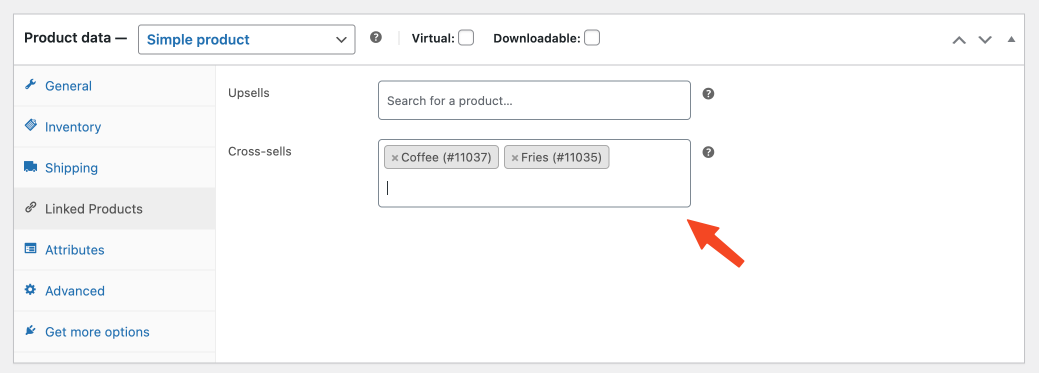
- Once happy, click on the Publish/Update button to save the product.
2. Enable cross-sells with Checkout Elements
This second method allows you to have slightly more control over the cross-sell products you add to your checkout page. You’ll be able to change the title that shows and be more specific with the products you display.
You’ll also be able to change their position and set your cross-sell to be conditional based on the items or total price of your customers’ cart.
This method is particularly useful if you want to:
- Show one (or more) cross-sell product at checkout, but don’t want to manually add them to every product’s settings.
- You want more control over where your cross-sell appears (say only on one checkout step).
- Want more control over your cross-sells depending on conditional elements like the product category, or spend amount.
If you want to set your cross-sell up this way, take the following steps:
- From your WordPress dashboard sidebar, go to WooCommerce > Flux Checkout > Elements and then click Add new Element.
- Click on the blue Plus (+) button on the top-right to open the block selector menu.
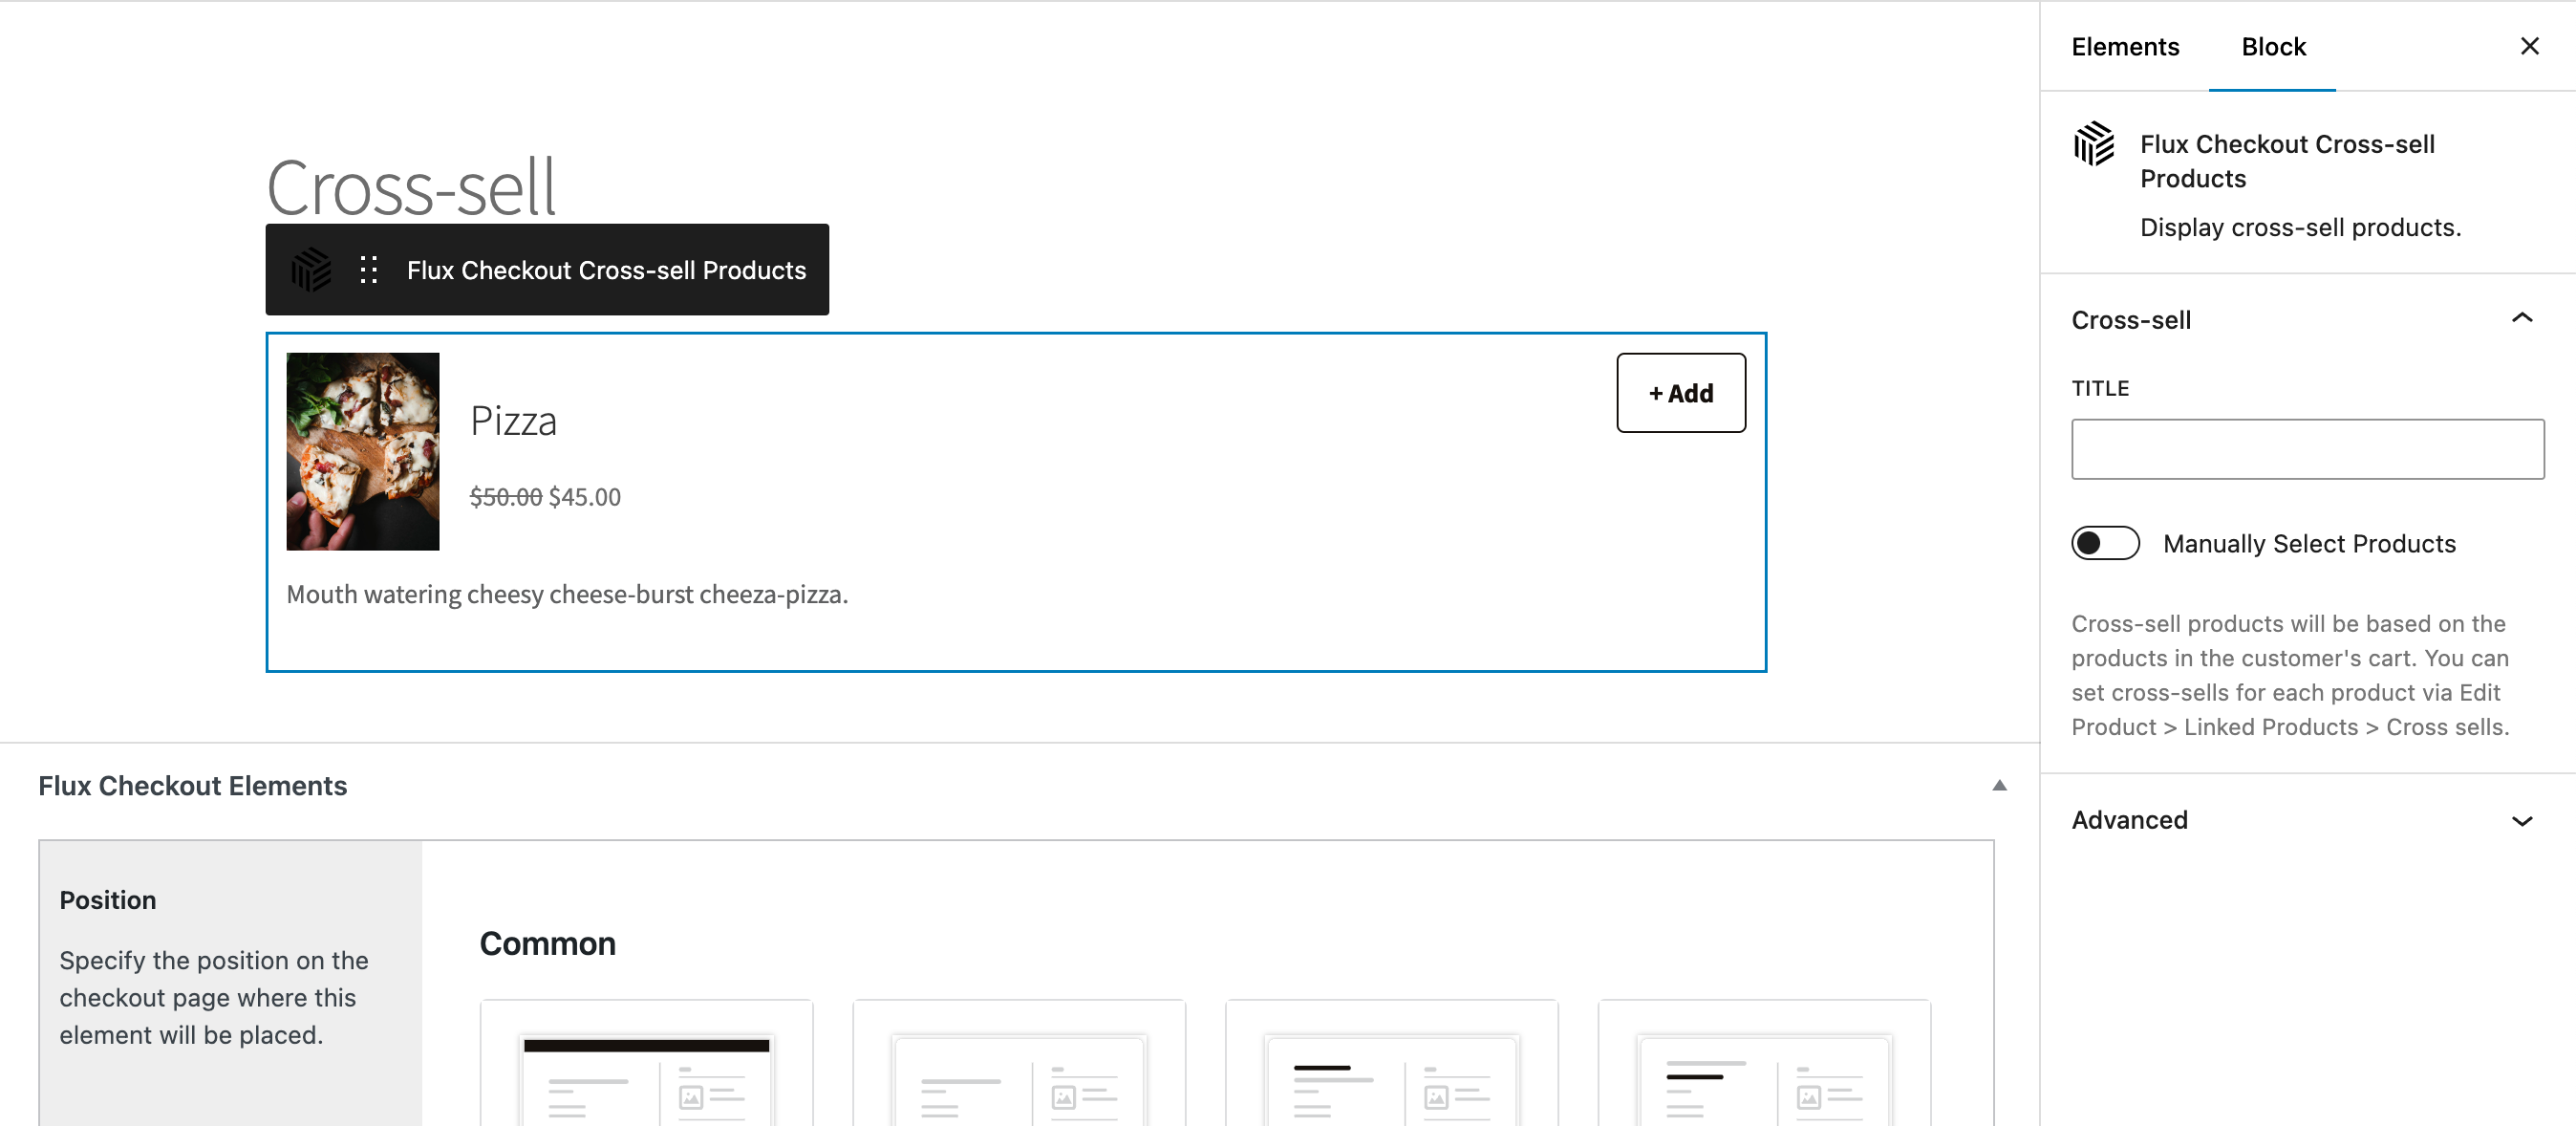
- Search for the Flux Checkout Cross-sell Products block and click on it to add it to the post.

- You can give it a Title and click on Choose Products from the right panel. When products are manually selected with the block setting, only those products will be displayed.
- You can then edit the conditional aspects of these cross-sell products, including their position, using the settings below. For more information on this, take a look at our Checkout Elements guide.
Testing cross-Sells
Now you’ve set your cross-sell products, it’s worth testing them just to make sure they’re working correctly.
To do this, take the following steps:
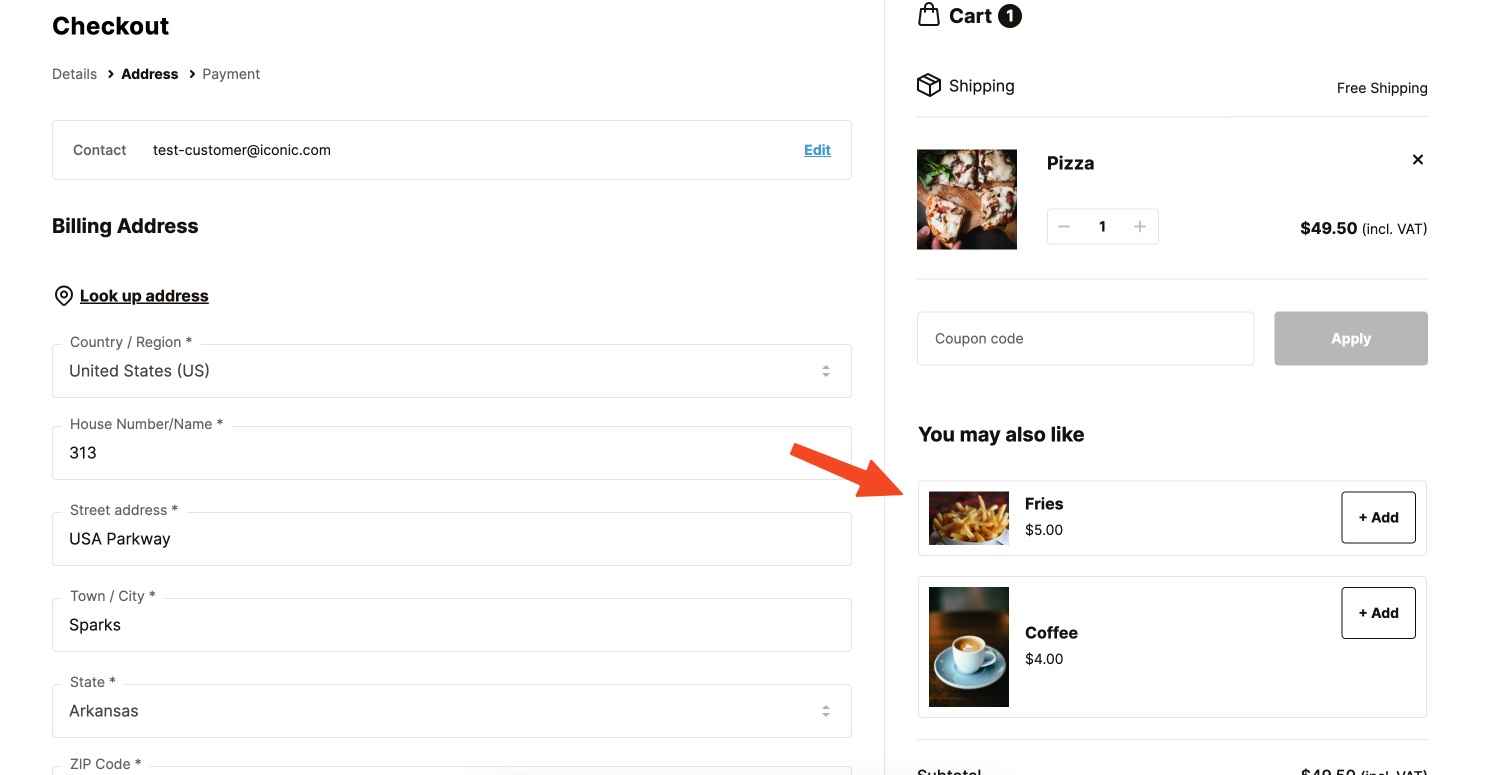
- Add the product to cart for which you added the cross-sell product.
- Visit the checkout page.
- Confirm that the cross-sell products are displayed.
If you don’t see the cross-sell products, make sure the cross-sell products are not in the cart already.
Flux Checkout for WooCommerce
Flux Checkout transforms the default WooCommerce checkout into one that’s lightning-fast, distraction-free, and reduces checkout abandonment.
Was this helpful?
Please let us know if this article was useful. It is the best way to ensure our documentation is as helpful as possible.