How to Use Checkout Elements
This guide will walk you through how to use Flux’s Checkout Elements to enhance your WooCommerce checkout page.
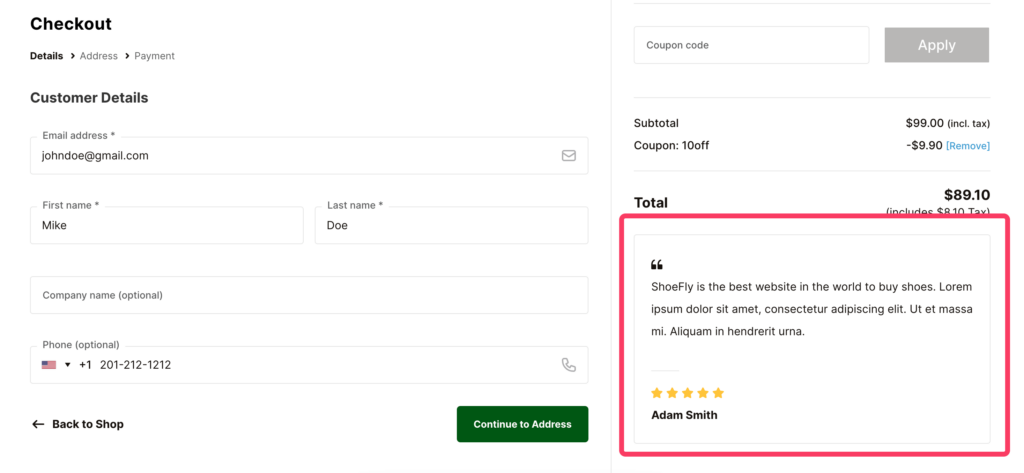
In Flux Checkout for WooCommerce, Checkout Elements are the blocks or designs you can create and showcase anywhere on your Flux Checkout page.
These elements are versatile and can be used for various purposes, such as testimonials, trust badges, FAQs, instructions, and more.
Step 1: Add a new Checkout Element
To create a Checkout Element, follow these steps:
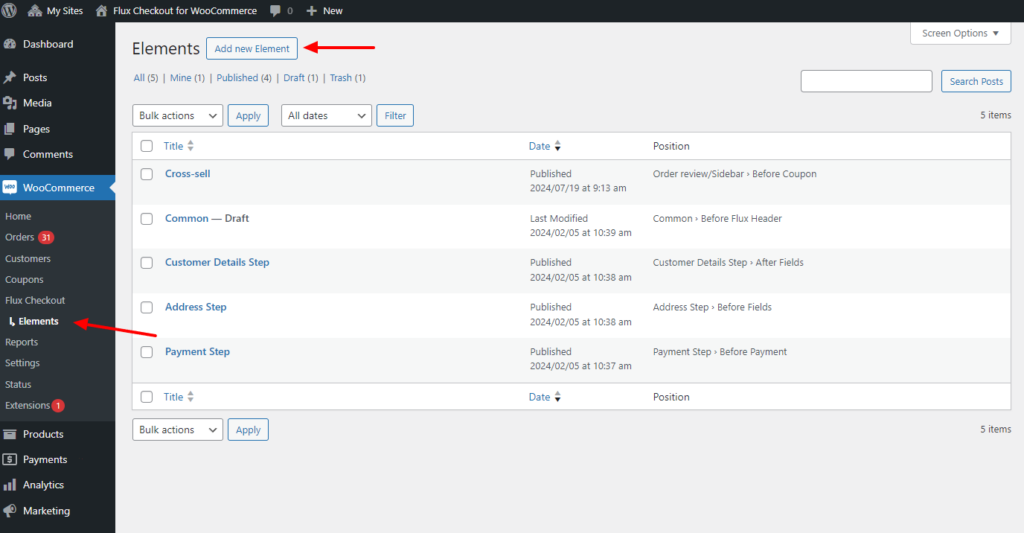
- From your WordPress dashboard, go to Flux Checkout > Elements.
- Next, click the Add new Element button.
Step 2: Design your Checkout Element
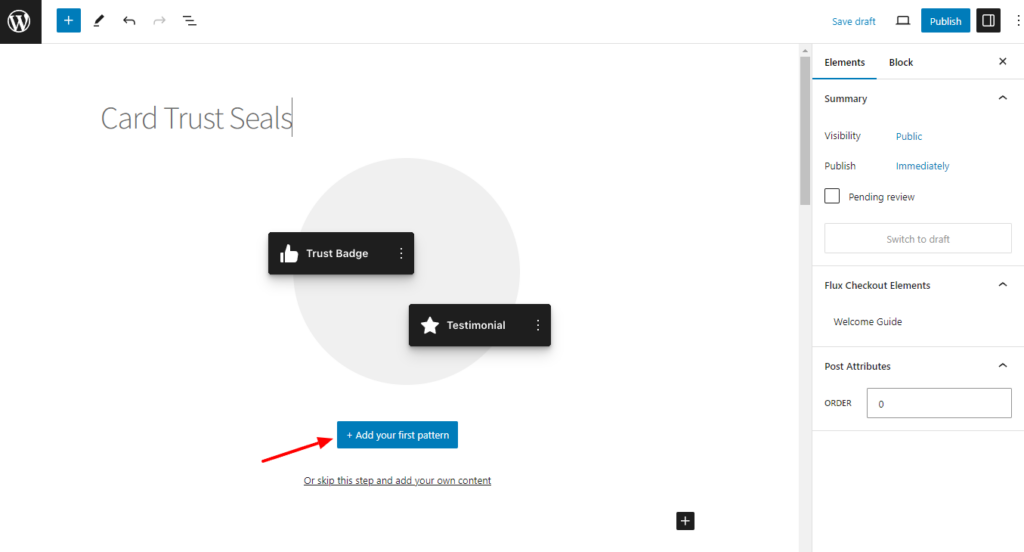
When creating a Checkout Element, you’ll be sent to the Block Editor in WordPress.
While here, you’ll be able to create your first Checkout Element and customize it to suit you. We’ve added some pre-built patterns to get you started, but you can create your own from scratch using the Block Editor like you normally would.
To find one of our pre-built patterns, take the following steps:
- Click on the blue Plus (+) icon located at the top left corner.
- In the popup, select Patterns and then click on Flux.
- In the second popup, you will find a list of available patterns. Click on any pattern to import it onto your page.
Or when you are creating a fresh document, you can just click on the Add your first pattern button.
Step 3: Position your Checkout Element
The last step is to pick where you want your Checkout Element to go on the checkout page and when you want it to appear.
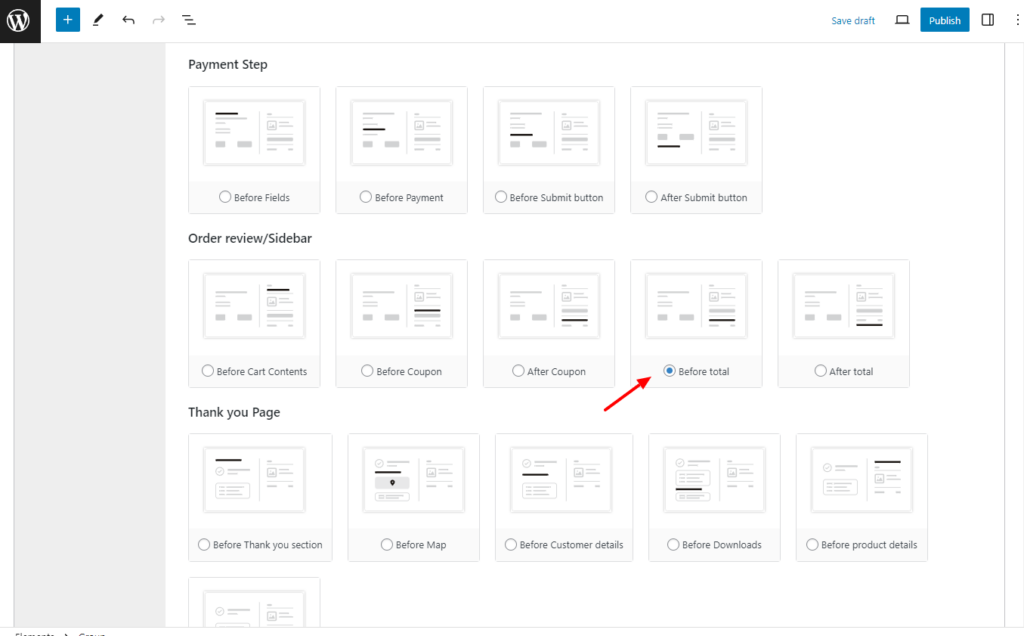
- Pick your Element’s position: Select where you would like the Checkout Element to appear on the checkout page using the Position dropdown.
- For example, choose positions such as Checkout page Footer from the dropdown menu, and your new Element will be placed there.
- Enable Conditional Display: This option allows you to show or hide the element based on certain conditions. Change this to Enabled to activate conditional rules.
- All rules must match: Setting this to Yes means that all conditional display rules you set must be true for the element to display. If set to No, the element will display if any condition is met.
- Conditional Display Rules: Here, you can create specific groups of rules that determine when the element should be visible to or hidden from customers. Flux gives you the opportunity to create multiple different groups that are evaluated separately. So, you can have different sets of matching conditions to cater to multiple scenarios.
- To add your first rule, choose a condition from the first dropdown in the first group (e.g., User Role, Product).
- Then select the appropriate operator from the next dropdown (e.g., “is,” “is not”).
- Finally, choose the value that must be matched for the rule to apply (such as a specific user role or a product in the cart).
- Click Add New Rule if you want to add another rule group containing more conditions.

Once you’re finished setting up your conditions, use the Publish button on the top right to immediately apply your new element settings to the checkout page.
Note: Remember to test your checkout page after setting up the elements to make sure everything displays as expected under the conditions you’ve set.
If you encounter any issues or need further assistance, reach out to our support team for help.
Flux Checkout for WooCommerce
Flux Checkout transforms the default WooCommerce checkout into one that’s lightning-fast, distraction-free, and reduces checkout abandonment.
Was this helpful?
Please let us know if this article was useful. It is the best way to ensure our documentation is as helpful as possible.