How to Add Multiple Images Per Variation
If you need to add more than one image for each product variation you’re selling, you can do so with WooThumbs for WooCommerce.
Let’s say your variable product is a t-shirt that comes in a variety of different colors. Sure you want to show a different image for each color, but you might also want additional images for each color. All so you can show the back of the t-shirt, the t-shirt fabric, logo detail, etc.
This is all possible with WooThumbs and this guide will show you how:
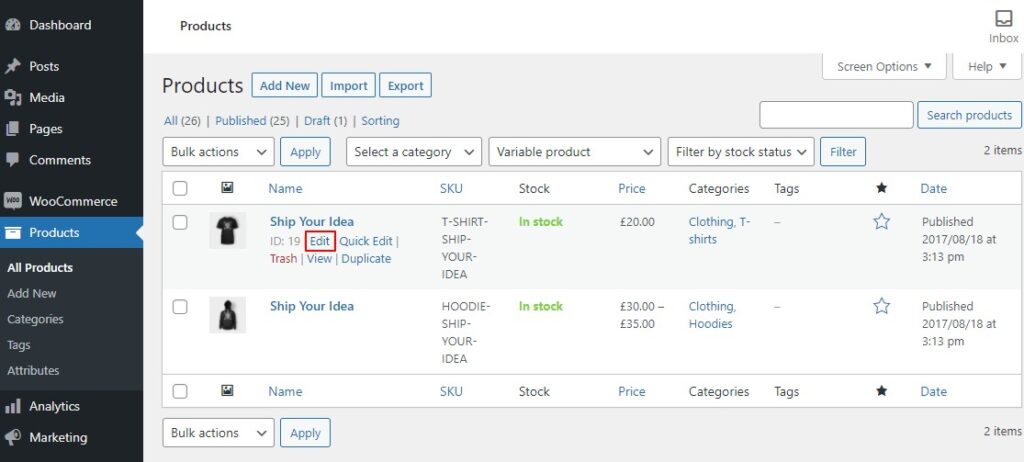
- From your WordPress dashboard, go to WooCommerce > All Products and click to edit the variable product you want to add additional images to.
- Scroll down to the Product Data section of the page (usually found below the main text/product description area).
- Select the Variations tab on the left.

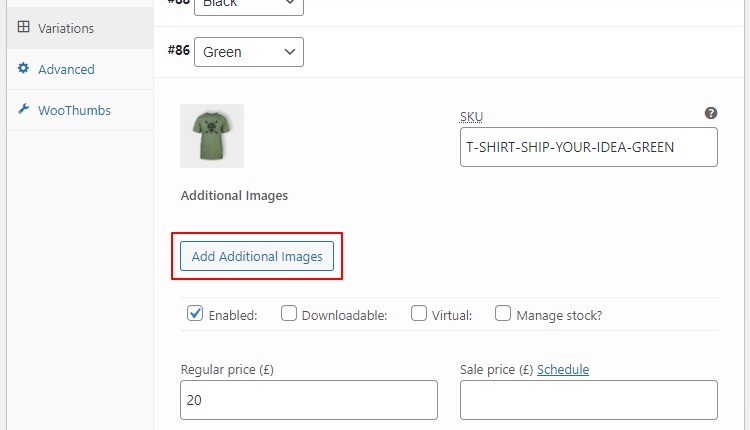
- Expand one of your variations by clicking the black down arrow.

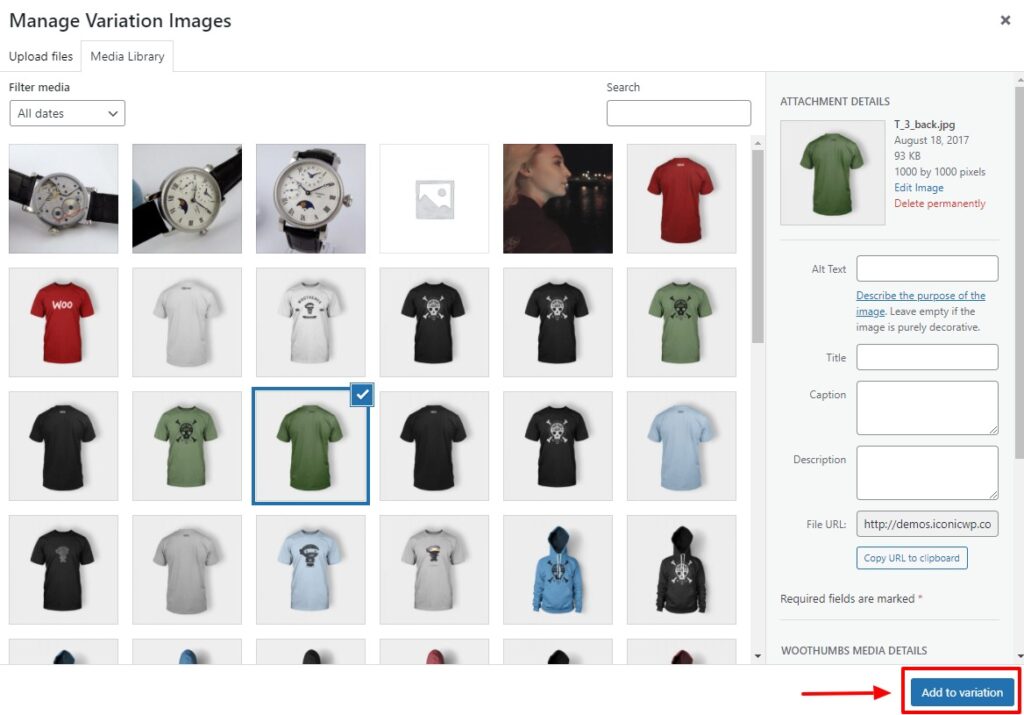
- Next, click the button titled Add Additional Images. This will open the Media Library where you can either upload your product image or select an existing one from the Media Library.
- Once selected, click the blue Add to Variation button at the bottom right of the Media Library.
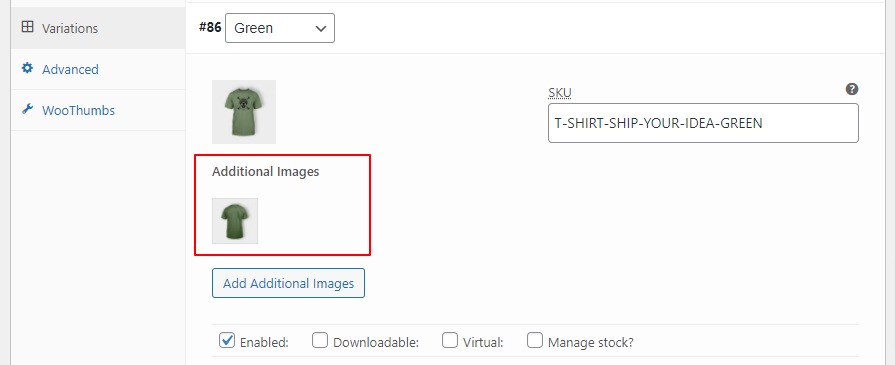
- Your new image will now be added to the Additional Images section below your main variation image.
- Once you’ve added all the images you want for each variation, click the blue Save Changes button at the bottom of the Product Data section. Then scroll to the top of the page and click the blue Update button in the Publish section.
Note: You can add more than one additional image per variation. Just select as many as you want when in the Media Library. You can always add more later.
How to reorder the additional images
Once you’ve added your additional images, you can simply drag and drop to reorder them.
How to remove an additional image
If you’ve changed your mind about an image and want to remove it from the variation, simply click the image to remove it.

You can always add it back again by clicking the Add Additional Images button and selecting it from the Media Library.
How to manage additional images in bulk
WooThumbs allows you to add additional images to your variations in bulk. But before we assign the images to your variations in bulk, we’ll first need to add the images to your Media Library.
To do this, take the following steps:
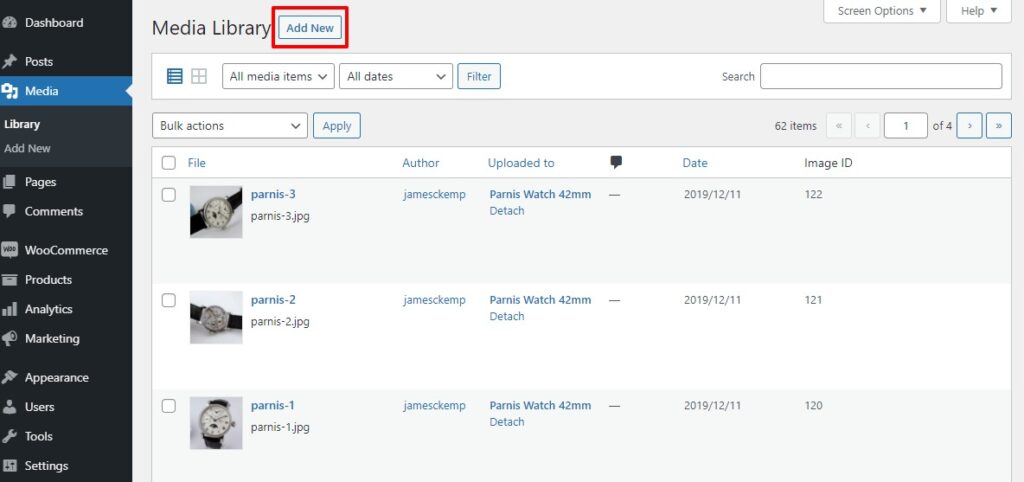
- From your WordPress dashboard go to Media > Library.
- Once here, click the Add New button at the top of the page. You’ll then be prompted to upload your images to the Media Library.
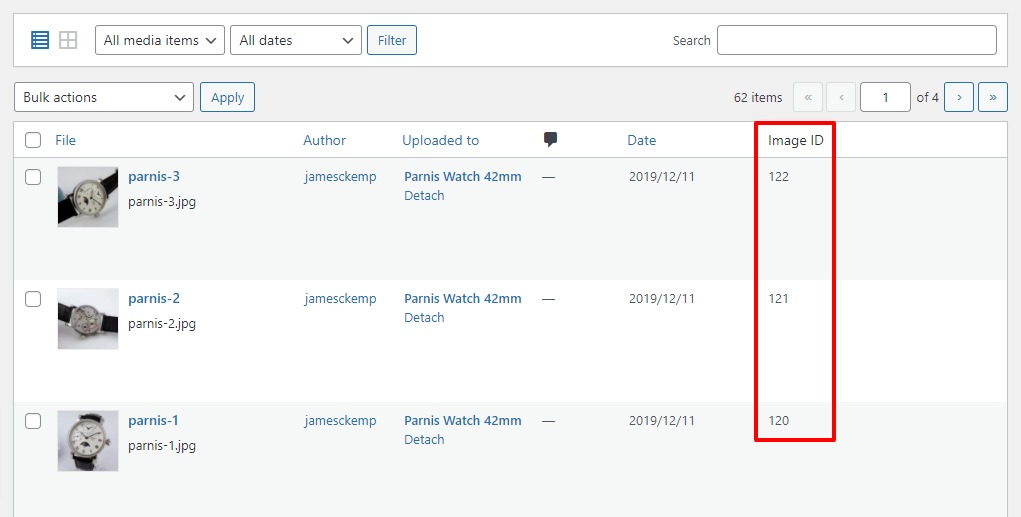
- When you’ve finished uploading all your variation images, go back to Media > Library and take a look at the Image ID column, you’ll be needing that in a minute.
Now we have all your images uploaded, let’s start adding them to your variations in bulk.
- In a new window or tab (in your browser), from your WordPress dashboard go to WooCommerce > WooThumbs > Bulk Edit.
- Here you’ll see all your product variations listed in a table. If you have a lot, you can search for variations using the variable product ID in the Filter by parent product ID section.
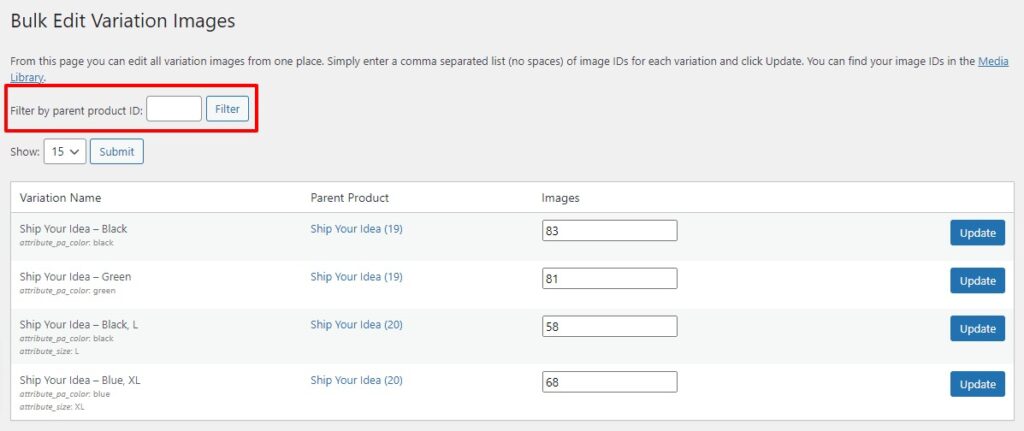
- In the Images column, you’ll see a list of image attachment IDs for each image associated with the product variation (these are the numbers from the Image ID column we showed you earlier).
- To add more images to each variation, enter the ID of each image you want to add, separated by a comma like this:
- Once happy, click the blue Update button next to the variation you want to edit.
That’s it. Once all your product variations have been updated, you’ll be able to see the new product images on your WooCommerce store.
WooThumbs for WooCommerce
Customize your WooCommerce product image gallery in minutes with a new layout, embedded video, multiple images per variation, and more.
Was this helpful?
Please let us know if this article was useful. It is the best way to ensure our documentation is as helpful as possible.