How to Add Images for Single Attributes
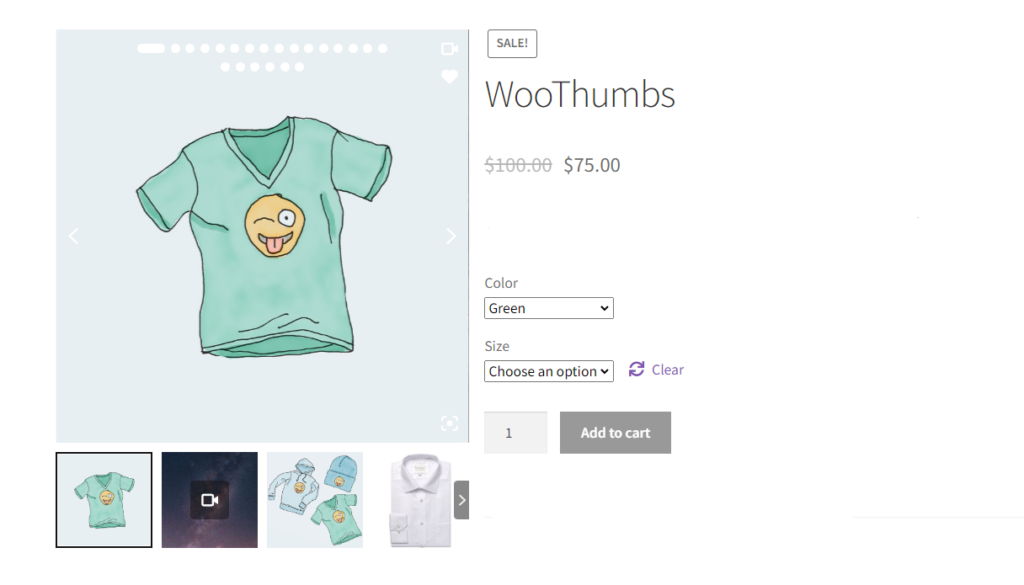
By assigning images to single attributes, customers will be able to see product images based on the individual attributes they’ve selected.
For example, the product image will change on the selection of ‘color’ without requiring ‘size’ to be selected as well.
This guide will walk you through how to set these images up using WooThumbs for WooCommerce. To do this, take the following steps:
Note: If you want the product only to use these images in the gallery, you can set it to do so by going to WooCommerce > WooThumbs > Display and changing the Use Gallery Images? dropdown.
- From your WordPress dashboard, go to Products > All Products and click to edit one of your variable products.
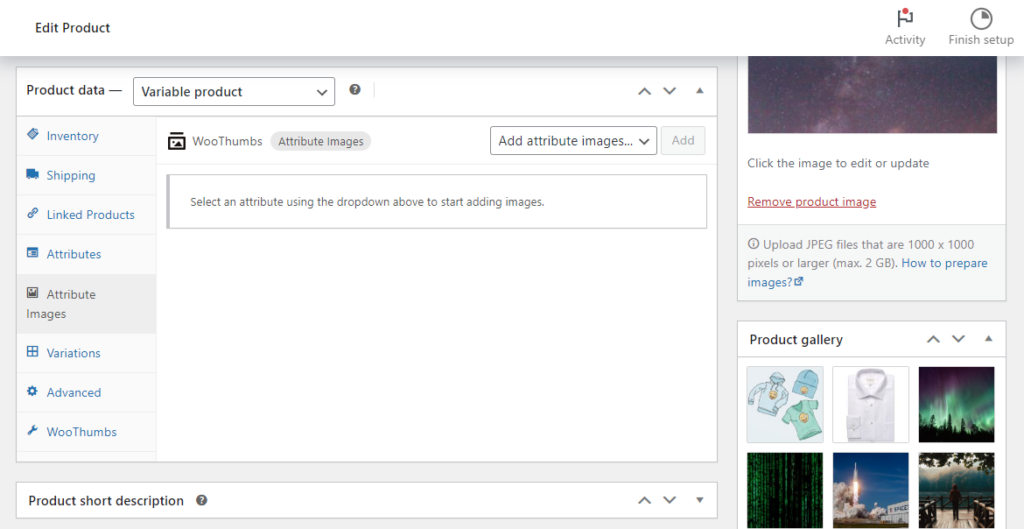
- Scroll down to the Product data section of this page and click on the Attribute Images tab.
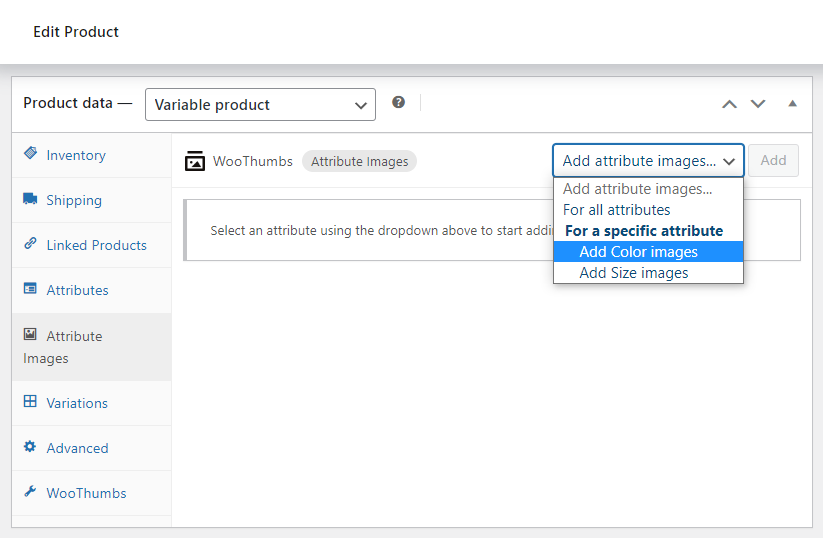
- Using the Add attribute images dropdown, select which attribute you want to add images to (in our case, Color). Then click the Add button.
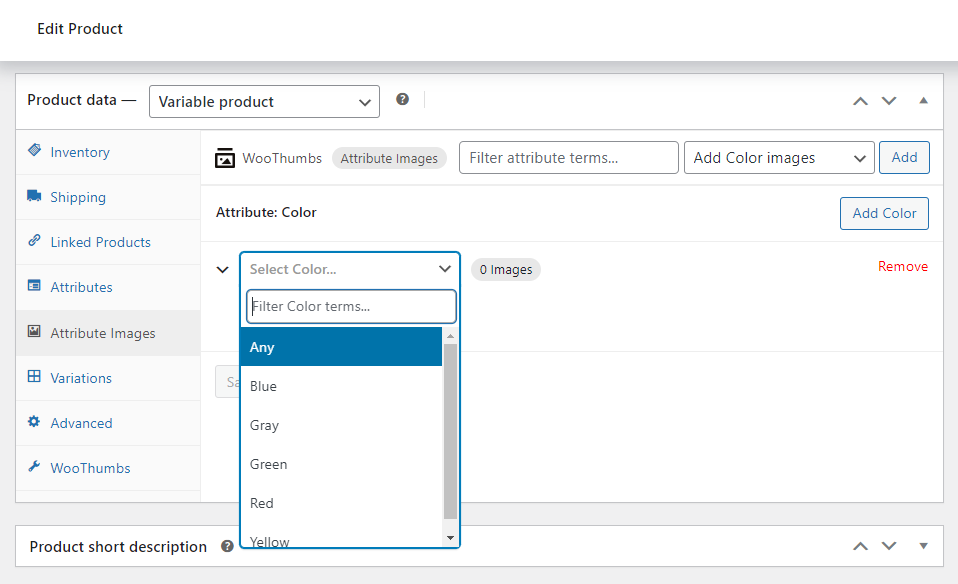
- Click the Add Color button to select which color you want to add images to. Then in the Select Color dropdown, make your selection.
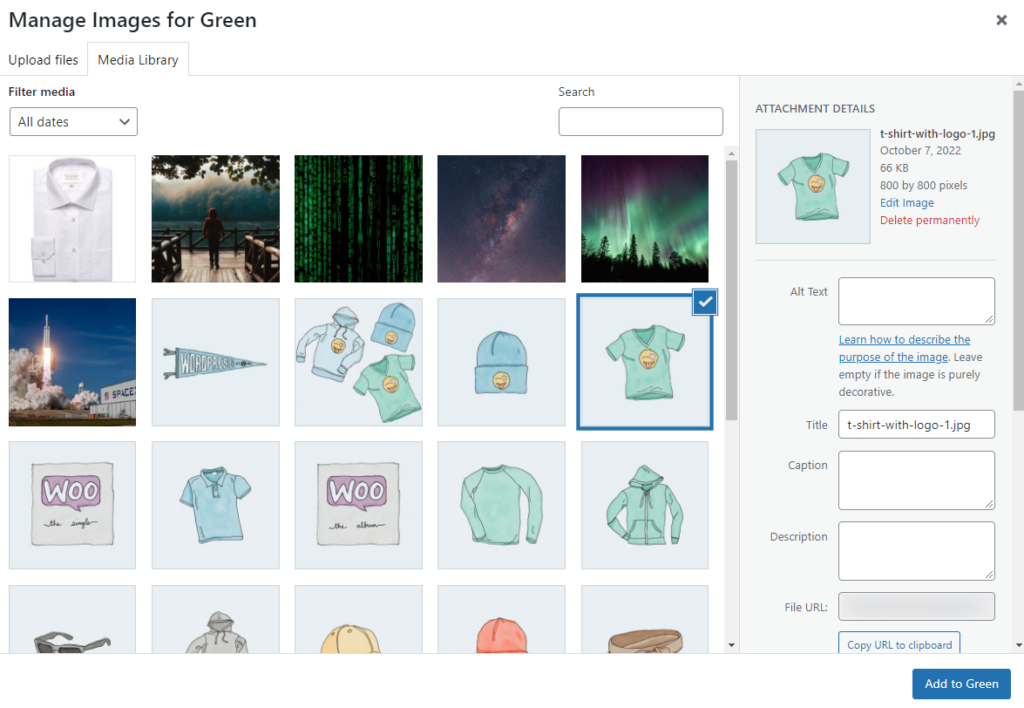
- Underneath this is the Add Images button. Click it, and you’ll be taken to the media library, where you can upload or add an image.
- Repeat this until you’re done.
- Once you’re happy with all your attribute images, click Save changes in the Attribute Images tab and scroll to the top of the page to Update your product.
Now when a customer selects just one of your attributes, the main product image will change to reflect that.
WooThumbs for WooCommerce
Customize your WooCommerce product image gallery in minutes with a new layout, embedded video, multiple images per variation, and more.
Was this helpful?
Please let us know if this article was useful. It is the best way to ensure our documentation is as helpful as possible.