How to Create Your First Conditional Layer
Conditional Layers are extremely powerful. In this guide, we’ll explain what they are and how to use them with WooCommerce Product Configurator.
As an example, let’s say our product, Modern Pine Desk, has a few configurable attributes.
We have “Drawer Width”, “Drawer Color”, “Leg Style”, and “Leg Color” and when the customer makes these selections, we want to update the compiled image to display the relevant attribute’s image.
In our example, the Modern Pine Desk’s drawer can span the width of the desk, or occupy only the middle section; both are available in all colors – meaning we can have a “Full Width” drawer in Green, Ocre, and Stone.
This means depending on the “Drawer Width” selected, we’d need to conditionally load a different image for the “Drawer Color”.
This is where Conditional Layers will come in handy. We are able to add a Conditional Layer to our “Drawer Colour” attribute, that says – if drawer width equals “Full Width”, use the Full Width image for our selected color.
So now we know why this feature is useful, let’s get it set up.
Step One: Creating a Conditional Layer
- When editing your product, navigate to the Configurator tab in the Product Data section.
- Open the attribute panel you’d like to add your Conditional Layer to. In our example, Drawer Colour.
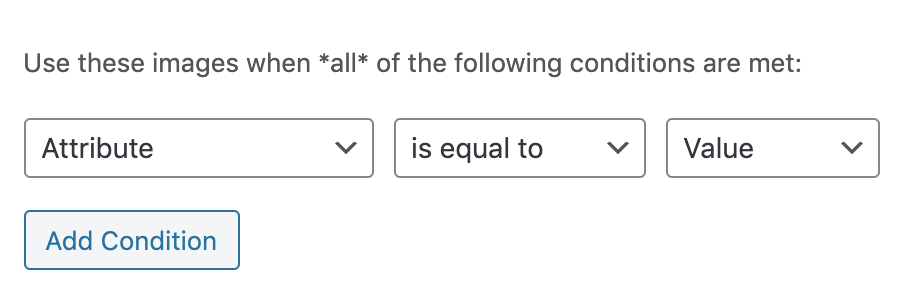
- Find and click the Add Conditional Group button. This will reveal a conditional group panel, giving you an attribute value, a comparison value, and the value itself.
We want to say, that if “Drawer Width” (attribute), “is equal to”, “Full Width” (value), then use the images selected in the next step for the “Drawer Color” layer. To add more conditions, you can click Add Condition.
Step Two: Selecting Conditional Images
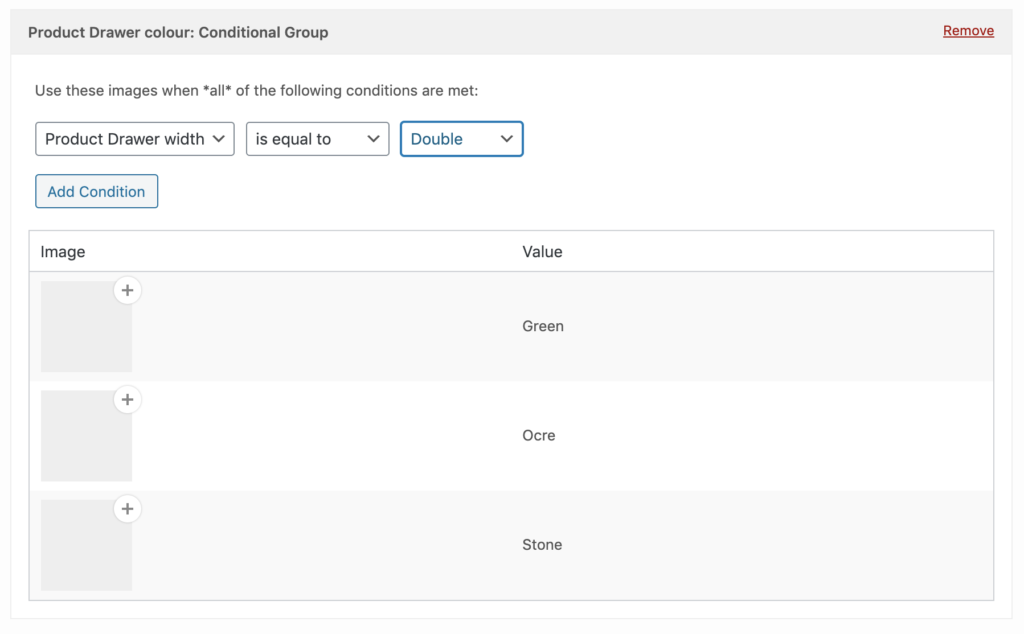
Now we have completed step one, we can add our conditional images. In our example, we want to tell the product page that when a customer selects the “Full Width” Drawer option, to use the full-width image for each color.
Here, we can add a full-width Green, Ocre, and Stone drawer image – and upon the customer making that selection, the compiled image will use the full-width image that we will upload.
- To select the image, click on the plus icon, found to the right of each attribute value (in our case, Green, Ocre, and Stone).
- This will initialize the media selection window, either upload, or choose the relevant image, and click
Set Image. - Once happy, update the product.
Further
Our Modern Pine Desk features interchangeable legs. We want to give customers the ability to toggle leg color and leg type.
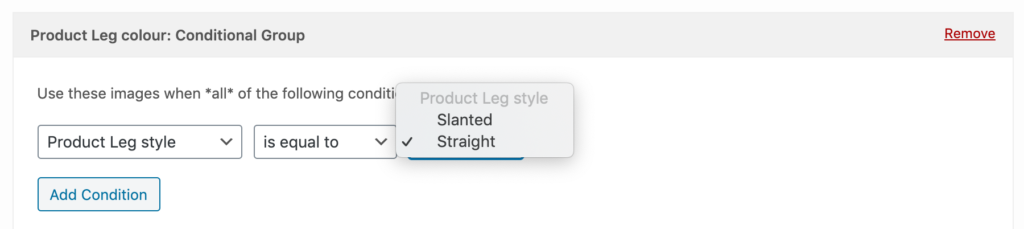
We need to set up a conditional layer, that says when a customer has selected the “Straight” leg type, display each color’s straight leg image variant.
- So, we find our “Leg Color” attribute in the Product Configurator tab and add a Conditional Group.
- We select “Leg Style” as the attribute and select “Straight” as the value.
- Now we can add the relevant images, (in this case, straight) for each color, “Charcoal”, and “Pine”.
Once happy, update the product. The customer should now be able to toggle the color of the drawer, the width of the drawer, the leg color, and the leg style.
WooCommerce Product Configurator
WooCommerce Product Configurator adds a visual product configurator to your WooCommerce store and allows visitors to customize your products with ease.
Was this helpful?
Please let us know if this article was useful. It is the best way to ensure our documentation is as helpful as possible.