How to Display Custom Fields on the Shop and Category Pages
This guide will show you how to display the custom fields created by Custom Fields for Variations on the WooCommerce shop and category pages.
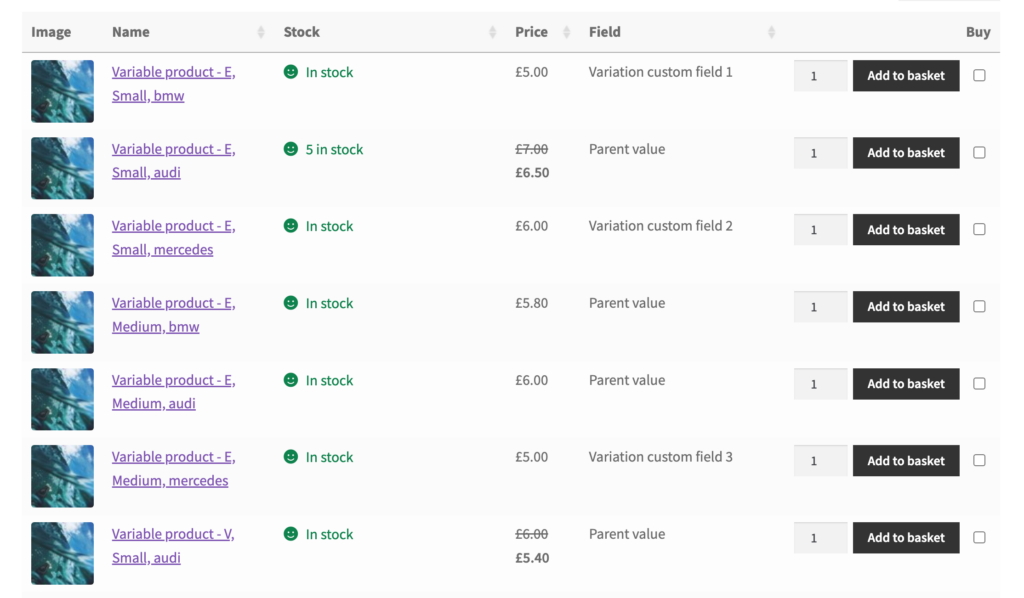
We’ll show you how to do this using the WooCommerce Product Table plugin by Barn2. This plugin displays the products on your shop and category pages in a structured table view, complete with extra columns of information, such as your variation custom fields.
There are two possible layouts for your variations, which affect where the custom fields will appear:
- Variation dropdowns in the ‘Buy’ column of the table. The variation custom fields will appear when the customer selects a variation.
- Display each variation on its own row in the table. You can add the variation custom fields as separate columns of the table.
Before we begin, please make sure that the Custom Field for Variations and WooCommerce Product Table plugins are installed and activated on your site.
Step 1:Create a custom field
Let’s begin by adding a custom field group in Custom Fields for Variations and some fields within it.
- From your WordPress dashboard, go to Products > Variation Field Groups.

- Click on Add New from the left sidebar.
- Give your field variation a title. This is just for internal reference.
- Click on the Add Field button, then give your field a label, type, and choices.

- Save the field by clicking on the Save Field button.
- Save the field group by clicking on the Publish/Update button on the right sidebar.
- Click on the Edit field button and copy the Meta ID for it.

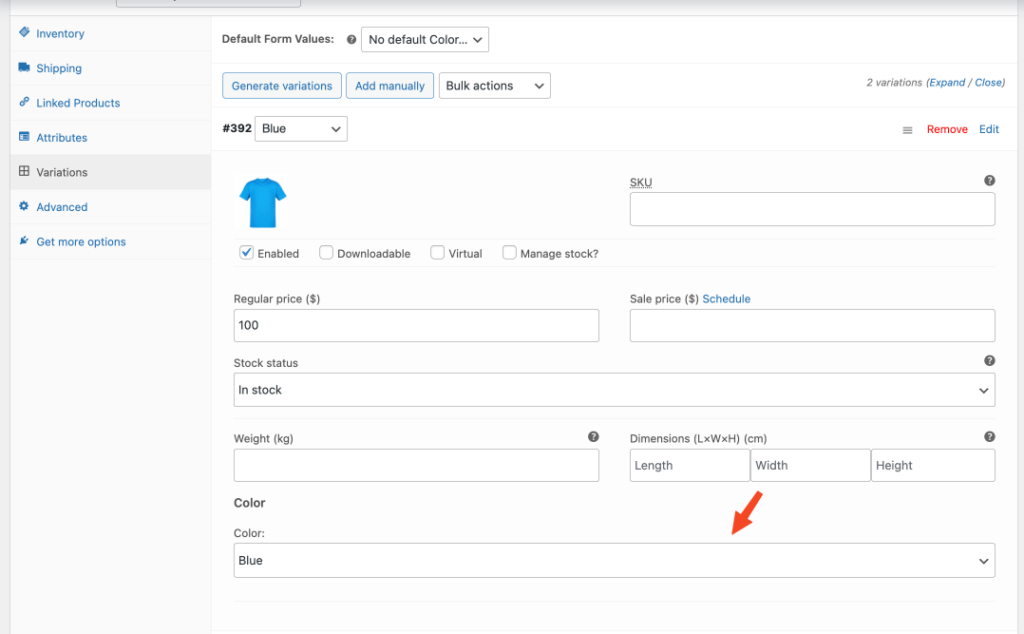
Step 2: Save custom field data for each variation
- If you haven’t already created a variable product, then create one. If you already have a variable product, then edit it.
- Scroll down to the Product Data section of the edit product page and click on the Variations tab on the left panel.
- Click on each variation and then enter the value of the custom field.
- Click save and add custom fields for other variations, too.
Step 3: Set up the shop and category page product table
- From your WordPress dashboard, go to Products > Product Tables > Add New.
- On the Create a table step of the table builder, select Display on a shop page.
- Use the next page to select which of your shop pages you’d like to display the product table with variation custom fields.
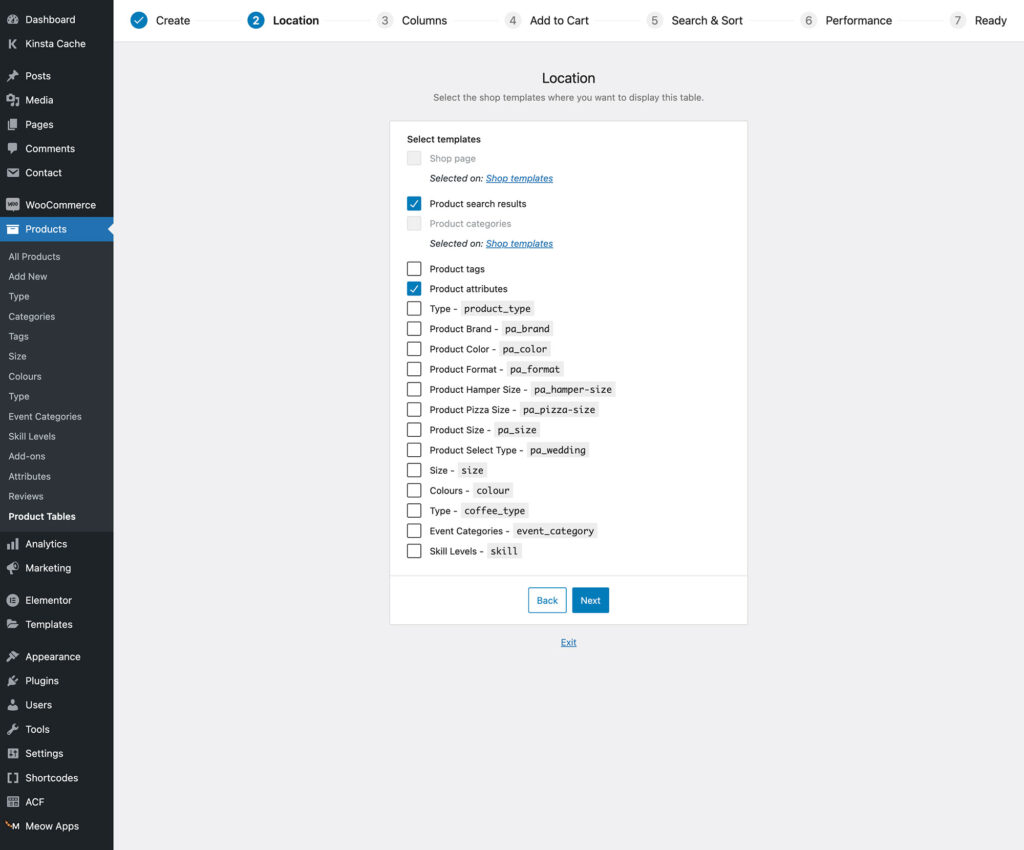
- Select table columns as needed. If you’re planning to display each variation on its own row in the table, then you should create a ‘Custom field’ column for each variation and paste the meta ID for the field which you copied in Step 1, above.
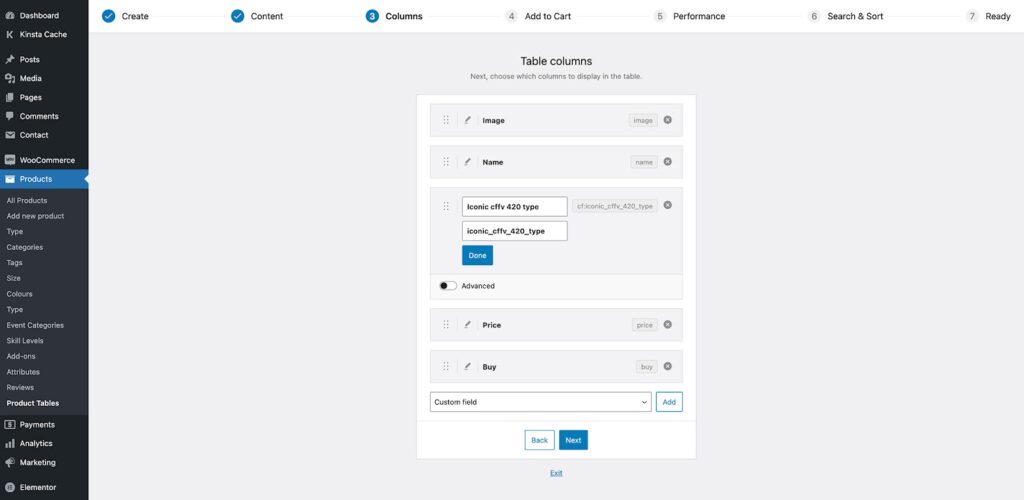
- On the ‘Add to cart’ page, choose whether to display the variations as dropdowns or individual rows.
- Go through the remaining steps of the table builder as needed. When you’ve finished, your variation custom fields will appear on whichever shop pages you enabled the table on.
WooCommerce Custom Fields for Variations
Add custom fields to your product variations and save time editing products with WooCommerce Custom Fields for Variations.
Was this helpful?
Please let us know if this article was useful. It is the best way to ensure our documentation is as helpful as possible.