How to Create A Checkout Order Bump
If you’re looking to add a one-time offer to the customer’s checkout, one that either displays for all products or based on the contents of the cart, you can do so with Iconic Sales Booster for WooCommerce.
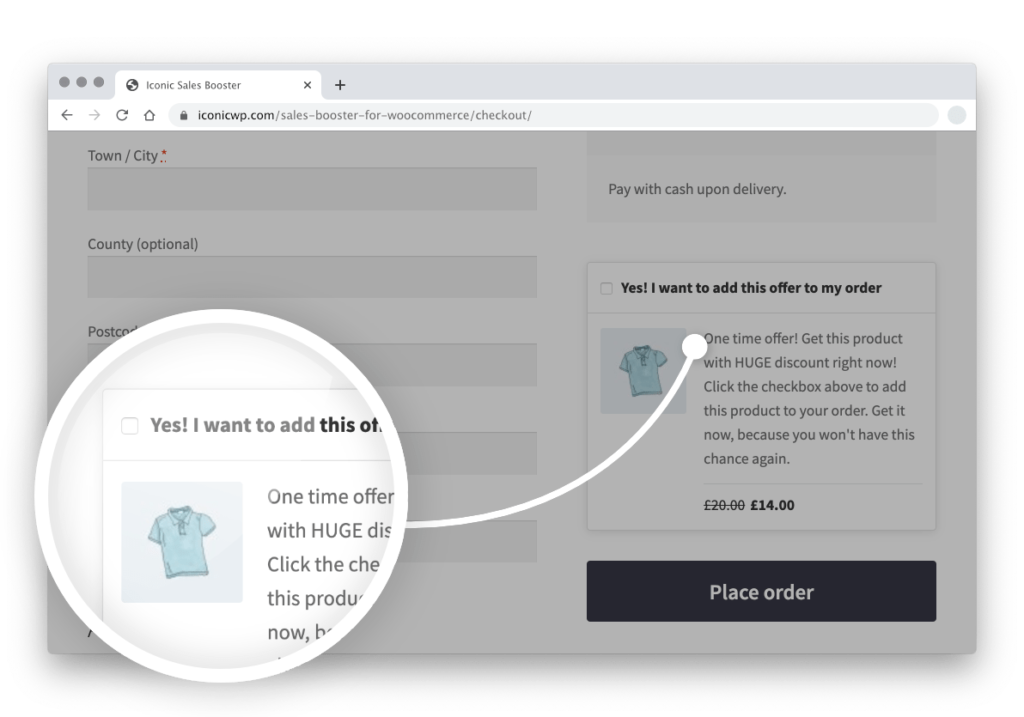
Customers can add the offer product to their order at the checkout, so they never have to leave the checkout form.
To set this up, take the following steps:
- From your WordPress dashboard, go to Sales Booster > Order Bumps.
- Click the Add New button at the top of the page.
- Once clicked, you’ll be able to customize your order bump. Enter a title for your offer in the Add title field.
- Below the title field you’ll see 3 tabbed sections.
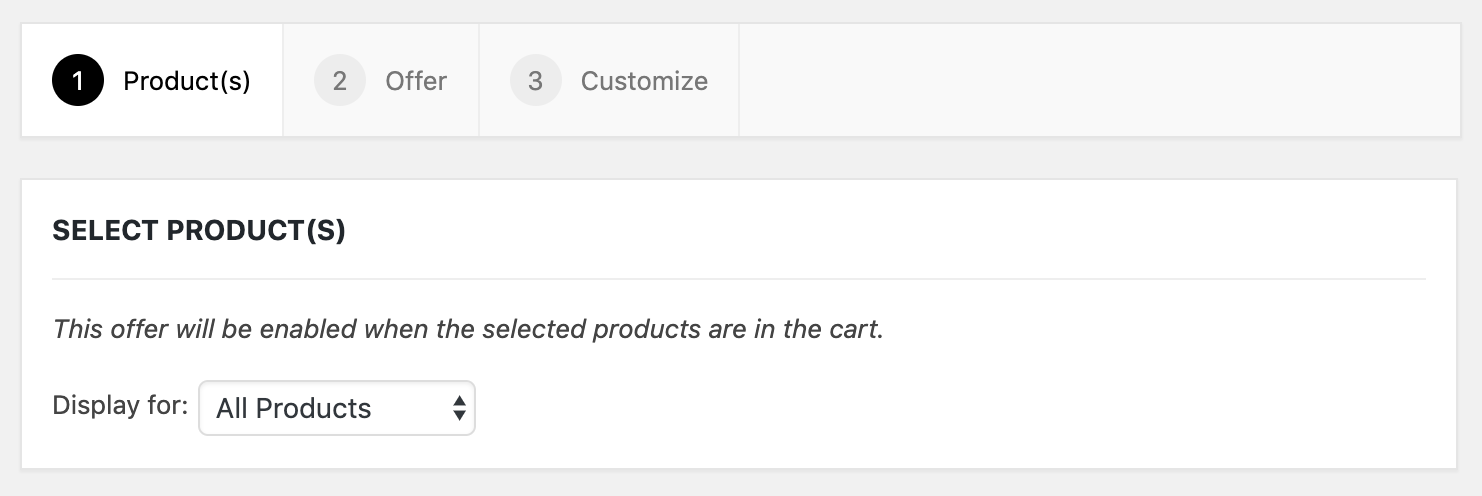
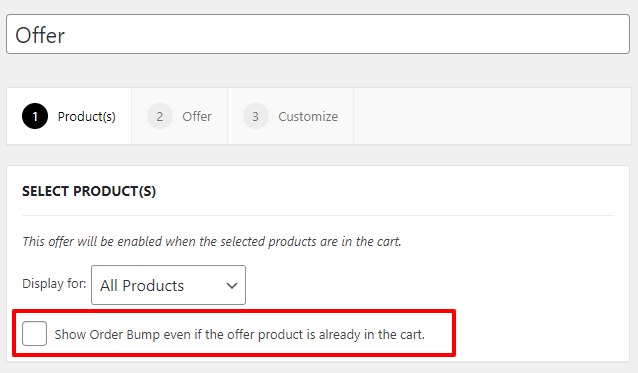
- The first section allows you to select which products to display this order bump for.
- By default, this is set to All Products.
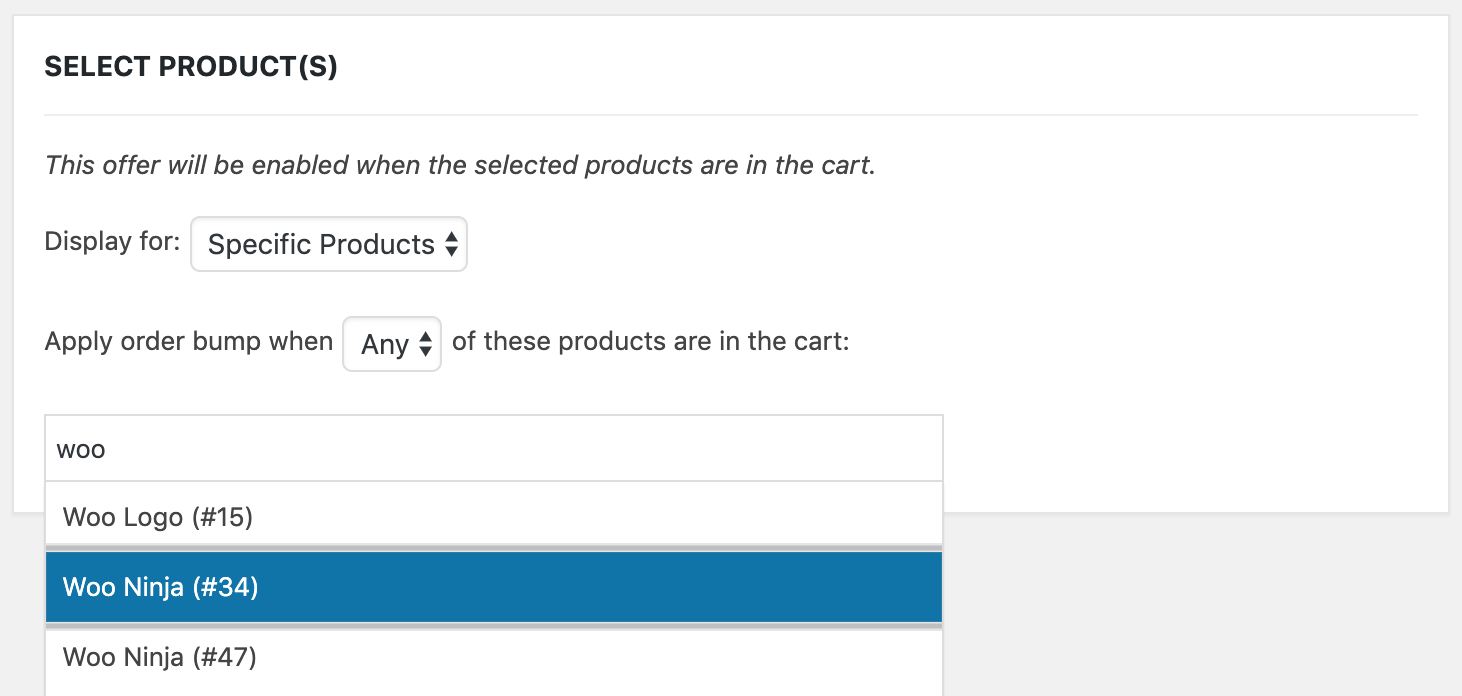
- If you change it to Specific Products you will see a search field where you can choose products to display the order bump for. You can show the order bump when Any or All of these products are in the cart.
- Once you’re happy with your selection, click the Offer tab.
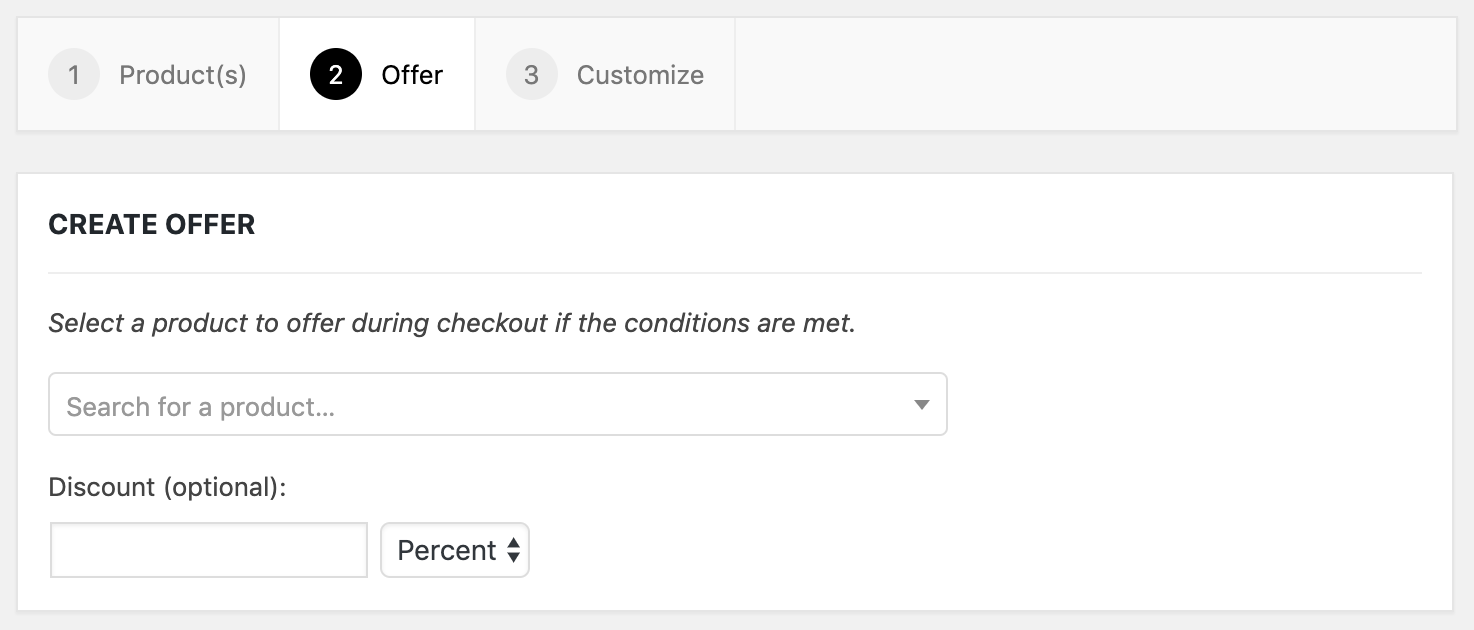
- Here you’ll be able to pick which products you’d like to offer at a reduced price. In the search field, enter the name, SKU, or ID of the product to offer at checkout.
- Once selected, you can enter a discount – this is an optional step.
- Next. click the Customize tab. Here you’ll see a visual preview of the order bump which you can customize.
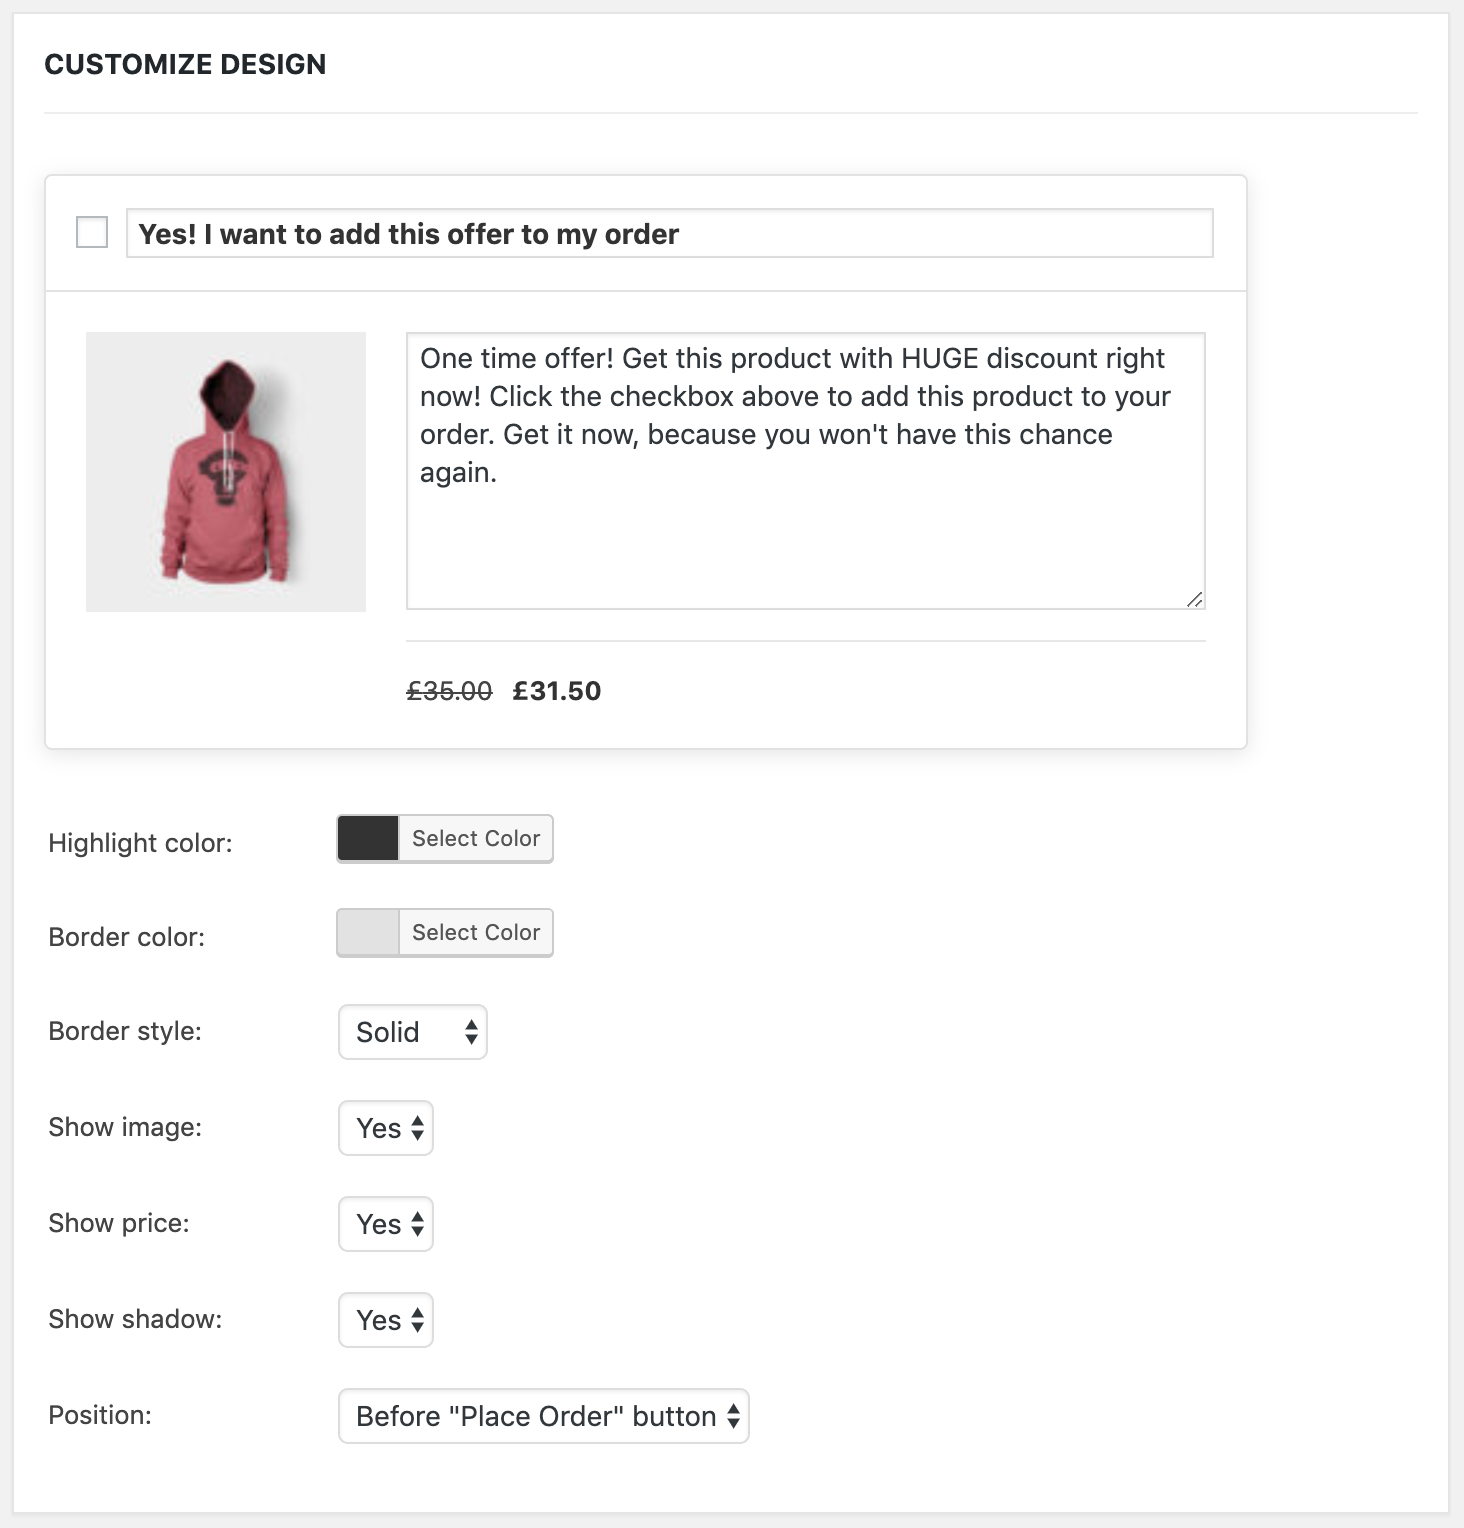
- You can customize the title and description of the order bump by entering your text into the relevant fields in the preview. You can also customize the offer’s design and position on this tab.
- Once you’re happy, click the blue Publish or Update button in the Publish section and your checkout offer will be active.
Notes
- If the customer already has the order bump product in their cart, the order bump will not be displayed at checkout unless you check the ‘Show Order Bump even if the offer product is already in the cart.’ box on the Product(s) tab.
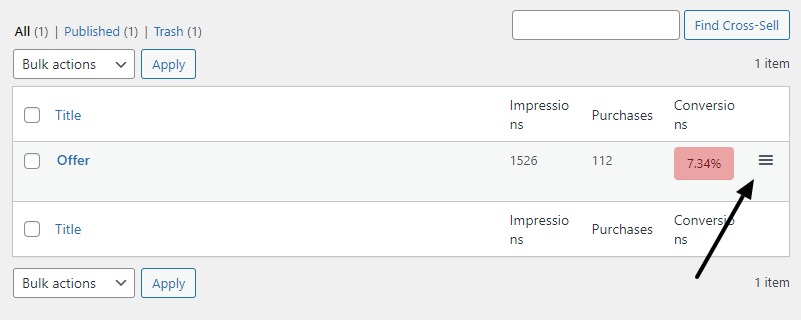
- Order bumps can be arranged by priority on the Order Bumps page (In your WordPress dashboard, go to Sales Booster > Order Bumps). To change the order, click the three lines at the right of your offer and drag and drop to re-order. If multiple cross-sells match the current cart, then the highest cross-sell in the list will be displayed.
Iconic Sales Booster for WooCommerce
Add cross-selling to your entire WooCommerce store in minutes with Iconic’s WooCommerce cross-sell plugin, Iconic Sales Booster for WooCommerce.
Was this helpful?
Please let us know if this article was useful. It is the best way to ensure our documentation is as helpful as possible.