How to Use Coupons With Flux Checkout
When it comes to using coupons in your WooCommerce store, Flux Checkout for WooCommerce has a few settings you can adjust to customize how customers use them at the checkout.
These settings allow you to hide the coupon field at the checkout and auto-apply a coupon at the checkout for all customers.
In this guide, we’ll go through them all. To find these settings, take the following steps:
- From your WordPress dashboard, go to WooCommerce > Flux Checkout and click the Checkout Page tab/link at the top of the page.
- Scroll down the page until you reach the coupon settings:
- Auto Apply Coupon – This setting will allow you to automatically apply a coupon to the checkout of every customer. It’s particularly useful for site-wide sales. Next to this setting, you’ll see an empty field. Type in your coupon of choice, and it will be applied to all checkouts.
- Hide Coupon Field – This setting, when checked, hides the coupon field from the checkout altogether. You can turn this on and off whenever you want.
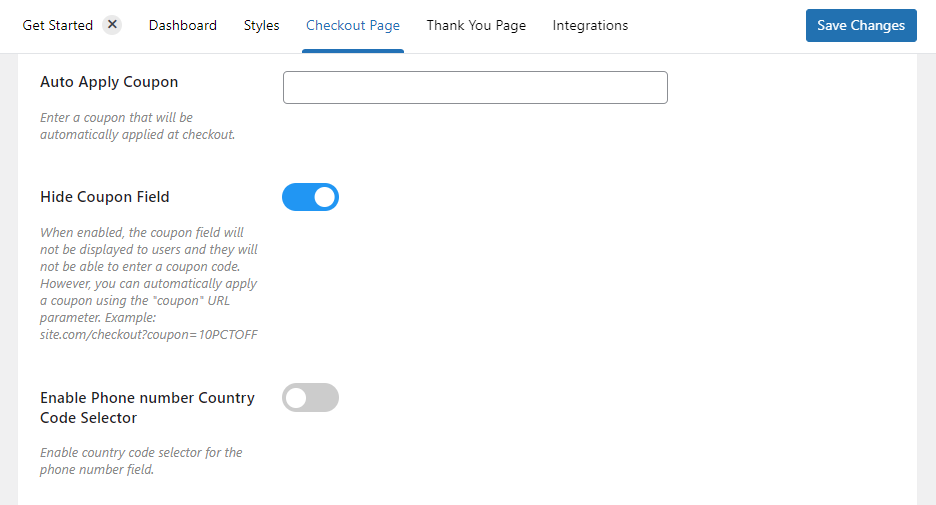
- Once you are happy, scroll up or down the page and click the blue Save Changes button.
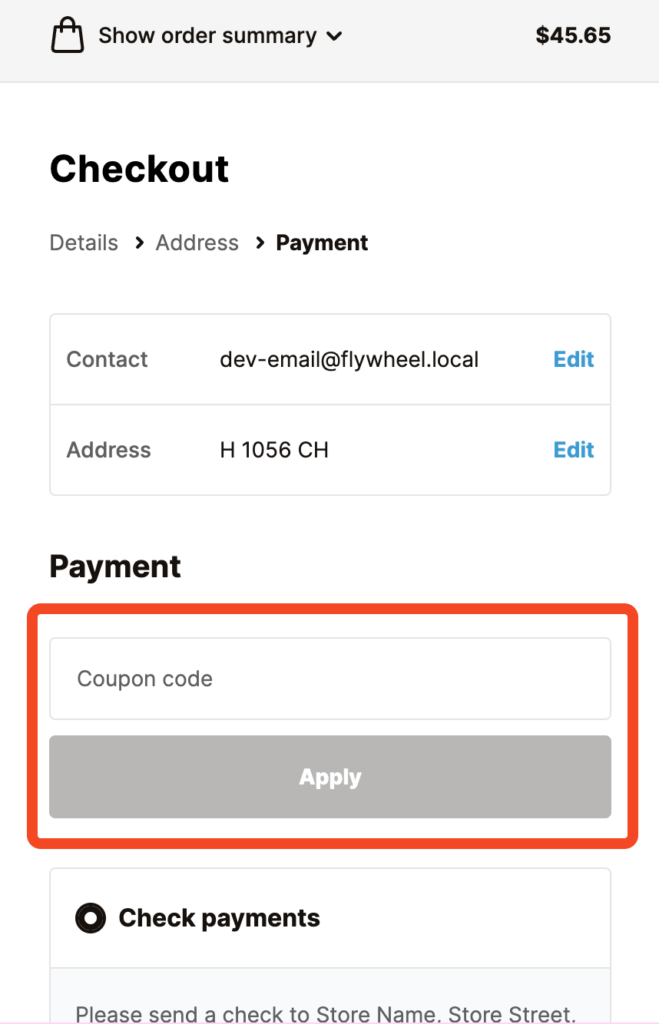
Note: If you hide the coupon field with the setting above, you can still allow customers to use coupons by sending them a custom link that has the coupon applied. For example:
https://site.com/checkout?coupon=10OFF
Change the coupon field position for mobile devices
This setting allows you to change the position of the coupon field for mobile devices on the Flux Checkout payment step. By default, the coupon field on mobile is located within the Payment step.
However, if you would like to move the position of the coupon field to the Order Summery, then follow these steps:
- From your WordPress dashboard, go to WooCommerce > Flux Checkout > and click on the Checkout Page tab.
- Scroll down to the Mobile Settings section and use the Coupon Field position on the mobile dropdown to change where you want the field to appear.
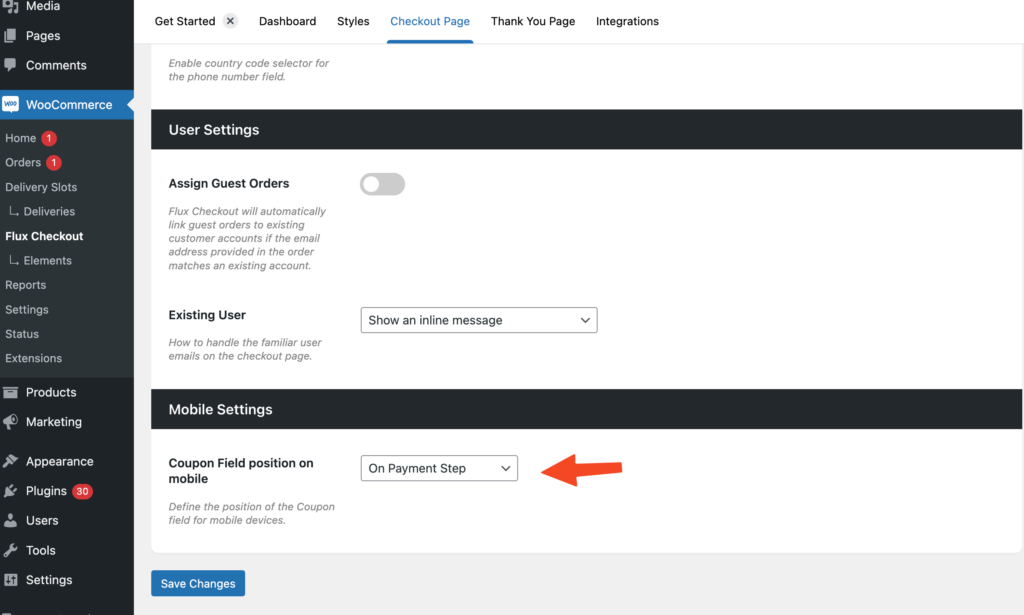
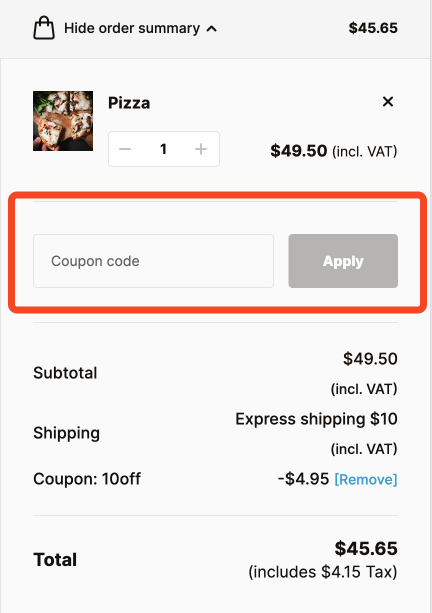
When Within Order Summary is selected the coupon field will move to the toggleable order summary section which appears on all the steps.
Flux Checkout for WooCommerce
Flux Checkout transforms the default WooCommerce checkout into one that’s lightning-fast, distraction-free, and reduces checkout abandonment.
Was this helpful?
Please let us know if this article was useful. It is the best way to ensure our documentation is as helpful as possible.