
I’m sure you know the feeling, you’ve worked hard to increase visitors to your online shop, and still, you’re not seeing the sales you know your store deserves. People are abandoning their carts left, right, and center.
Sometimes, customers may choose not to purchase an item they’ve added to their cart. They may also see something they like but are not yet ready to buy. When this happens, potential customers can leave your site and potentially never return.
[click_to_tweet tweet=”Not all of your store’s visitors are ready to buy. Make sure they come back by using Wishlists for #WooCommerce” quote=”Not all of your store’s visitors are ready to buy. Make sure they come back by using Wishlists for WooCommerce”]
Why You Should Add Wishlists to Your WooCommerce Store
Let’s reduce the odds of this happening. By adding wishlists to your WooCommerce store you can allow customers to save items for a later date.
Not convinced? Here are a few other reasons why a wishlist could benefit your online store:
- Promotes sharing with friends and family.
- Creates a connection to your site for ‘special occasions’ like weddings, birthdays or Christmas.
- You retain leads – your wishlist user will provide you with their email address which as a result can be used for email campaigns.
- The wishlist will help you gauge the popularity of your store items.
So, you’re convinced. Adding wishlists to your WooCommerce store will definitely benefit you and your customers.
In the rest of this article, we’ll break it down for you. How to install an easy-to-use wishlists plugin for WooCommerce and how to change the settings so that it works perfectly for you and your customers.
How to Set up Wishlists for Your WooCommerce Store (in just 5 Steps)
To keep things simple, we’ve broken down the following instructions into 5 simple steps. To add your wishlist functionality, just follow along and you should be set up in no time.
The following uses our plugin, Wishlists for WooCommerce.
Wishlists for WooCommerce
Increase sales, conversions, and visitors with multiple Wishlists for WooCommerce.
Step 1: Install and Activate Wishlists for WooCommerce
To start, you’ll need to purchase and download the Wishlists for WooCommerce plugin.
Once you have the ZIP file (a downloadable file you get when you purchase the plugin through our site), navigate to Plugins > Add New within your WordPress dashboard.
Next, click the Upload Plugin button at the top of the screen, and choose the Wishlists for WooCommerce ZIP file from your computer.
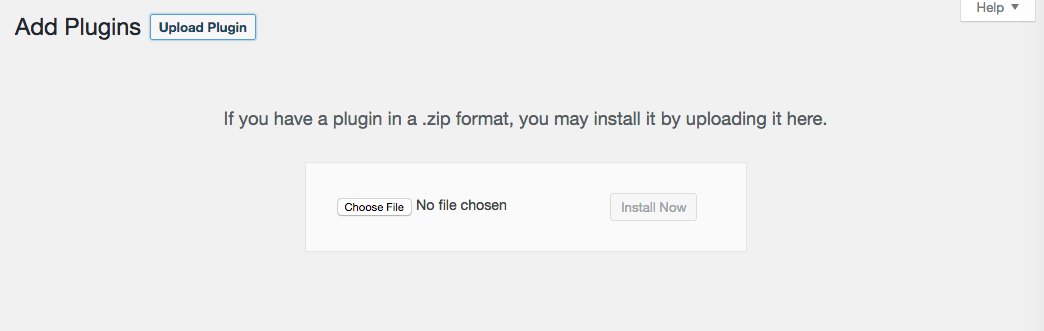
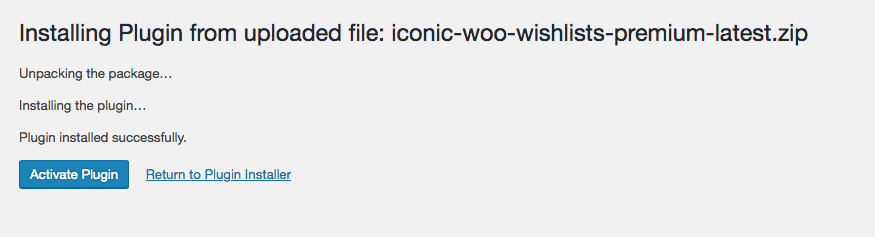
Once Wishlists for WooCommerce has been uploaded and installed (by clicking Install Now), click the Activate Plugin button.
Now that the plugin is installed, it’s time to begin creating your wishlists.
Step 2: Set up Your Main Wishlists Page
Next, you can set up a Wishlist page on your site. This page will display each customer’s personal wishlist/s, as well as a button for them to create a new list.
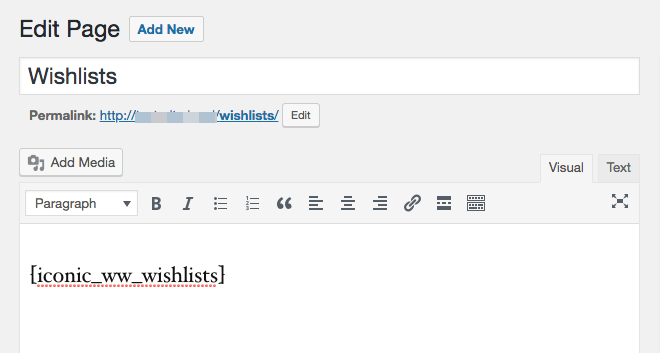
To add this page, go to Pages in your dashboard sidebar and select Add New.
Give your page a title (usually ‘Wishlists’), then add the [iconic_ww_wishlists] shortcode into the text editor section.
This simple piece of code will automatically display everything you need for your Wishlists page. Save and publish your page.
Your next step is to link this page to our plugin.
To do this, select the Wishlists menu option within WordPress, then go to Settings. In the General tab, select your new Wishlists page from the drop-down menu.
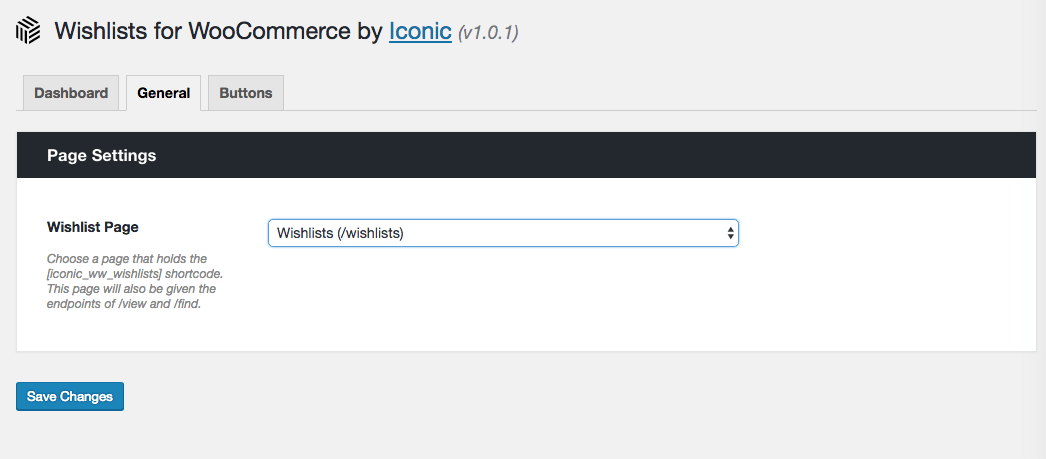
Your site now has a single, easy-to-use list of all your customer’s wishlists!
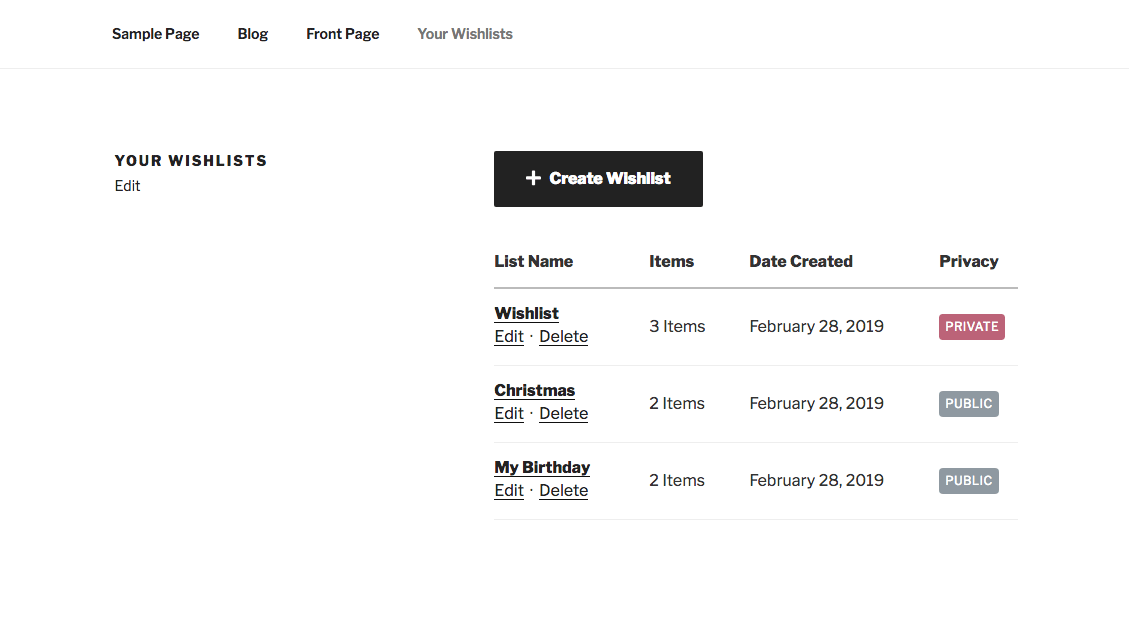
Anyone who visits your site will be able to access their own lists – or lists belonging to others – provided the owner has made the list public.
To make your Wishlist page easy to find, you can add it to your site’s navigation the same way you would add any page to your site menu.
First, navigate to Appearance > Menus within WordPress.
Ensure you’ve selected the correct menu from the drop-down at the top of the screen, then select your Wishlists page in the list on the left:
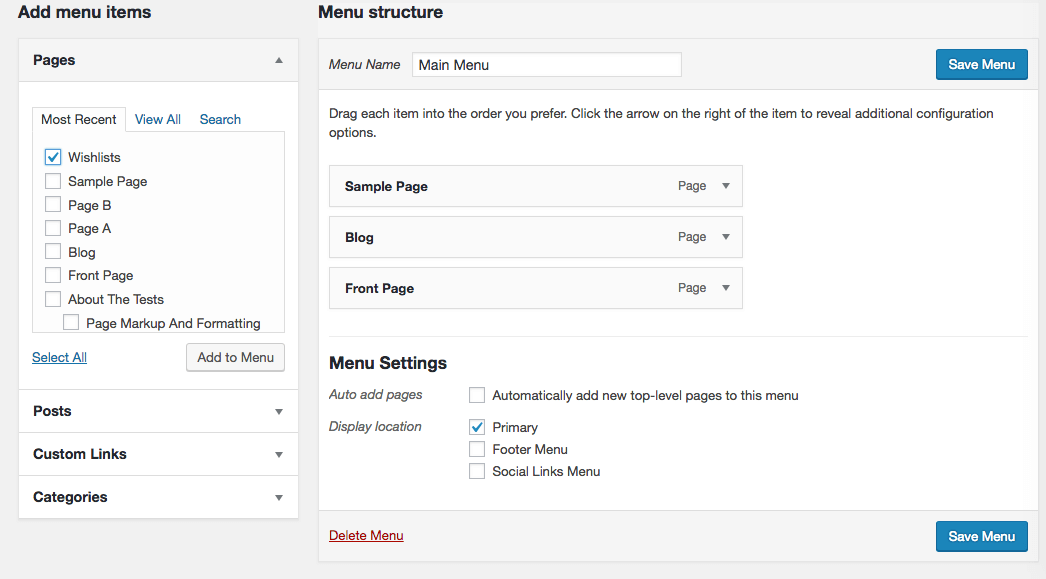
Click the Add to Menu button to include your Wishlists page in the main navigation menu, then select Save Menu.
You can also add a Find Wishlists link to your menu to help customers search for specific lists. Under Custom Links on the left side of the Menus area, type in your Wishlists page’s URL and add /find to the end. Then add some suitable link text – something straightforward such as Find Wishlists is good.
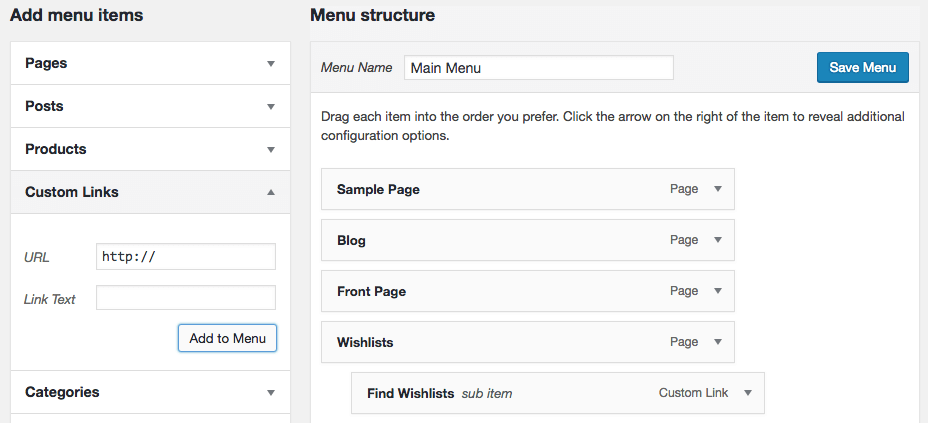
Click Add to Menu, then drag and drop the link to make it a sub-item of your Wishlists page, before finally selecting Save Menu.
Step 4: Customize Your Wishlist Buttons
Wishlists for WooCommerce makes it easy for your customers to add items to their wishlists directly from your product pages. In the Buttons tab of your wishlist settings screen, you can add and choose the placement for Add to Wishlist buttons.
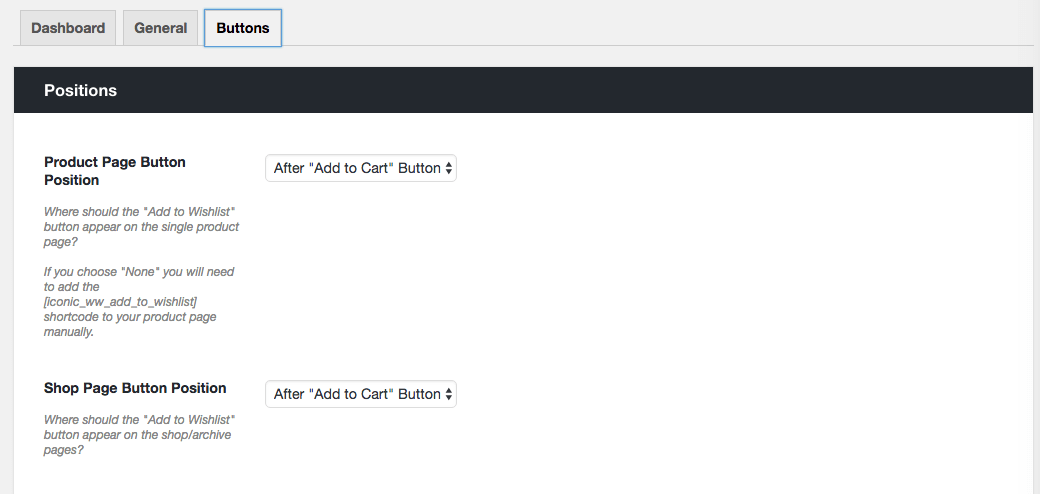
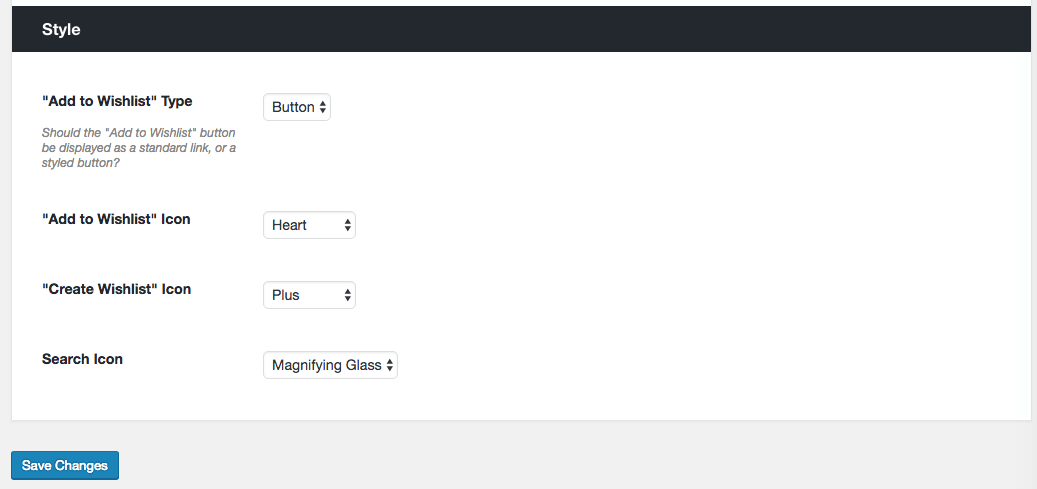
Here you can also determine how the buttons look by adjusting the button style settings. These enable you to specify if you want to provide a button or a link, and what icons you want to use on your buttons.
This ensures your buttons blend seamlessly with the rest of your site, and are clearly recognizable to your customers.
Step 5: Manage Your Customers’ Wishlists
Your customers can now create wishlists on your WooCommerce site! All that’s left is for you to manage their wishlists and collect data for your marketing campaigns.
You can see all your customers’ lists by navigating to Wishlists > All Wishlists within WordPress.
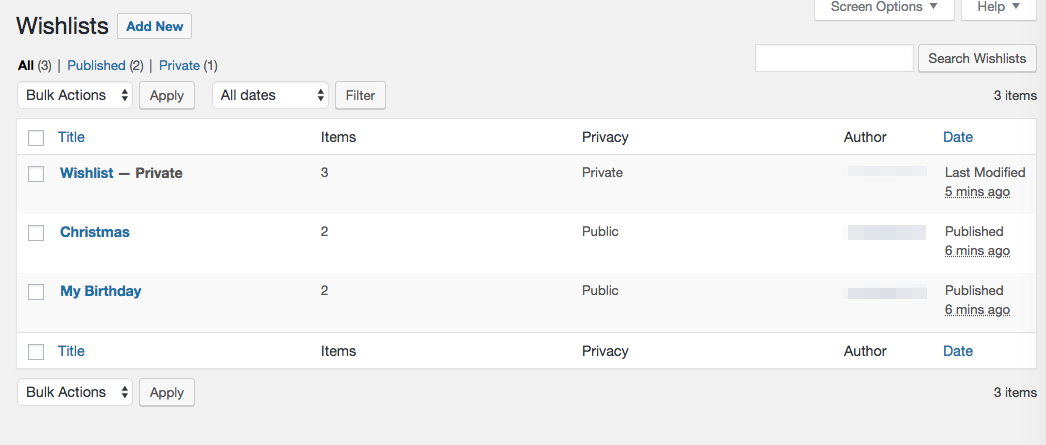
Here you’ll see your customers’ wishlist titles, the number of items in each list, and privacy settings. You can search through the lists to gather information on how your customers are using them, then put the information to good use in your next campaign.
Note: You will need to make sure that what you do with your customer’s wishlist data is outlined in your privacy policy.
That’s it, you now have easy-to-use, loyalty-creating, conversion-increasing wishlists added to your site. All that’s left to do now is tell your customers.
Have questions about wishlists? Leave them in the comments section below.