One of the greatest things about WooCommerce is the flexibility it gives you as a store owner. I’m currently working on a side project where I needed to add some custom data to a product when adding it to the cart. Using hooks means I can achieve this quite easily.
In the following tutorial I will guide you through the process of adding a field to your product, showing that data in your cart, saving it to the order, and then displaying it to the customer and admin users.
This is an advanced tutorial. You’re best off building this functionality into a custom plugin, but I’ll leave that decision up to you.
[content_upgrade id=”853440″ title=”Want to download the code from this tutorial as an example plugin?” content=”Simply enter your name and email to receive the complete and formatted version of this code as a feature plugin for FREE. I’ve also added a little bonus to the code!”]
Add a Custom Field to Your Product
Firstly, we’ll want to add a custom field to our product. Let’s consider this scenario as our example; you run a store which makes custom engraved wooden signs. You want your customer to be able to enter the text for their engraving into an input field on your product, which is then saved with the order for the production team to start building the sign.
I have set up a simple product 1 to act as the base of our customisable product.
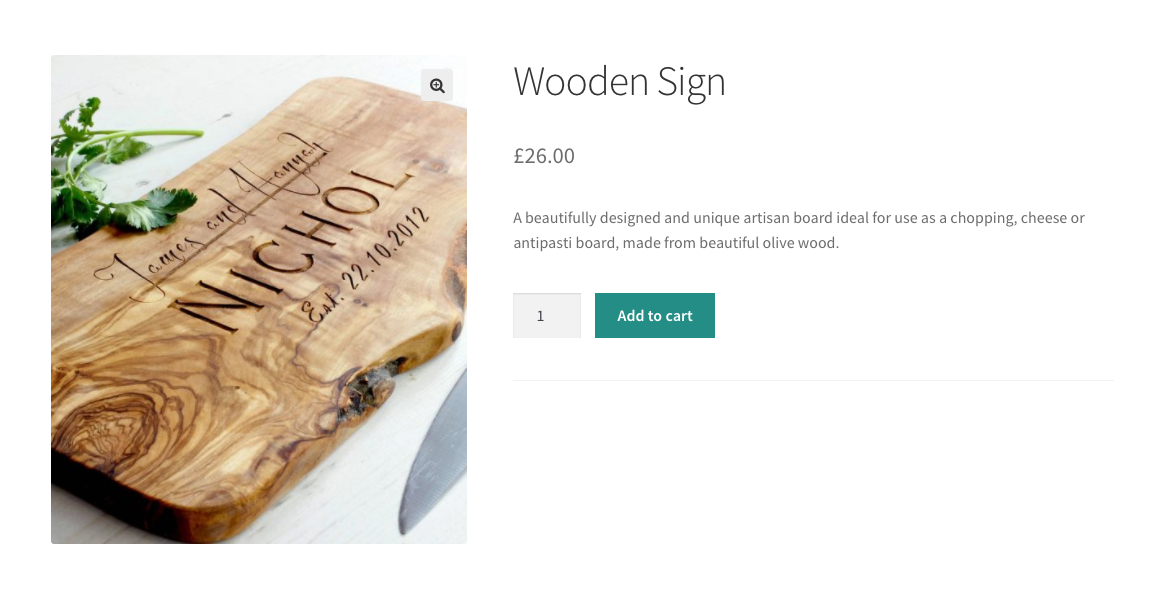
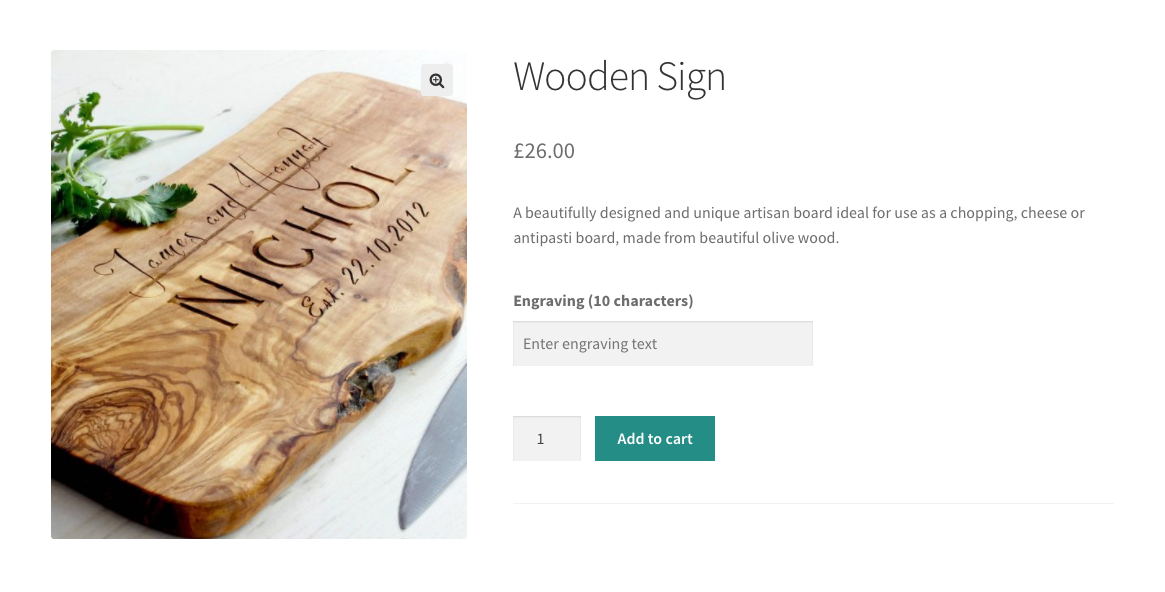
Before the add to cart button, let’s add a simple input field called “Engraving”.
We want our custom field to be within the add to cart form, otherwise the data will not be posted along with the form when the customer adds it to their cart. Within the /single-product/add-to-cart/simple.php template, there are a number of hooks we could use. It makes sense to add our field before the add to cart button, so we’ll use the woocommerce_before_add_to_cart_button hook.
/**
 * Output engraving field.
 */
function iconic_output_engraving_field() {
	global $product;

	if ( $product->get_id() !== 1741 ) {
		return;
	}

	?>
	<div class="iconic-engraving-field">
		<label for="iconic-engraving"><?php _e( 'Engraving (10 characters)', 'iconic' ); ?></label>
		<input type="text" id="iconic-engraving" name="iconic-engraving" placeholder="<?php _e( 'Enter engraving text', 'iconic' ); ?>" maxlength="10">
	</div>
	<?php
}

add_action( 'woocommerce_before_add_to_cart_button', 'iconic_output_engraving_field', 10 );
There’s a few things going on here:
- Firstly, I’m checking that this is our product with a hardcoded ID. Ideally we’d have a meta field in the edit product page where we can toggle the engraving field from showing. But for the sake of clarity and speed, I’ve done it like this.
- Next, we’re breaking out of PHP and outputting our field HTML.
- I’ve dropped in a
maxlengthon the input field. - Finally, I add the action to output that field before the add to cart button.
Add Engraving Data to the Cart Item
Our customer can now enter their engraving text before they add the product to the cart. Currently, when they do add the product to the cart, nothing will happen. We need to grab that data when it’s posted, and add it to our product before it’s added to the cart.
WooCommerce is quite clever in the way it adds multiple items to the cart. For example, if we add the sign to the cart twice with the same text, we’d want that to show as a single item in the cart with a quantity of 2. However, if we add the product to the cart with 2 different engravings, we’d want that to show as 2 separate items in the cart.
WooCommerce has this covered. It uses any item meta we add to the cart item (among other things) to generate the cart ID. This means if our item meta is unique, it will be shown as a unique product in the cart.
To catch this engraving data when the product is added to the cart, we want to use the woocommerce_add_cart_item_data filter.
/**
 * Add engraving text to cart item.
 *
 * @param array $cart_item_data
 * @param int   $product_id
 * @param int   $variation_id
 *
 * @return array
 */
function iconic_add_engraving_text_to_cart_item( $cart_item_data, $product_id, $variation_id ) {
	$engraving_text = filter_input( INPUT_POST, 'iconic-engraving' );

	if ( empty( $engraving_text ) ) {
		return $cart_item_data;
	}

	$cart_item_data['iconic-engraving'] = $engraving_text;

	return $cart_item_data;
}

add_filter( 'woocommerce_add_cart_item_data', 'iconic_add_engraving_text_to_cart_item', 10, 3 );
This filter accepts 3 parameters:
$cart_item_data
An array containing any other cart item data for this product. As with any filter in WordPress, this is also what we want the function to return.$product_id
The ID of the product we’re adding to the cart.$variation_id
If we’re adding a variation, this is the variation ID.
Firstly, we’re using filter_input() to sanitise our posted data. If $engraving_text is empty (i.e. no value was entered or the data was not even posted), then we go right ahead and return the $cart_item_data.
If it does have a value, we assign it to the $cart_item_data array with a key of iconic-engraving. Then we return $cart_item_data.
Our custom engraving data is now associated to the item in the cart. However, it won’t actually save with the order or show up anywhere yet.
Display Engraving Data in the Cart
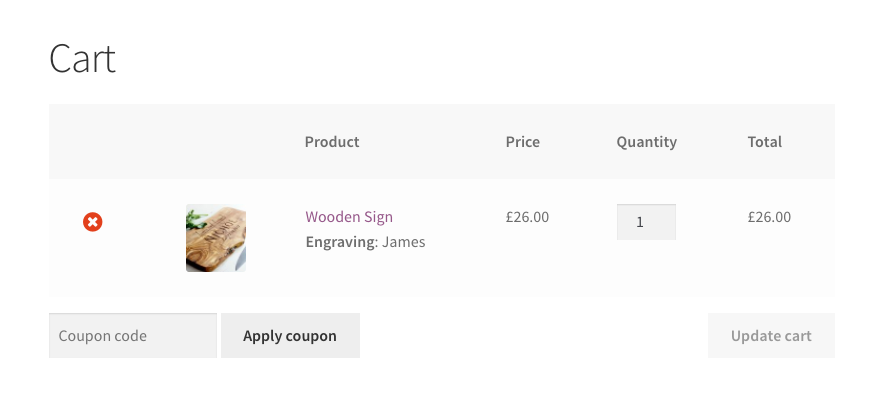
Now that we’ve associated our engraving data with the cart item, we can access it and display it in the cart. By default, WooCommerce shows variation data in the cart after the product title, so it makes sense for us to add it there. We can use the woocommerce_get_item_data filter to add our engraving data to the cart item.
/**
 * Display engraving text in the cart.
 *
 * @param array $item_data
 * @param array $cart_item
 *
 * @return array
 */
function iconic_display_engraving_text_cart( $item_data, $cart_item ) {
	if ( empty( $cart_item['iconic-engraving'] ) ) {
		return $item_data;
	}

	$item_data[] = array(
		'key'     => __( 'Engraving', 'iconic' ),
		'value'   => wc_clean( $cart_item['iconic-engraving'] ),
		'display' => '',
	);

	return $item_data;
}

add_filter( 'woocommerce_get_item_data', 'iconic_display_engraving_text_cart', 10, 2 );
As you can see, woocommerce_get_item_data accepts 2 parameters:
$item_data
This is an array containing additional data for our cart item.$cart_item
This is an array of our cart item and its associated data.
Because we assigned our engraving data to the cart item, it is now accessible in the $cart_item array. Firstly we check that it exists. If not, we return the item data as normal. Otherwise, we add our data to the $item_data array, assigning it a key and a value. The key will be used as the data item title.
You’ll notice there is also a display array item. If this is populated it will be used on the frontend instead of the value array item. This allows you to have a different value to what is displayed on the frontend. In this case, I left it empty so the value field is used instead. You can also leave it out of the array entirely, if you wish.
Save Engraving Data to the Order
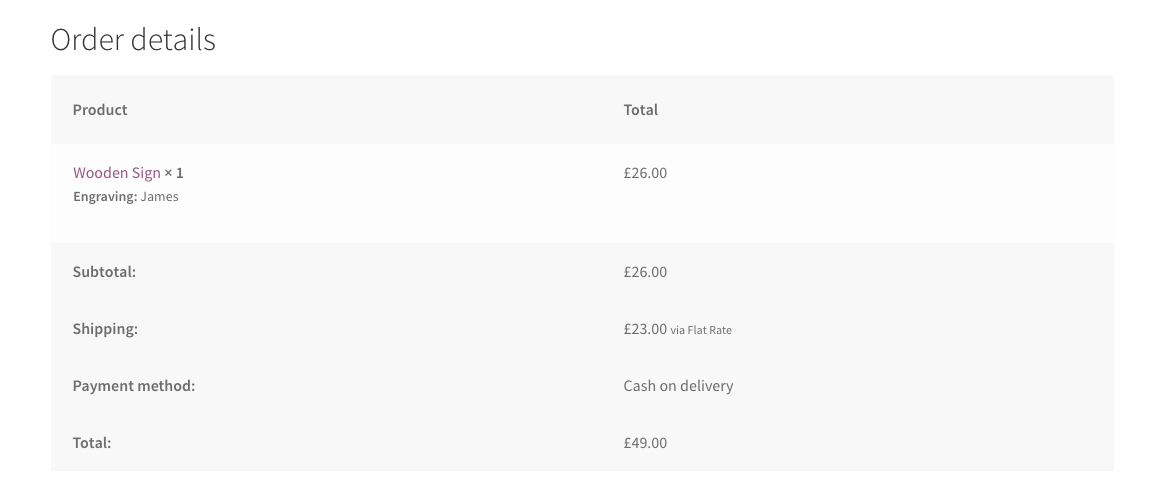
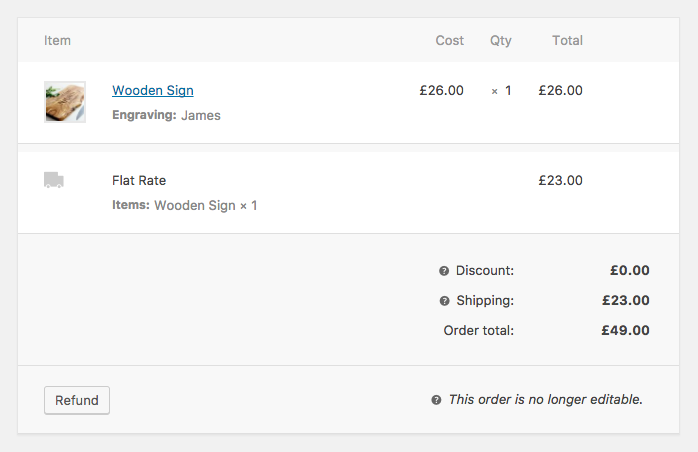
The next step is to save the data to the order when it is processed. This is actually very straightforward when we use the new CRUD methods in WooCommerce. All we need to do is hook into the woocommerce_checkout_create_order_line_item hook and add our order item meta. WooCommerce will then handle displaying that data in the order receipt, account area, and admin area.
/**
 * Add engraving text to order.
 *
 * @param WC_Order_Item_Product $item
 * @param string                $cart_item_key
 * @param array                 $values
 * @param WC_Order              $order
 */
function iconic_add_engraving_text_to_order_items( $item, $cart_item_key, $values, $order ) {
	if ( empty( $values['iconic-engraving'] ) ) {
		return;
	}

	$item->add_meta_data( __( 'Engraving', 'iconic' ), $values['iconic-engraving'] );
}

add_action( 'woocommerce_checkout_create_order_line_item', 'iconic_add_engraving_text_to_order_items', 10, 4 );
The woocommerce_checkout_create_order_line_item action accepts 4 parameters:
$item
This is the order line item object.$cart_item_key
This is the string containing our cart item key.$values
This is an array containing all the data for our cart item, including our custom data.$order
This is aWC_Orderinstance containing the new order object.
Firstly, we check whether the iconic-engraving value is set. If not, we return and do nothing else. If it is, we use the add_meta_data() method on the $item to add the engraving data to our order item.
The add_meta_data() method accepts 3 parameters:
$meta_key
This is the meta key. This is also what is displayed alongside the order item to the customer, so I have entered it as the label “Engraving”.$meta_value
This is the value of our meta data, the engraving text in this instance.$unique( bool – optional )
Setting this totruemakes sure this meta key is unique. It isfalseby default.
One interesting thing to note; if you want to add meta data to order item that only the admin can see, prefix the $meta_key with an underscore: $item->add_meta_data( '_private_meta', 'Some Value' ). This will then show in the admin area only.
As mentioned, this meta data is now saved to the order item, and is displayed throughout:
Conclusion
So there you have it; that’s how you add custom cart item data and then save it to your final order. There’s many scenarios for this, so I hope this tutorial gets you off to a good start. Let me know what you do with it in the comments below.
[content_upgrade id=”853440″ title=”Want to download the code from this tutorial as an example plugin?” content=”Simply enter your name and email to receive the complete and formatted version of this code as a feature plugin for FREE. I’ve also added a little bonus to the code!”]
Footnotes
- Image courtesy of The Rustic Dish
